
Fabrication Process
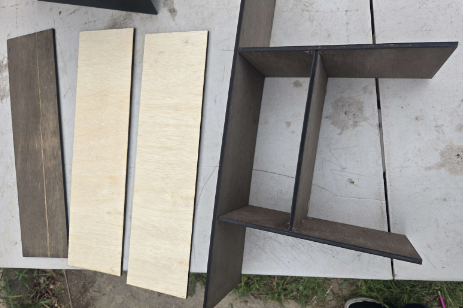
1. Preparing Materials
I started by cutting the pine plywood sheet down to laser-compatible dimensions. I then uploaded the CAD files and laser-cut each component—sides, back, drawer panels, and mug dividers.
2. Assembly
Once cut, I lightly sanded each piece before dry-fitting everything. Each individual panel was then stained with a walnut finish. I started wood gluing and nailing the panels together, starting from the inside panels and ending with the outer ones.
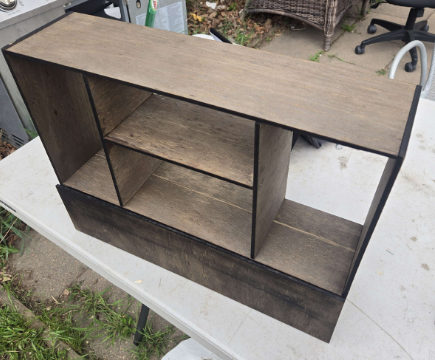
3. Finishing Touches
After assembly, I touched up any blemishes caused by the assembly process and added the drawer slides and handle.
Conclusion
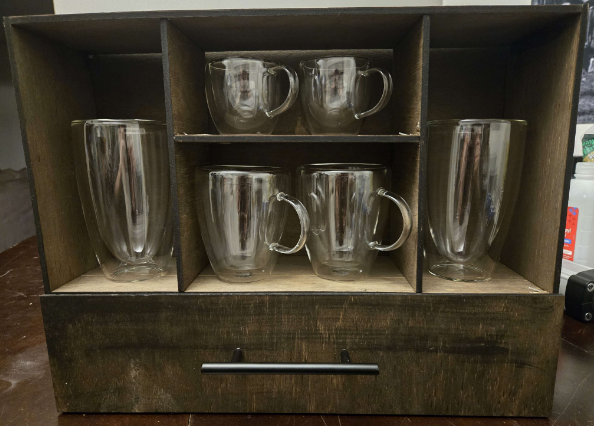
Looking back at the original plan—a floating shelf with a drawer—I’m surprised at how much the design evolved. The final piece feels far more intentional and sculptural, embodying a balance of rustic charm and thoughtful organization.
Aesthetically, the stained pine plywood brought unexpected richness. I had originally planned to use faux-concrete textures and industrial colors, but shifting toward warmer tones and natural materials gave the piece more personality and presence.
If I were to do it again, I would spend more time experimenting with stain samples before committing. The final tone works, but there’s room for more subtle contrast between interior and exterior elements. i would also look for higher quality wood, as I had a lot of warping with the wood after staining and laser cutting
For now, the organizer lives next to my coffee station, adding both visual interest and practical storage. I may later expand it with modular add-ons, or create a matching set of accessories in the same style.