
What’s my project again?
The Cozy Cabin Perk-a-Cola Bottle Display is more than just a shelf—it’s a nostalgic, interactive homage to Call of Duty: Zombies built with a handcrafted aesthetic and a dash of engineering ingenuity. At its core, this project is about transforming a simple display into an immersive experience. Drawing inspiration from the eerie charm of the Zombies loading screens and the iconic Perk-a-Cola bottles, this shelf brings the game world into the real-world using 3D printing, LEDs, audio cues, and careful design choices.
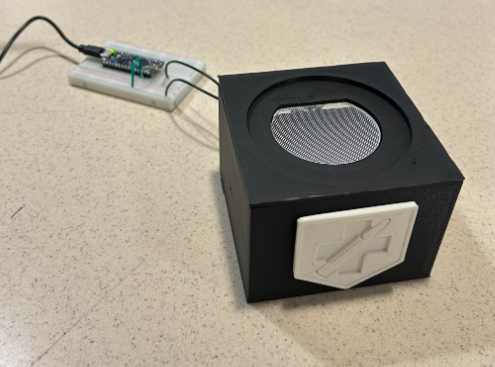
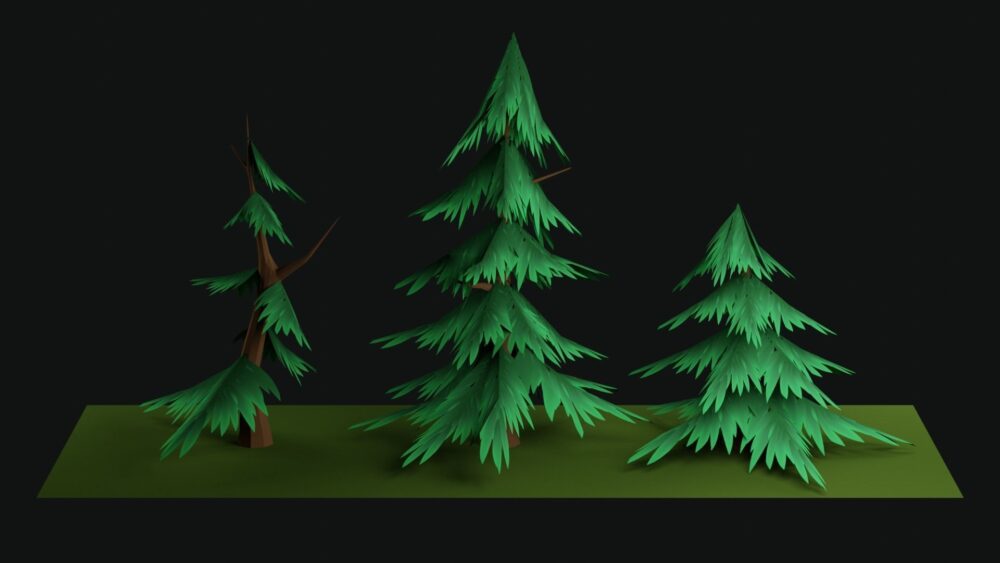
Each bottle slot is equipped with an LED light and a spring-loaded end switch. When a bottle is placed on the shelf, it lights up with a soft glow; when removed, a corresponding jingle plays from a hidden speaker—just like grabbing a perk in-game. The whole thing is wrapped in rustic wood textures, faux moss, and miniature pine trees to echo a cozy, forested cabin. This isn’t just about building a functional display—it’s about building atmosphere, interactivity, and emotional connection.
As the project has evolved, I’ve found it helpful to distill my vision and constraints into two focused lists: five key goals and five core challenges. Here’s where I stand.
Specifications:
1. It Looks Like It Belongs in a Cabin
The aesthetic should immediately evoke the cozy, wooded warmth of a remote log cabin. From the faux wood grain to the mossy touches, the display should feel like a piece of furniture you’d find nestled beside a fireplace in the woods.
2. It Feels Like a Real Game Prop
The experience should be familiar to fans of Call of Duty: Zombies. From the moment you place or remove a bottle, it should echo the feeling of grabbing a perk in-game—complete with glowing lights and the nostalgic audio cues. It should feel authentic, not like a loose interpretation.
3. It Reacts Smoothly and Reliably
Every interaction should feel purposeful and responsive. When a bottle is placed or removed, the lights and sounds should react immediately and predictably—no delays, glitches, or overlapping triggers. A polished user experience is critical.
4. It’s Professionally Finished
Clean cable management, post-processed 3D prints, hidden hardware, and deliberate visual balance are all key. This should not look like a messy prototype—it should look like a finished piece that could be proudly displayed.
5. It Stands Alone as an Art-Engineering Piece
Even to someone unfamiliar with the game, the piece should stand on its own as a captivating blend of tech and art. It should draw attention for its craftsmanship, storytelling, and creativity—not just for the reference it pays tribute to.
Constraints:
1. Time
Balancing the build with other responsibilities means each step needs to be planned carefully. Testing, iteration, and aesthetic polish all take time—especially when trying to integrate both hardware and design in a meaningful way.
2. Space and Setup
I’m working in a small space with limited tools and room to spread out. Between the 3D printer, electronics, and various materials, organizing and executing the build has required a lot of planning and improvisation.
3. Technical Integration
Getting the end switches, LEDs, Arduino Nano, and sound module to work together seamlessly is no small task. Ensuring stable code and intuitive interactivity adds a layer of complexity that could easily cause delays.
4. Supply and Budget
With limited funds, every component has to be selected carefully. I can’t afford backups or premium parts, which makes sourcing both a logistical and creative challenge. Materials like wood filament or high-quality speaker modules aren’t always cheap or easy to get on short notice.
5. Balancing Detail with Practicality
As much as I want to add every possible detail—from textured log grain to individually painted trees—some trade-offs are inevitable. Prioritizing what actually enhances the project vs. what’s just “nice to have” is a constant challenge.
What does this project show?
This project is really about taking everything I’ve learned in college—basic circuits, microcontroller programming, and 3D design—and using those skills to make something personal and fun. I’m not using anything super advanced or complicated, just the kind of tools and ideas I’ve worked with in class and on past projects.
That’s what makes it meaningful to me. It’s a way to show how simple components—like LEDs, switches, and a speaker—can come together to create something unique when you add creativity and purpose. The end goal isn’t just to make a shelf that lights up and plays sounds, but to build something that feels complete and shows off both my engineering work and my design style.
If everything works smoothly and the final piece looks and feels like something you’d actually want to display, I’ll know I succeeded. It’s about making something cool from the basics, and I’m excited to bring it all together.
2 Comments. Leave new
Hi Jack, love this project- grew up playing call of duty so this is very nostalgic to me. I like how you incorporated a bunch of different disciplines you’ve learned into one main project, excited to see how this turned out!
This project is such a cool fusion of nostalgia, interactivity, and craftsmanship. I really like how clearly you laid out both your creative goals and technical challenges. The attention to user experience,especially how the lights and sounds react to the bottles,is a great touch that shows strong design thinking.
One question I had was about the durability of the interaction system. Have you tested how well the switches and LEDs hold up after repeated use? Also, are you considering any low-cost ways to protect or reinforce the electronics in case it gets moved or handled frequently?
Overall, this is a thoughtful and well-scoped project that showcases both engineering and creativity.