
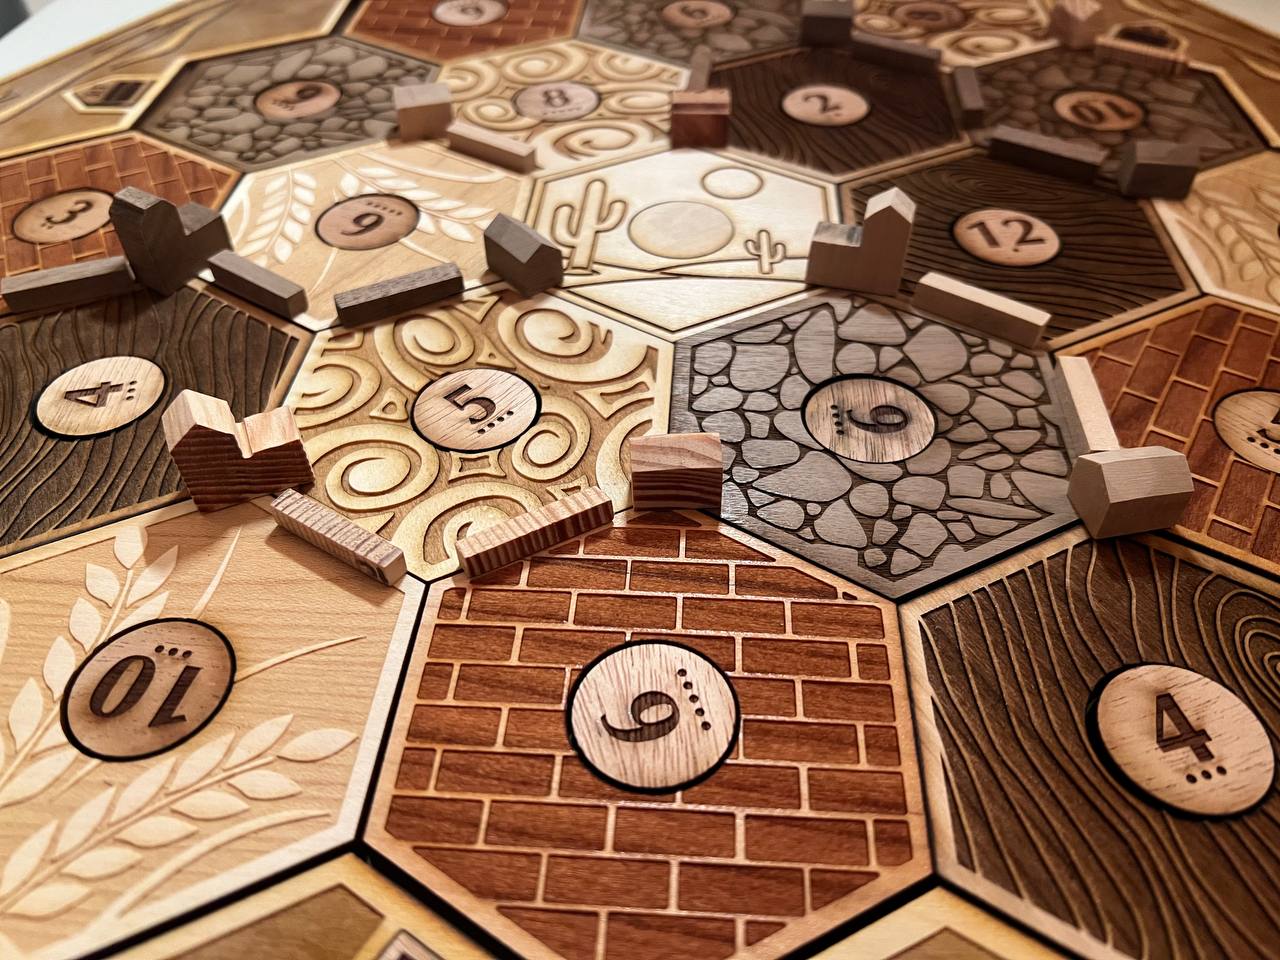
For my project, I decided to create my own version of the board game Catan with a rustic and naturalistic aesthetic. Catan is a strategic and interactive board game (with tons of individual pieces) where players act as settlers that build settlements, cities, and roads while gathering and trading resources (wool, brick, rock, wheat and wood). The goal of the main game is to get 10 victory points through building across the board and strategically planning. For my project, I created the both the base game (3-4 players) and the expansion version (5-6 players). In this post I will go over the fabrication for each component in this project and how I was able to create the rustic themed catan board. Here is my final product below:

Roads, Settlements, and Cities:
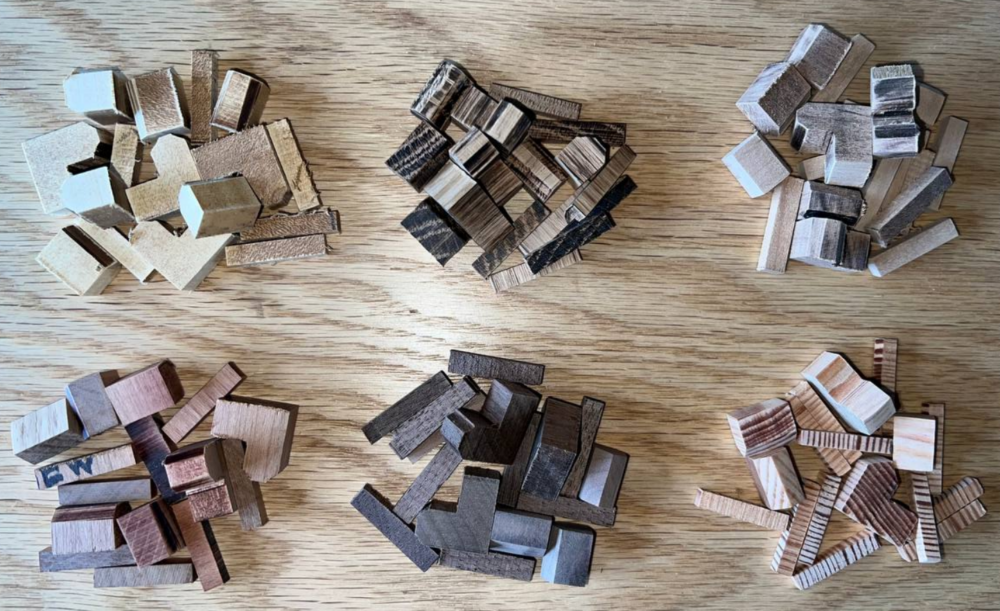
To start, I focused on the player pieces including the roads, settlements, and cities. I decided to use six different types of wood with unique grain patterns and colors: walnut, longleaf pine, alder, cherry, oak, and buckeye. The idea was to avoid using color entirely and instead let the natural variation in the wood distinguish each player. I stook time selecting woods that had noticeably different tones and textures so players wouldn’t get confused mid-game. To make all these pieces, I used a bandsaw with a stopper to cut in straight lines.
For the roads, I began by cutting 5mm thick slivers out of each wood block using a bandsaw. I then chopped those into 25mm lengths. These were the easiest pieces to make since they were just small rectangles, but they still required consistency and care. To keep everything straight and square, I used a stopper and made repetitive cuts.
Making the settlements and cities was a little more involved. For settlements, I cut pieces to roughly 10mm x 13mm x 10mm, then made angled cuts on top to give them a sloped roof shape. For cities, I cut pieces into 10mm x 20mm x 20mm and removed one corner of each piece to form an “L” shape. I then added a sloped roof to finish off these pieces.
Once all the pieces were cut, I sanded each one with 220-grit sandpaper. This step made a huge difference in the color and patterns expressed by each type of wood. Sanding removed saw marks and any burn marks while helping bring out the grain and natural tones. For a rustic aesthetic, highlighting the grain was essential. I considered adding a finish or stain but held off initially so I could evaluate how the raw woods looked side-by-side on the board. I will most likely stain or finish these pieces later on to make them more durable and bring out colors further.
Dice:
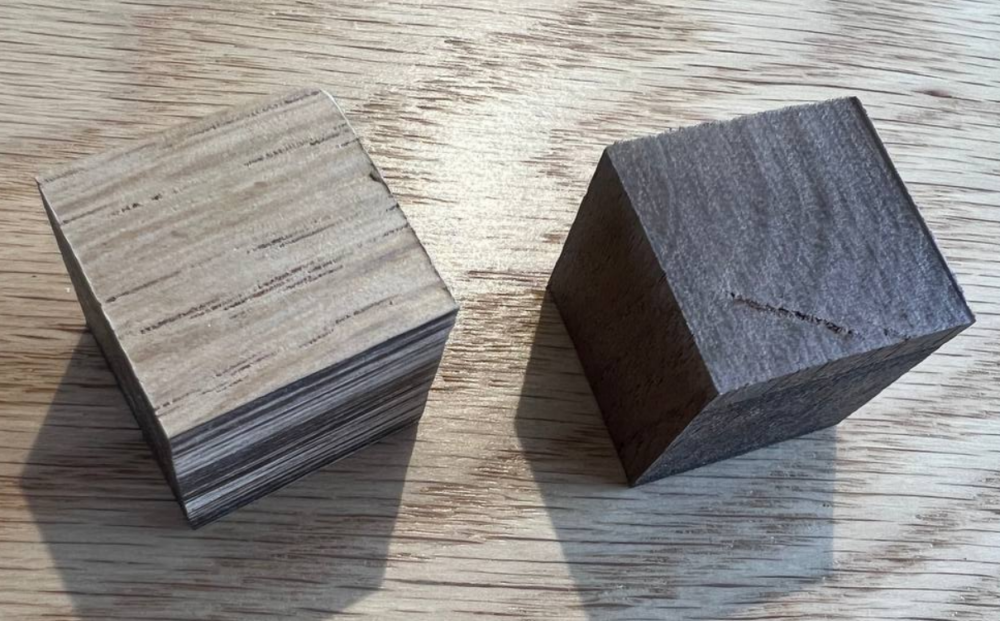
The dice were a fun mini project within the larger build. I wanted to keep with the rustic theme, so instead of using store-bought plastic dice, I made my own out of oak and walnut. I started by band sawing small cubes around 20mm x 20mm x 20mm. This is as far as I have gotten on the dice so far but my next steps include rounding the edges using sandpaper to soften their look and make them feel more handcrafted.
To mark the numbers, I plan on using a metal punch to create shallow indentations. After punching, I would like to fill each indentation with black epoxy resin. Once the resin has cured, I will sand the faces flat again and give the dice a light finish using stain or polyurethane. The contrast between the epoxy and the wood should look super clean and keep the handmade look strong.
Tiles:
The heart of the game is the board itself, made up of hexagonal resource tiles, number tokens, harbor pieces, and the boarder. I ordered 1/4-inch thick slabs of Alder, Basswood, Cherry, Hard Maple, Mahogany, Walnut, and Baltic Birch to give myself a wide palette of wood grains and colors. Each wood type was selected for a different resource. The resources include brick, wheat, wood, wool, rock, and desert and I choose each wood based on color, tone, or texture.
I used Affinity Designer on my iPad to design the layout and patterns for the tiles. It’s a vector graphics tool that’s great for preparing files for the laser cutter since it can export clean DXF files. Each tile required two laser passes, one for cutting the shape and another for engraving the design. I kept the engravings simple generally simply to enhance the rustic aesthetic. I wanted to make sure that the natural wood to do most of the visual work. After designing the pieces, I could actually cut and engrave the pieces. Here is how these pieces came out individually:
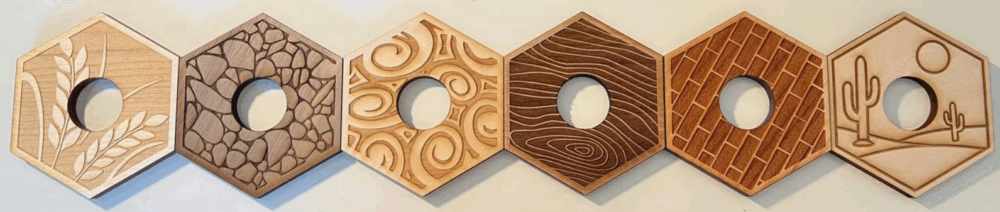
From here, I carefully sanded all edges to remove any laser burn marks. I was pleasantly surprised with the color of the woods after the engraving process. Because of how well these colors came out, I have been hesitant to apply any polyurethane or stain to the pieces. In the future, I may apply wood stain or a clear polyurethane to each tile depending on how I wanted to enhance or preserve the natural look but more thought needs to go into this before I do this. I will need to test each stain on scrap pieces first to make sure that I don’t mess up any pieces.
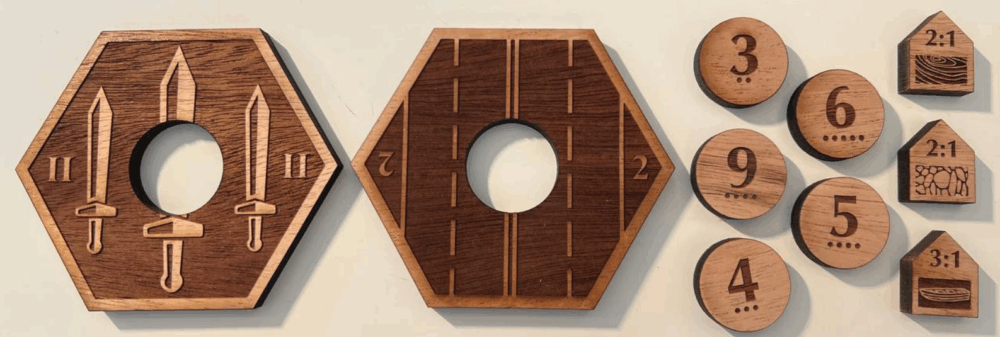
Tile Numbers, Harbors, Longest Road, Largest Army and Board Border:
The number tokens, harbor pieces, longest road tile and largest army tile were smaller but still required detailed design. For these, I used mahogany wood as the main tiles to keep the aesthetic cohesive. The number tokens were laser-engraved with bold numbers and lightly sanded. For the harbor tiles, I engraved simple symbols that represented the resource they traded. For the largest army and longest road tiles, I designed simple designs to express what they mean and I also kept them as similar shapes as the main board tiles. Here is how these came out:
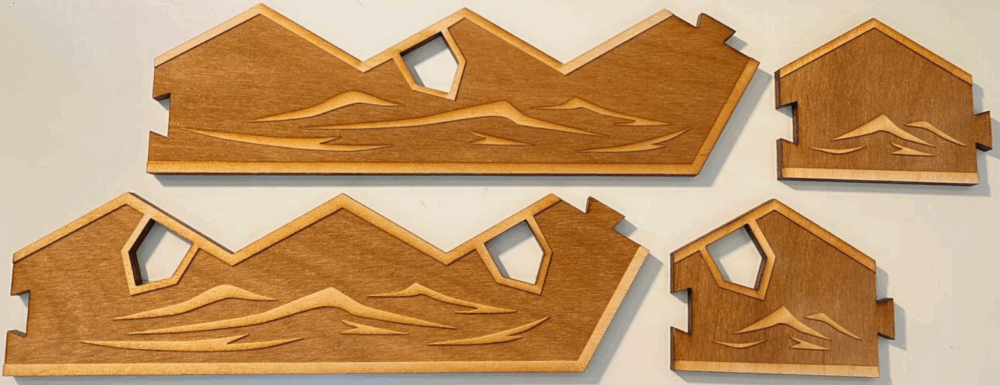
Next I could work on the boarder. The border of the board was made from birch wood and had an interlocking feature to keep the hex tiles in place. I laser-cut the border segments and engraved waves into the boarders. This was by far the longest engraving piece that I had to perform. Here is how it came out:
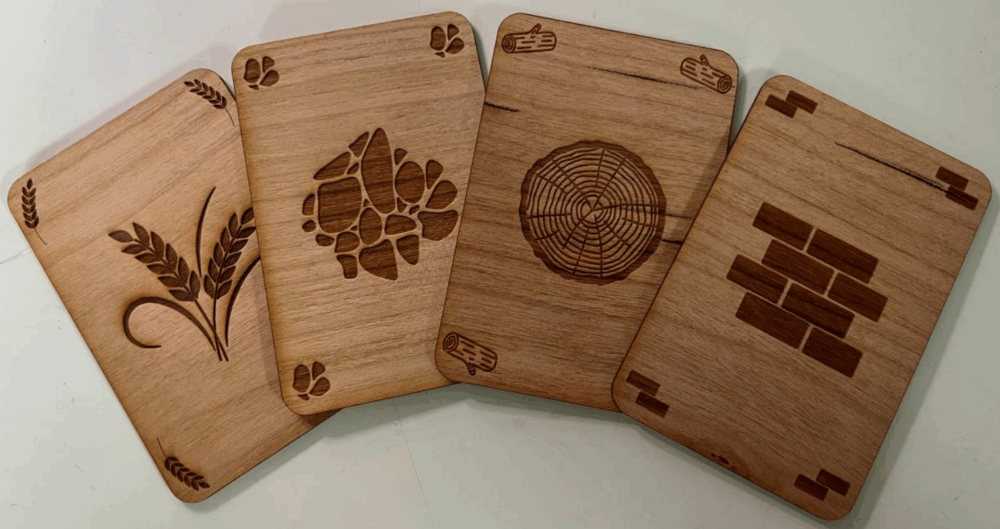
Cards:
This part of the build was probably the most ambitious and time-consuming as there were a lot of cards to make. I didn’t want to use paper cards because they would feel out of place next to everything else I had made. Instead, I designed and built wooden versions of the game’s resource and development cards.
I originally wanted to glue thin pieces of wood veneer onto acrylic sheets to create a layered card. While this would’ve been cool, it would’ve been harder to successfully do because of the gluing. I shifted to using 1/16″ plywood and laser engraving these slabs of plywood. This method was way more efficient and let me do large batches at once.
I needed to make 95 resource cards (brick, wood, wool, wheat, and ore) and 25 development cards (knights, progress cards, and victory points). Each card had its name and a small engraved icon that matched the rest of the game’s theme. I do plan on using staining these cards to bring out their wooden tone and patterns. Here are the finished cards below:
Final Thoughts:
Looking back, this has been one of the most fun and rewarding projects I’ve worked on. It brought together digital design, woodworking, and a love of board games all in one. I learned a lot about materials, tools, and woodworking and ended up with something that’s not just functional, but also really personal. It’s a version of Catan that reflects my style and the work I put into it. And the best part is that I’ll be able to play it for years to come.