
This week, I completed a preliminary version (V1) of the wooden elephant baby rattle I am designing for both my Aesthetics in Design course and as a gift for my soon-to-be-born niece or nephew; although unfortunately, it was damaged during one of the final fabrication steps. The design process began in AutoDesk Fusion 360, where I used the image seen in Figure 1, sourced from an Etsy listing, as a reference. I imported the image into Fusion 360 as a calibrated canvas, scaling it to a length of seven inches. Using splines, arcs, and circle tools, I traced the image to create a detailed sketch of the rattle’s body. This sketch was then exported as a DXF file, which I used to laser-cut a stencil from an acrylic sheet for shaping the wooden body.
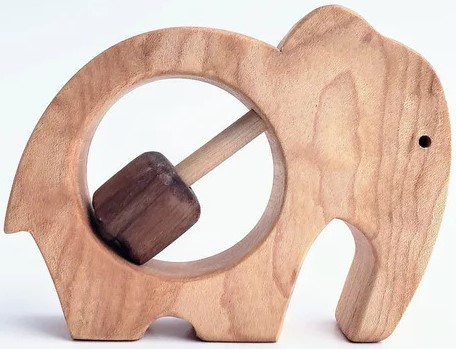
Figure 1. Photo taken from an Etsy shop of the toy that I imported into Fusion 360 to draft my stencil
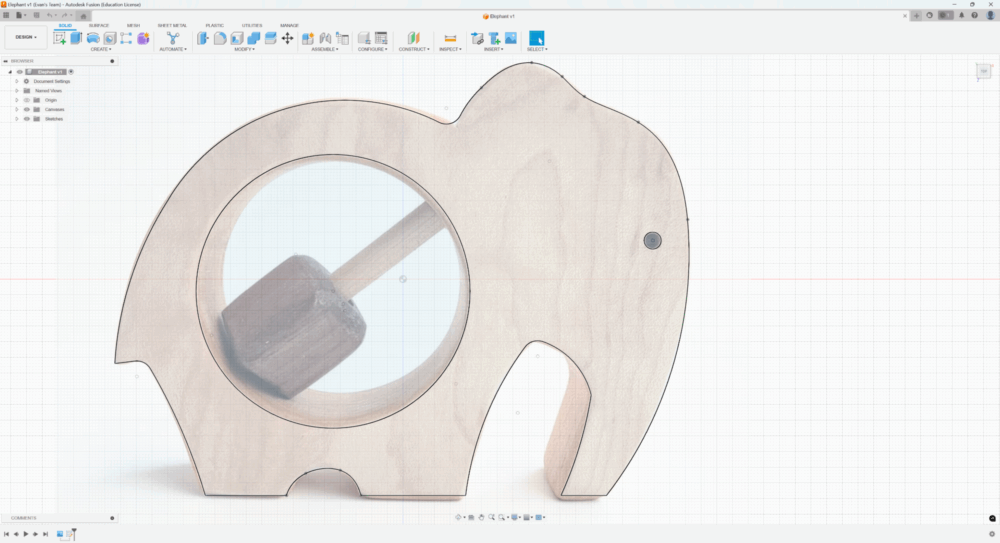
Figure 2. The Fusion 360 sketch overtop of the canvas that I used to create the DXF for the stencil.
After creating the stencil, I began preparing my stock material. I used a miter saw to cut a ½” × 7.25” × 3-foot oak board into 8-inch sections. Two of these sections were then laminated together using wood glue to form a 1-inch-thick board. I traced the elephant shape onto this new board with a pencil using the acrylic stencil and rough-cut the outline on a bandsaw. Next, I used a 3.5 inch hole saw on the drill press to cut the central opening in the elephant’s body. Before moving on to sanding and finishing, I drilled a hole for the dowel that would hold the spinning block, intended as a press fit. At the same time, I drilled an oversized hole in the wooden block itself to ensure it would spin freely on the dowel. The block is a 1 ½” x 1 ½” x 1 ½” cube cut from a 1 ½” x 1 ½” x 30″ piece of oak with all of the shape corners of the cube sanded round.
However, I mistakenly used the oversized drill bit for the press-fit hole in the elephant as well, which created a loose fit. I decided to continue working on the toy while brainstorming a solution. I used belt and spindle sanders to refine the curves and remove bandsaw marks, then added chamfers to the edges using a Dremel with a sanding drum. The edges were further rounded by hand with a sanding belt, and I finished all surfaces by incrementally sanding with finer grits.
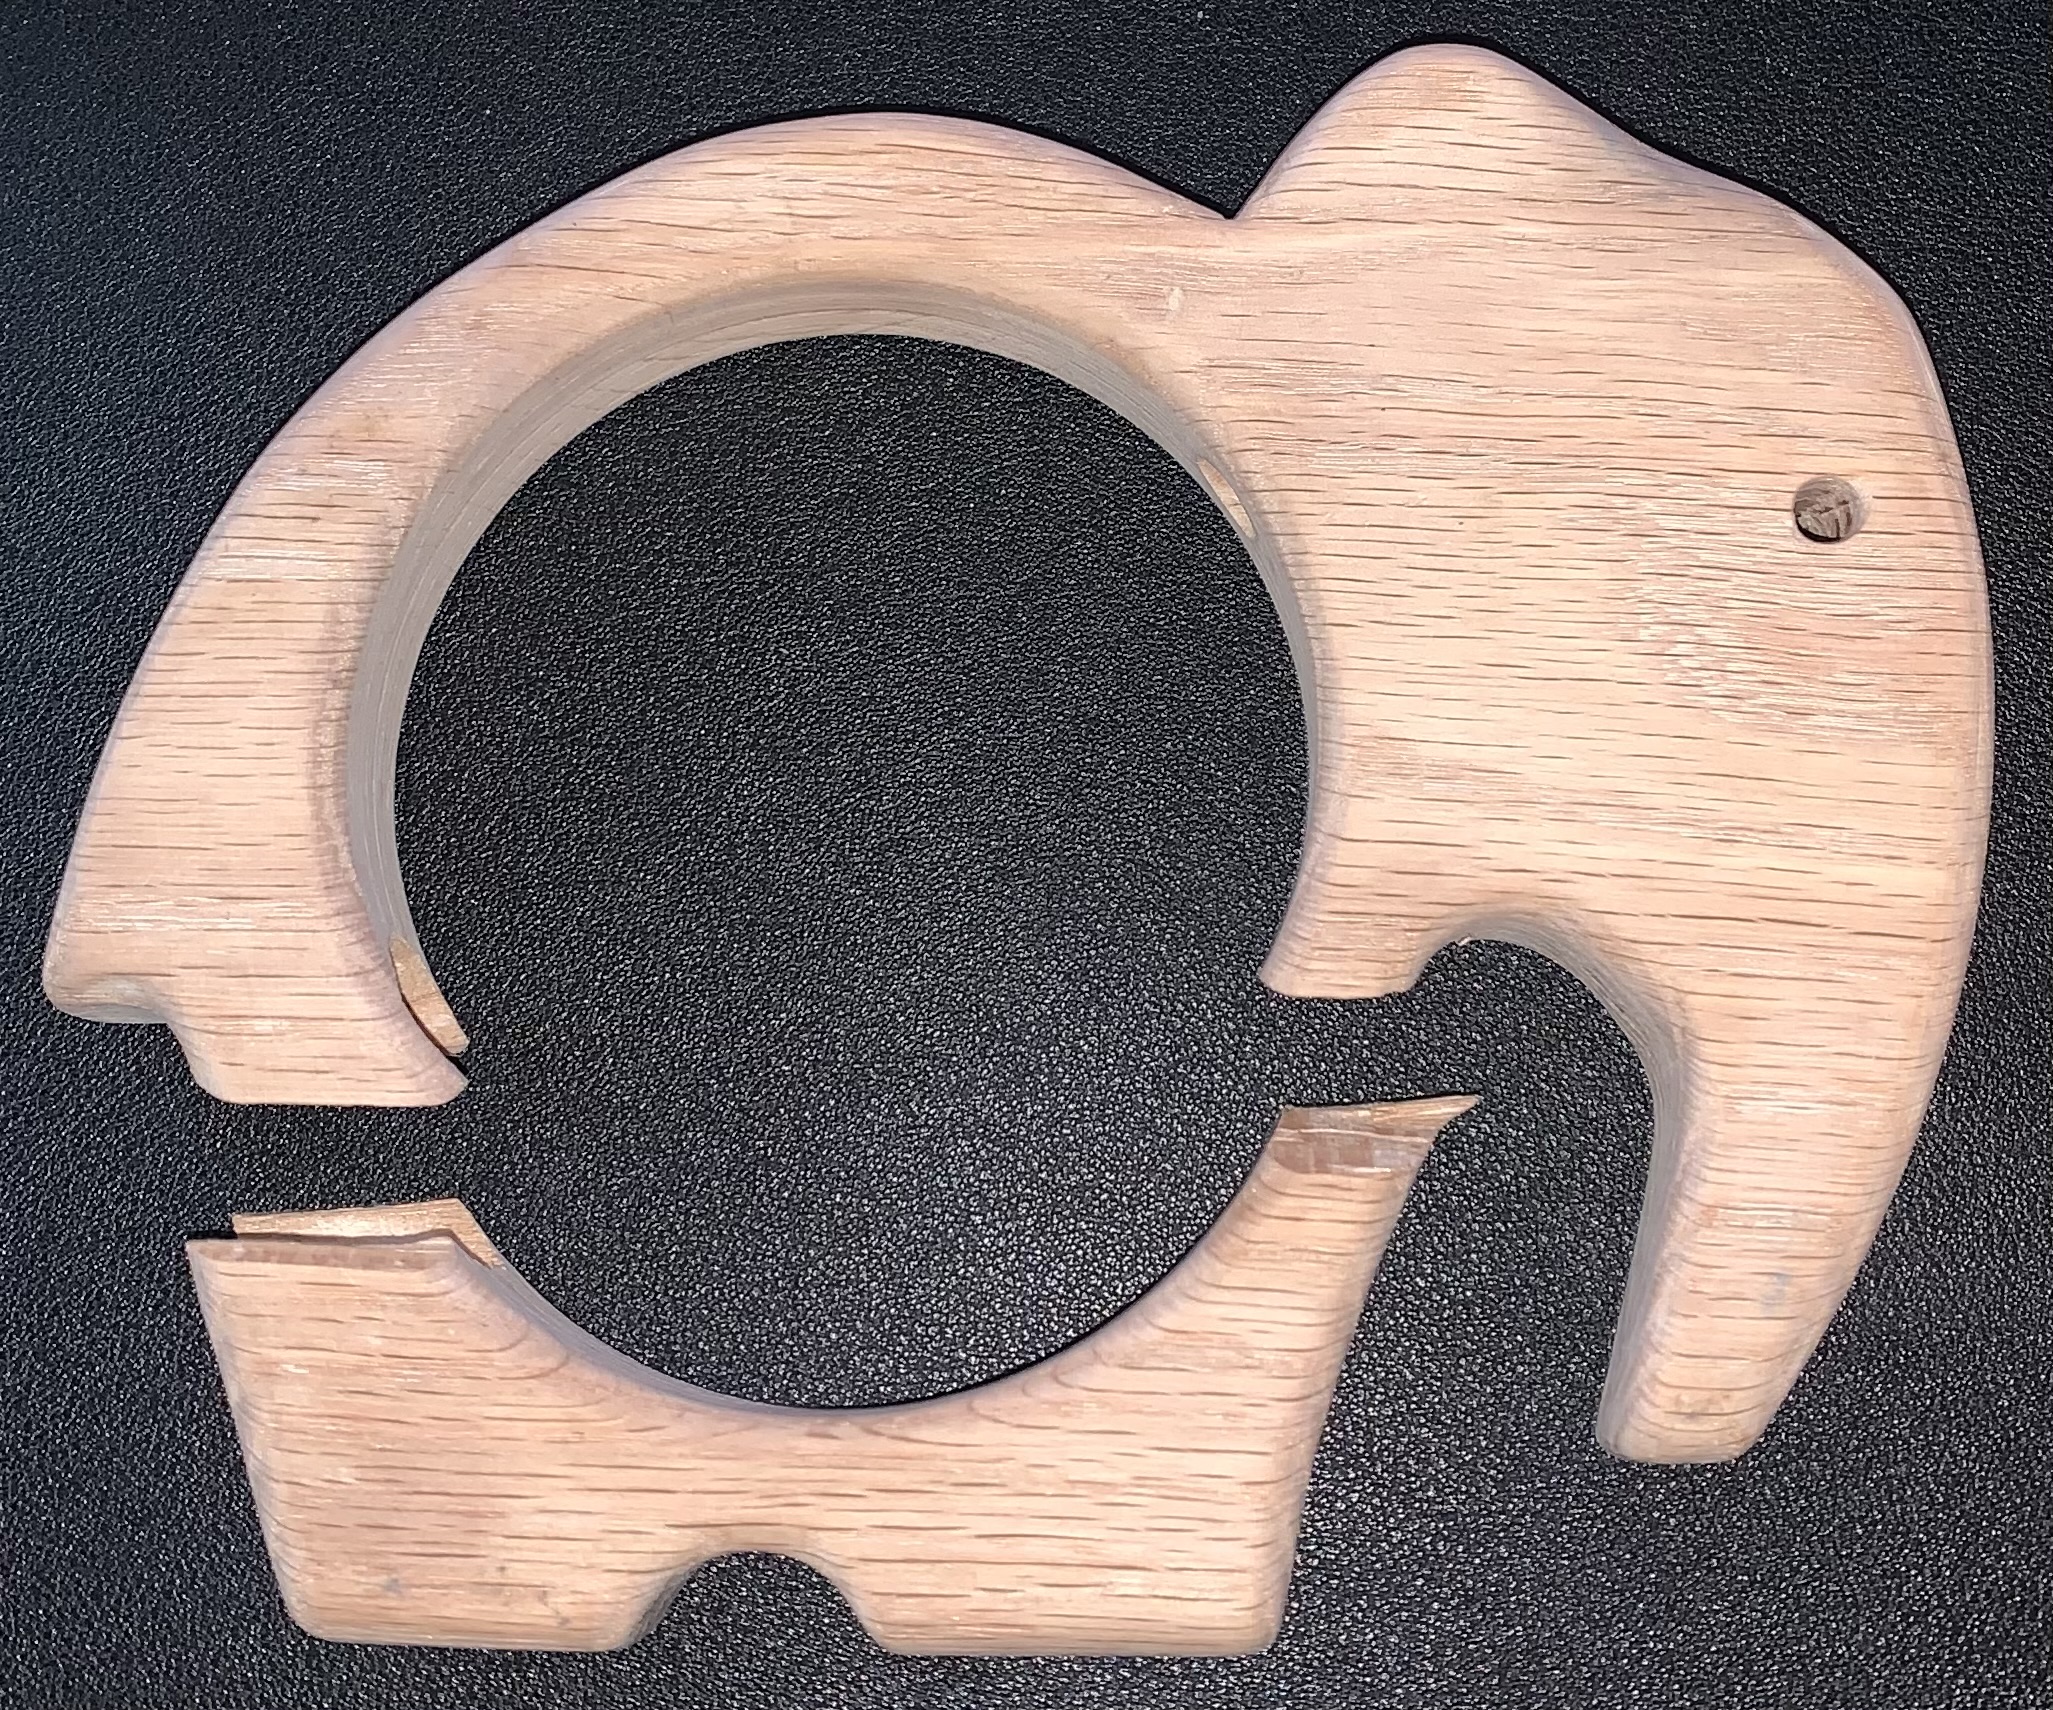
To fix the oversized press-fit hole, I planned to enlarge it and glue the 3/8” dowel into a ¾” dowel plug. Unfortunately, the dowels were not perfectly aligned, and when I attempted to hammer the plug into place with a mallet, the wood split along the hole, causing the elephant to break in half. The damaged piece can be seen in Figure 3. Despite the setback, this first version taught me valuable lessons, and I plan to apply them as I begin fabricating a second version using my remaining stock.
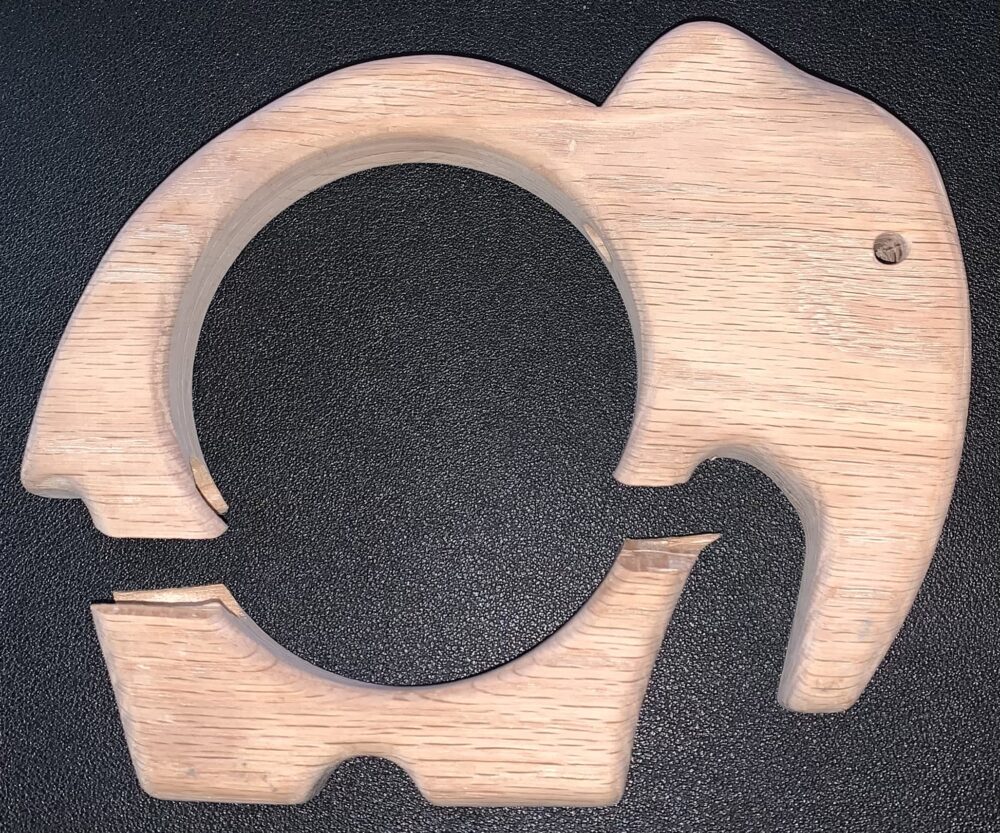
Figure 3. The broken elephant; it broke along the grain and at the thinnest points of the body.
References
- Figure 1 – https://www.etsy.com/listing/674749612/wood-elephant-rattle-natural-baby-toy?gpla=1&gao=1&&utm_source=google&utm_medium=cpc&utm_campaign=shopping_us_ps-b-toys_and_games&utm_custom1=_k_Cj0KCQjwzrzABhD8ARIsANlSWNPpls9_8WEbFFGk9B7CDfi9bD7c1w6wnftN993NjggffWnNpcoUhaYaAtBNEALw_wcB_k_&utm_content=go_21791667522_169566885358_716586690693_pla-314535279060_c__674749612_12768591&utm_custom2=21791667522&gad_source=1&gbraid=0AAAAADtcfRItpFY6376EejAwjDXa-yVEW&gclid=Cj0KCQjwzrzABhD8ARIsANlSWNPpls9_8WEbFFGk9B7CDfi9bD7c1w6wnftN993NjggffWnNpcoUhaYaAtBNEALw_wcB
This post was edited for clarity and conciseness using ChatGPT.
2 Comments. Leave new
Evan, your dedication to crafting the wooden elephant baby rattle is truly impressive. The detailed process you outlined—from importing the Etsy image into Fusion 360 to creating the acrylic stencil and shaping the oak—shows your commitment to both design and craftsmanship. Although there was a mishap with the oversized drill bit, your choice to continue refining the piece while looking for a solution demonstrates resilience and adaptability. Your attention to detail in sanding and finishing suggests that the final product will be both aesthetically pleasing and functional. I’m looking forward to seeing how you address the dowel fit issue in your next iteration. Best of luck with the upcoming steps!
It’s great to see the progress you’ve made on the wooden elephant baby rattle! Even though the damage was a setback, it sounds like it was a valuable learning experience. I’m sure the second version will turn out even better, best of luck with the next steps!