

This week I made good progress in the fabrication phase of my camp table project. After spending the past few weeks refining the design direction, material selection, and function goals, I finally transitioned into physical progress. There’s something very nice about moving from an ideation phase into morphing something physical.
Materials Gathered
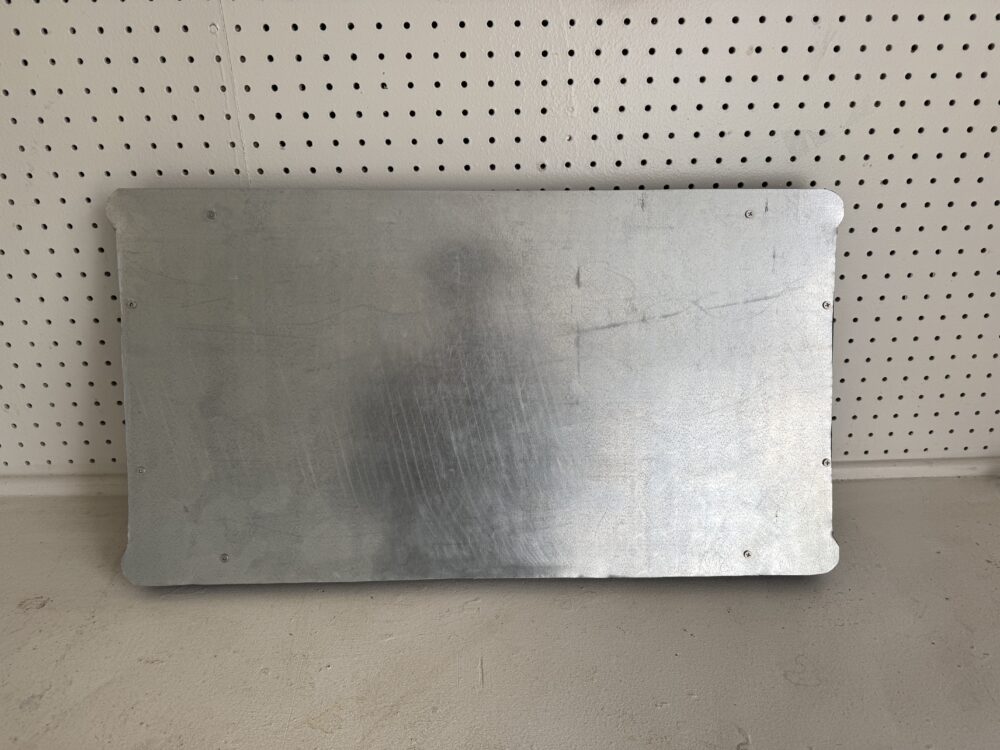
The first major milestone was gathering all the key materials I need for the build. This includes the aluminum sheet for the tabletop, wood stock for the legs, and the mesh fabric for the under-table storage system. I also picked up general hardware and sanding tools to smooth the tabletop edges after cutting. Having all the materials in one place allowed me to begin layout testing and fabrication, transitioning from concept to reality.
Legs Cut and Sanded
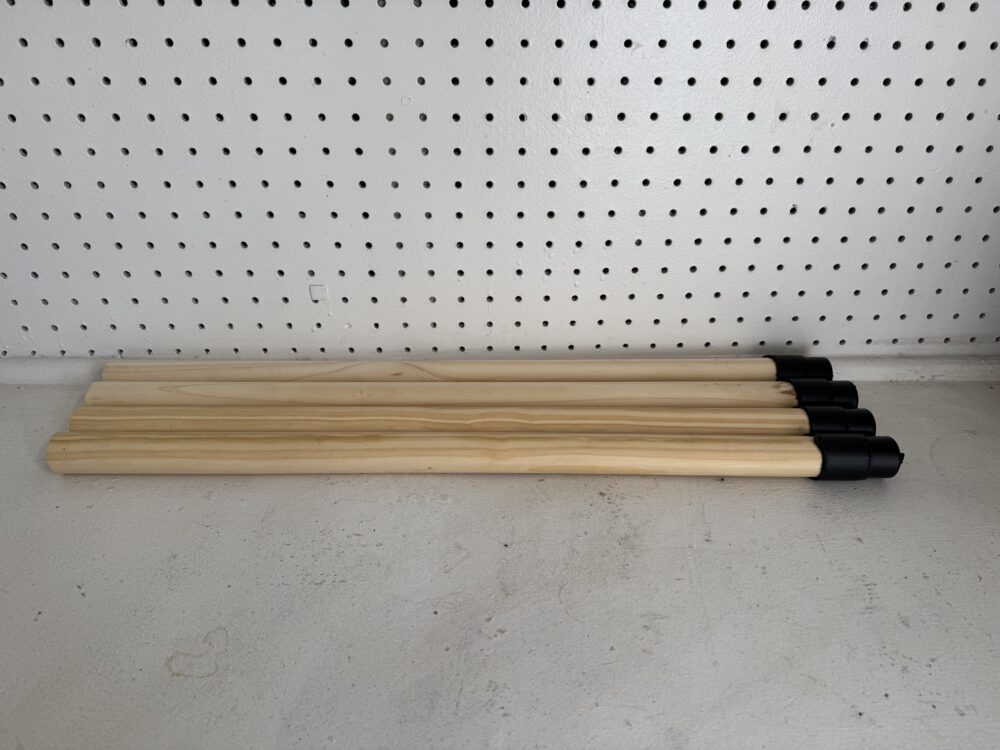
I cut all four legs to their finalized length using a miter saw, then sanded them to remove splinters and rough spots. The wood has a solid feel and fits well with the rugged, workshop-inspired look I’m going for. To ensure uniformity, I used a stop block to make repeated cuts at the same length. This consistency is important to keep the table stable and level once assembled.
New Attachment System
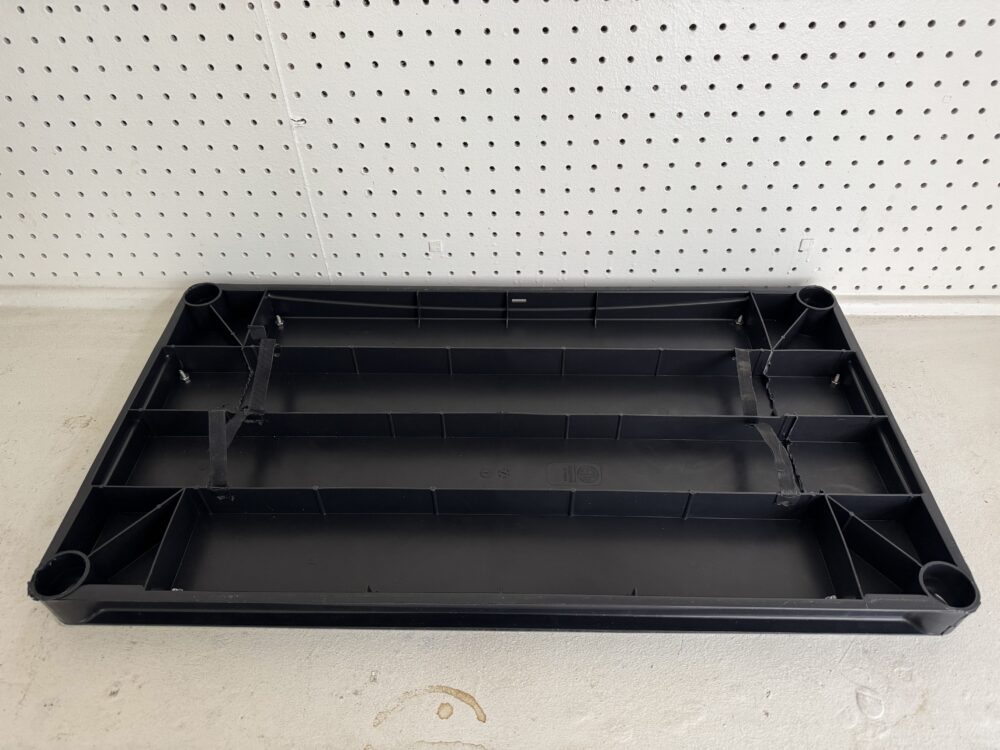
Originally, I planned to attach the legs using threaded inserts embedded in the tabletop. While conceptually sound, this approach required tight alignment and introduced the risk of the inserts loosening over time.
As I reassessed, I found a more effective solution using salvaged hardware from an old shelving unit. I attached the aluminum tabletop to a rigid plastic brace piece using small nuts and screws. This created a strong yet flexible connection point that allows the legs to slot into place securely.
This updated method eliminates the need for threading and simplifies the setup process. The plastic brace holds the legs firmly through pressure fit and physical structure, giving the table a quick and tool-free assembly—something I had set as a key requirement from the beginning.
What’s Next
Next up, I’ll be finishing the tabletop edges, installing the mesh shelf, and testing how all components fit and hold up under load. With the new leg connection method in place, the project has taken a practical turn that reflects the spirit of rugged functionalism I’m aiming for. I’m looking forward to testing it in a real environment soon.
Reflecting on this week’s progress, I’ve realized how important it is to stay flexible during fabrication. While the original plan involving threaded inserts was well thought out, actually handling the materials gave me a better sense of how things would function in real use. The new attachment method not only simplifies the process but better fits the environments this table is intended for.
I also spent some time test-fitting the leg components with the brace in different orientations. Stability is always a concern with collapsible furniture, and I’ve been pleasantly surprised by how solid the structure feels. While it’s still early, the design is meeting my benchmarks for strength and simplicity. The plastic brace, though unconventional, offers a lightweight yet strong way to integrate modularity into the system without requiring high-precision threading or expensive machining.
In the coming week, I plan to mockup the full frame, attach the mesh storage shelf, and finalize all connection points. I’ll also be field-testing the table on uneven ground to see how it performs in real outdoor conditions. These next steps will help confirm whether the current system can hold up under variable loads and use cases.
1 Comment. Leave new
Hey Thomas! Really enjoyed reading this—love how your design choices evolved with the materials in hand. The shift to the salvaged hardware for leg attachment is clever and feels totally in line with your rugged, functional aesthetic. I’d be curious to see more close-ups of how the brace system works in action. Looking forward to seeing how it holds up in the field—keep it up!