
Introduction
This post is the complete fabrication and process behind the project. In my last post, I walked through the journey of creating a custom space-themed keyboard for my Aesthetics of Design final project. I explored the inspiration behind the aesthetic—drawing from cosmic elements like stars, nebulae, and spacecraft—and discussed the iterative design process.
Timeline of Work
| Sr. No. | Tasks | Dates |
|---|---|---|
| 1 | Materials confirmed, gathering resources | March 13 |
| 2 | Start Dismantling the Keyboard and Cleaning it | March 24-31 |
| 3 | Hydro dipping Hydrographic film and wait for couple of days for drying and apply primer | March 31 – April 7 |
| 4 | Midway check-in, fixing errors | April 7 – 14 |
| 5 | Final touches and assembly | April 14 -21 |
| 6 | Photoshoot and Documentation | April 21 – 28 |
| 7 | AesDes Expo—Final presentation | April 28 – May 7 |
Fabrication Process
Materials Required
- Hydro dipping kit with compatible paints and activator
- Keycaps (preferably made of ABS plastic)
- Sandpaper (fine grit)
- Degreaser (Optional)
- Clear coat spray (Didn’t Done due to package Delay)
- Protective gloves and safety glasses
- Large container for dipping (hydro dipping tank)
Fabrication
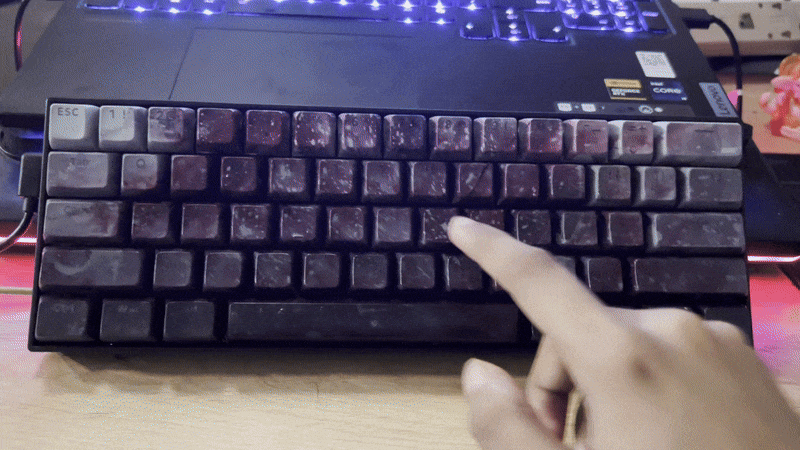
Step 1: Prepare the Keycaps
-
Clean the keycaps thoroughly to remove dust, oil, or residue.
-
Lightly sand the surface to ensure better paint adhesion.
Step 2: Set Up the Water Tank
-
Fill a suitable container with room-temperature water.
-
Carefully place the hydrographic film on the water surface with the printed side facing up.
Step 3: Activate the Film
-
Wait 30–60 seconds for the film to hydrate.
-
Evenly spray the activator over the film to dissolve it into a liquid ink layer.
Step 4: Dip the Keycaps
-
Slowly and steadily dip the keycaps into the film at an angle to prevent air bubbles.
-
Let the film wrap around the keycaps completely.
Step 5: Rinse and Dry
-
Rinse off any excess residue under running water.
-
Allow the keycaps to dry completely.
Step 6: Apply Clear Coat
-
Spray a protective clear coat to seal the design and enhance durability.
-
Let it cure as per the coating instructions.
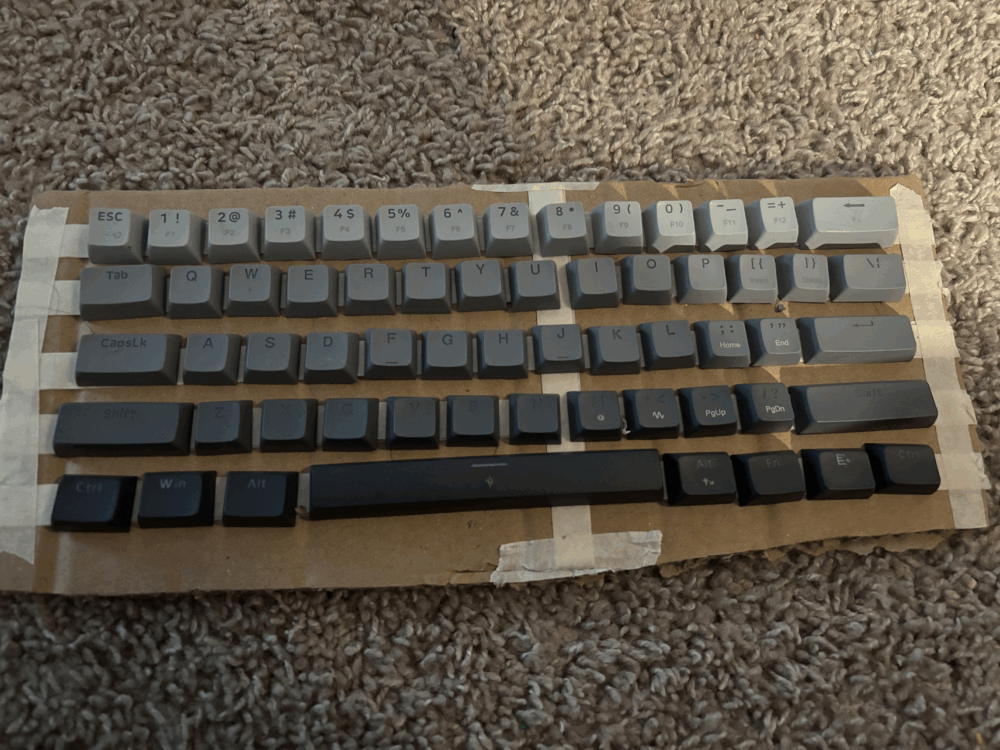
Before Hydrodipping
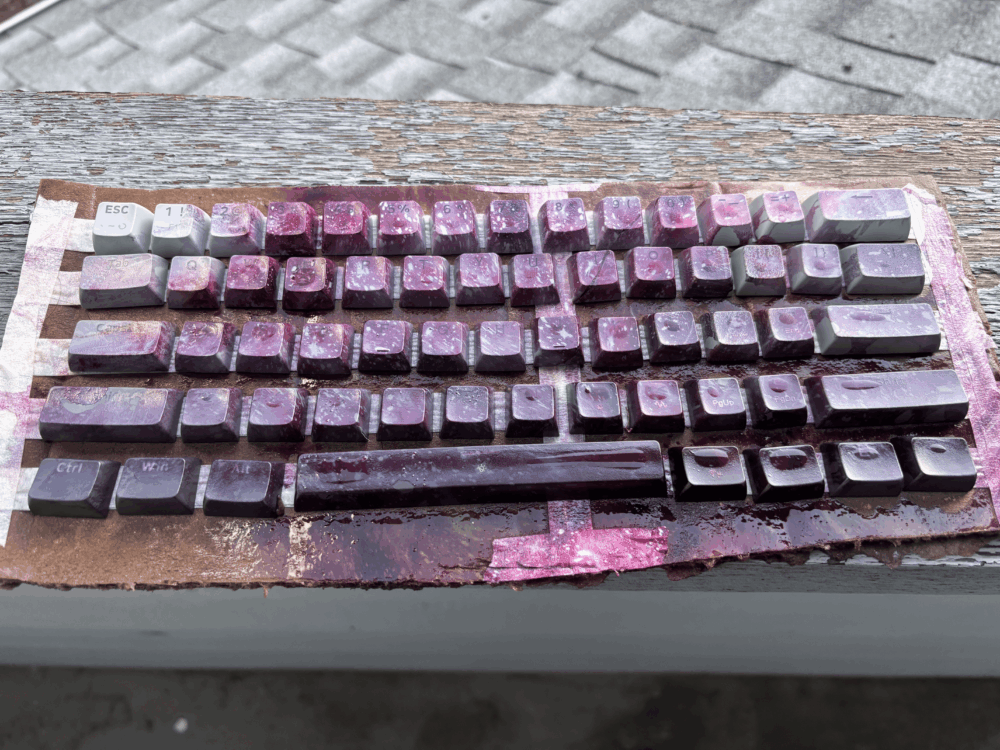
After Hydrodipping
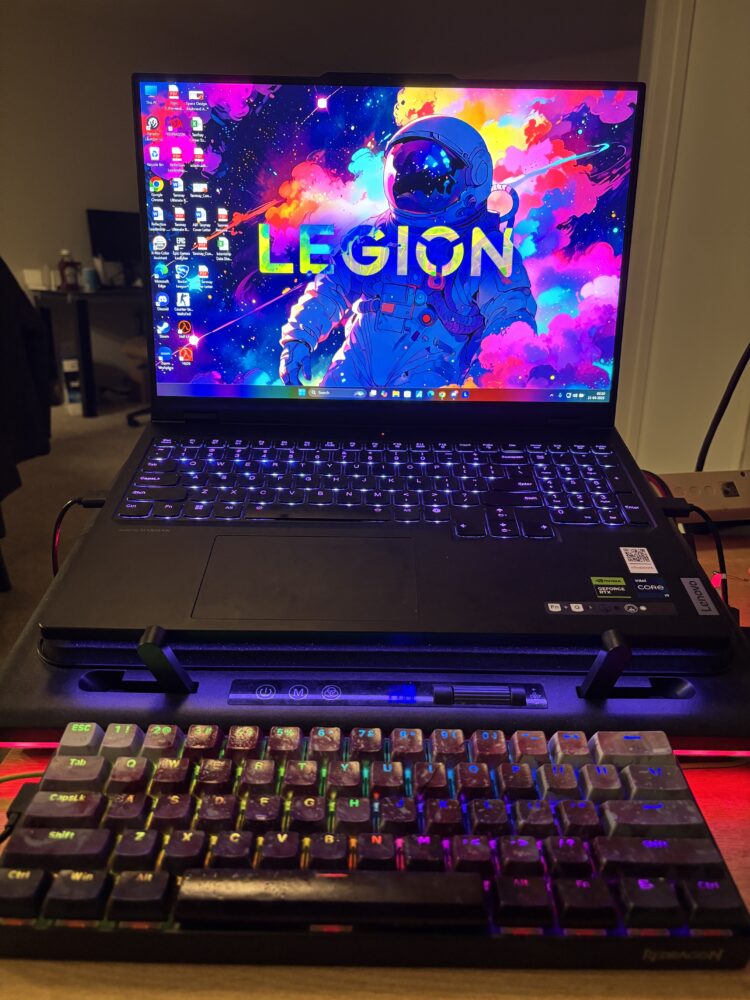
My Entire Setup with Space Exploration Theme
Reflection & Comparison to Initial Vision
At the beginning of this project, my vision was to create a keyboard that was both functional and visually captivating, inspired by the vastness and mystery of outer space. I imagined a design that would blend sleek, modern aesthetics with cosmic visuals—incorporating shades of blue, purple, black, and subtle lighting—that felt both futuristic and artistic. Reflecting on the final outcome, I am proud to say that the project remained true to much of that original vision. The hydro-dipped keycaps, featuring swirling galaxy patterns, brought the aesthetic to life in a way that exceeded my expectations. The RGB lighting underneath enhanced the design, adding depth and interactivity to the overall theme.
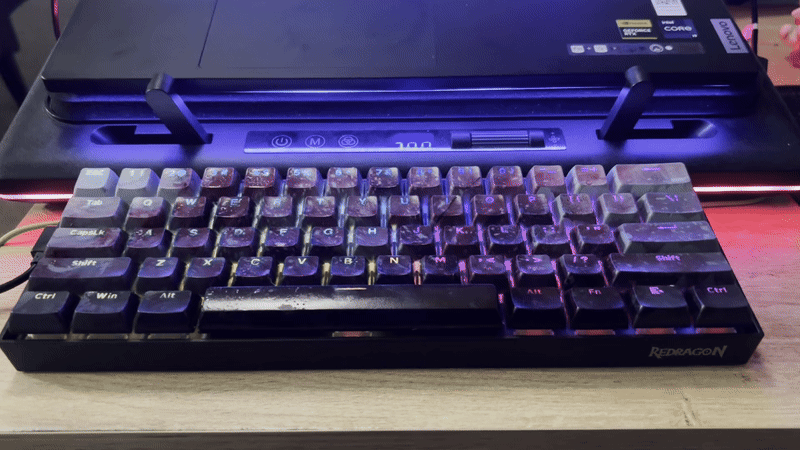
RGB HighLights
What I Learned
During this project, I gained invaluable insights into both the creative and technical dimensions of design. One key lesson was the critical role of prototyping and iteration, as early concepts often required significant refinement. By exploring multiple versions, I was able to enhance the form, functionality, and aesthetic appeal of the keyboard. I also embraced a new technique: hydrographic printing. Despite initial challenges—particularly in handling the film and applying the activator correctly—the impressive results made it worthwhile. Furthermore, I learned that surface preparation is vital; meticulous sanding, cleaning, and drying dramatically influenced the final finish and durability. Balancing aesthetics with functionality became an essential skill, as crafting a visually engaging design while ensuring ergonomic and mechanical performance demands thoughtful consideration. Lastly, this project taught me the importance of flexibility in design thinking; what began as a minimalistic vision evolved into a more colorful and expressive outcome, ultimately yielding a superior result. Overall, this experience significantly deepened my understanding of hands-on design and highlighted the immense creative potential that experimentation and adaptability offer.
Final outcome of the Project
References: –
[1] Featured Image is Mine
[2] All Images Provided are mine as well