

Timeline of the Design Process
The creation of this project followed a non-linear but intentional design process. My timeline included exploration, ideation, material acquisition, prototyping, and several iterations of design adjustments. Much of the time was spent adapting existing parts to work in harmony with the newly added elements. Below is a description of each major phase as outlined in the timeline graphic

– Exploration & Aesthetic Ideation (Week 1–2): This phase involved researching inspirations such as Casey Neistat’s workshop, existing camping tables, and bushcraft furniture. I developed my aesthetic of rugged functionalism and sketched out initial design ideas.
– Skill Refinement & Planning (Week 3): I spent time refining my understanding of how to adapt salvaged components from a modular shelving system. I also decided not to use CAD and instead relied on hands-on mockups.
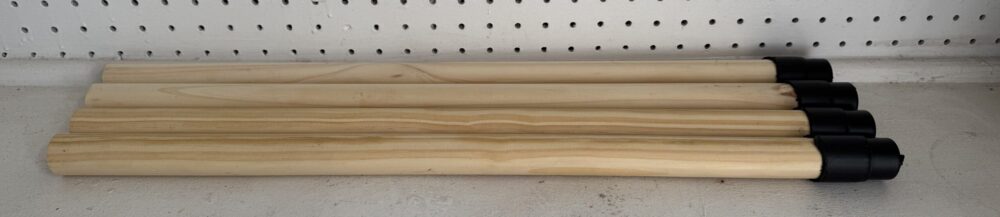
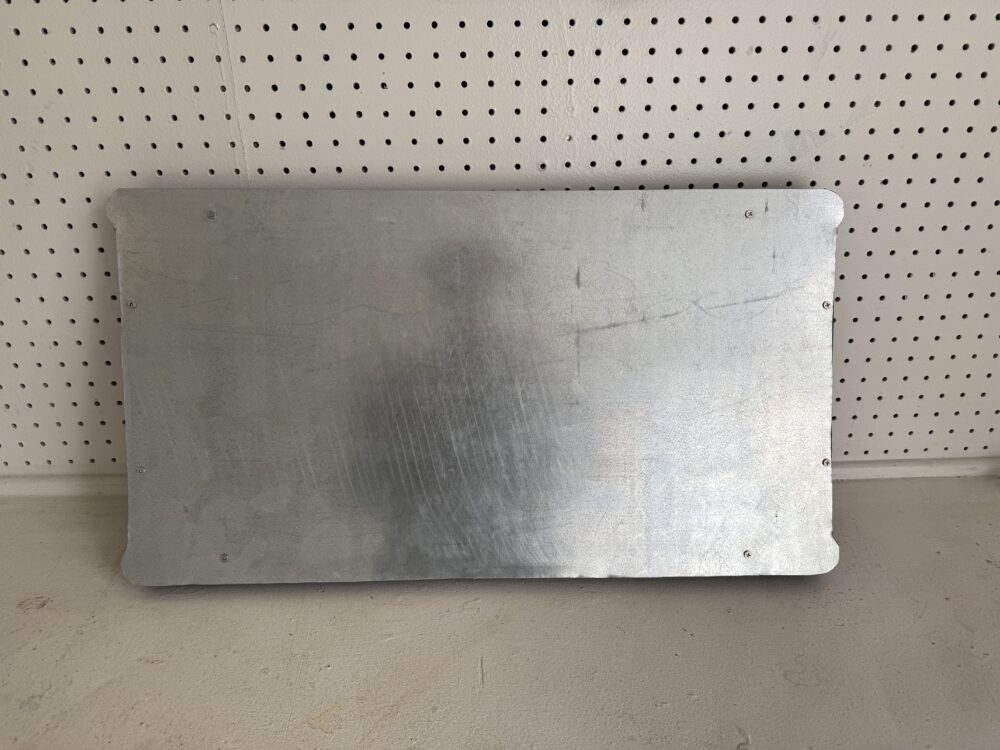
– Material Sourcing (Week 4): I acquired an aluminum sheet for the tabletop, wood for the legs, and salvaged plastic brace pieces and metal frames from the shelving unit.
– Fabrication & Adjustment (Week 5–6): This phase took the most time. I cut and sanded the legs, reworked the plastic connectors to fit snugly onto wood, and aligned the aluminum sheet with the frame before bolting it together.
– Documentation (Week 7–8): I took progress photos, compiled sketches, and wrote reflections for each step of the project.
Fabrication Process
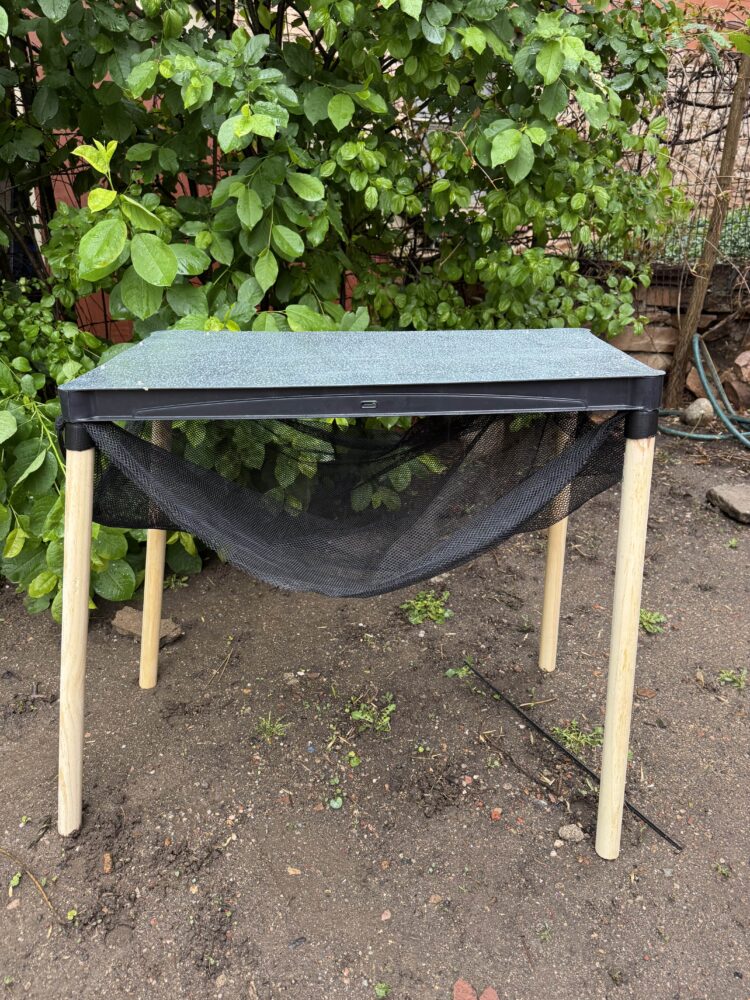
The actual build was relatively simple, but it required creative adaptation of existing parts to meet my functional and aesthetic goals. I began by cutting the wood legs to length and sanding them down. This step ensured stability and consistency in the table’s overall structure.
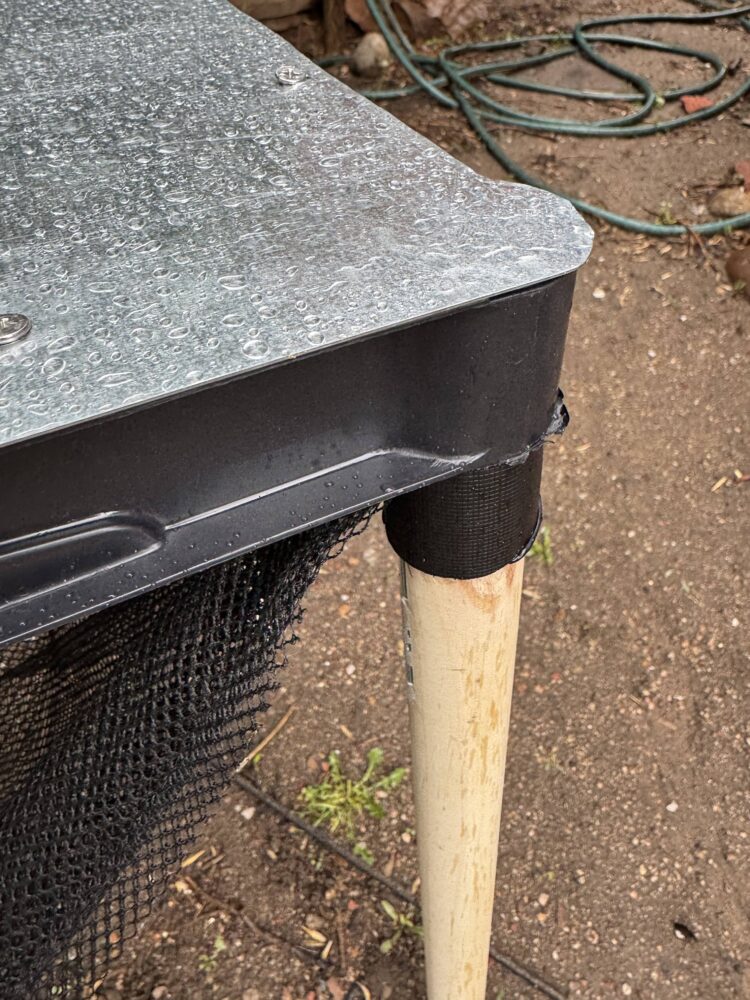
Next, I took plastic press-fit brace pieces salvaged from an old shelving unit and began adapting them to attach securely to the wooden legs. This was the most experimental portion of the project. These brace pieces weren’t made to interface with wood, so I had to manually carve notches into the legs to create a tight fit and allow for structural pressure. I went through a few iterations until I got a clean, even connection.
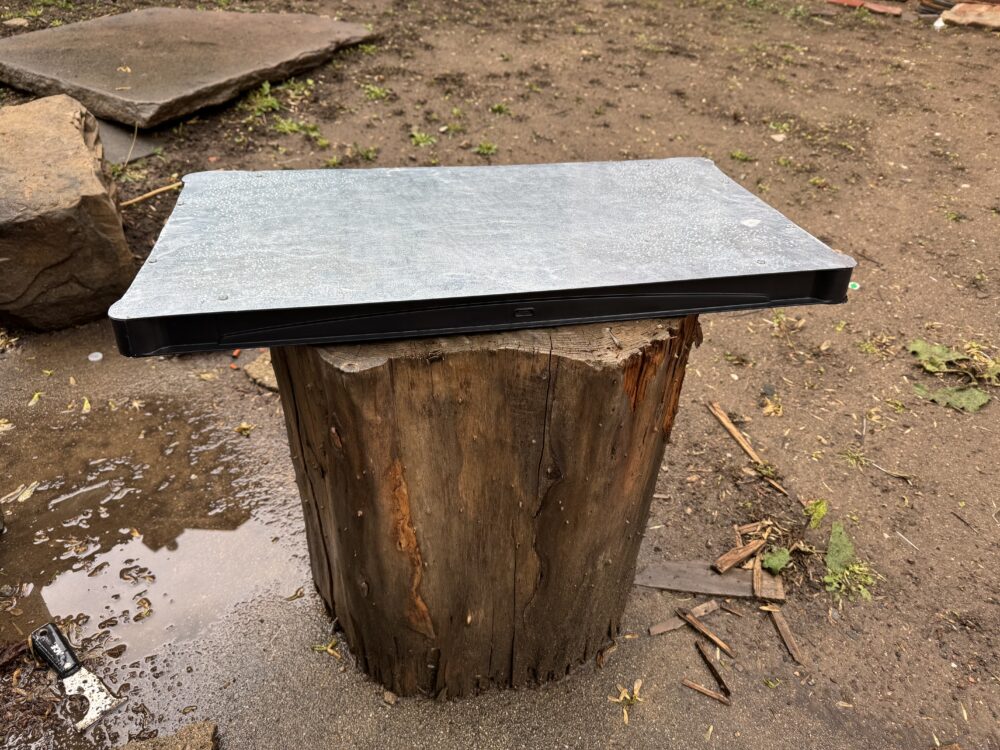
After that, I cut the aluminum tabletop to size using the original shelving frame as a template. I ensured the dimensions were matched precisely so the aluminum would bolt flush to the plastic frame. I then used small machine screws and nuts to mount the sheet to the frame. Finally, I ensured all fasteners were tightened, the corners smoothed, and the legs aligned properly.
The final piece to assemble was the mesh shelf. I used elastic loops to hook lightweight mesh between the legs underneath the table while giving the option of removing it. This provides a soft shelf for tools and gear without adding weight or interfering with the collapsibility of the table.
Another thoughtful feature I added toward the end of the build was a velcro strap system to keep the legs secured during transport. After completing the frame and testing the collapsibility, I realized that simply removing the legs would leave them loose and potentially awkward to store. To solve this, I installed a pair of industrial velcro straps on the underside of the tabletop.
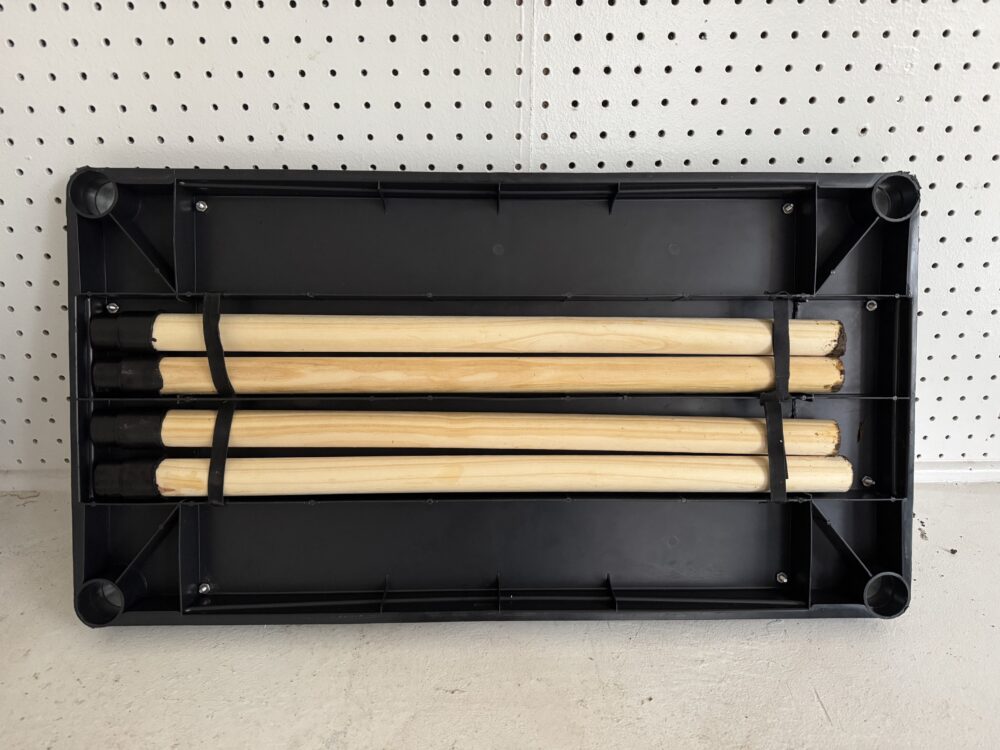
These straps allow the legs to nest securely inside the perimeter of the frame, holding them tightly in place when the table is disassembled. This addition not only improves portability but also keeps all components together as a self-contained unit, which is in keeping with my design philosophy of rugged functionalism and efficiency. The velcro solution is simple, unobtrusive, and blends into the underside of the table without adding bulk or requiring permanent hardware.
Conclusion and Reflection
Looking back, I’m proud of how closely the final product adhered to my original vision, even as the execution shifted. Initially, I imagined a more engineered solution with precise, threaded inserts and machined components. What I ended up with was something more intuitive, more raw, and more aligned with my actual aesthetic taste.
The final table feels grounded and intentional—it’s not perfect, but it expresses my design values. The rugged functionalist aesthetic comes through clearly: exposed fasteners, unfinished aluminum, visible connection points, and minimal polish. These are not flaws—they’re evidence of real use and purpose. In retrospect, I’m glad I didn’t go the hyper-minimalist route. A polished carbon fiber table would have been sleek, but it wouldn’t have felt like mine.
If I had more time, I would’ve explored different leg bracket materials or perhaps experimented with branded engraving on the tabletop. Still, the project taught me that adaptability and improvisation can elevate design just as much as precision tools.
Going forward, the table will live in my garage and come with me on weekend trips. It’s light enough to carry, sturdy enough for gear, and custom enough that no one else has one like it. That’s a success in my book.
Throughout the entire process, I found myself revisiting the design in small but meaningful ways. While the overall concept remained the same, small improvements—like trimming leg lengths or shifting mesh strap positions—contributed to the final feel and usability. These changes may not seem dramatic, but they helped refine the interaction between parts and reinforced the project’s emphasis on purpose-driven aesthetics.
The visible junctions between the salvaged plastic and new wood express a story of upcycling and adaptation. Rather than hiding these transitions, I chose to make them part of the table’s visual narrative. This aligns with the functionalist mindset: the table isn’t trying to be something it’s not. It’s direct, honest, and shaped by what was available.
An unexpected insight came from testing the table with different configurations. Sometimes I placed heavier gear on one side or added different strap attachments underneath. This helped me realize how even rugged designs benefit from flexibility. It led me to consider future improvements like adjustable feet for sloped terrain or modular brackets that can slide depending on what’s being stored.
I also received informal feedback from friends who looked at the early mockups. One pointed out that the raw aluminum gave it an industrial feel, which contrasted nicely with the warmer wood tones. Another liked the visible bolts because they added texture and made it look ‘mechanically confident’—a term I hadn’t considered but appreciated. These reactions helped me realize that the aesthetic I was aiming for was coming through, even in its rough form.
What I’ve learned is that working with reused materials can push your design thinking further. You’re not starting from a blank canvas, which forces you to be inventive. Adapting the plastic braces was one of the most satisfying moments of the build—not because they were perfect, but because I made them work in a new context. That sense of resourcefulness is something I want to bring into future projects.
The process of integrating reused shelving components into a functional design proved to be more rewarding and challenging than I initially expected. The plastic slots I salvaged were never intended to interface with wood, much less support a full tabletop. Adapting them meant carefully taking notes on their form, then reverse-engineering the dimensions I would need to match on the legs. I experimented with different notch shapes until I found one that created enough tension for a secure fit without causing damage to the plastic or compromising the integrity of the wooden legs.
Every phase of the fabrication required small problem-solving steps like that—micro decisions that shaped the overall project. Even the bolt placement became a design decision. Should I center the holes, or leave a slight overhang for finger clearance? Would too many bolts make the top look cluttered? I ended up choosing symmetry and balance over total minimalism, deciding that visible hardware contributed to the aesthetic rather than distracted from it.
As I neared completion, I took the table outside for a few trial uses. I wanted to see how it behaved in its intended environment: dirt, grass, gravel. I loaded it with tools, placed a stove on top, and moved it around folded and assembled. These tests gave me a greater sense of how the aesthetic meets function. The table looks like something you’d see in a backcountry tool shed. It blends with the surroundings rather than standing apart. That groundedness was a major part of my goal.
In summary, the process was not just about building a table, but about refining an approach to design that’s grounded in material honesty, reuse, and intention. Each step shaped the final aesthetic: utilitarian, adaptive, and personal. While the project may evolve further with future modifications, it already represents something complete—a reflection of how I think, work, and build.