
Art Deco Pendulum Final Report Part 2
I started the construction of the project with a wooden base and frame. I used a piece of 1×4 for the base, and I cut out a piece of ½ inch plywood for the arch. I did all of this construction in the carpentry shop where I work, using the scraps that I have access to. The base is about 18 inches wide, and the arch is a semicircle that spans the width of the base. To reinforce the arch’s attachment to the base, I added some small “columns” from plywood that will be screwed into the base and arch. I clad the columns with 3D printed PLA that made them look more decorative and added to the Art Deco aesthetic. These columns have pentagonal shapes at the top, which vary in size, giving them a cartoonish and exaggerated look.

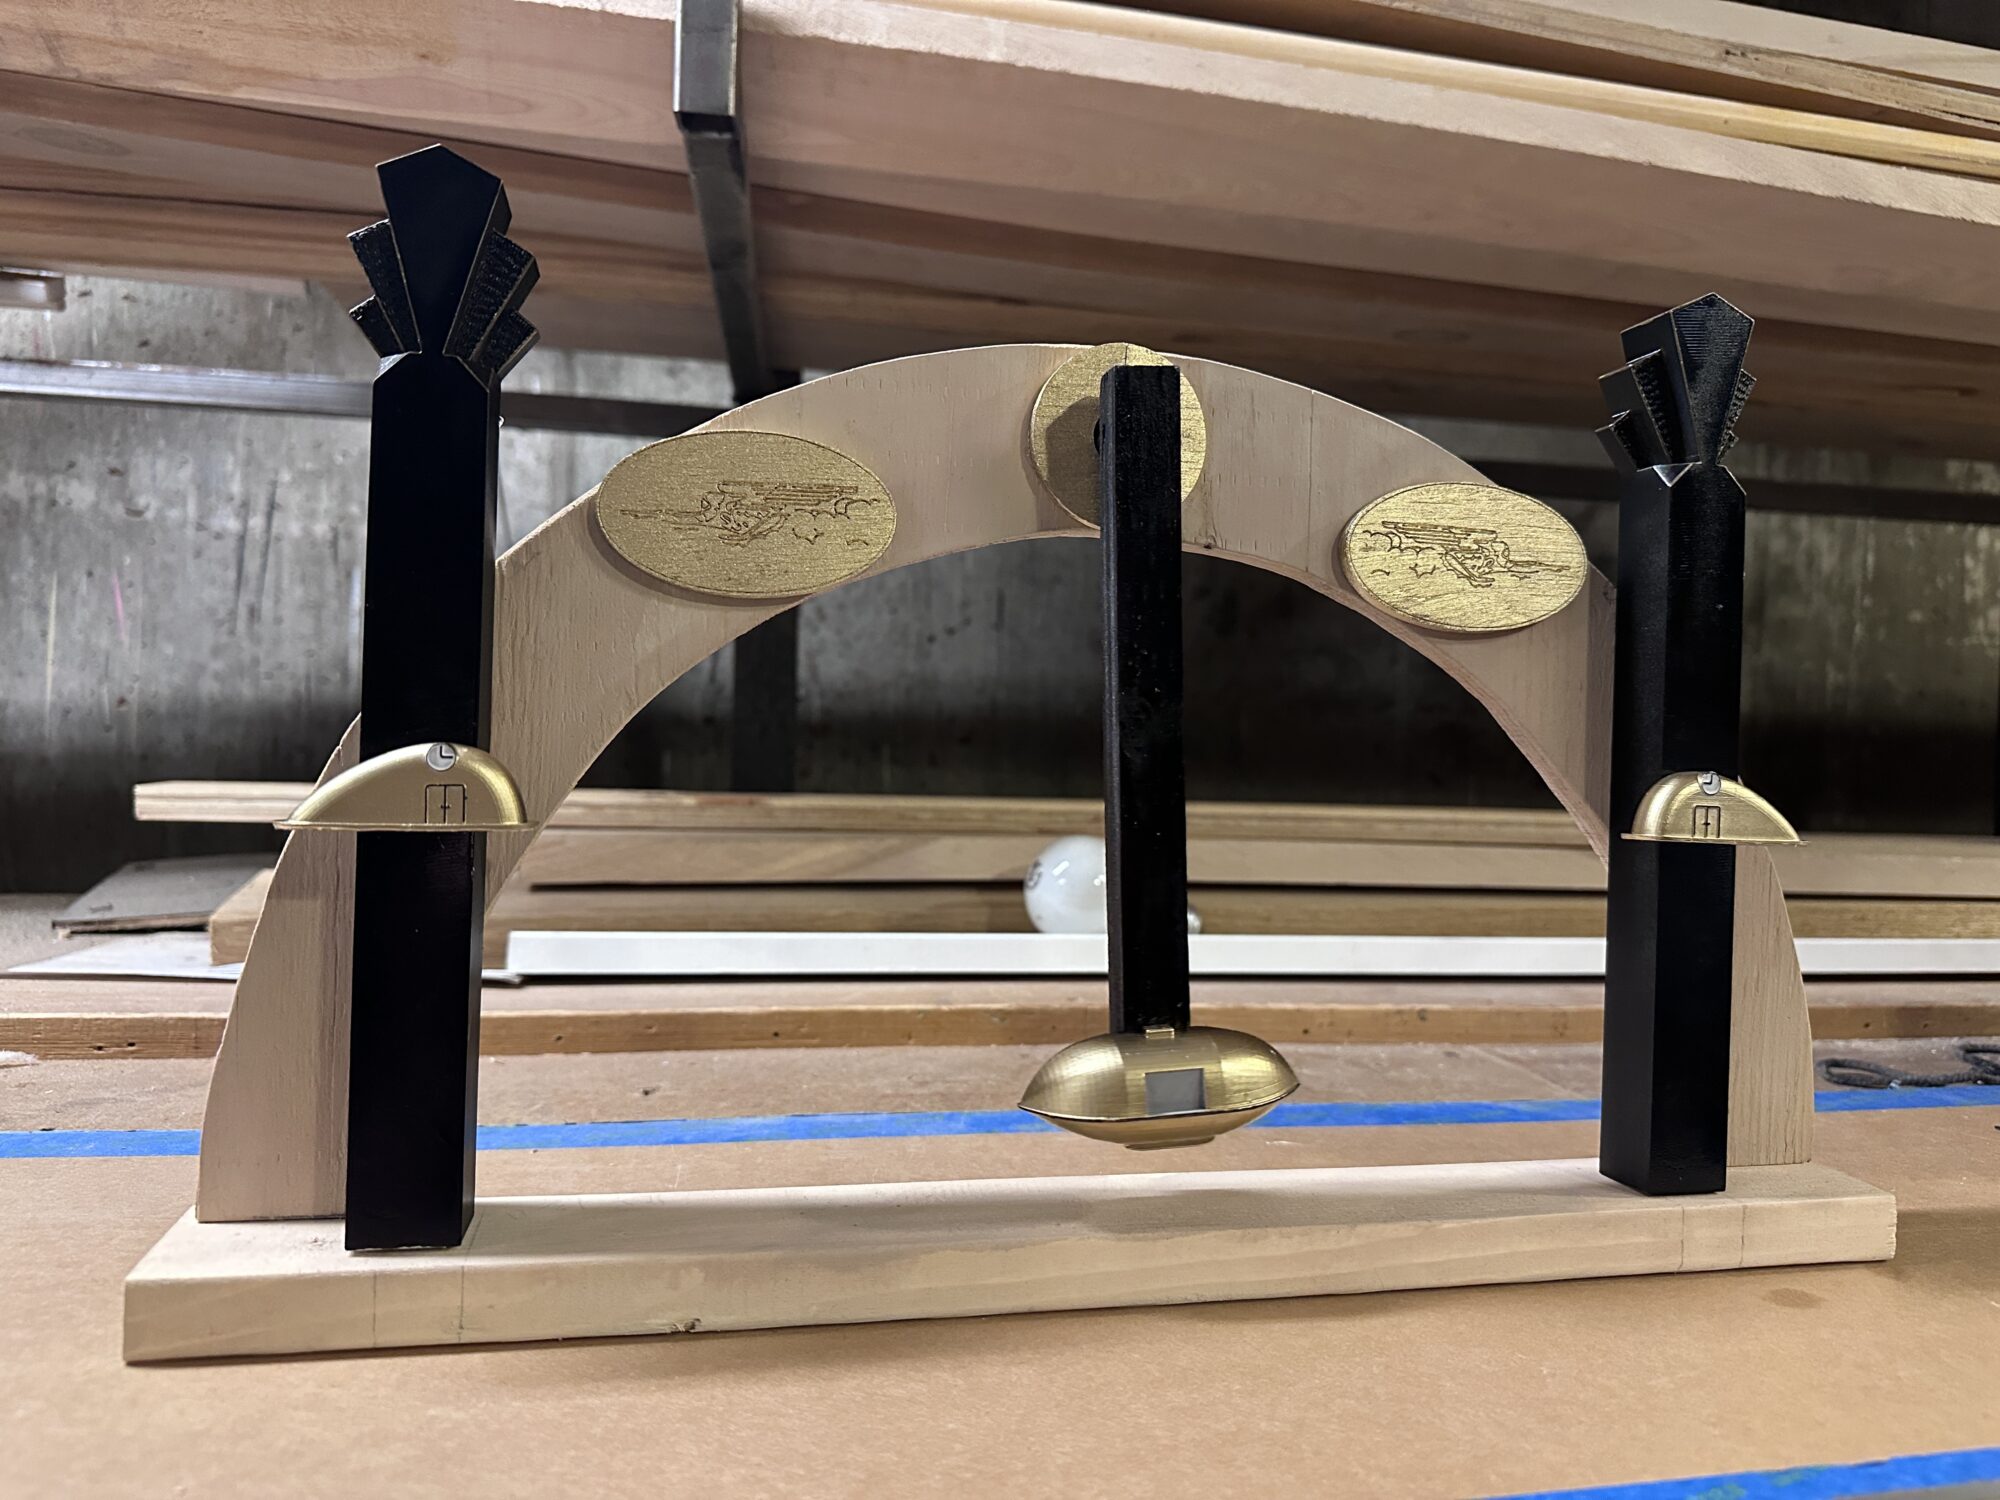
The above image shows my finished project.
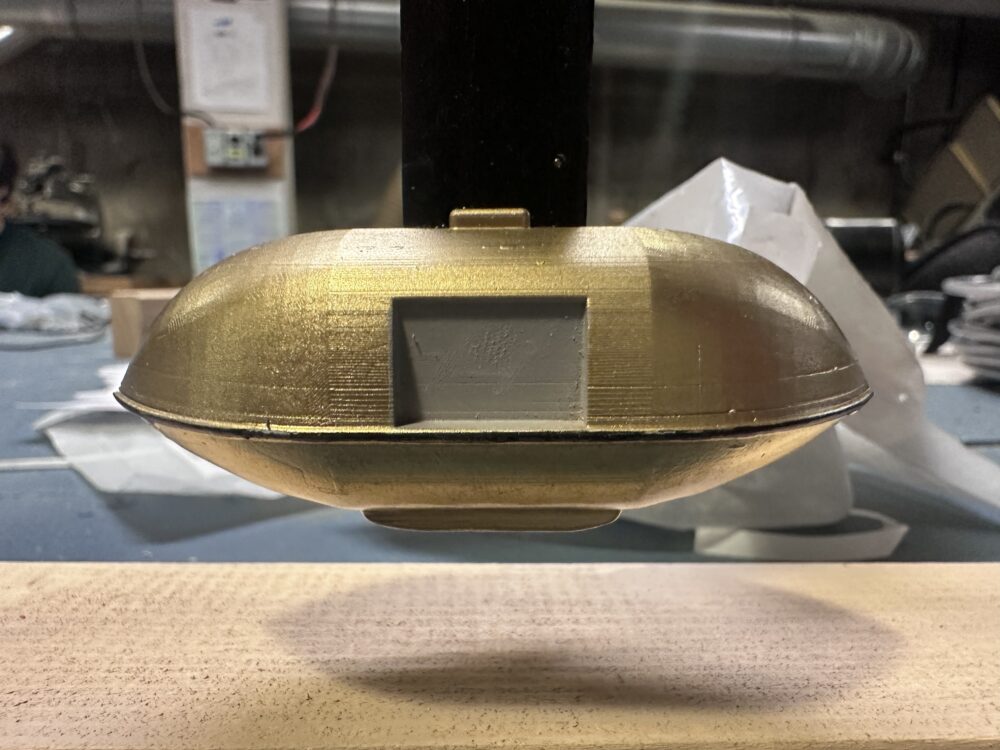
At the top of the arch, there is a skateboard bearing. The pendulum arm is a piece of ½ inch plywood that is attached to the bearing with a wooden dowel. The monorail is attached to the bottom of the arm. There is a slot in the back of the monorail that allows the arm to fit into it. Initially, I thought that the dowel would have to go through both sides of the plywood, and I would have to cover it. Fortunately, I was able to drill only into one side of the plywood, and the dowel fits in with a very strong press fit. Initially, I was going to print the monorail in 2 parts so that it could be hollow but not open at the back. I was going to add lead weights to the hollow space in the monorail to increase the period of time that the pendulum swings over. In the end, I could not come up with a good weight solution, but the monorail is much heavier than I anticipated. Therefore, the pendulum swings fairly slowly, even without the added weight.
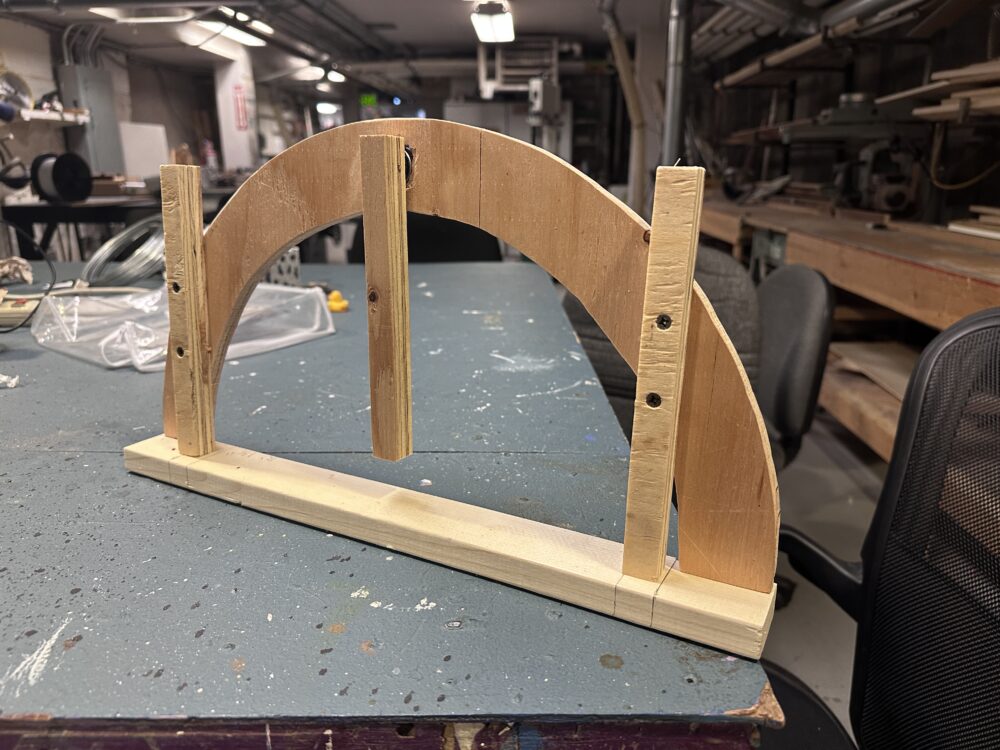
The above image shows the pendulum frame. The skateboard bearing is slightly visible behind the arm.
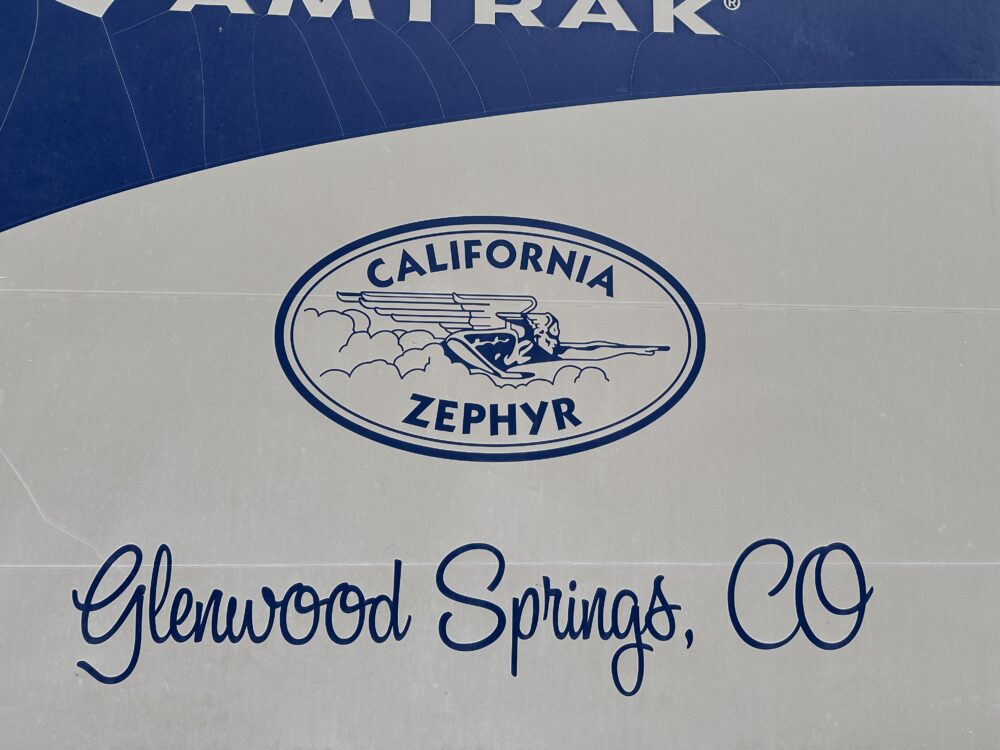
The above image shows the sign that I used to make the Zephryus plaques.
The above images show the painted monorail and one of the stations.
The columns will act as stops, so the pendulum can only swing a certain distance. I CADed them in Solidworks and had them 3D printed through the Idea Forge. It’s always fun to CAD decorative things that don’t need to serve any kind of utilitarian purpose. I do this regularly with model railroading, but it was fun to use my non-conventional CAD skills for a school project. The stations on the columns are also fairly simple 3D-printed structures. They look like a stationary version of the train from Wicked with the addition of a clock on top. The clocks are set 12 hours apart from each other to symbolize the time difference over the long distance that the monorail is traveling. Setting the clocks differently was easy because the 2 structures are just mirror images of each other. The station buildings are SLA(resin) printed. I’m lucky enough to own an Elegoo Mars 3 Pro, which gives me great detail in my resin prints. I also printed the monorail on this printer.
I painted the whole structure with different techniques. I painted the wood frame to look like concrete with some craft store acrylics. I should have thinned the paint less because the wood still shows through the paint. That said, I still don’t think it looks like wood because of the paint, so I consider this a win. I spray-painted the columns and pendulum arm with a glossy black. There are some gold highlights on the columns at the top that I did with a gold Sharpie. I spray-painted both the stations and the monorail with gold. For the monorail, I made a small black outline around the trim piece with black Sharpie. I then masked off everything but the window, and spray-painted the window gray. For the stations, I brush-painted the clock faces with white acrylic. This was very small, but I’m used to painting small things, so I was very comfortable with this. I outlined the clock with a black Sharpie and used the same technique for the hands.
The biggest challenge with this project was the Zephyrus images on either side of the pendulum arm. For these, I started by taking a photo of a sign that I saw at the Amtrak station in Glenwood Springs. Then, I imported the photo into Photoshop, and removed the background. I took the PNG without a background and moved it into Illustrator. In Illustrator, I made the file a vector and was able to export it as a .dxf. I lasercut the dxf file in the Idea Forge.
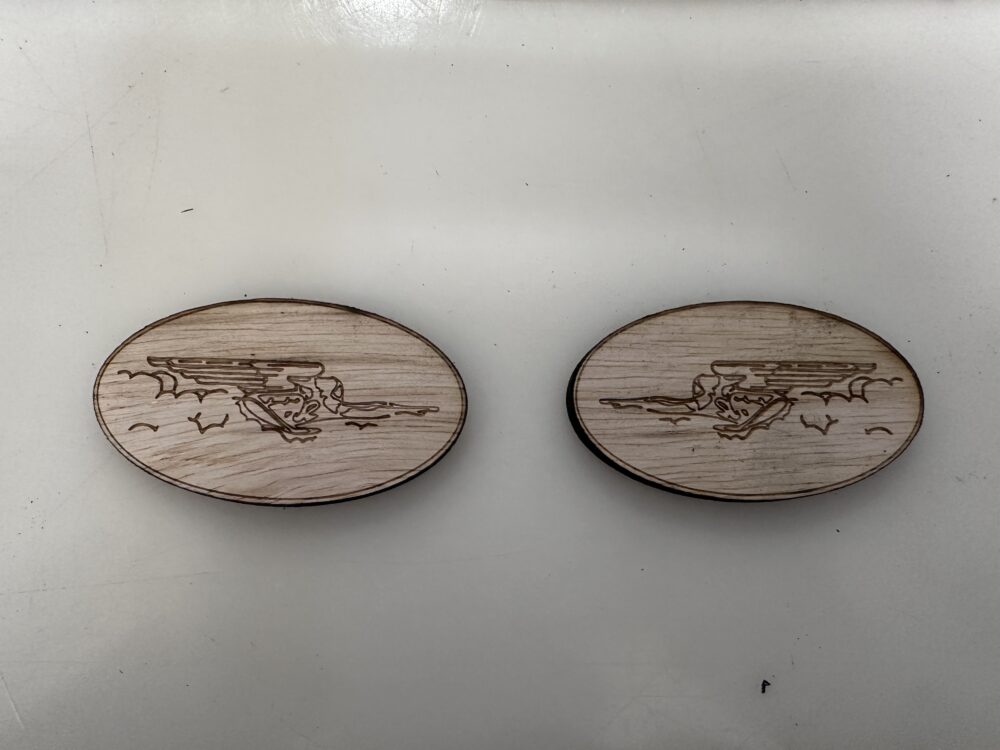
The above image shows the 2 lasercut Zephyrus plaques.
I had a great time constructing and painting this project. The main new skill that I learned was creating a lasercut-able .dxf file from a photo. I wasn’t even sure if this was possible going in, and I think it turned out really well. If anything, this project inspired me to make more things that don’t serve a purpose or are part of one of my already existing hobbies. I’ve already started brainstorming ideas for some wall art that I want to make. This project turned out basically exactly how I wanted it to. It looks just as I had envisioned in my head.