
Design Timeline: From Spark to Stitch
Before Spring Break
– Decided to create a modern take on Rajasthani mirror work for my final project ✨
– Sketched out multiple ideas and finalized one with clean lines and room for embellishment
– Asked my mom in India to send me mirror work materials along with her usual care parcel
– Reached out to my aunt in Denver (a sewing pro!) to ask if I could work on the project at her place — she happily agreed and had a sewing machine and body form all set up.
![]()
Spring Break
– The parcel from India arrived safely 🙌
– Headed to my aunt’s place for a hands-on sewing bootcamp
– Revisited the basics — practiced machine stitching and hand stitching on scrap fabric
– With my mom’s help over video calls, traced the dress pattern onto the actual material
– Started top-stitching the base dress, focusing on precision and clean structure


After Spring Break
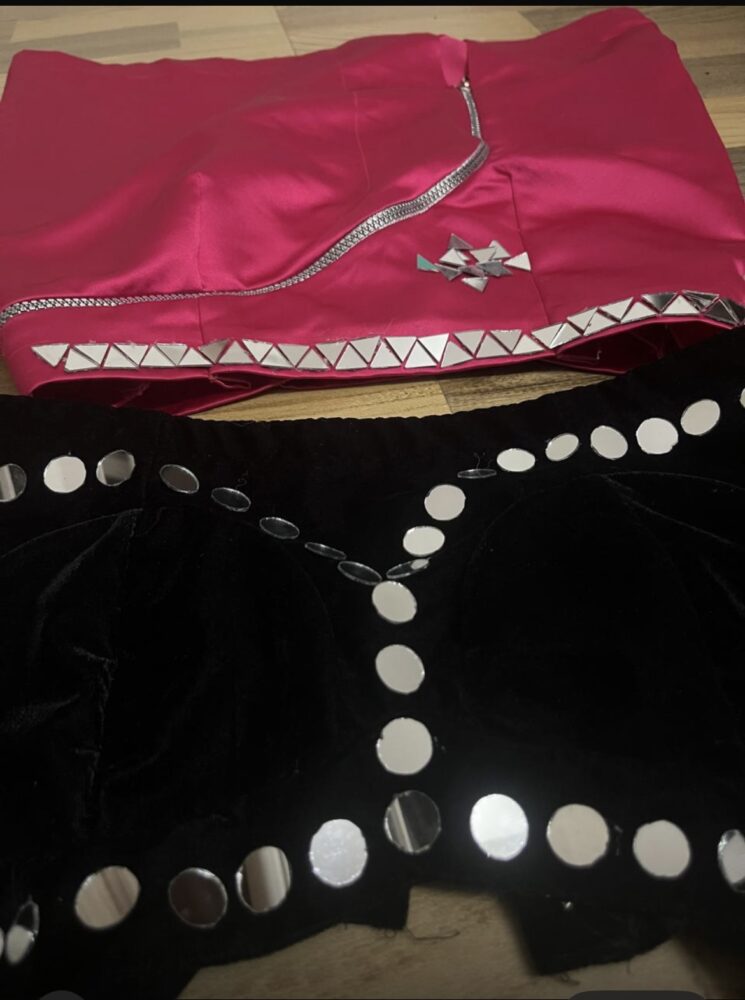
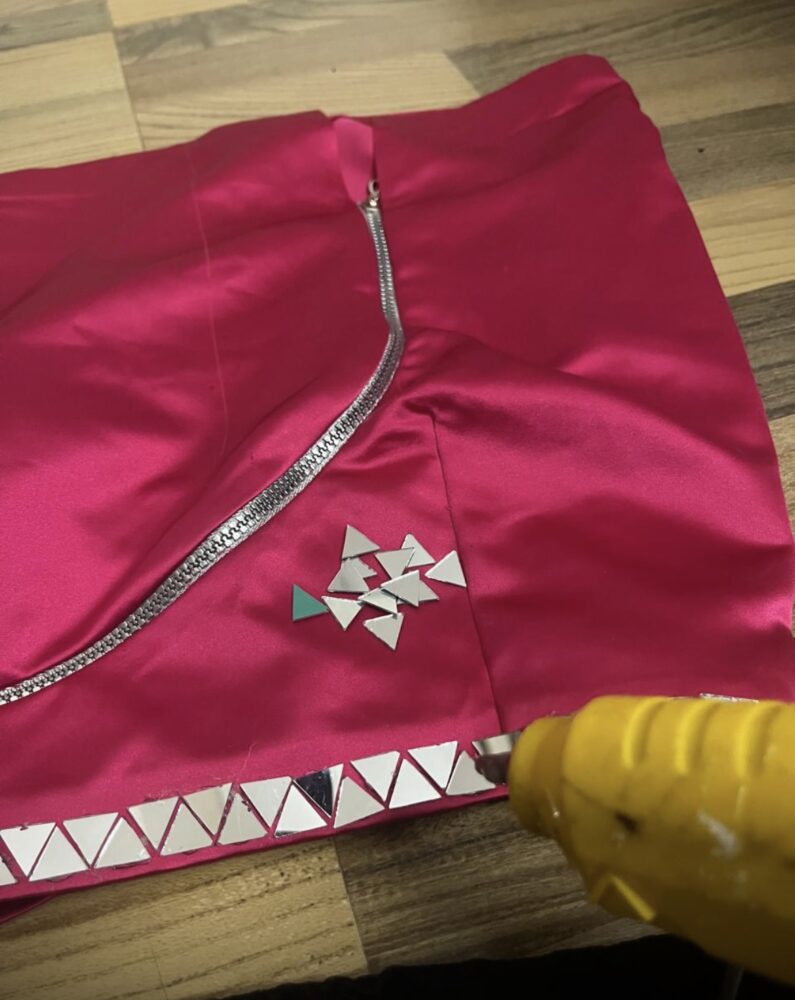
– Played around with mirror and chamki layouts — arranged them on the base dress to test designs
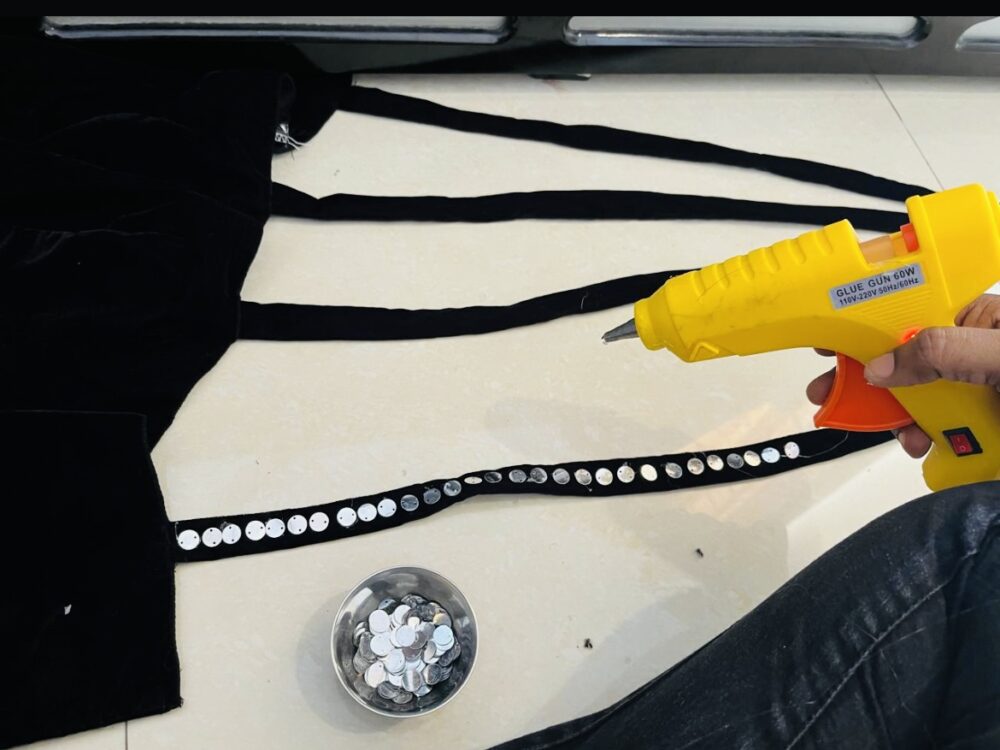
– Decided to glue the real mirrors (they needed more structure and time to stitch)
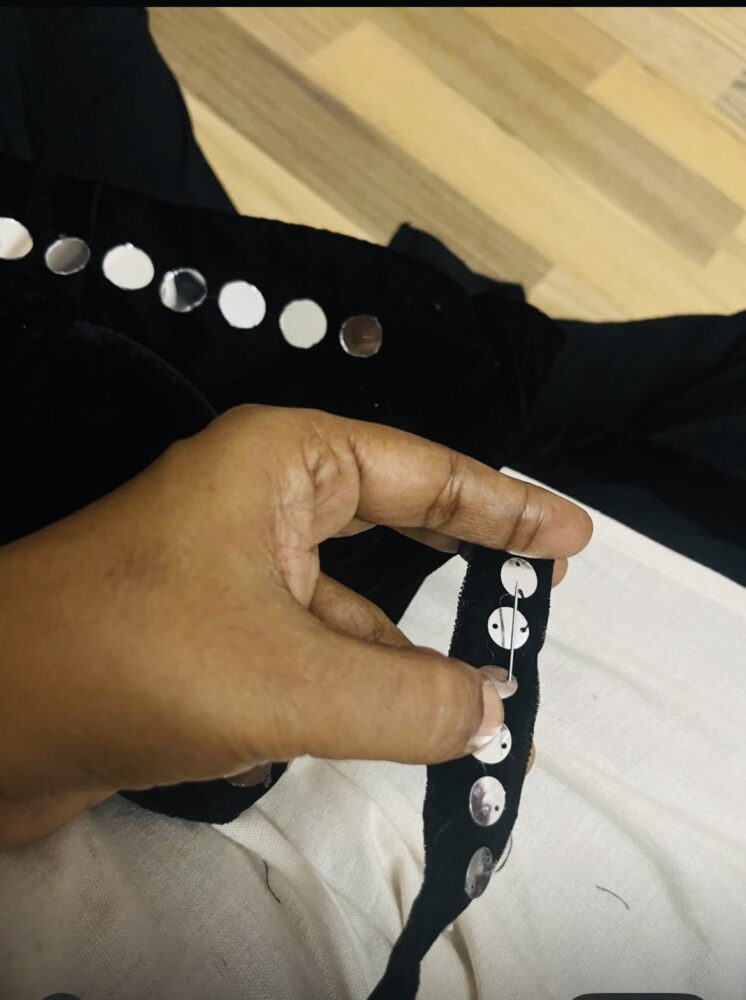
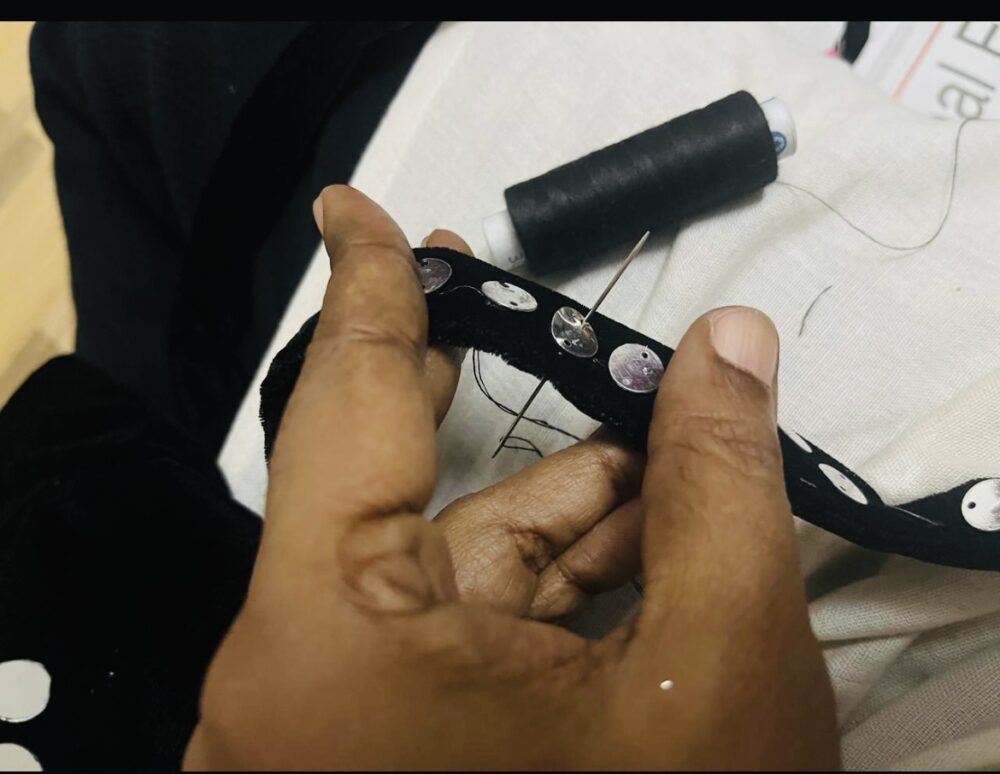
– Hand-stitched the acrylic chamkis for a lighter, secure finish ✨
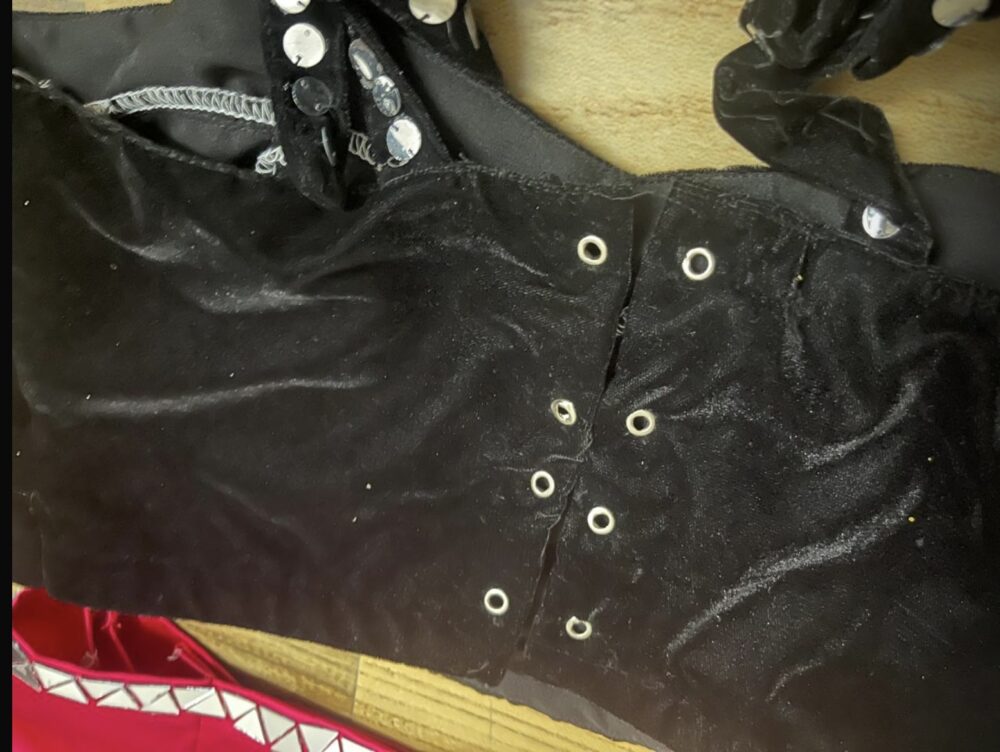
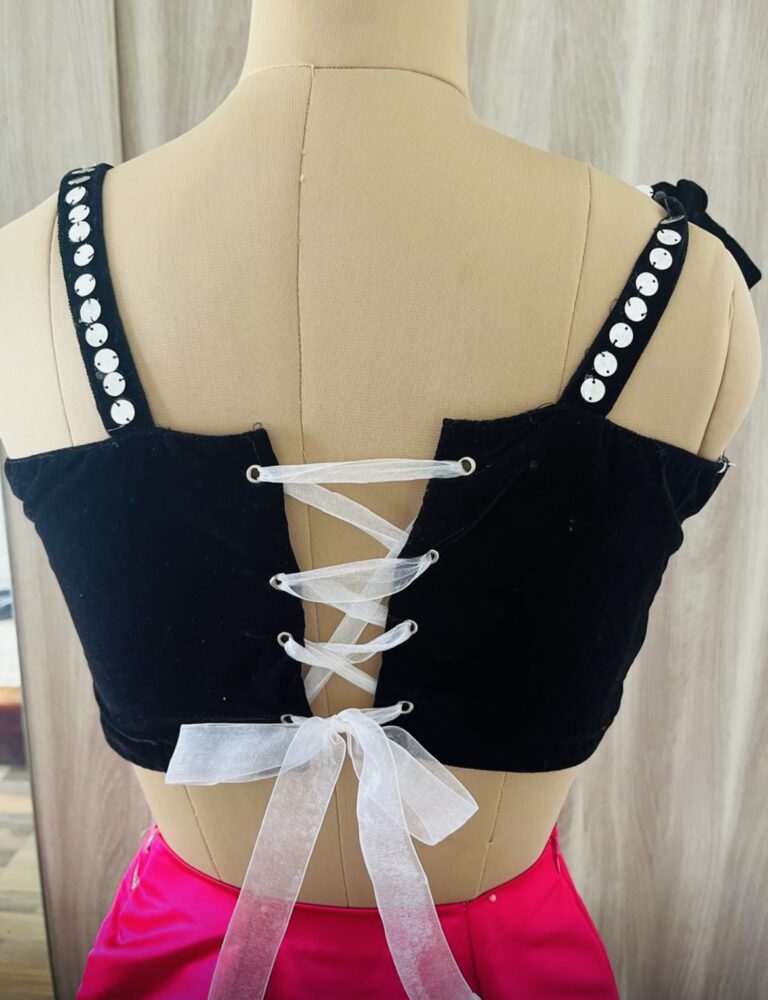
– Finished the back with rivet buttons and added a lace-up bow closure for a soft, elegant touch
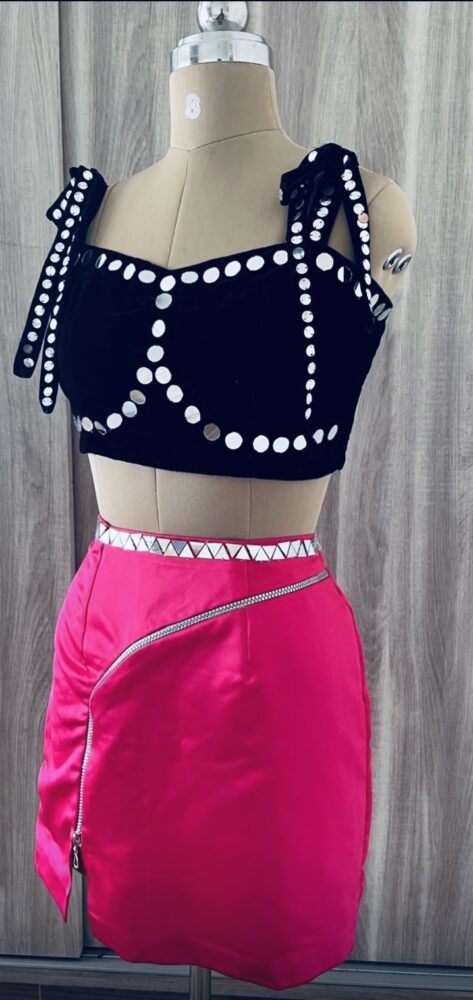
– Final result turned out better than expected — clean lines, balanced sparkle, and wearable charm 💛
![]()
Fabrication in Detail: How I Brought the Sparkle to Life
1. Material Magic
Top: Velvet for luxe vibes
Bottom: Cotton satin for structure
Chamkis: Acrylic mirrors from India (lightweight and easy to sew)
Bonus: Metallic zipper and soft lace for the modern twist
2. Sewing the Base Dress (Pre-bling)
Worked at my aunt’s home in Denver during weekends and spring break
Practiced stitches on scrap cloth to get my flow back
Traced the dress pattern with my mom’s help over a video call
Cut the fabric, stitched the top and skirt separately
Added a zipper for a clean, modern finish
Realized the skirt was loose 😭 — took it apart, adjusted the fit, and moved forward
3. Embellishment Galore
Laid out chamkis and mirrors based on my sketches
Glued on heavier mirrors (hand-stitching them would’ve taken forever)
Hand-stitched the chamkis with just two stitches per piece
Kept the sparkle minimal and classy to match the modern vibe
4. The Bow-tiful Back Hack
Originally planned for a traditional buttoned placket
Midway, decided to make it more delicate and flexible
Added rivet holes and threaded in a soft lace
Tied it into a bow — adjustable, aesthetic, and simple 💁♀️
Conclusion: From Spark of an Idea to a Sparkling Gift
When I started, I had one clear goal — bring the magic of Rajasthani mirror embroidery into a wearable, western silhouette. I knew I loved the aesthetic, but reimagining it in a subtle, modern way was a challenge I was excited about. Limiting the amount of mirror work was tough, but I really love how it turned out in the end.
Where it’s going next:
This piece isn’t just staying in my closet — it’s heading to someone really special. I shared progress photos with my closest friend while I was working on it, just asking for her thoughts… and she loved it. So now, it’s hers 💛 I’m hoping it fits her well, and if not, I’ll happily make adjustments. Honestly, just knowing it made someone that happy makes me feel like I’ve already won.
What I’d do differently:
– Experiment earlier with stitching real mirrors, even in minimal patterns .
– Stop questioning my own capabilities — start exploring more skills without hesitation .
– Keep documenting along the way — I missed so many wholesome moments in the rush.
2 Comments. Leave new
This came out really well! It is really impressive that you made these from scratch, they look really well shaped and do not show signs of being hand made. The mirror and chamki work appears to have been rather tedious, but it sounds like you wanted to add even more. Would you say that this part of the project was challenging?
I love how personal and collaborative this project felt from start to finish. How did you decide on the final layout for the chamkis and mirrors?