
My first ever and from-scratch electric guitar has been progressing at a great pace since our return from Spring Break, covering a lot of ground in fewer days than expected – albeit via many, many hours in the woodshop daily. Before the break, all that existed was a guitar-shaped object: Two conspicuously shaped pieces of wood glued face-to-face with a substantial offset around the whole perimeter, not yet the dimensions of the final product. By the end of this week, I expect to be ready for applying an oil finish to both the body and the neck.
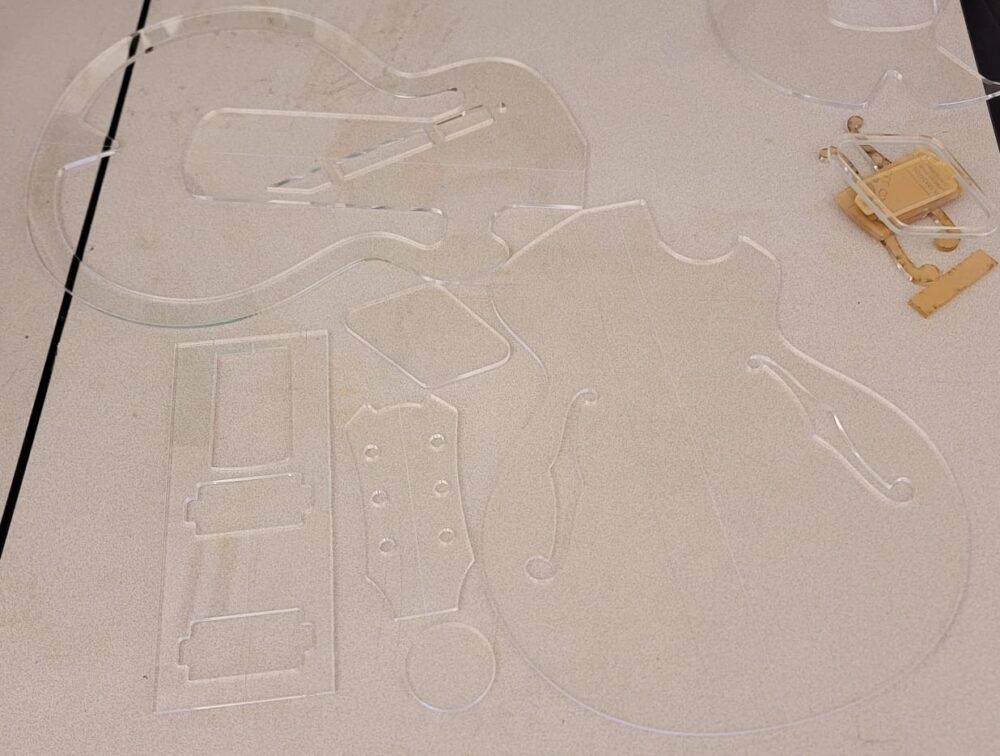
Just before the break, I created 1/4″ acrylic templates for all critical shapes and dimensions with a laser cutter. In theory, now, I could replicate this guitar in the future without a CNC router. Over break, all of the remaining part’s I’d ordered arrived in the mail as well. All parts in-hand meant more accurate measurements and no more time waiting for critical pieces to arrive.
 After the week’s hiatus, I hit the ground running with some very important routing work: Aligning the body shaping template along the guitar’s center seam, securing it to the body with double-sided tape, and routing its final shape on the routing table.
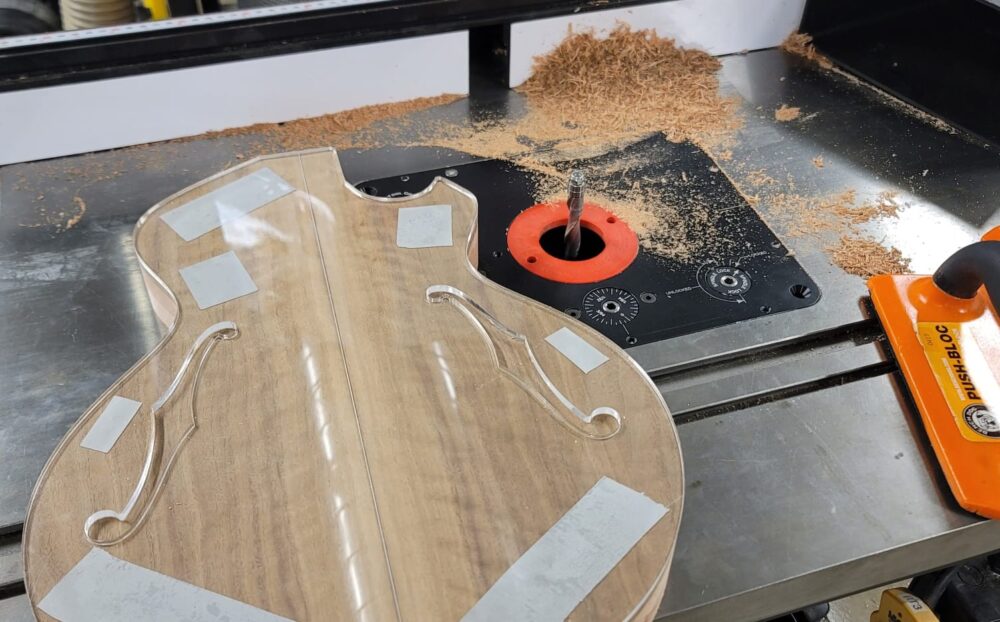
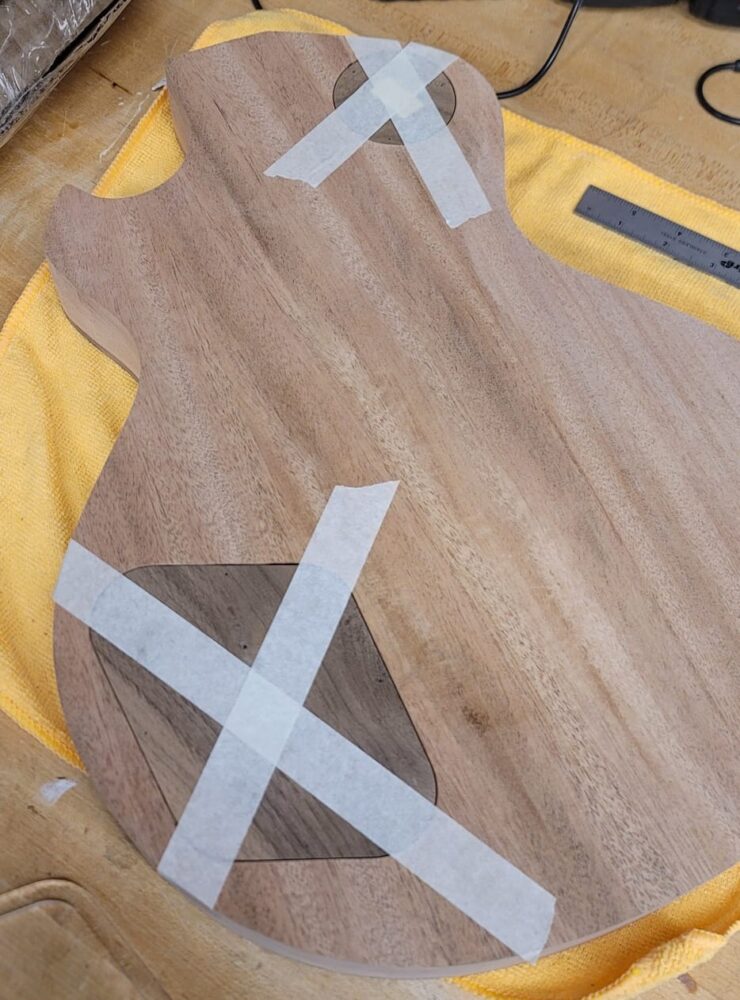
![]() With the body template still attached, I drilled away material from what would soon be the guitar’s single, left-sided F-hole.
With the body template still attached, I drilled away material from what would soon be the guitar’s single, left-sided F-hole.
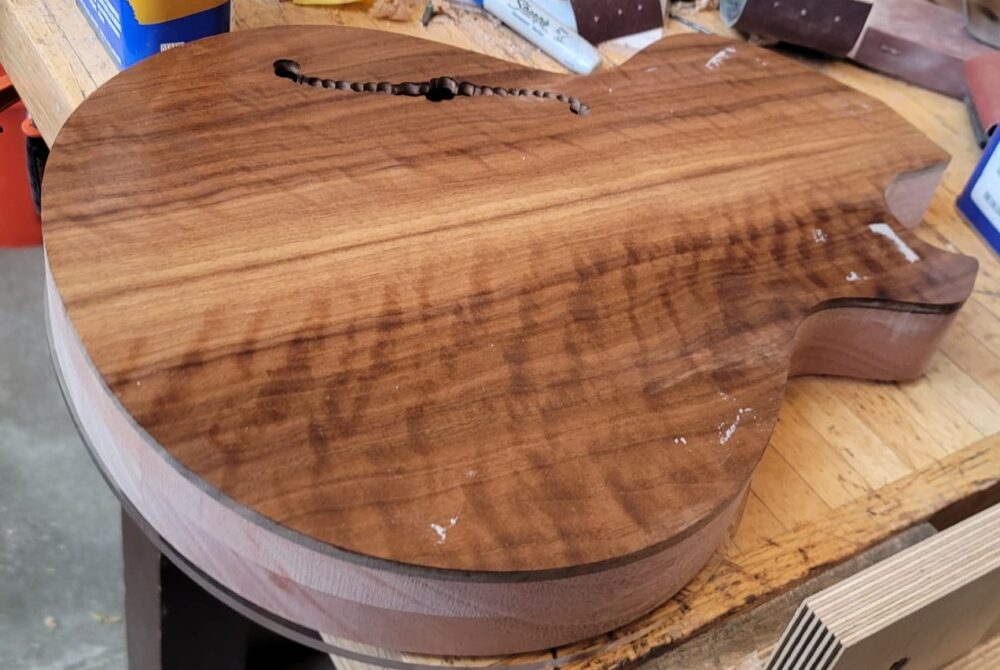
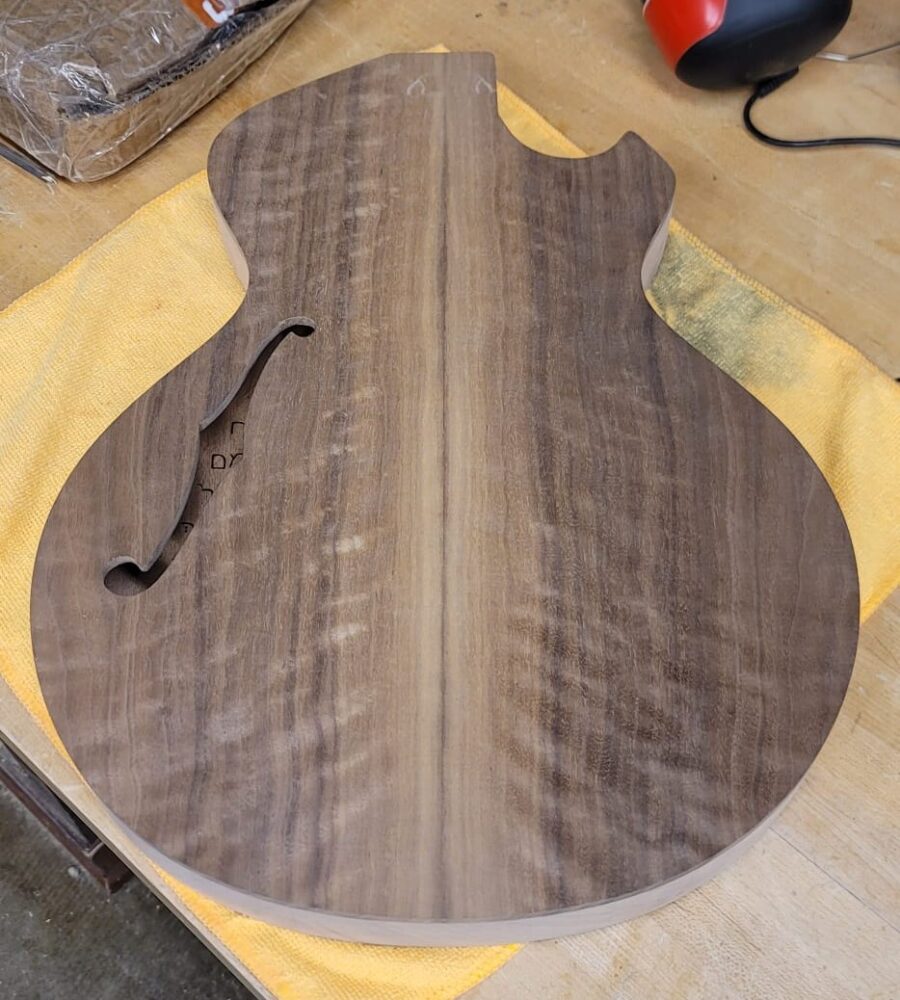
I then removed the template and wiped away any tape residue using mineral spirits. This gave a first sneak peak at what the walnut top will look like when an oil finish is finally applied. The color deepens richly, and the flaming in the wood emerges just a beautifully.
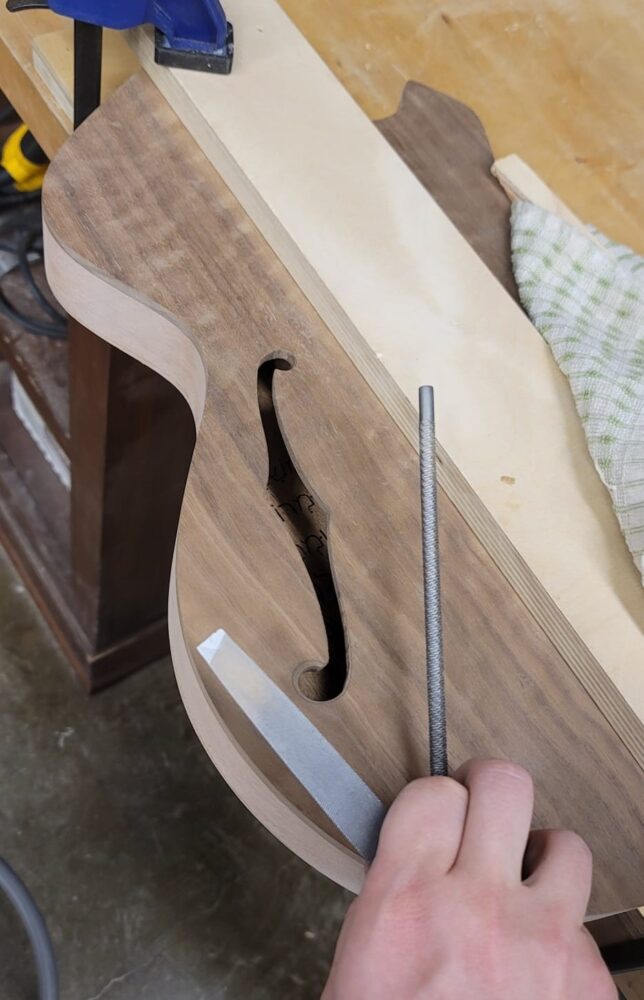 With much of the material drilled, I used files to shave away the remaining material from the F-hole up to its final shape I’d traced with the template on.
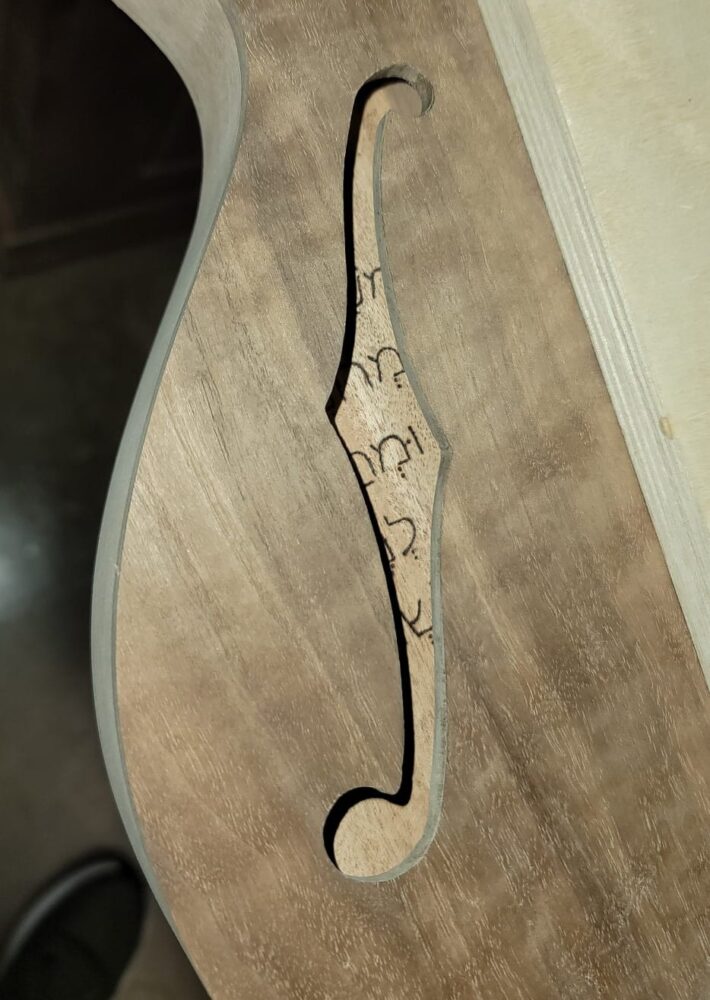 I’m extremely happy with the result and found the Hebrew script I’d written inside the body hollowing prior to glue-up to show itself subtly yet clearly – exactly as intended.
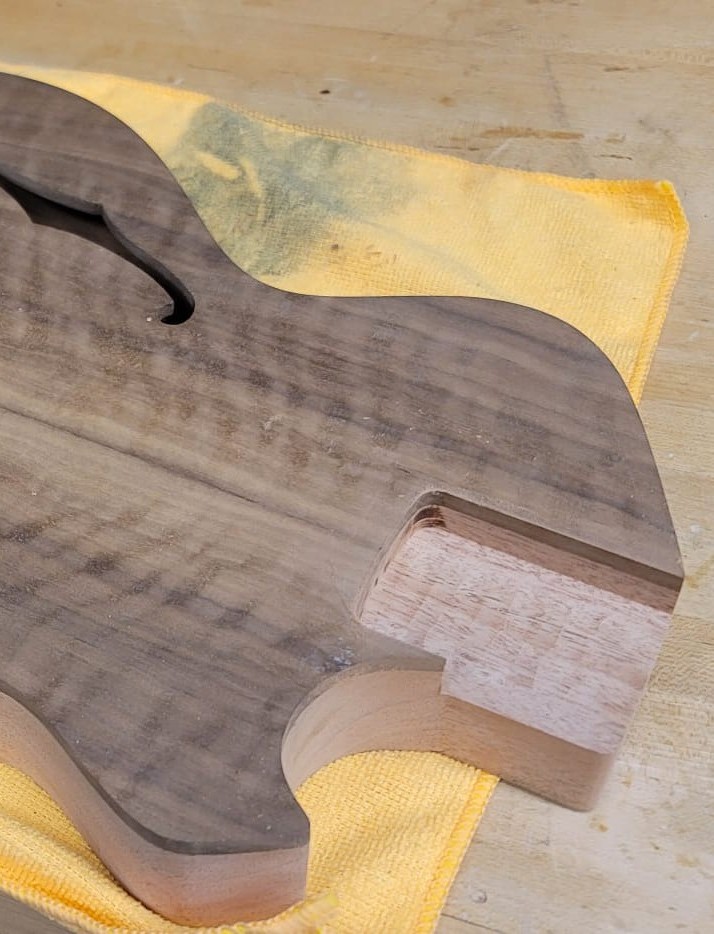
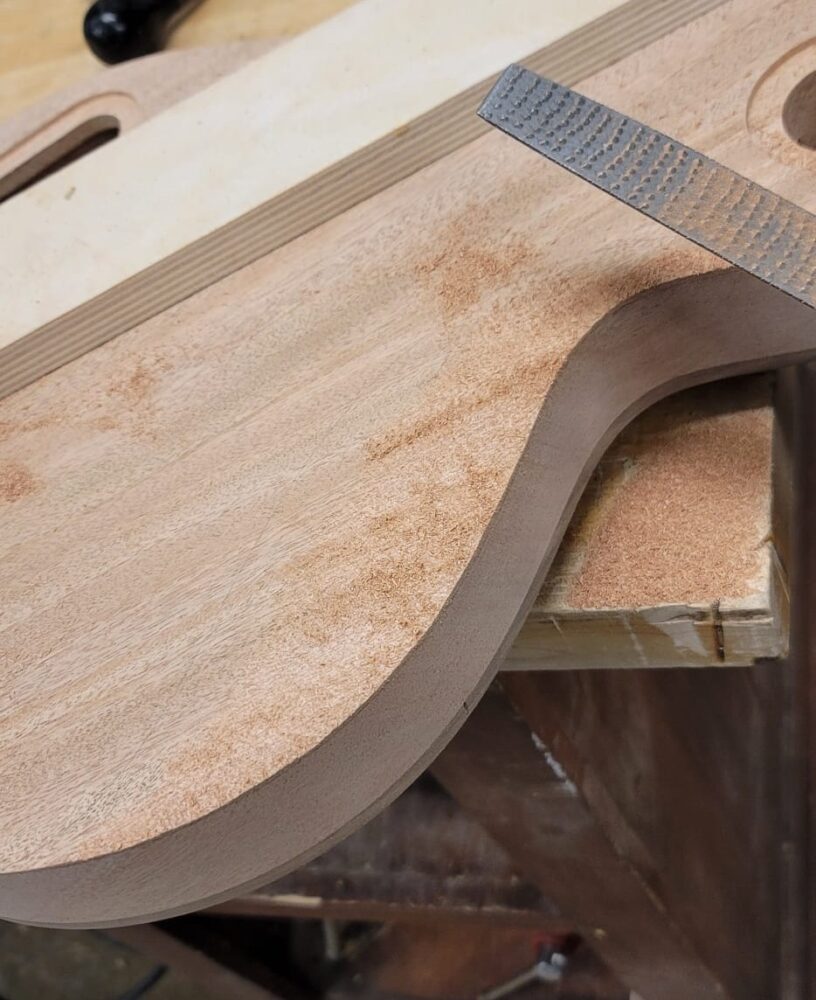 I did a little CAD work again and found I had enough material remaining around the guitar’s back edge to add a belly cut. A belly cut is purely ergonomic, allowing the guitar to sit more comfortably on the player’s side by creating a slight recess in the body where a sharp edge would otherwise be. My aim is to improve both comfortability and playability. This meant simulating the cut in CAD before printing traceable templates to bring to scale on the guitar. With proper lines traced, I could begin filing away material.
 This took a good amount of tender love and care, filing away so much material very slowly. The lines came out accurate enough, and I’ll give them another once-over during the finishing sanding process to be sure my edge lines are crisp and blend nicely with an edge fillet (one of the final steps in construction).
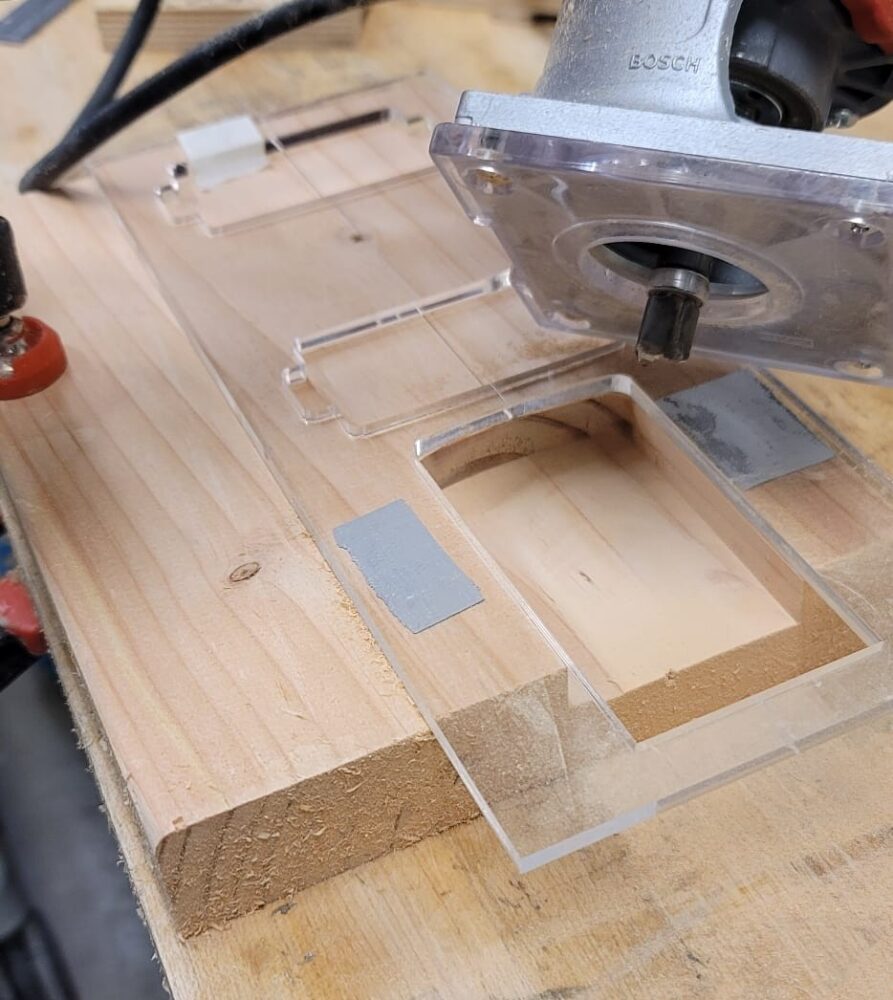
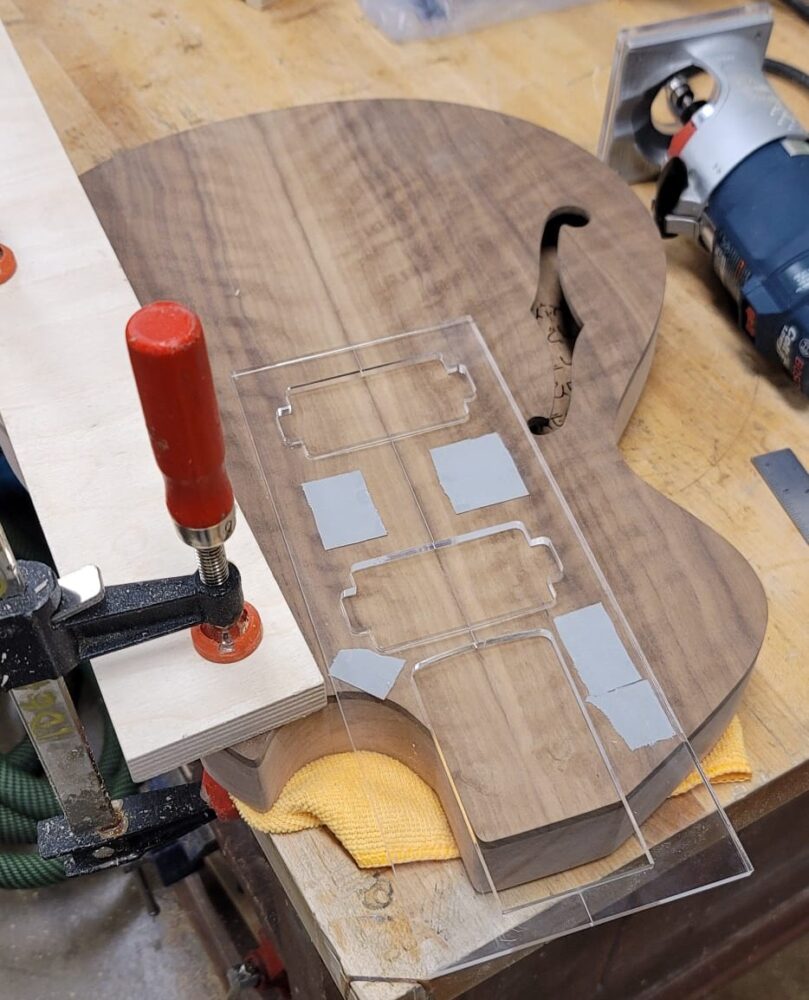
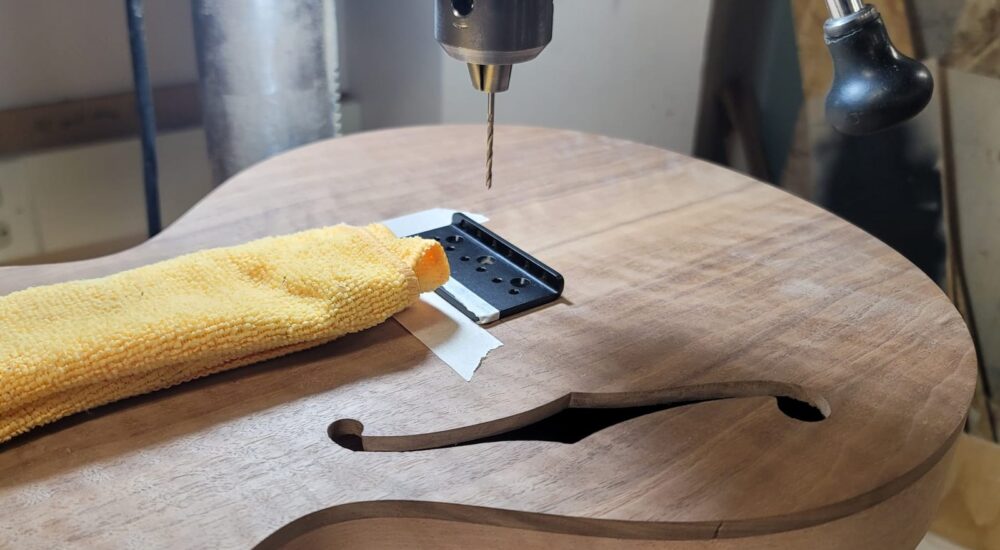
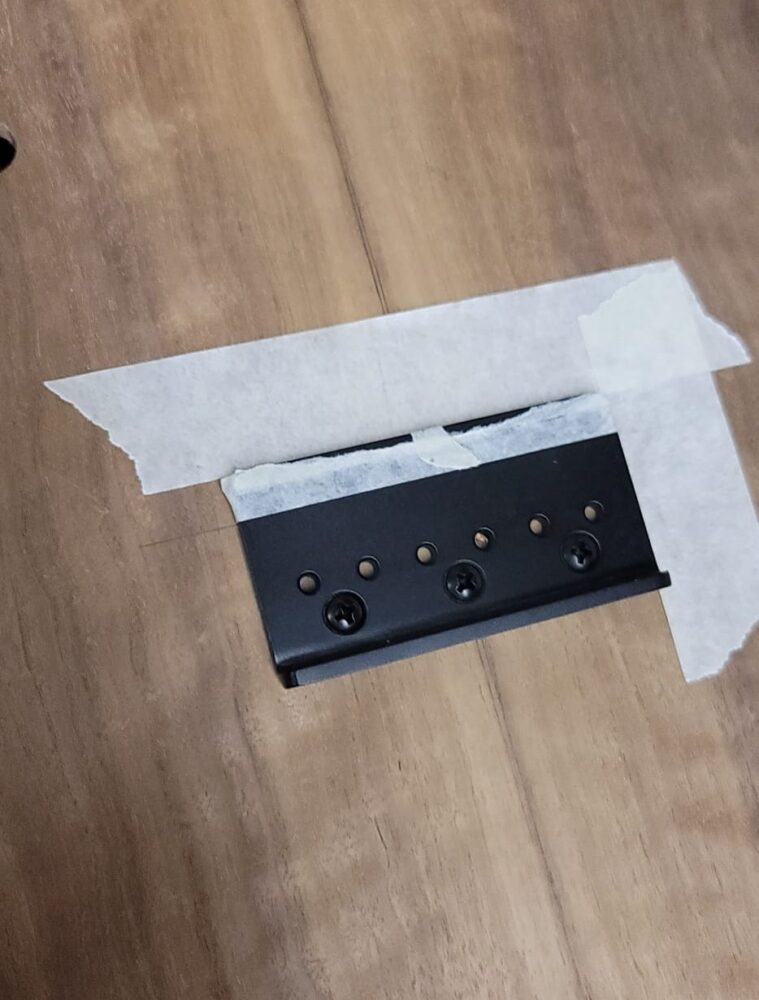
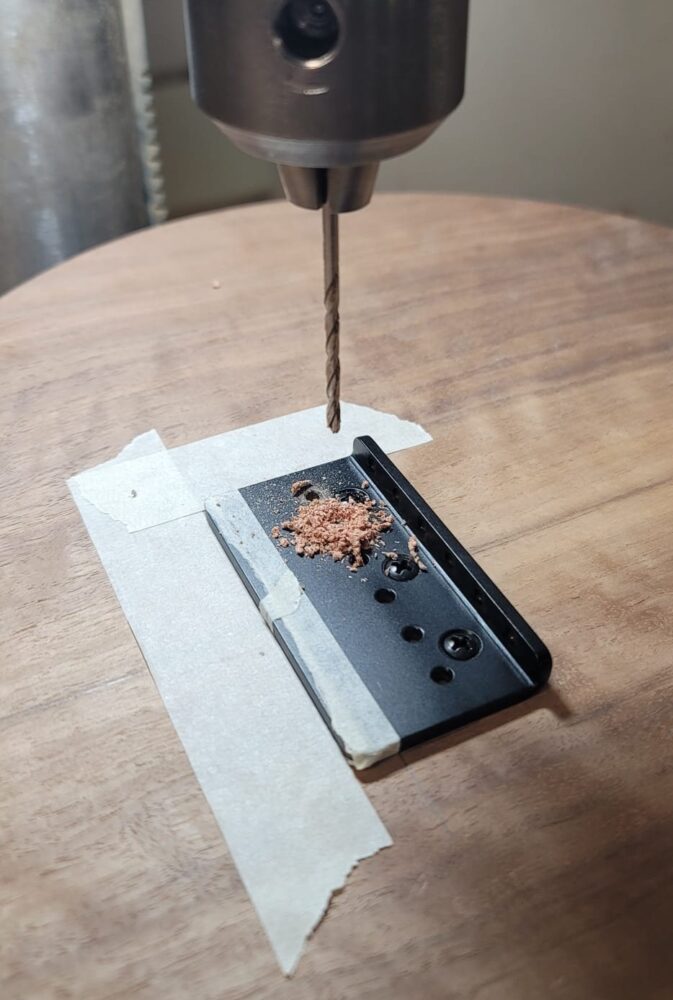
 Then I made my control cavity covers out of another piece of walnut. After planing down to approximately 1/8″, I cut the covers with more acrylic templates and cleaned the edges with the routing table and a bit of belt sanding. Shown here, I taped them centered in their respective slots to drill holes for the screws that will fasten them. I countersunk these holes to allow the screw head to sit comfortably lower on the surface.
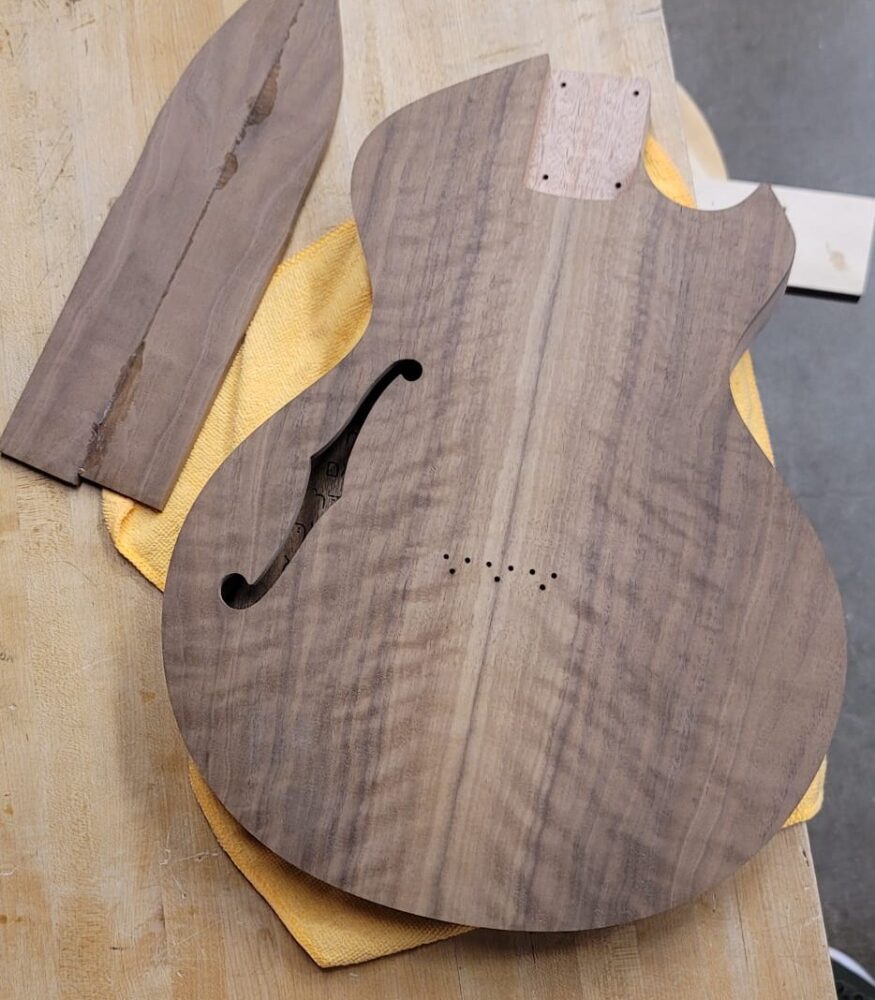
 Shots like this are exciting. Progress from a lot of hard work is visible, and the current product slowly starts to look like the final, making it incredibly easy to stay motivated and put in more hours. Also, the light just catches that flamed walnut perfectly.
 Next up were the two most important operations of the whole build: Setting the neck and aligning the bridge. If the scale length is wrong or strings aren’t aligned with the neck, the instrument is completely unplayable. So, I practiced on scrap. With a plunge router, I carved a neck pocket into a large piece of wood and sat the neck inside to verify it was straight and snug. All checked out, so I moved on to the guitar itself.
 I spent the extra time to be sure my template was perfectly aligned on the guitar’s center seam before sticking it to the walnut face.
 I then routed about 1/4″ into the guitar before slowly increasing the depth until I was just past the ideal 5/8″ depth. Going a little further gives some wiggle room to account for material that might be lost during final sanding.
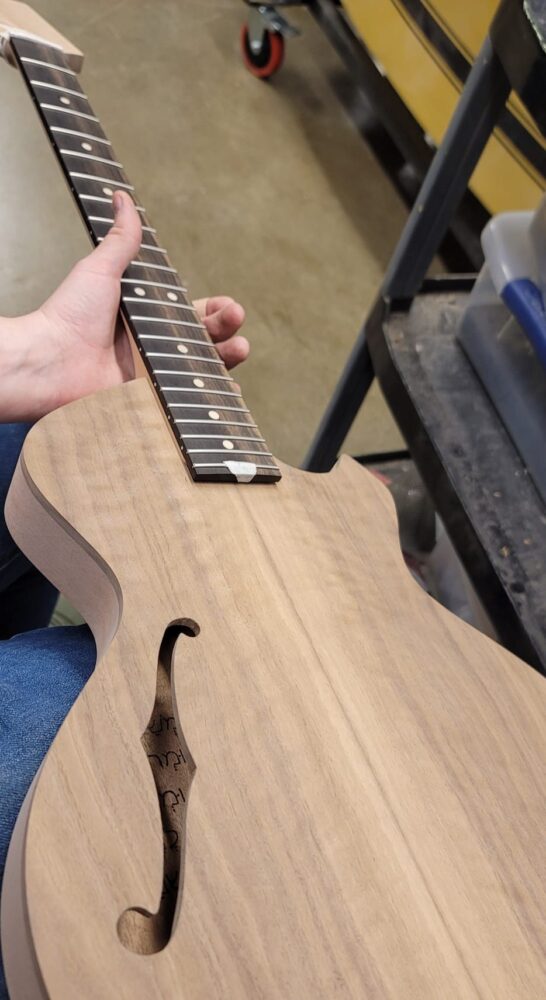
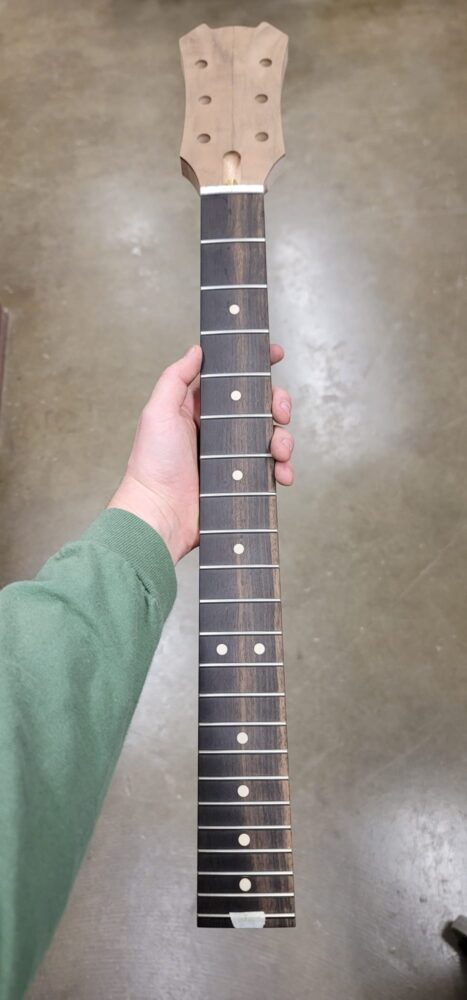
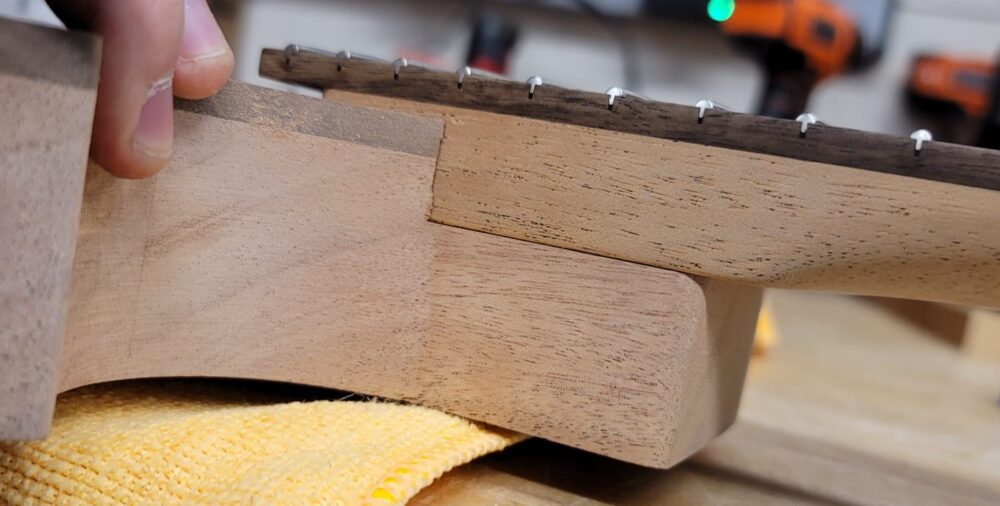 I tested the neck inside the pocket and, sure enough, it fit as well as it did in the scrap. The little bit of overhang you can see between the fretboard and the top of the guitar is standard on most all Fender guitars because it allows room for a 1/8″ thick pickguard underneath (which I won’t be integrating) and closely matches the height of most flat-mount bridges.
 The problem I had, however, was that the new neck I ordered already had screw holes in the heel, and my guitar body didn’t. If I’m even slightly off in this alignment, it could throw off the alignment of the whole guitar. So, my solution was to hacksaw the tips of four nails the same diameter as the pre-drilled holes. I fitted them snugly inside the holes and then aligned the heel of the neck inside the body’s neck pocket. Once the alignment was correct, I pressed down to make small impressions where each hole should be drilled.
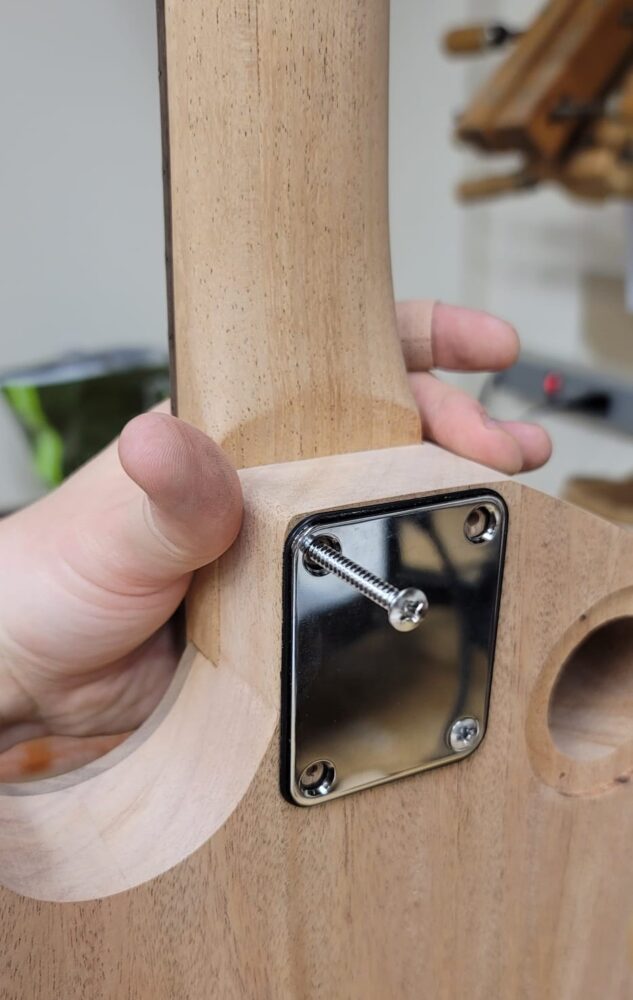 I then drilled the neck bolt holes trough the body and mounted the neck to check my work. While not dead center, the guitar’s new centerline based on the neck is only 1/16″ shifted, and I’m very happy with that margin of error for such a difficult operation of aligning existing neck holes.
 With the neck bolted on, this chunk of wood is really beginning to look like a guitar.
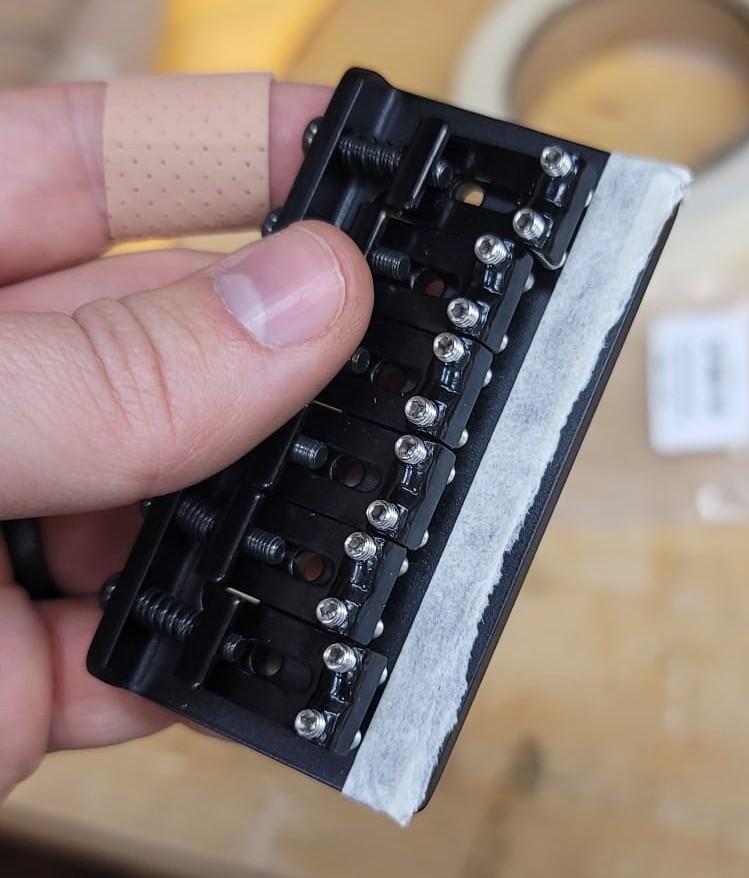 Next up and of critical measurement specificity was the alignment and placement of the bridge. My first task was to adjust the saddles on which each string rests so that they were exactly in the center of their adjustable range (adjustment allows for fine-tuning called intonation). I marked this line with a piece of scotch tape and set the bridge aside.
 I then marked the guitar’s exact centerline based on the neck as-mounted. Measuring from the nut (the white piece of corian at the top of the neck on which the strings rest), I then marked the guitar’s scale length (distance from nut to bridge saddles) on the face of the guitar, extending sideways exactly perpendicular to centerline. I’m using the shorter 24 3/4″ Gibson Les Paul scale length for which my neck is fretted. After marking center on the bridge, I aligned the bridge to centerline and the scale length.
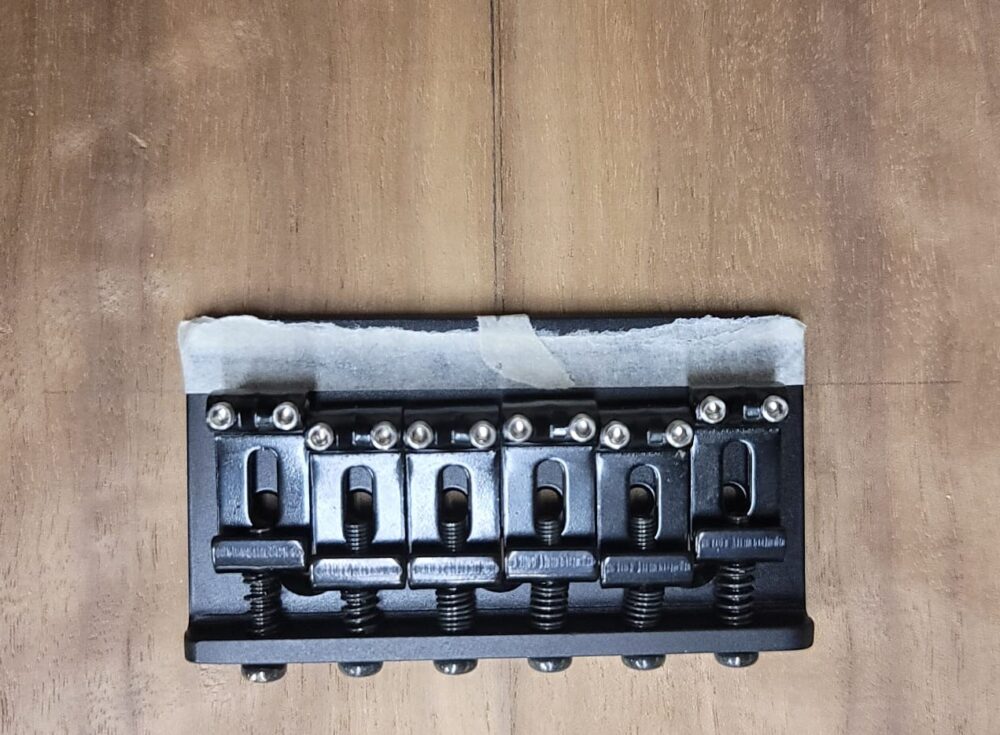
 To make life easier, I also placed masking tape along the front and side edges of the bridge to help me place it accurately again. I then double-stick taped the bridge to the guitar in this position without the saddles.
I took the guitar body and bridge to the drill press and made holes for each of the bridge’s mounting screws.
 The holes aligned extremely well, and I screwed on the bridge plate to make the next step easier and more accurate.
 For a hardtail guitar like mine, the strings feed up through the back of the guitar. My next operation was to drill string holes almost through the guitar body from the top – but not quite all the way through. More on this soon.
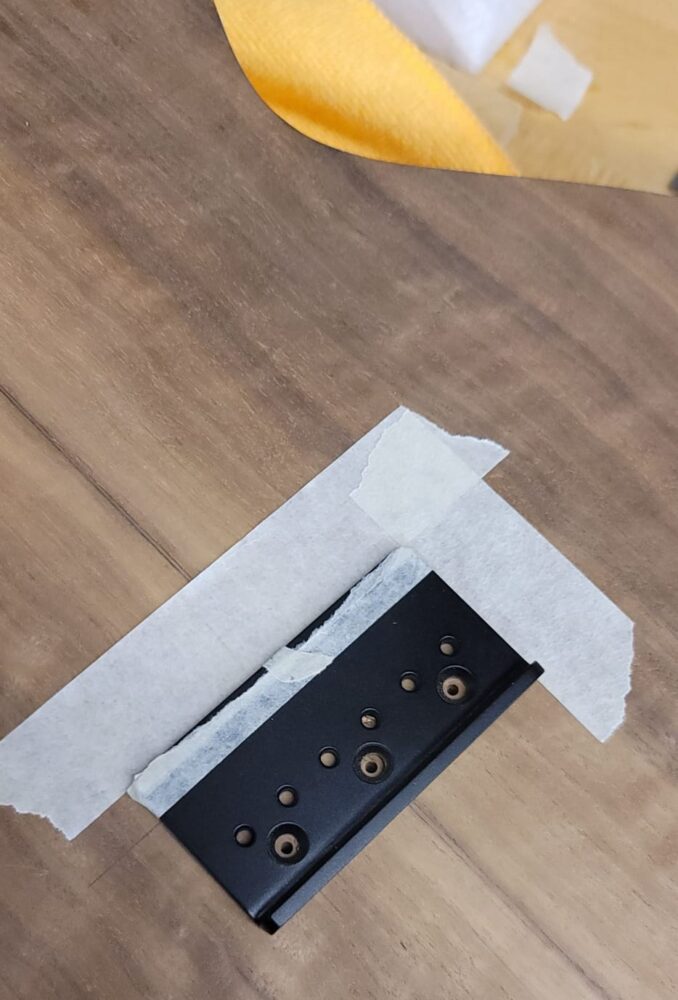
With mounting screw and string holes drilled, I removed the bridge again and cleared the tape residue.
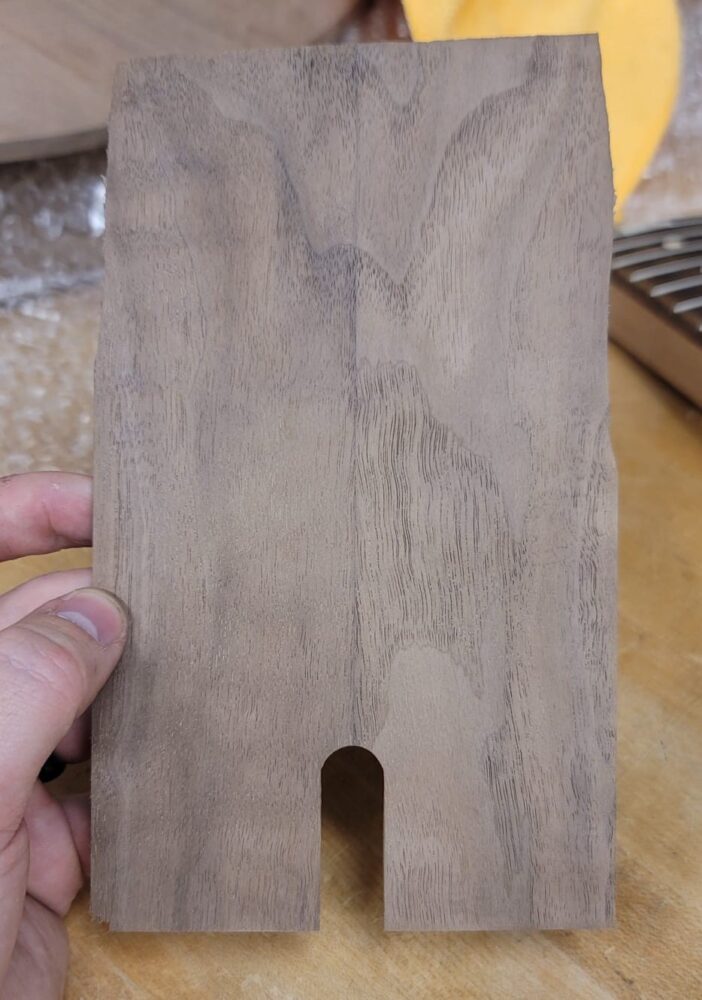
 During this time, I also glued together some bookmatched pieces of scrap walnut – the same walnut from the guitar’s top. From this, I’ll create a thin veneer to glue to the top of the guitar’s headstock so the headstock and body match in grain and tone. You can see the comparison here.
 With some (more) help from luthiers on YouTube, I created a “pin jig” from the drill press. A flat piece of scrap wood is placed under the press, and a small pin sticks up from that scrap. The pin is aligned directly below the tip of the drill bit. When I place the guitar face down below the drill press, that pin slips into one of the holes I’ve drilled in the top for the strings. With the guitar in place on the pin, I can be sure I’m drilling a hole directly behind the hole I’ve already drilled.
In so doing, I made larger holes in the back of the guitar that meet the smaller hole’s I’d already drilled into the body, creating a perfect through-hole for the strings.
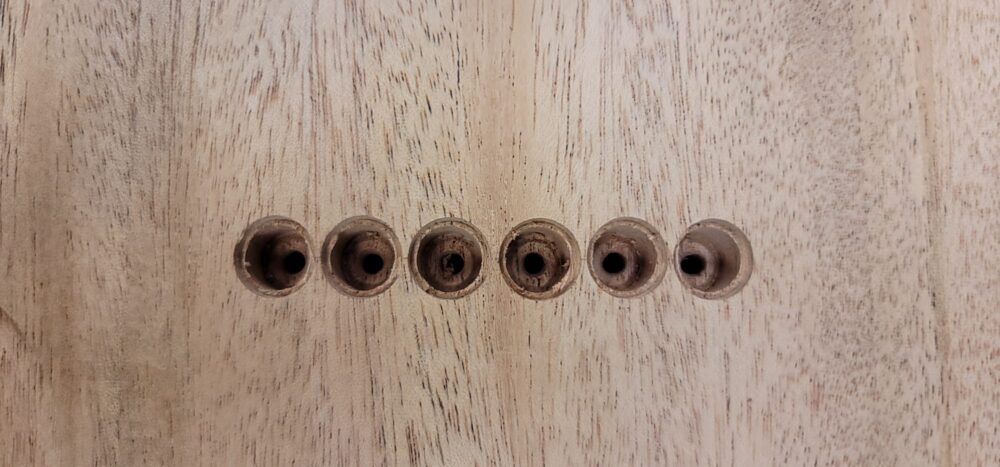 Each of these holes also received a shallow recess to accommodate the lip of the ferrules – small metal pieces seated in the back of the guitar that hold the end of the string in place.
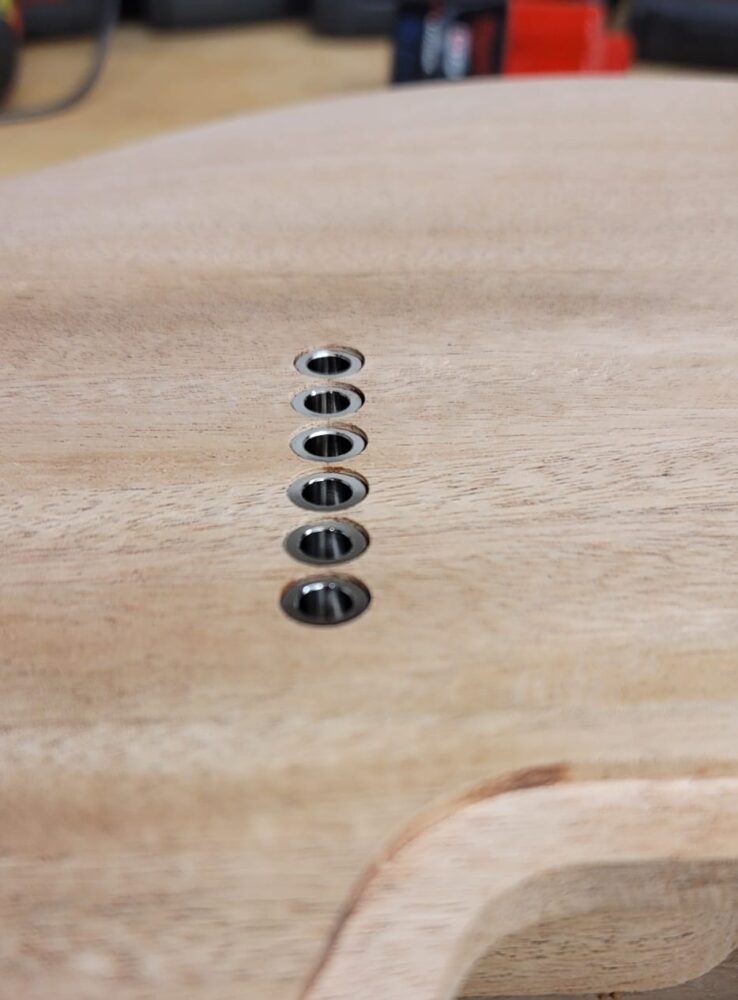
 I applied a small amount of super glue in each hole before tapping the ferrules into place, just below the mahogany surface.
That pin jig ensured these ferrules were aligned absolutely perfectly. Crisp and clean.
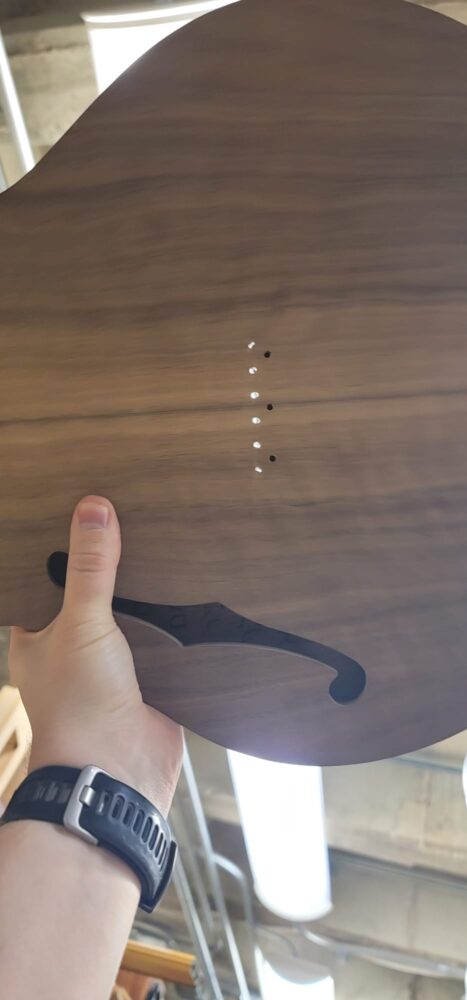
And each of the string holes is completely unobstructed, showing through against the light.
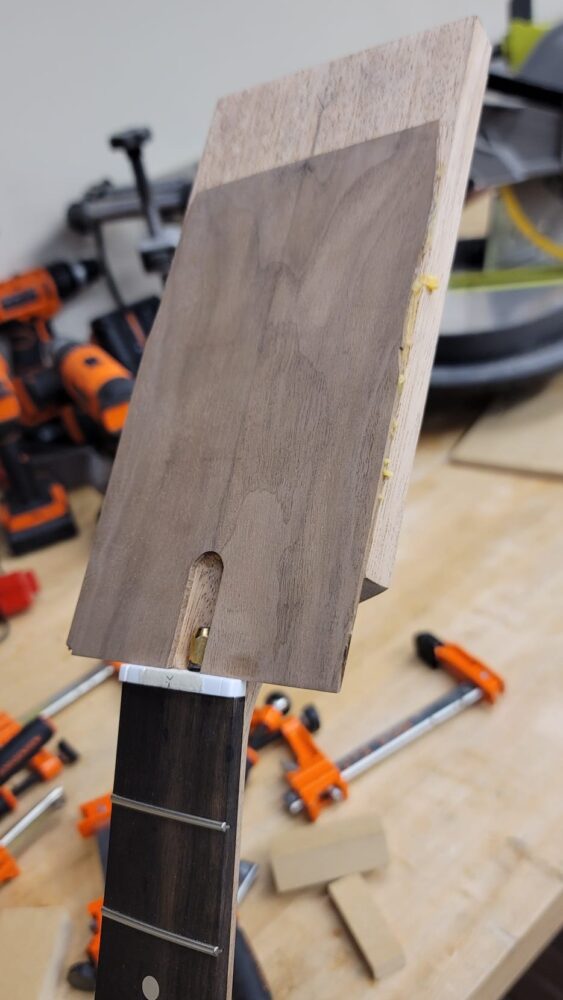 I then planed down my walnut veneer to under 1/8″, closer to 1/16″ thick. I also cut a slot into the bottom so the neck’s internal truss rod can be adjusted.
The veneer was then glued to the face of the “paddle” headstock.
 I did a rough cut of my headstock shape before taping my headstock template to the top. This template was thick enough that it stuck out above the nut, meaning I could simply put it face down on the routing table and route perfect edges without additional support.
 Probably the most difficult routing job yet, I took my time to make sure the edges were crisp and not burnt by the spinning router blade.
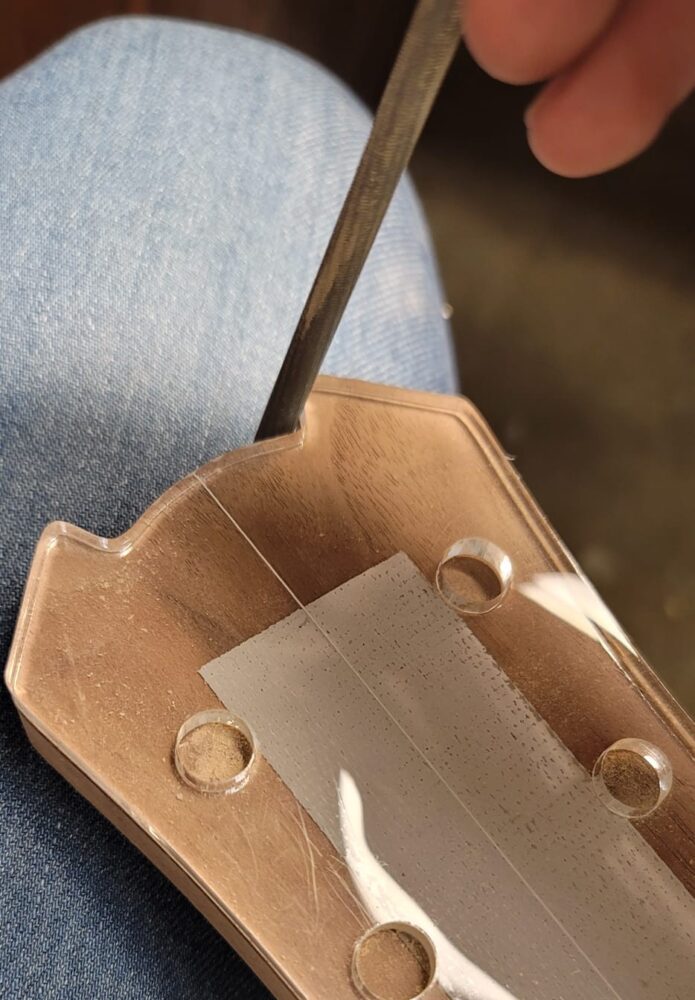 Since my design had a tight radius in two corners of the headstock, I took another file to the headstock and met up with my template line again.
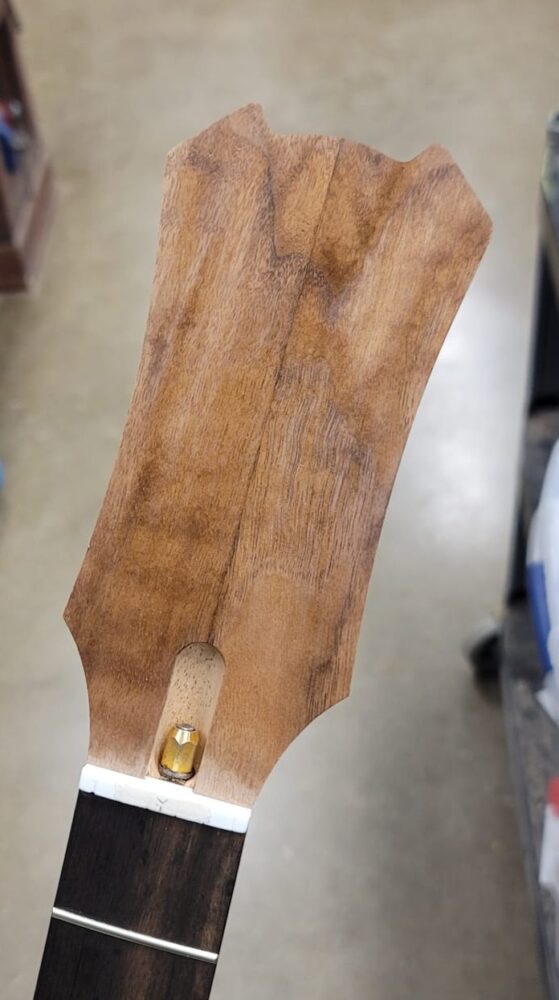 With the template removed, I got another look at the grain and coloring with mineral spirits on the wood.
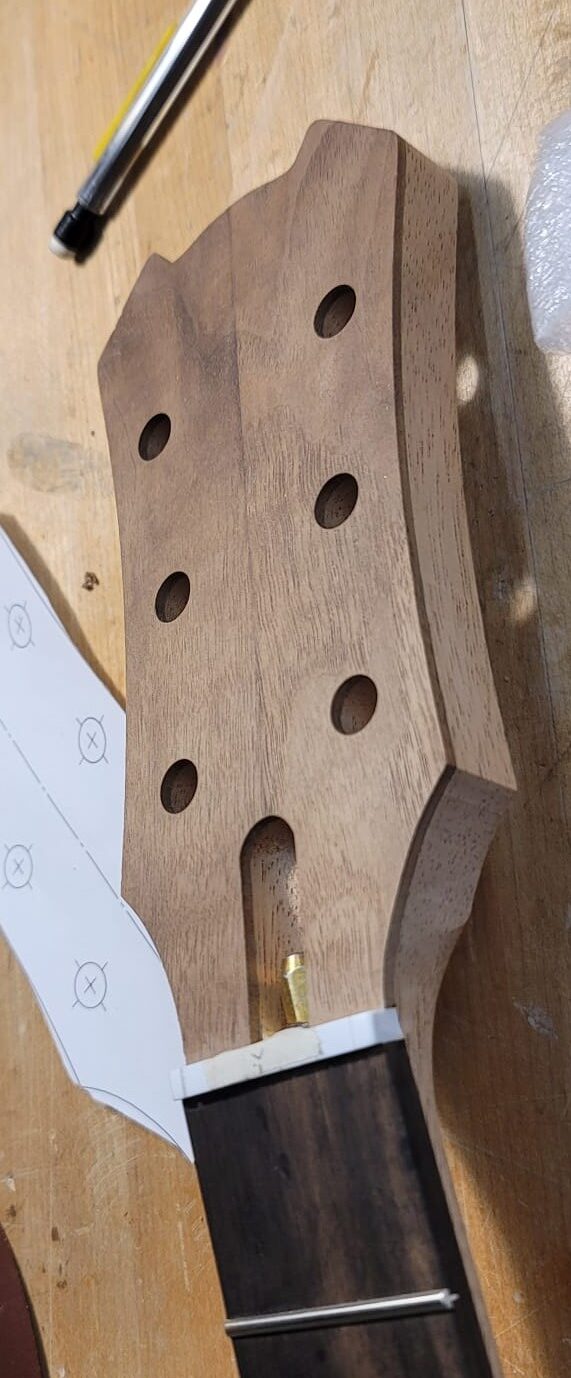
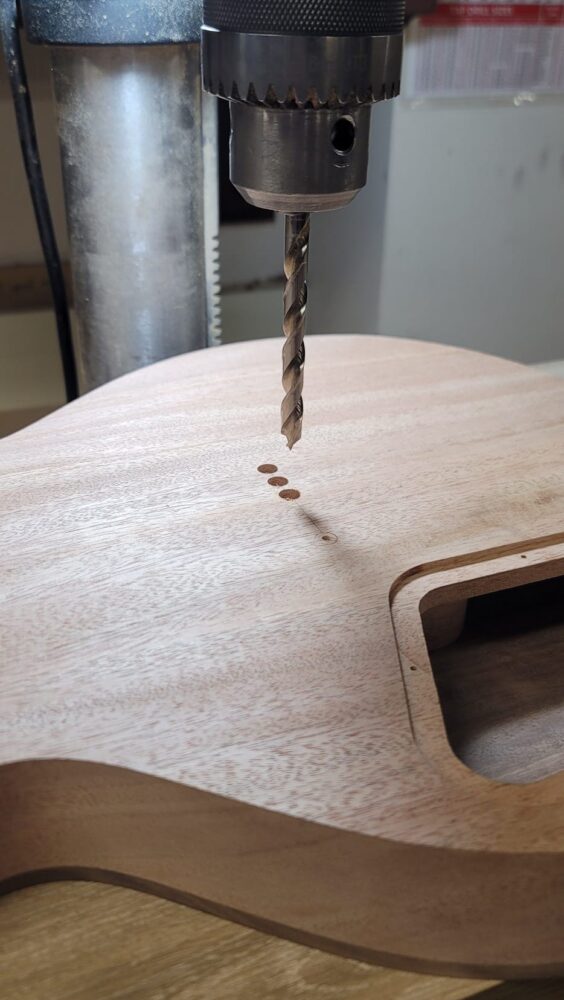
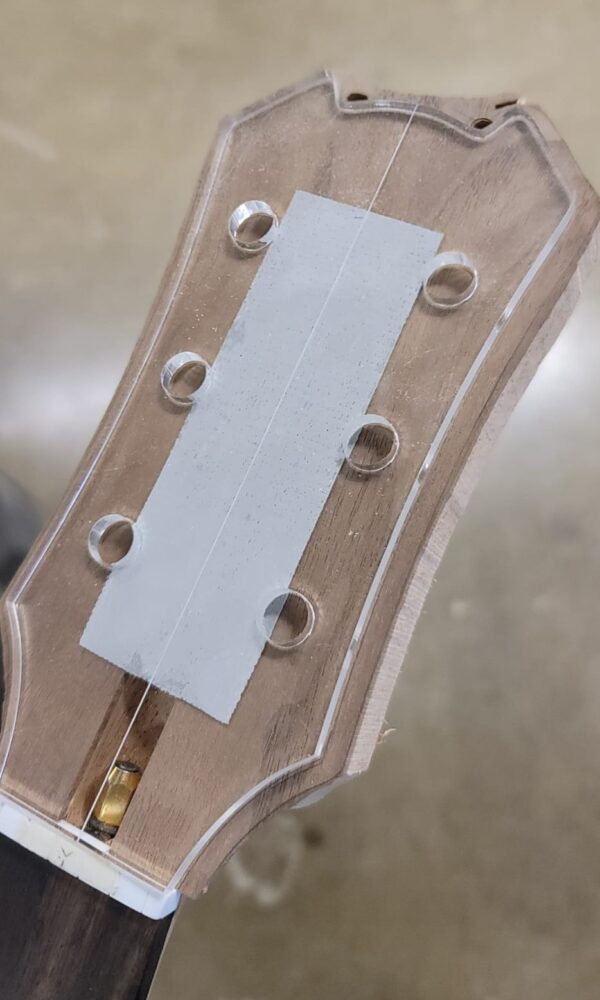
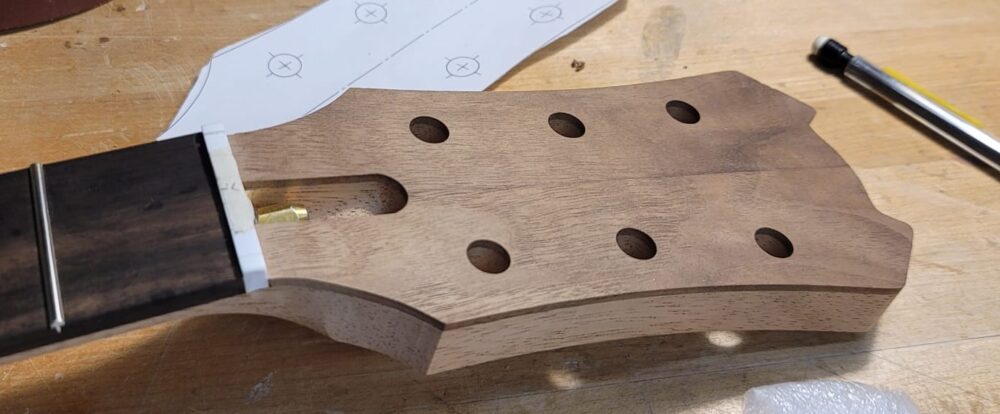
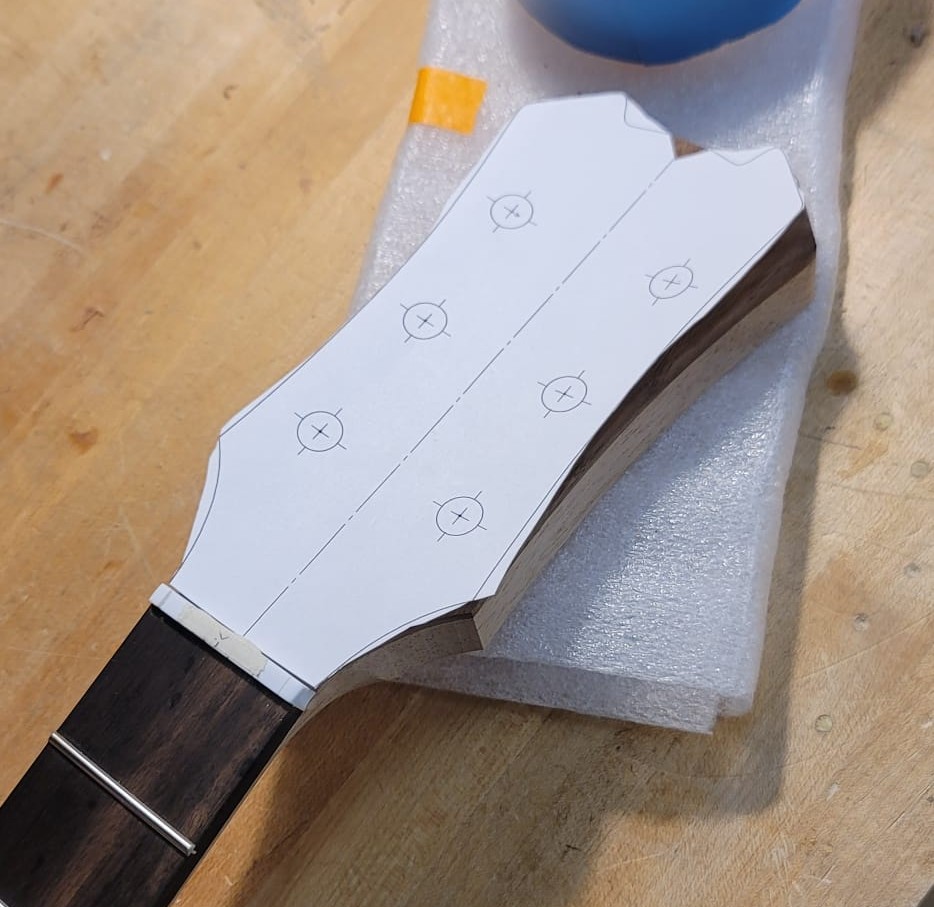 Next, I printed and placed a paper template on the headstock with new, better markers for the tuner holes. I marked them with an awl to make them much easier to find and align under the drill press.
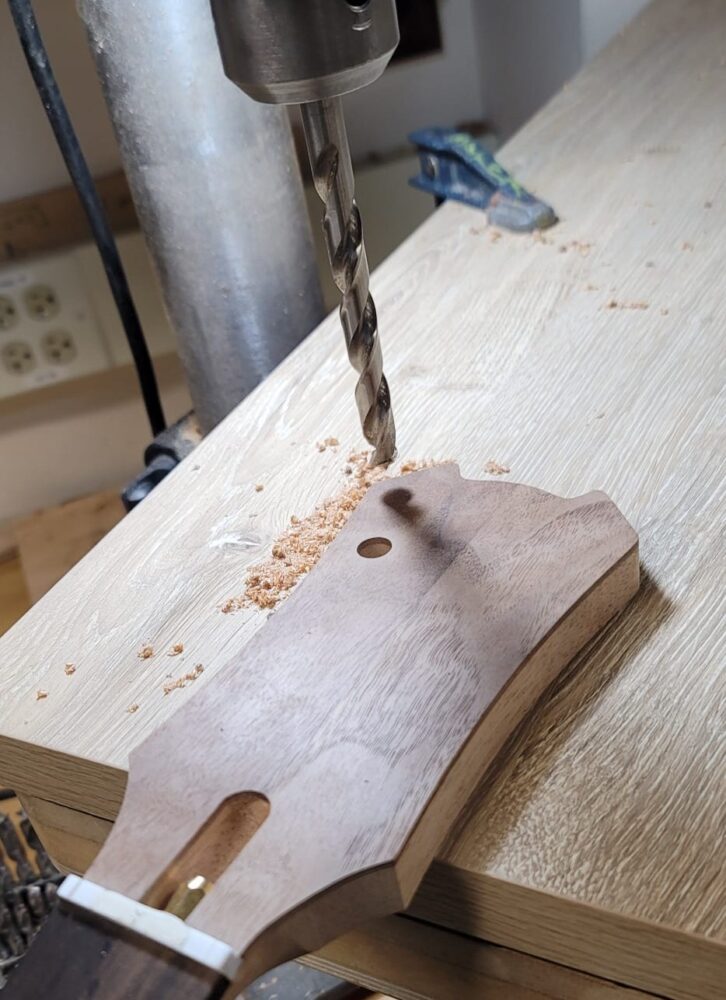 I sized the holes based on my tuners and drilled all six into the headstock.
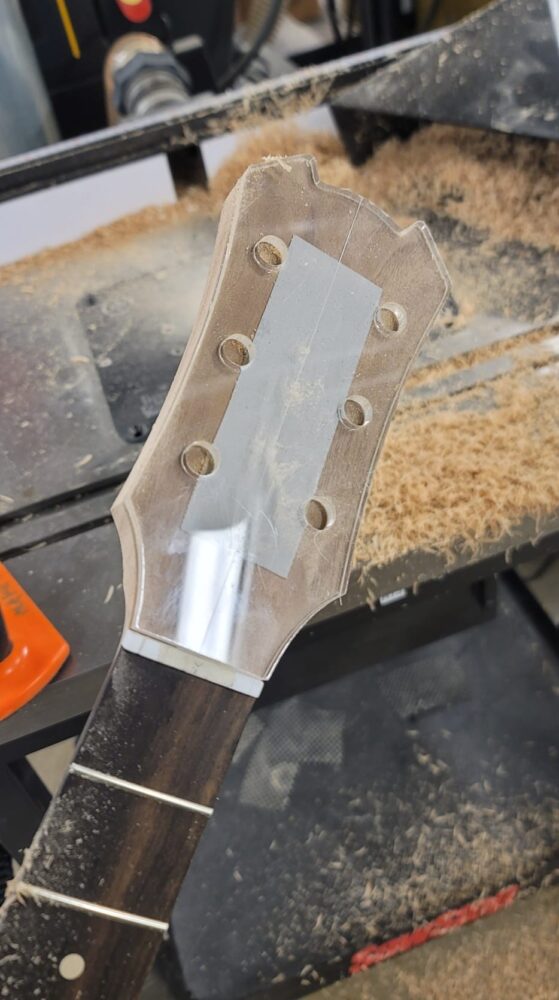
 At this point, the headstock is nearly complete and needs only some sanding work before being ready to oil finish.
I also got a brief look at how the tuners will seat in their respective holes.
![]()
They run smoothly along the headstock’s concave edge and mimic that tasteful curvature of the Les Paul headstock.
At this point, I only have a few operations remaining before I’m ready to apply the oil finish: Routing pickup pockets, routing a fillet around the top and bottom edges, drilling holes for electronics and wiring, blending curvatures on the belly cut and headstock, and final sanding prep.
 I plan to use Tru Oil – a gun stock oil that works great for guitars, is easy to apply, and will seep into the grain to really bring out color and bring light into the flamed walnut. Between 10 and 20 coats will take as many days apply. All that will be left is installing electronics and soldering them for a finished and functional electric guitar.
4 Comments. Leave new
Seth, this is genuinely amazing! The level of craftsmanship, patience, and precision you’ve poured into this is so inspiring.I am looking forward to see how this turns out.
Thanks, Shreya! It’s been a big commitment but rewarding.
This is awesome and extremely well-made. I’m super impressed with your craftsmanship and precision. Walnut was a great choice of wood and I always love the look of it. Super excited to see how this turns out.
Thanks, James! It’s taken a lot of time for sure. Hoping the walnut turns out as good as imagined.