
Developing and finishing my vision for this project required that I plan out every step I would need to take to complete it on time.
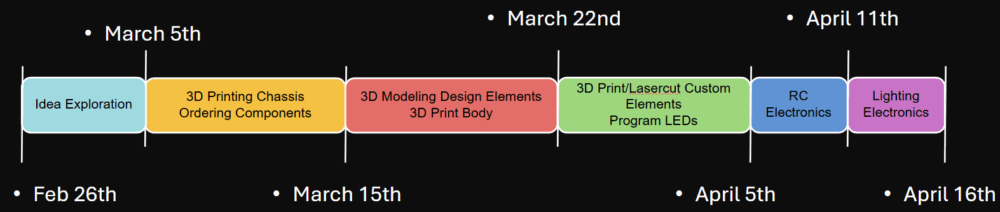
Timeline breaking down major tasks, according to completed dates.
Even though I had already been thinking of making an RC car before I started making this project, I still had to fully narrow the scope. I spent about a week really looking into car models and specifics into how I would bring my vision to life. This is when I chose the AMG GT, the 1/10 scale chassis, the main dark blue color, the lights, and the decision to use a microcontroller. Additionally, the exact aesthetic came to life with all the decisions I made to move forward. I had this idea ready to go around the beginning of March, and was ready to start tackling the chassis first.
The chassis is the foundation to the project. It gives it the function that adds to the aesthetic. Since I was using an existing model, I had to 3D print each component. The chassis was split into 4 major processes to fully 3D print. I already had black and white PLA and used it to start the printing. The first process was getting all the AMG GT specific components printed, which I did in white PLA. Additionally, the second process all the smaller components that fit on my printer from the main chassis. Both these processes were completed on my personal printer due accessibility and ease.
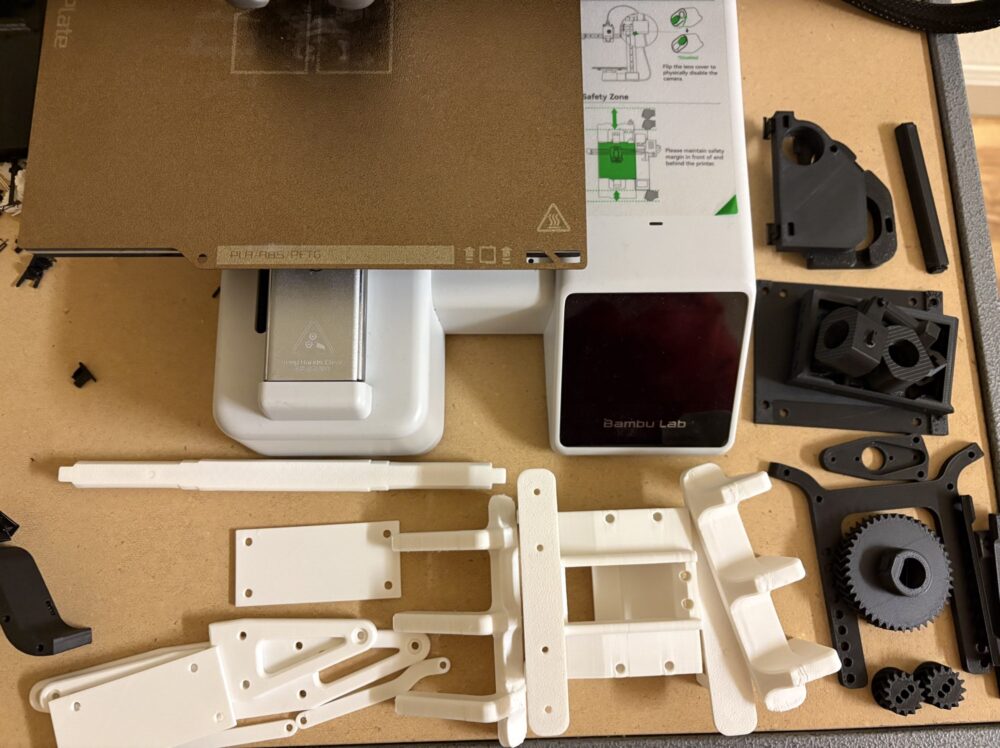
Most chassis components printed in black and white PLA, ready to assembly.
The next two processes became a challenge. The main floorboard of the chassis was 5mm too long to print on my personal 3D printer. Thus, I went to the ITLL and used their slightly larger printer to print out the two components of the floorboard. After they were finished, I then started using the ITLL’s TPU printer. My original plan was to make the suspension and tires out of normal PLA, but I did not like how stiff the chassis became after printing them. Thus, when I saw the TPU printer in the ITLL, I thought it would be a good opportunity to create a better performing RC car using it. With the chassis fully printed I then assembled it. Printing all these components took about a week with my printer running every night. The only components I did not print at this stage for the chassis was a mounting plate for the RC electronics and a strong gear for the motor (found out I needed it stronger after running the car).
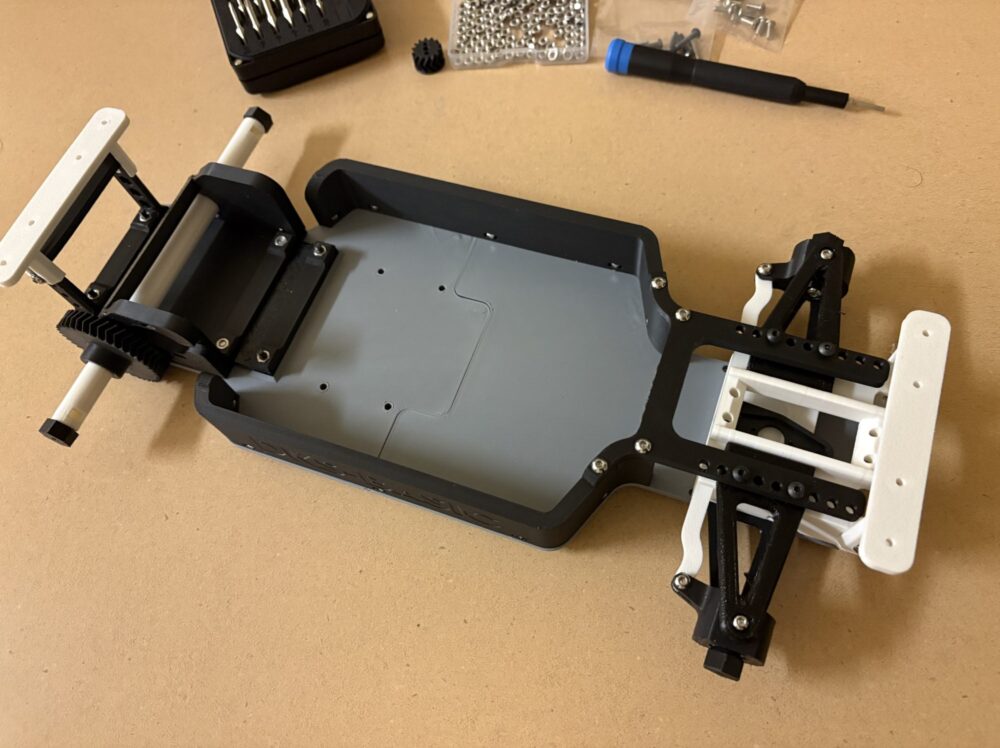
Assembled chassis with TPU suspension.
During the chassis printing process, I also started ordering the materials I would need to build the body, implement the lighting, and the RC electronics. For the body, I ordered 50 M3x8mm screws and 100pc M3 nuts to assemble the chassis. I also ordered a set of bearings for the wheels to roll freely. For the blue color of the body I was aiming for, I ordered a kilogram of Polymaker’s Panchroma Silk Dark Blue PLA, which turned out amazing. For the lighting, I got DFRobot’s Arduino Beetle for controlling the lighting, and a 100 pack of individually addressable RGB LEDs that use Adafruit’s NeoPixel programming. Finally, I ordered a 20kg servo, Hobbywing’s Quicrun Electronic Speed Controller and a 3250Kv motor. These would allow me to make the throttle and steering function of the RC car. Finally, I got an Energizer 5000mAh power bank to power the Arduino and LEDs, since I was concerned using the RC power source.
With the dark blue PLA in hand and the chassis complete, I started printing the AMG GT base body. Printing the body also came in three processes. The first one consisted of printing all the accent pieces in black PLA, since I already had it on my 3D printer. I realized I needed to modify the headlight and taillights components I printed in this batch, since they did not have cutouts for any LEDs. I put this aside to do later when I modeled the custom body kit. Meanwhile, I then started printing each of the body components in dark blue PLA. This process took almost two weeks with a constant running of the printer and only one failed print. I also printed some additional accents in white PLA such as the logo and some taillight inserts I could use for lighting.
With the main components of the body ready to assemble, I used CA glue to bond each body panel together. Gluing the body panels together worked for the most part. However, I did end up accidentally touching the hood of the car with super glue on my finger. This action left a undesirable mark on the hood, and I was worried I would have to print a new set of body panels. I then thought of implementing my aesthetic a little. I took inspiration from my personal car, a Chevrolet Camaro, and painted on some hood stripes. The hood stripes worked flawlessly to hide the imperfection. I also painted the front Mercedes logo silver using some leftover paint I had from my Pokémon TCG box.
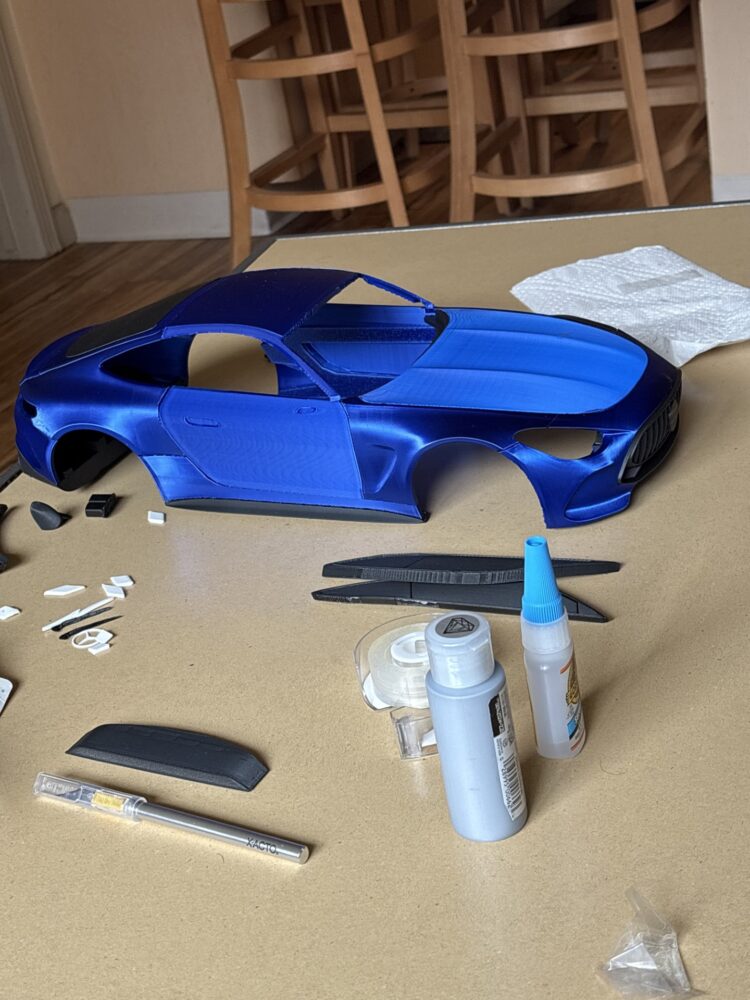
Body in process of being assembled.
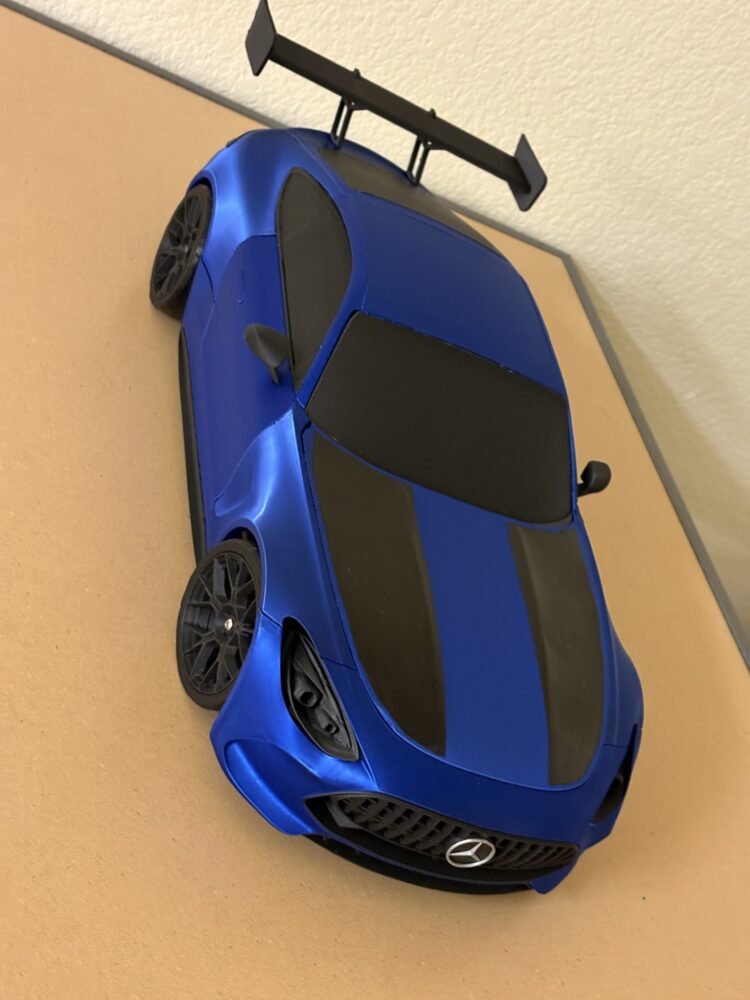
Original AMG GT Body finished on chassis, with my custom rear wing.
With a base car body to work with, I had to tackle the part of the project I had been putting off, the modeling of a custom body kit. I had originally planned on using SolidWorks, but that did not turn out possible. Alternatively, I was planning on using my calipers and the base car I already had physically to measure and model in SolidWorks individually. However, to better model the entire body kit together and to visualize my vision, I thought it best to try out modeling in Blender.
I had previously used Blender 8 years ago when I was interested in learning some technical skills behind game design. Back then, I had used a version of Blender much older to create a model of a Pikachu. I also started picking it up last summer during my internship to create better renders of my work compared to what SolidWorks could do. My internship experience was just a dip into the current version of Blender I was not familiar with anymore. Using some tutorials and my prior experience, I slowly rebuilt the base car model in Blender to model the body kit directly. I spent the week of spring break getting familiar and setting this up.
Once I returned from break, I started modeling small openings into the headlights to allow the LEDs to shine through. I also modeled a custom rear wing to add to the aesthetic. Small side additions were modeled as well to house some LEDs, and provide some side glow. The front also got a custom splitter that had space for LEDs. Finally, I further dove into Blender modeling when I started creating the fender and quarter panel additions. These components were shaped onto the body, and I focused on exaggerating a lot of the design elements from the AMG GT car to fit the aesthetic. I was very happy with the result of the modeling, and started printing these components right away.
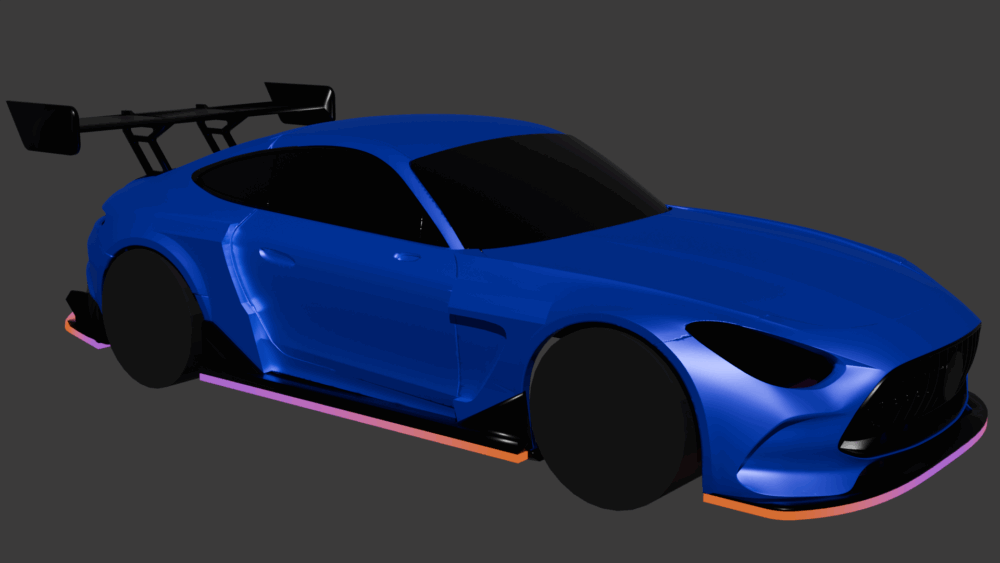
Render from Blender model,
With the body complete, I had to start wiring every LED together and attaching it to the body. I started with the headlights and taillights, using the custom components I modified to fit these lights. When soldering wires to the LEDs, I realized that it would be a challenge to remove the headlight wiring once installed, and thus I added some connectors I was given from the Idea Forge. These connectors allowed me to expand the LED harness if I so desired and allowed me to remove the microcontroller easily. I made sure the wiring followed the body, encircling it.

Headlights and Taillights harness turned on, with connectors.
Taillights illuminated.
I received the RC motor in early April, and immediately installed it. The motor ran really fast, and the chassis drifted a lot. I then found out the gear I made in PLA was not strong enough when the motor completely wore down the teeth. So, using some PETG I had from my work on the FSAE team, I printed a new gear in this gold material. I have not had an issue with motor wear since installation of this gear. I also created a small plate to mount the electronic speed control, receiver, and battery, ensuring the components did not fly out during a hard crash. I learned I was not good at driving, but did get the hang of it after a few hours.
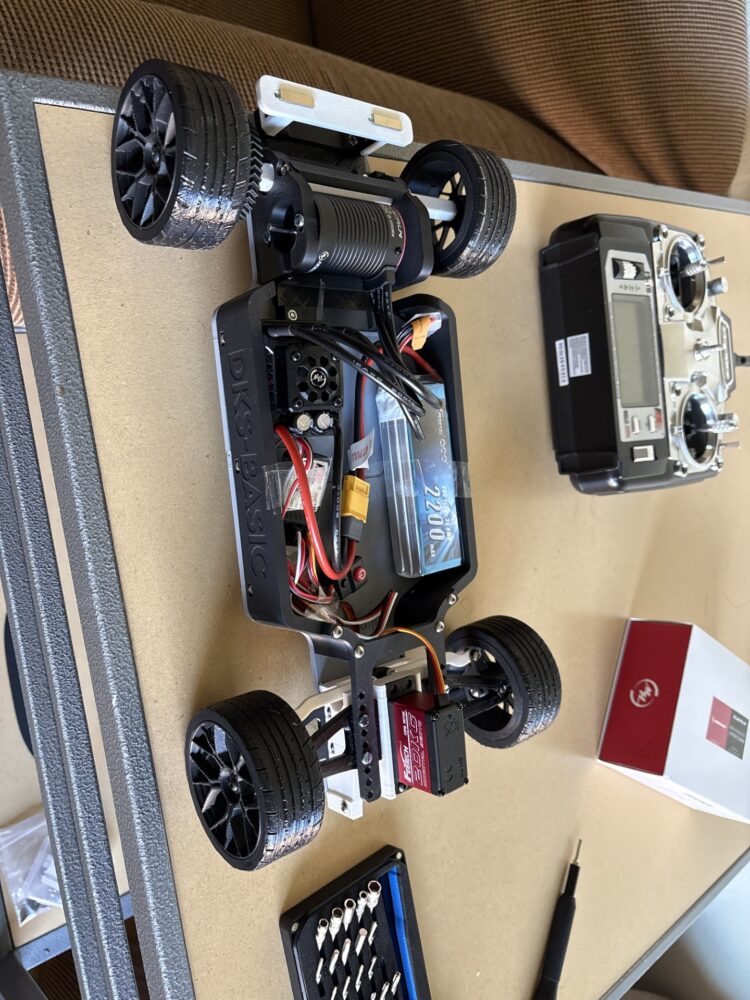
RC Chassis with electronic components.
With the base wiring harness done, I started work on the second wiring harness for the accent lighting. This one took longer, due to the amount of LEDs being double that of the basic harness. I used the same procedure and connectors, and implemented the body kit onto it. Finally, I attached the body kit with wiring harness to the car, and I couldn’t be happier with how it turned out.

RC accent wiring harness on.
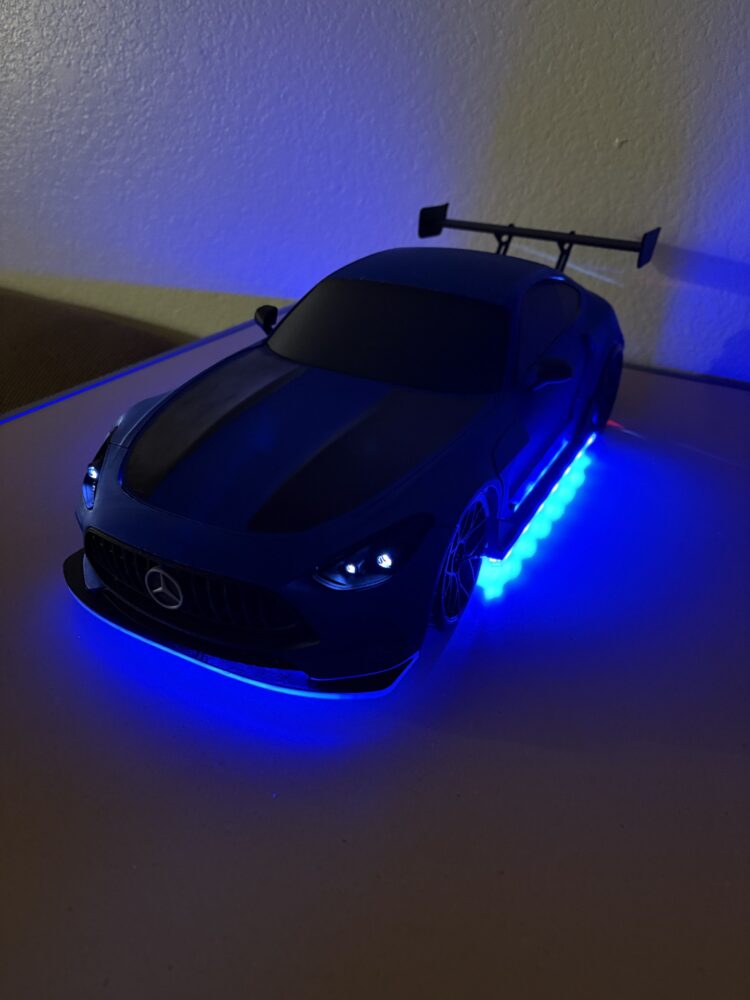
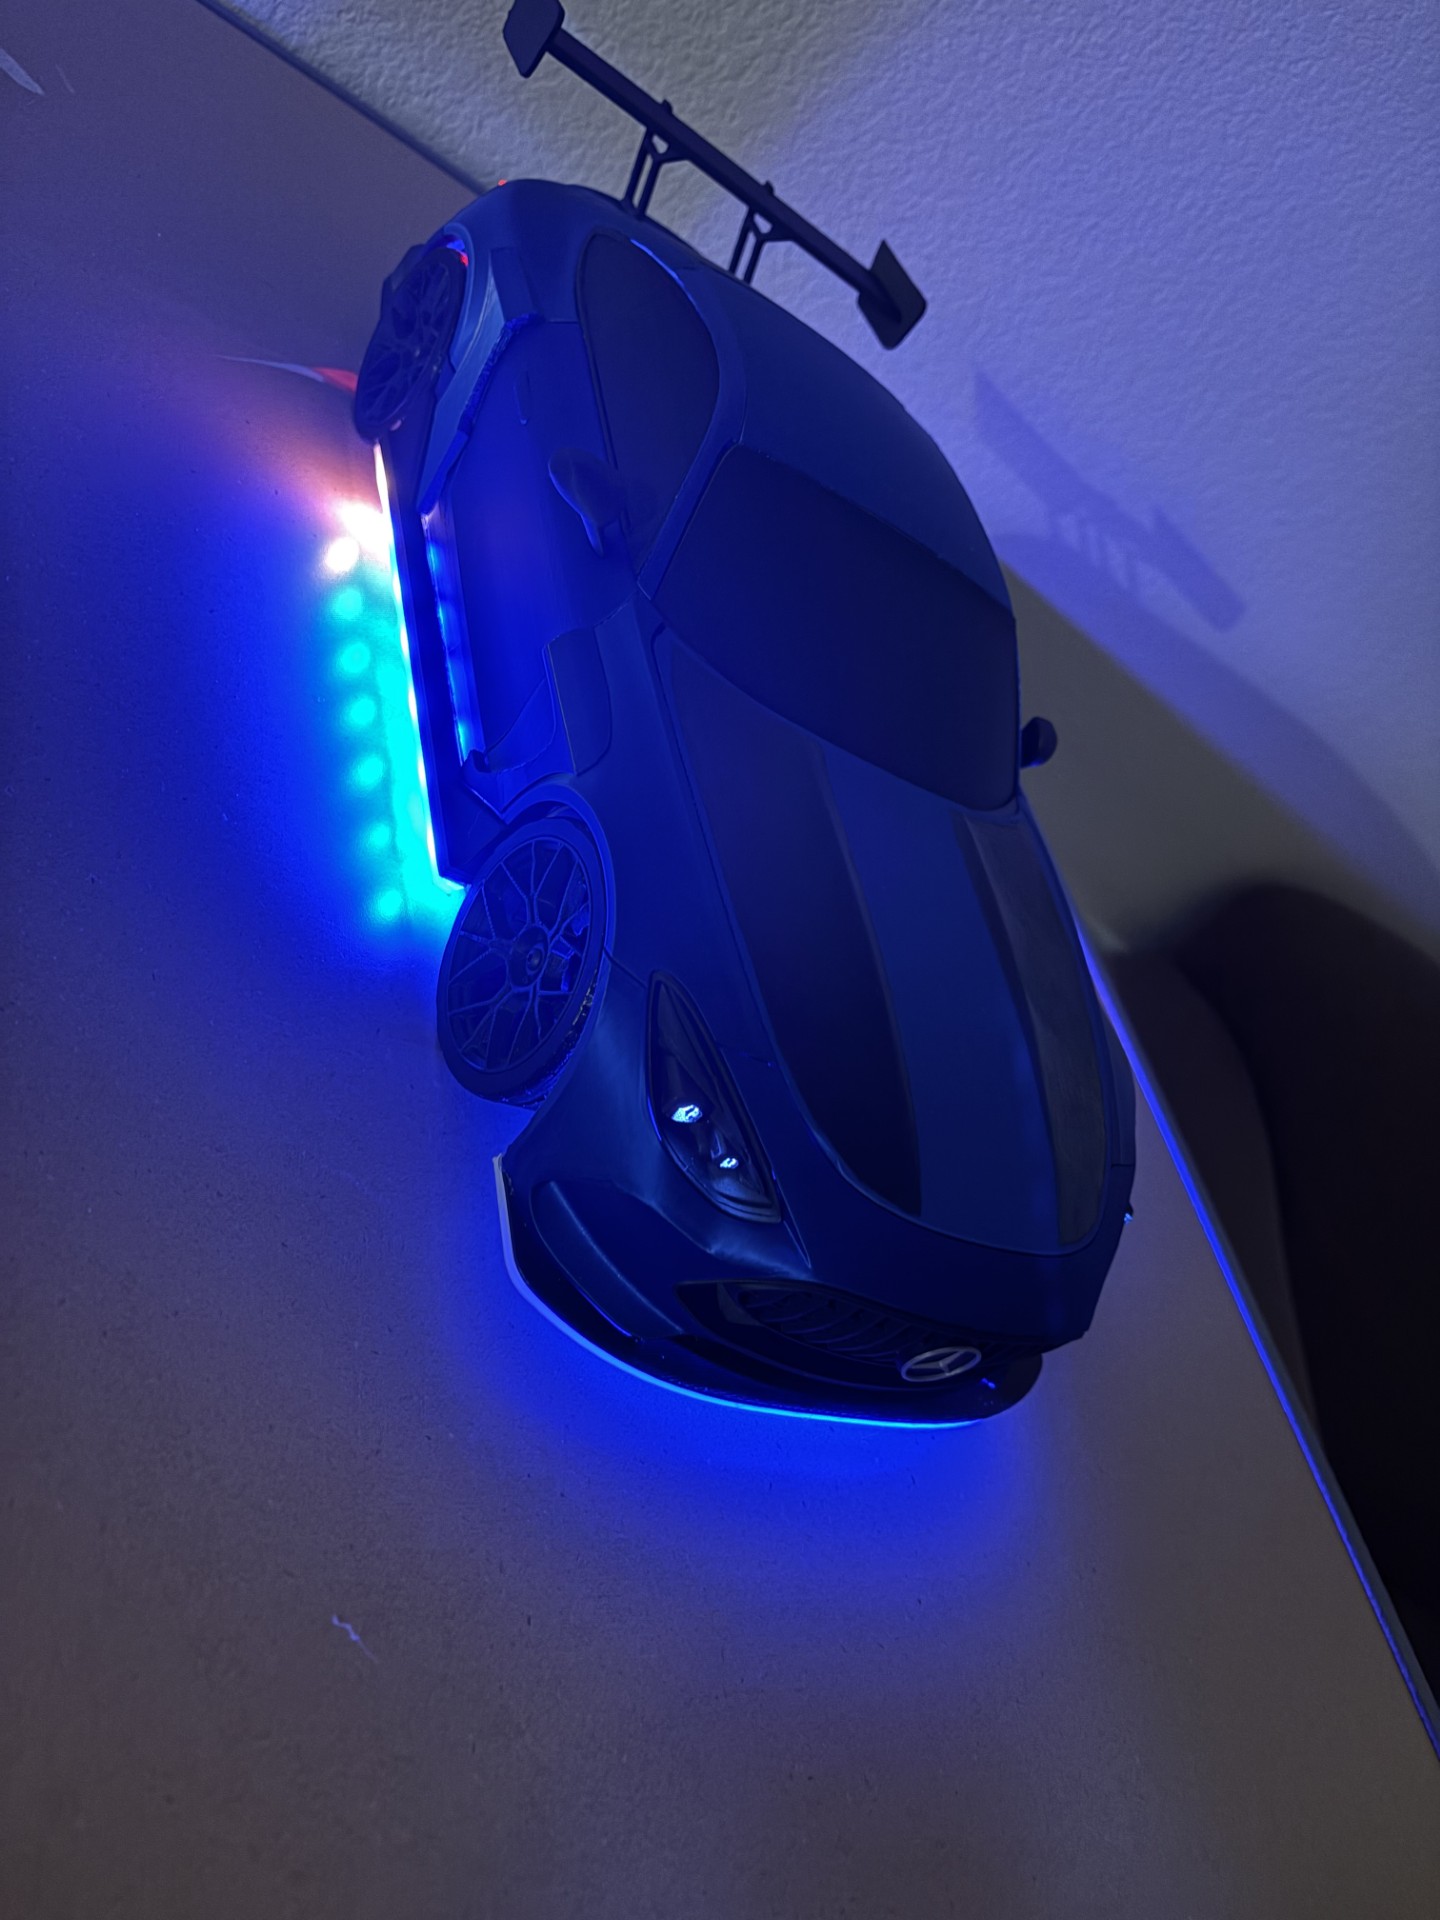
RC car with body kit and lighting.
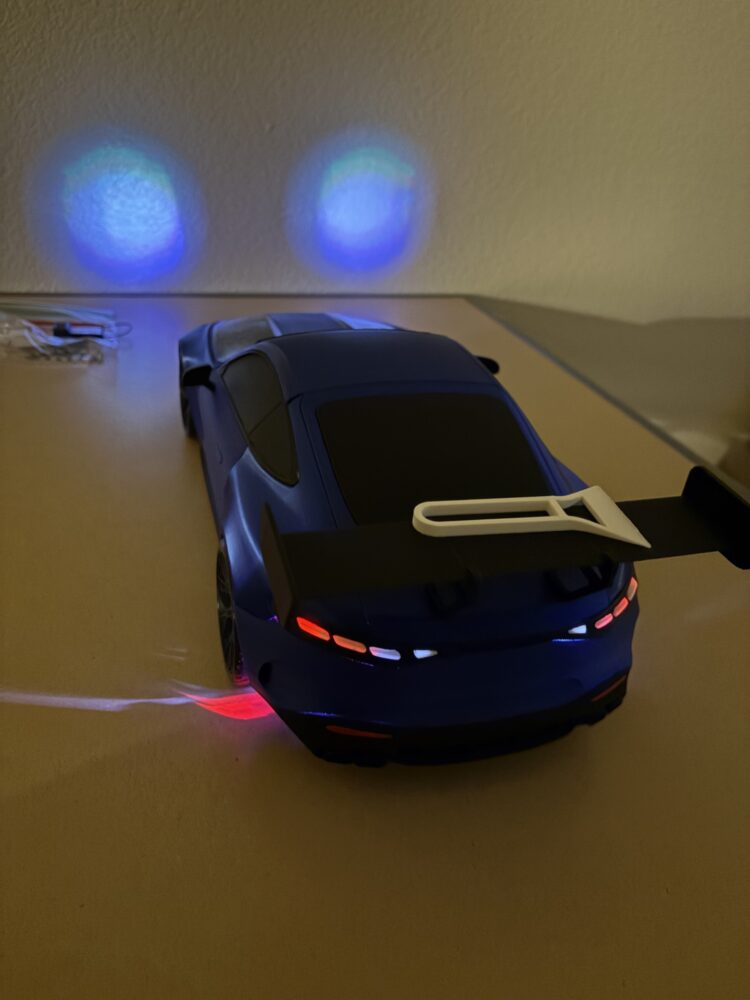
The final step for this project came with the programming of the LEDs. Because of the microcontroller I am using, I can create any sequence of lighting I desire. Using the colors from my vision, I created a sequence of lighting that loops through these colors. The programming is very simple for an individual LED. Each LED is numbered like an array. Identifying which LED to color, and the RGB values of that color allow the microcontroller to set the LED when I run a command. I used this to loop through purple, pink, orange, and blue.
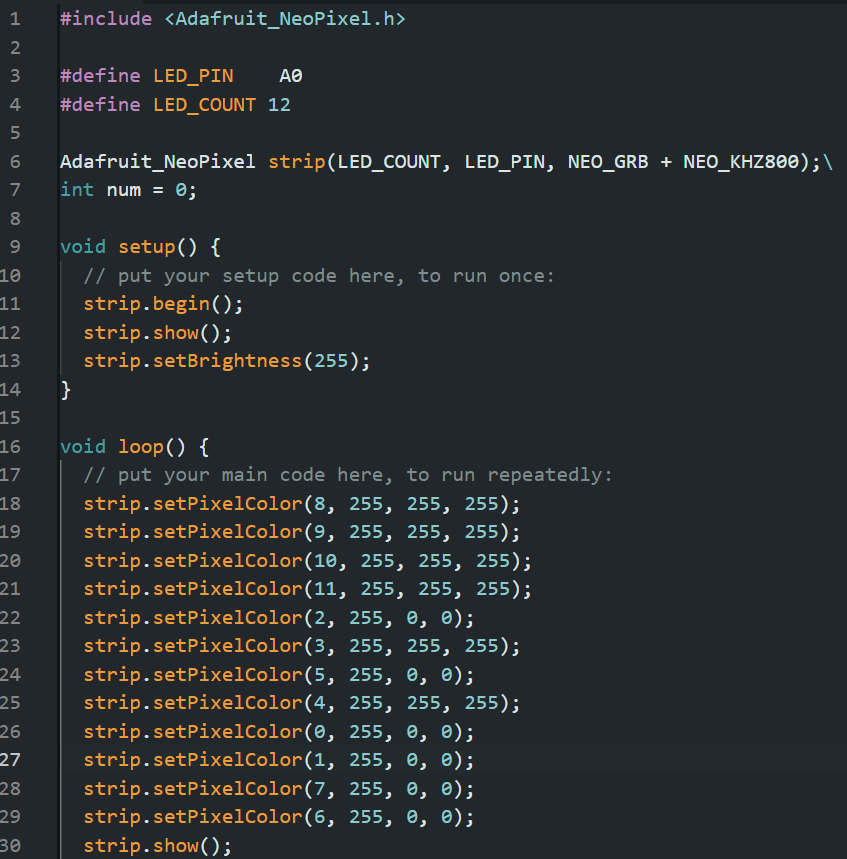
Code snippet showing how LED are individually set, and then shown (old version).

Dynamic Lighting snapshot, transitioning from pink to blue.
I am very happy with how this car came out. I did originally want to make my own design from scratch, but it would take much longer and be harder to implement the aesthetic I was going for. The LED harness had a long lead time, and thus I decided to keep the body kit simple. A true body kit would require modification to the wheelbase and different wheel sizes. The true body kit would allow me to better implement the cyberpunk/elegant aesthetic.
Looking ahead, I want to implement better diffusion of the lighting on the sides, and block out some of the taillight LEDs seeping through the rear wheels. I also want to mess with grippier tires, potentially with a softer TPU. The current tires are great for drifting, but are terrible for anything else. I am very happy with how this project came out.
2 Comments. Leave new
This build is sick, I really love how you tied everything together from the AMG base to the lighting and body kit. The TPU suspension and Camaro-inspired stripes are a very nice finishing tough and gives the car a very clean look. Whole thing came out super polished and really hits that cyberpunk look.
I like how this turned out! I am excited to see what the final product looks like after you implement diffusion for the underglow!