
Introduction
For my final project, I set out to create a neon light-inspired 3D printed sign. This idea was born from a desire to add personalized decor to my home office—something that felt both unique and reflective of my interests. As a big fan of Marvel and DC comics, I wanted to incorporate elements of that bold, energetic visual style into my design. The aesthetic I aimed to capture blends comic book graphics, vintage Americana signage, and pop art. I believed that by creating something vibrant and eye-catching, I could showcase this aesthetic while bringing a fun, creative flair to my workspace.
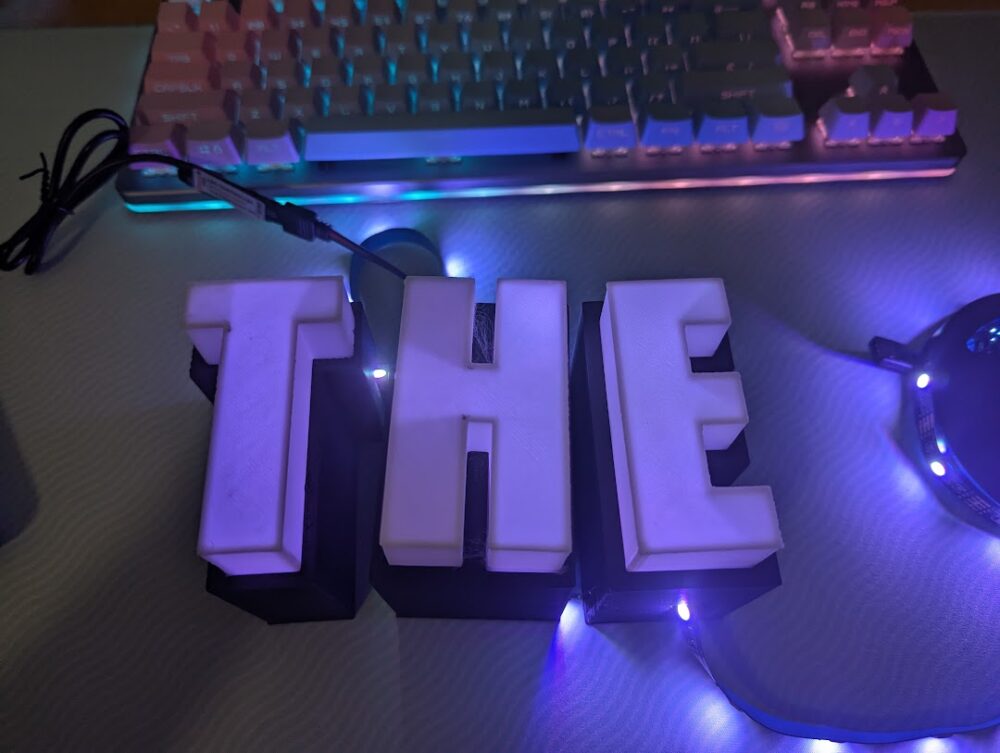
Initial print of my sign.
How to Create a Neon-Inspired 3D Printed LED Sign
Creating a neon-style LED sign with 3D printing involves a combination of artistic vision, digital modeling, material selection, and hands-on assembly. I began the process by brainstorming and deciding on a phrase for the sign. Since I wanted the project to reflect my personality, I chose to feature my gamer tag: “TheGreasyPotato.” To match the comic book and pop art aesthetic, I selected a bold, stylized font that mimics the look of vintage comic book lettering.
With the concept in place, I used Fusion 360 to model the sign. The design included a solid backing plate and an added lip to hold diffusive caps in place. I also incorporated wire-routing paths directly into the model to allow for clean LED installation. Initially, I created the CAD model based on the size limitations of my printer bed. To accommodate a larger final product, I segmented each letter of the phrase so that I could print them individually and scale the sign up later. [1]
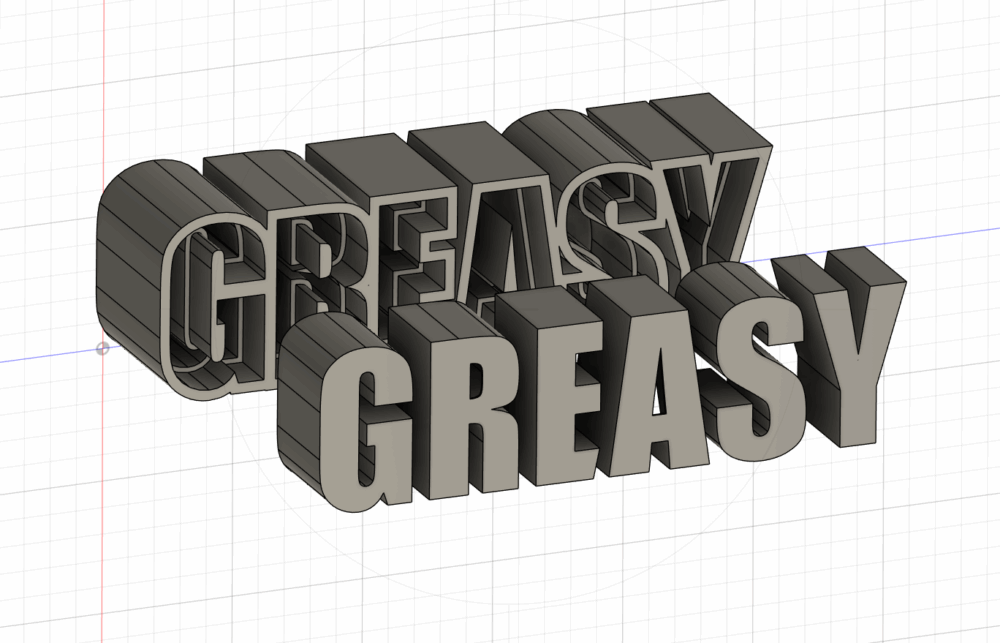
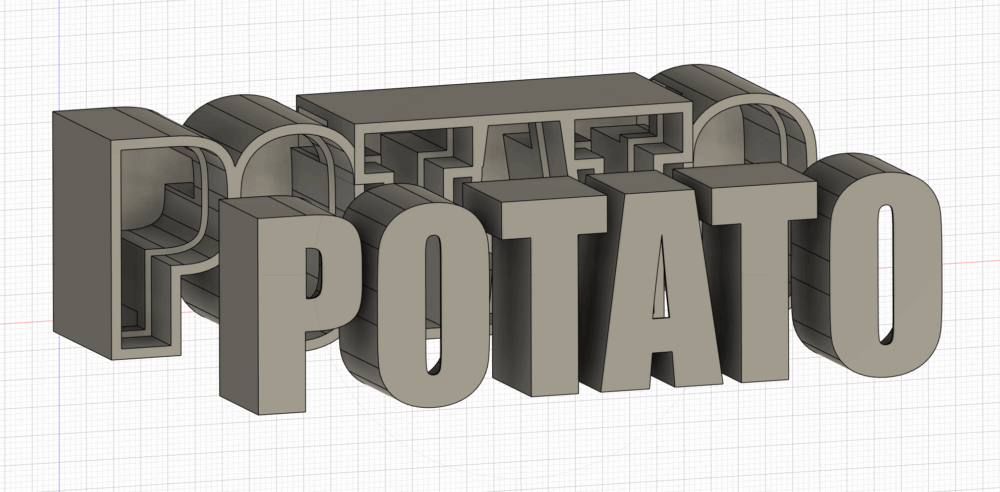
CAD models of the base and caps.
Material choice played an important role in achieving the look I wanted. I used black PLA for the base to maintain contrast and visual clarity, and white PLA for the caps to help diffuse the LED light. While my original plan was to use flexible RGB LED filament to recreate the classic neon glow, I ultimately opted for LED fairy string lights due to the smaller size of the final sign. I already had most of the materials on hand, so the only item I purchased specifically for this project was the string lights. [2]
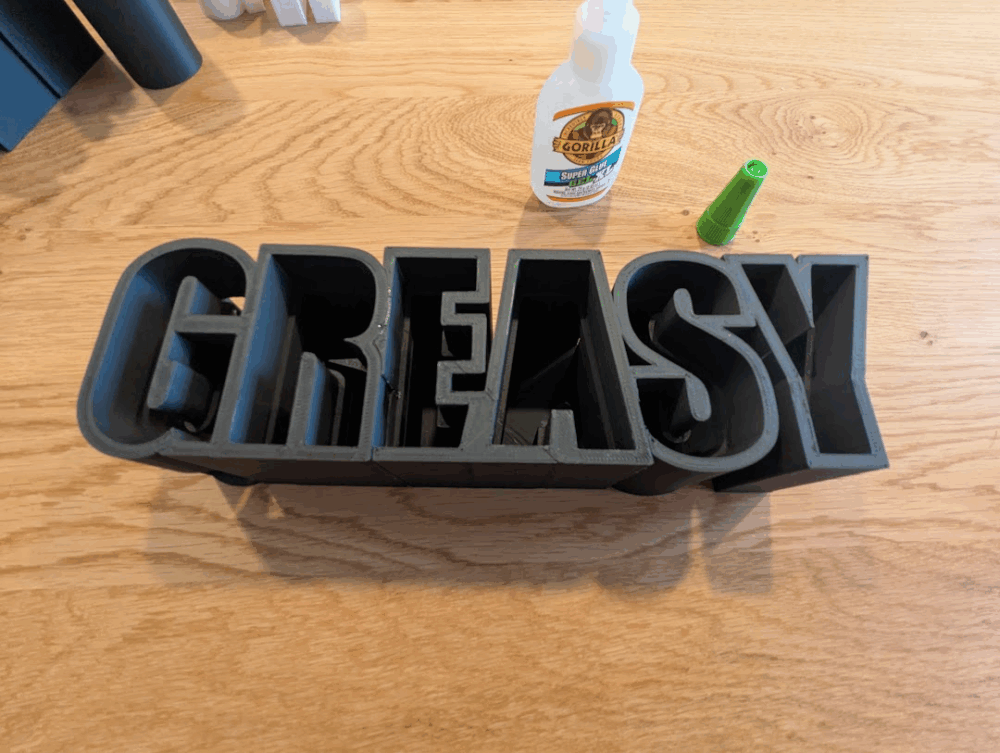
Before committing to the final print, I created a small-scale prototype to evaluate the design and test the tolerances of the LED channels. This also gave me the opportunity to check my printer’s bed leveling. The initial print revealed some quality issues—particularly with the caps—due to the nozzle being too close to the bed. After adjusting the bed height and releveling, I achieved cleaner prints. The final sign was printed in segments to fit my build volume, and although I initially planned for a larger piece, time and material limitations led me to scale it down. Along the way, I faced some challenges, including failed prints and tolerance mismatches caused by scaling. However, after reprinting and troubleshooting, I assembled the finished pieces using super glue.

Initial print of the sign, I was able to properly level the bed after this print as well as see how I wanted the overall sign to look.
Gluing the 3D prints together to create one word.
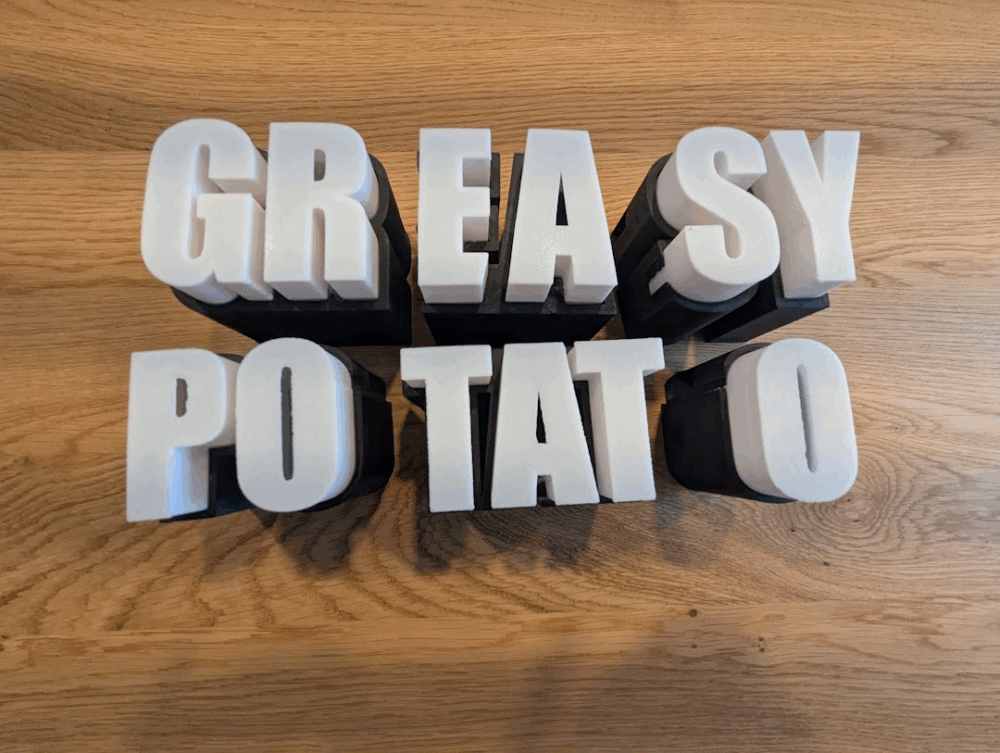
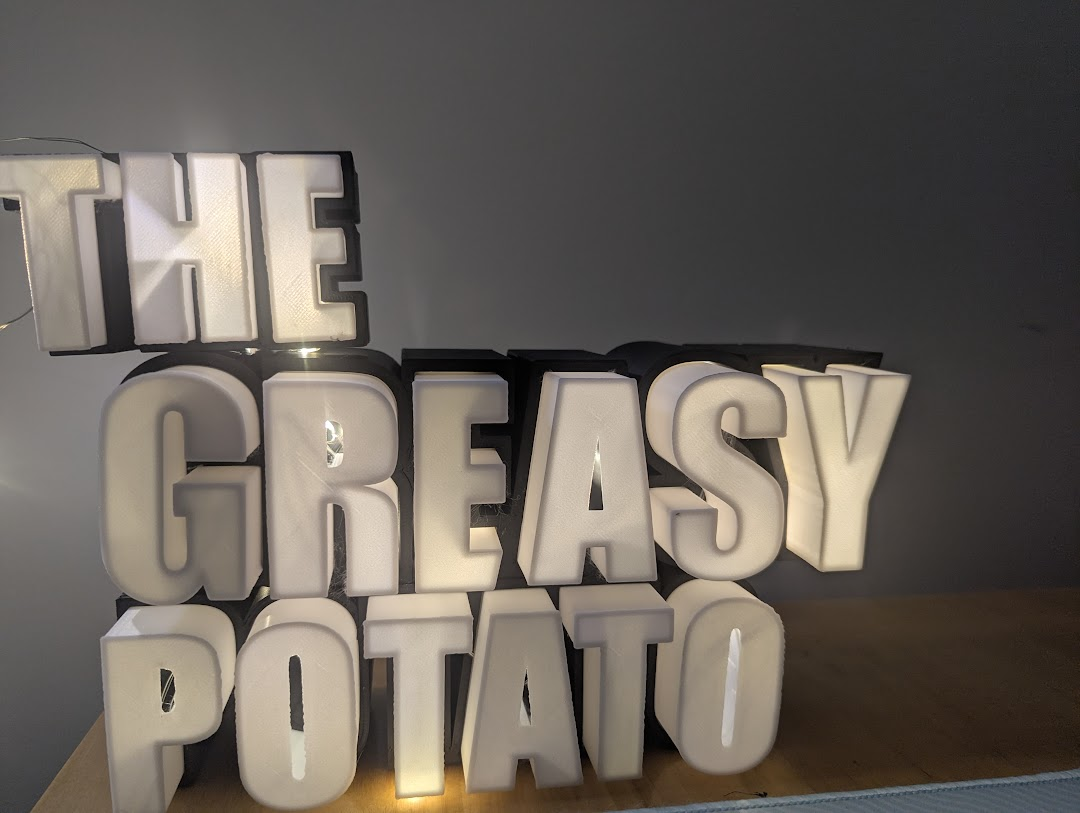
Final scale of the overall print with the diffusive caps.
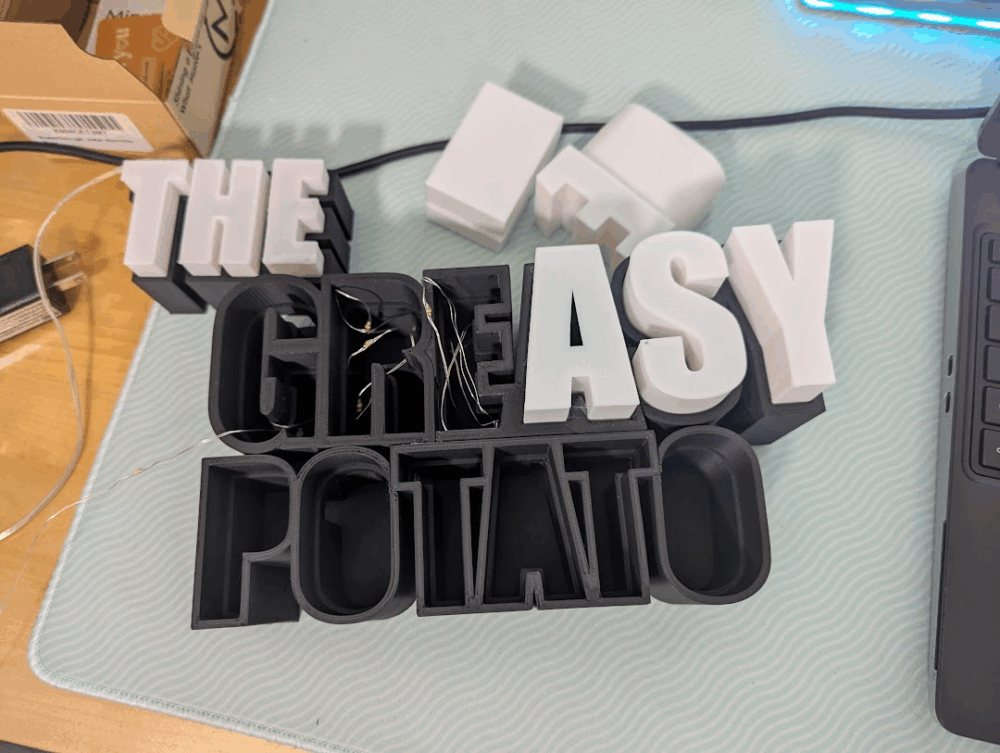
For the lighting phase, I routed the string lights through the pre-designed channels in the base. Since fairy lights typically can’t be cut like LED strips, I made sure to use the entire strand. Although I wasn’t able to replicate the multicolored “neon” effect of RGB LEDs, the warm glow of the string lights gave the sign a soft yet vibrant ambiance that still captured the essence of neon signage.
Conclusion
Overall, I’m very pleased with how the project turned out. While I wasn’t able to implement RGB LED strips as originally envisioned, the finished sign still achieved the look I had in mind. The light diffused through the white caps adds a gentle glow that mimics neon lighting and aligns well with the pop art style. The choice of string lights gave the piece a more minimal and calming feel—an unexpected but welcome contrast to the boldness typically associated with neon. In the future, I would like to recreate this sign at an even bigger scale so that I could add the RGB LED light strip. I think that would be the end goal of this project. However, this balance between expressive design and subtle lighting makes the sign a unique and fitting addition to my home office, blending function, personality, and creative expression in one piece!

Finished product!
References
[1] YouTube. (2023, April 14). How to make a DIY LED neon sign with 3D printing [Video]. YouTube. https://www.youtube.com/watch?v=Hufr2D_5fVc [2] Lighting EVER. (n.d.). LE LED string lights, battery operated, 50 LED 16.4 ft fairy lights. Amazon. https://www.amazon.com/dp/B00JR5N0JM
4 Comments. Leave new
Hello Jamie,
This is a really cool way to provide decoration and lighting for your room. I never thought about 3D printing something that could be used as a light fixture because I underestimated how well light shines through plastic. Overall, it turned out really similar to that pop-art aesthetic that you were shooting for. When you can add RGB strips to the project at a bigger scale, have you considered creating a program to change the colors? I believe it would add a cool element to your project.
Hi Garrison,
Thanks for your comment! I did want to try a Bluetooth controlled LED strip eventually so that I can have the sign change colors just by programming it from my phone. I do have one of those light strips so that would definitely be something I consider in a next iteration!
Hi Jamie, this is such a fun project! I love the overall look and feel of the letters, and I think utilizing 3D printing was a smart move. You mentioned that you do want to redo this and add RGB lights, what colors are you envisioning for the updated project?
Hi Ayesha,
Like I mentioned in another comment, I would like to try an Bluetooth LED light that I can control from my phone. With that I can try out different colors and settings and play around with the lights in that way.