
1. Timeline: The Making of the Hexagonal Bookshelf
Below is a visual timeline representing my build process, highlighting the cyclical and non-linear nature of design:
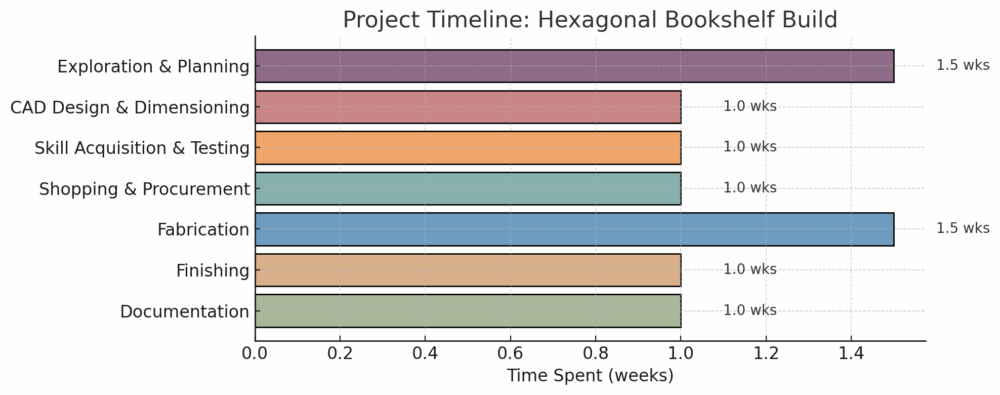 Week 1–2: Exploration & Planning
-
Brainstorming 1970s-inspired aesthetics
-
Sketching geometries
-
Defining functional requirements (book storage, compact corner fit, modular potential)
Week 3: CAD Design & Dimensioning
-
Modeled in SolidWorks
-
Solved hexagon joint angles and flange proportions
-
Designed for symmetry and lid alignment
Week 4: Skill Acquisition & Material Testing
-
Practiced mitered angles and pocket-hole joinery on scrap
-
Tested Danish oil finishes on pine
Week 5: Shopping & Procurement
-
Purchased 1″x4″ common boards, plywood, hinge, latch, Watco Danish Oil
-
Total spend: ~$85
-
Visited Home Depot twice to adjust for design changes
Week 6: Fabrication
-
Cut side panels and base
-
Assembled hexagon with angled cuts
-
Installed lid and latch mechanism
-
Sanded and prepped all surfaces
Week 7&8: Finishing and Documentation
-
Applied glue
-
Let dry and reapplied for depth
-
Completed touch-ups and hinge alignment
-
Took progress and final photos
-
Compiled notes for reflection and future improvements
2. Fabrication Process: How I Built the Bookshelf
Step 1: Frame and Base Cuts
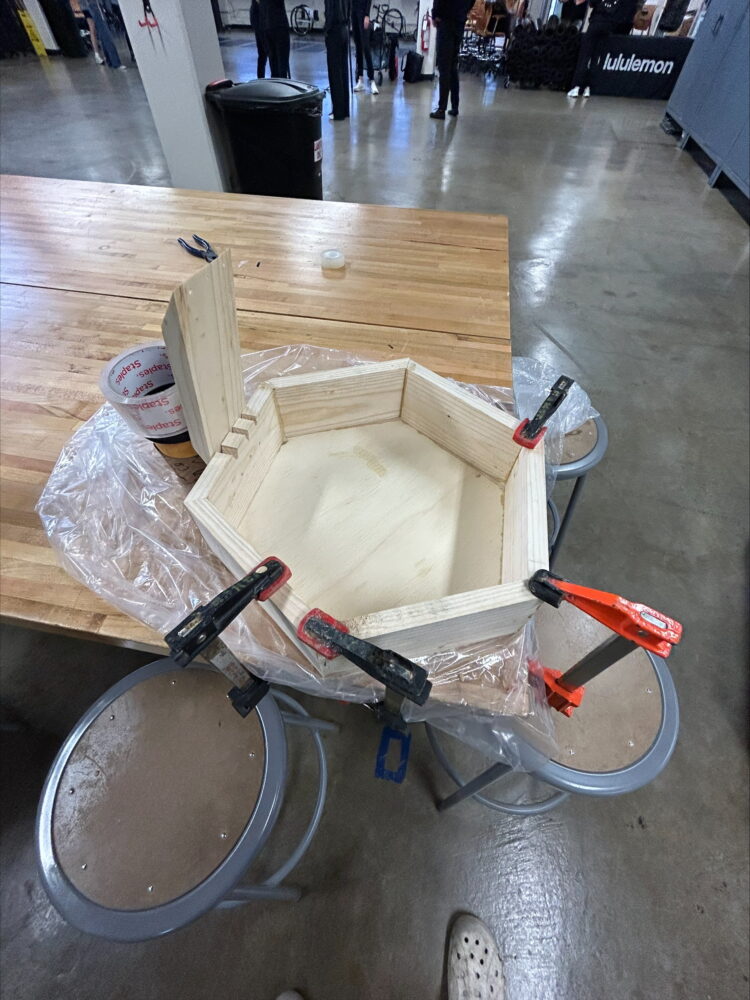
After designing the piece in CAD, I started by transferring the hexagonal base dimensions to a plywood board. Using a miter saw, I made six 30° cuts for the vertical sides of the hexagon, ensuring tight joints. Each piece was glued and clamped, with small brads added to hold it while drying.

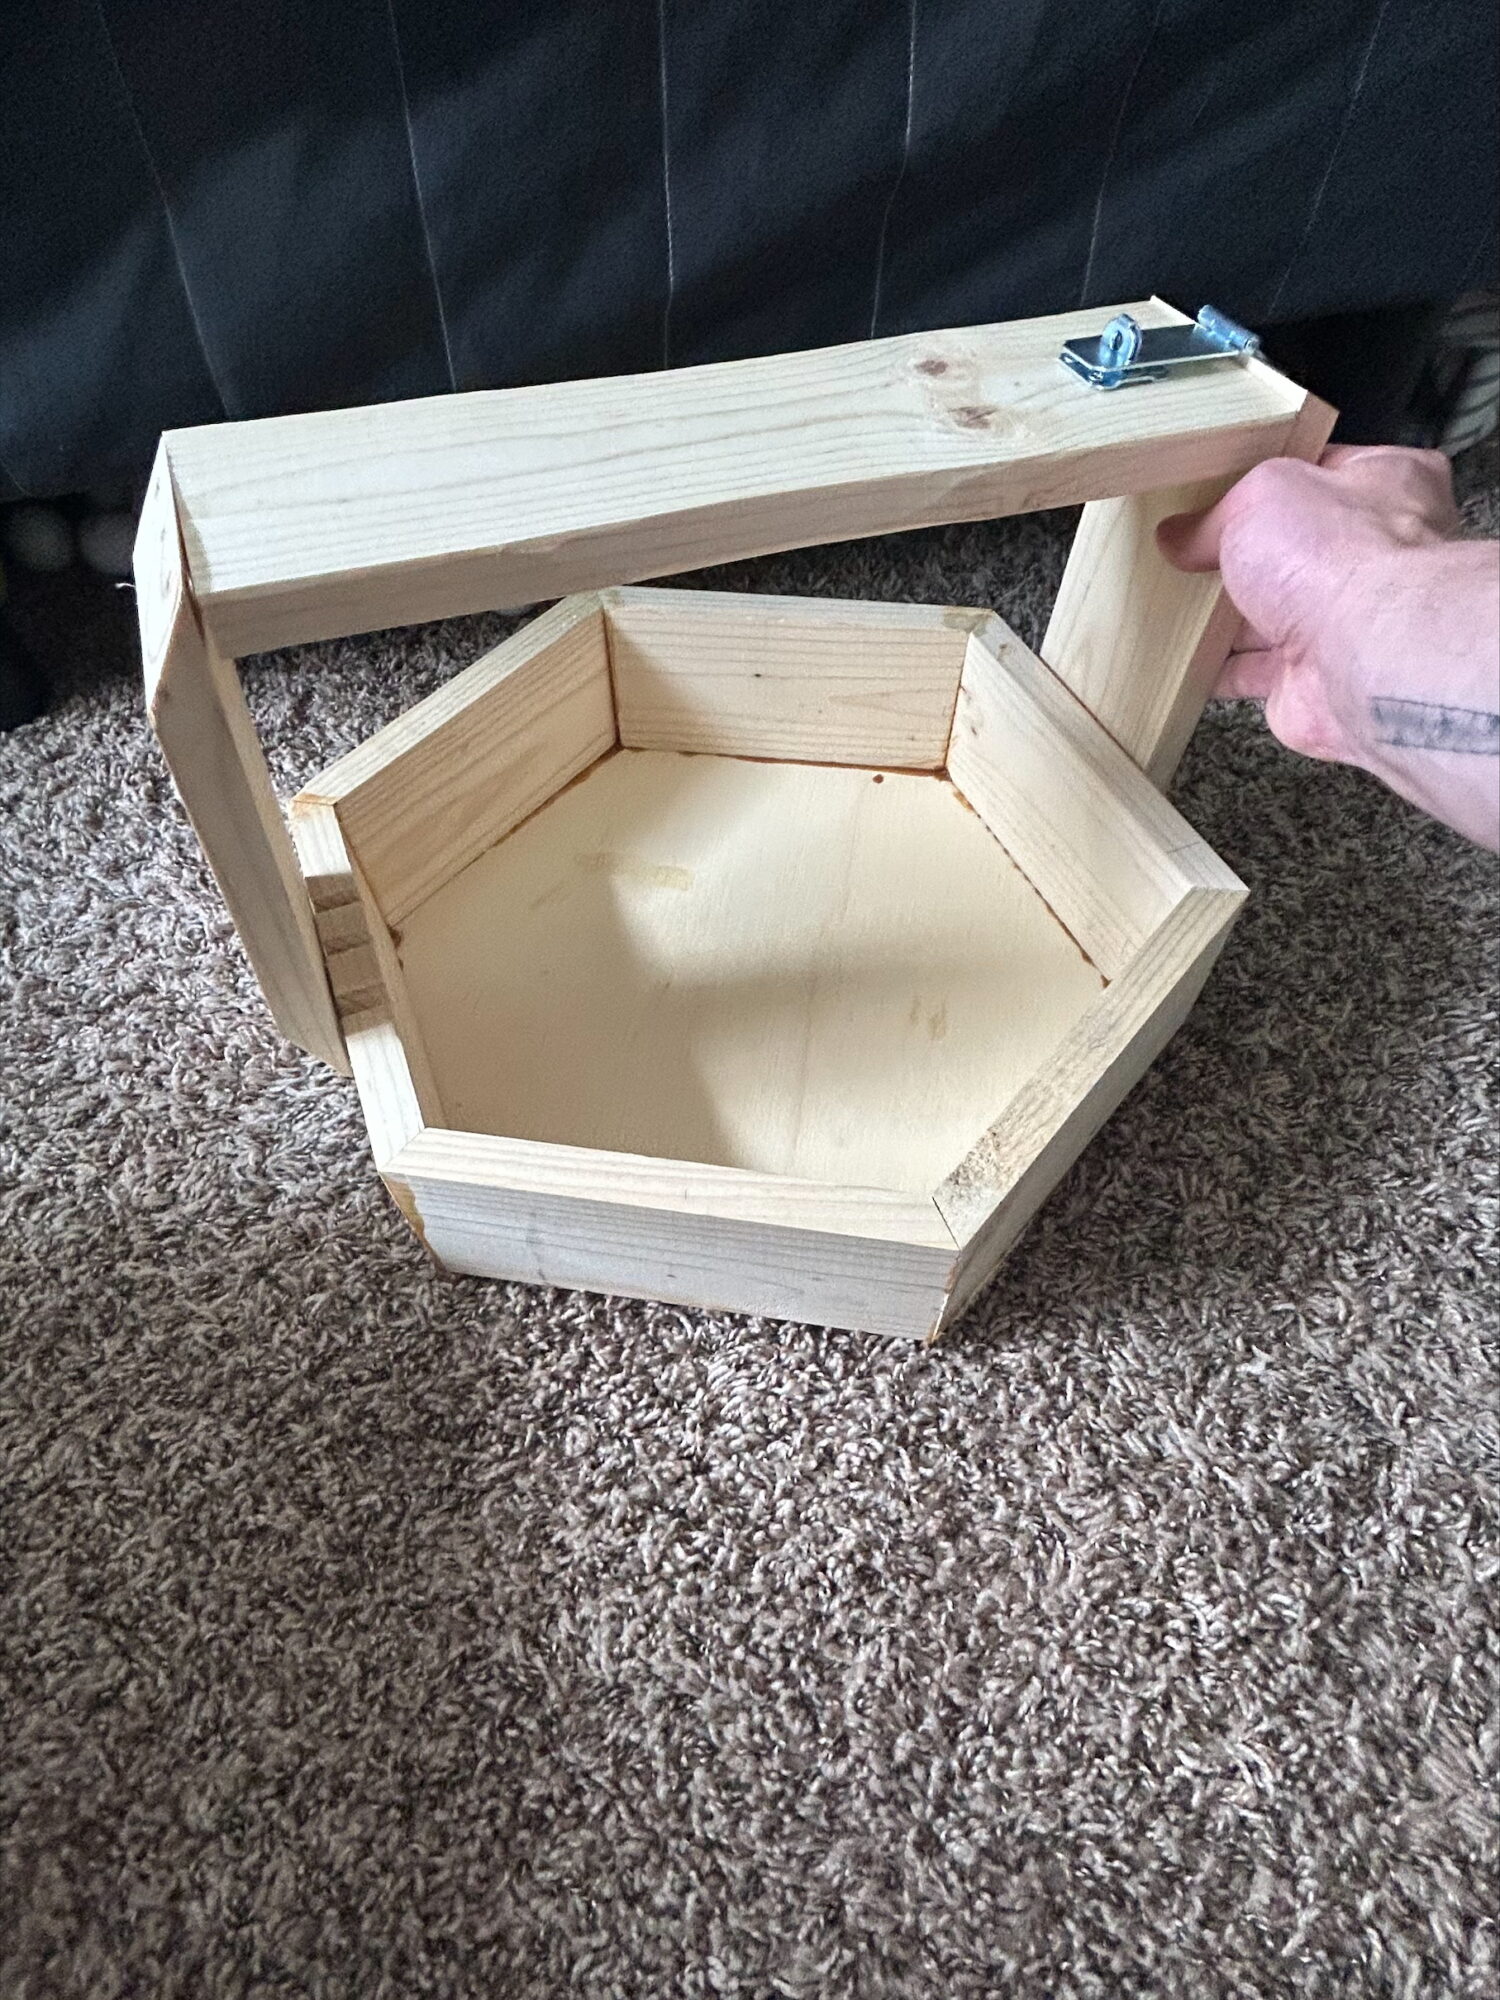
Step 2: Attaching Vertical Supports
To make the hinged lid functional, I attached two upright pine members, one fixed and one moving. These were notched to align with the hexagon frame and glued to the sides to ensure stability. One vertical arm received a simple steel hinge to allow the top lid to swing open.
Step 3: Lid Construction
The top lid was made from a single pine board that spans across the hexagonal frame. It was aligned carefully with the moving upright and connected with a latch to the fixed arm. Testing the motion took a few iterations, and I shaved down small corners to ensure smooth operation.
Step 4: Surface Prep and Finish
Before staining, I sanded all surfaces using 120 grit followed by 220 grit sandpaper. I applied Watco Danish Oil (Medium Walnut) with a lint-free cloth, allowing it to penetrate for 20 minutes before wiping off the excess. I repeated the process the next day to deepen the color. The finish highlighted the grain and added the warm brown tone I wanted.

3. Final Assembly and Evaluation
The final assembly brought the whole concept together. The lid opened smoothly, the geometry was tight, and the overall shape stood out while still blending into my room. The medium walnut finish worked well, but I need to apply more in order to softening the brighter pine tones without over-darkening the piece.

4. Conclusion: Design Evolution and Future Outlook
Where I Started: I envisioned a modular, rotating bookshelf with visual nods to 1970s interiors. I planned to use oak, fluted panels, and bearings for rotation. But constraints, budget, tooling, time, required simplification.
Where I Ended: I pivoted to pine and plywood, removed the rotating base, and instead created a more compact piece with a functional lid. I preserved the hexagonal geometry and mid-century color palette, which maintained my aesthetic intent.
What I’d Do Differently:
-
Refine Joint Work: Some of the mitered joints could have been cleaner with better jigs.
-
Explore Routing Flutes: I’d revisit the fluted paneling idea now that the basic structure is complete.
-
Consider Veneers or Inlays: For added 70s flair, a brass or walnut veneer inlay on the lid could elevate the look.
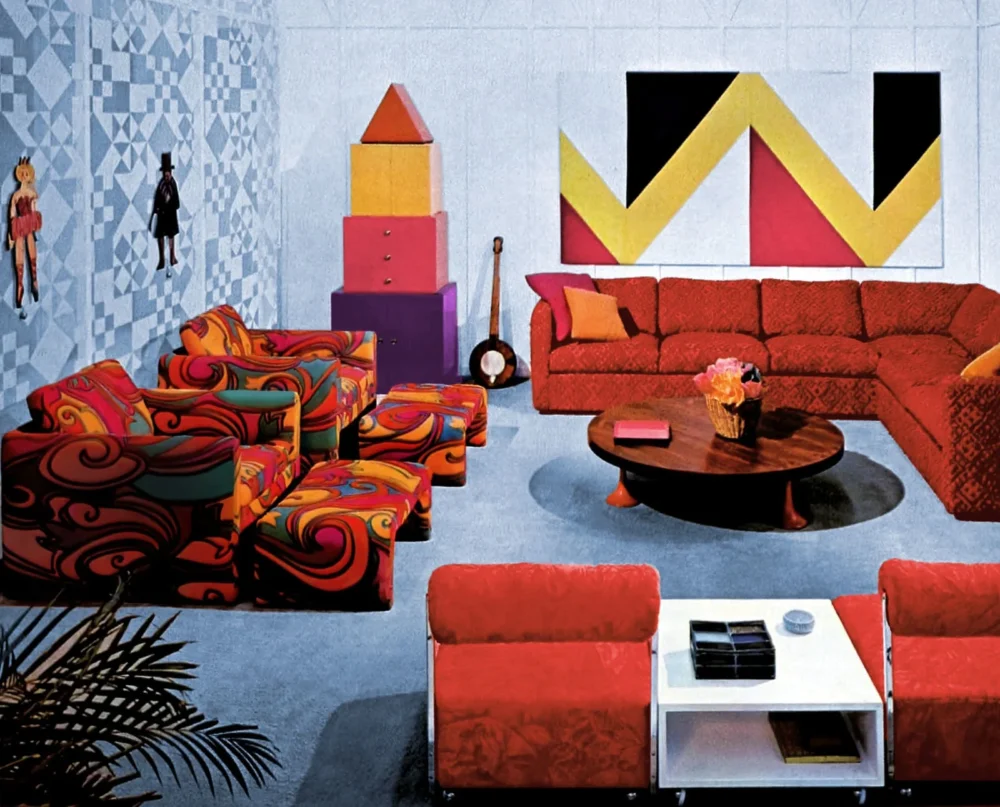
One of the defining traits of 1970s furniture design was its embrace of geometric boldness, clean lines, modular forms, and unexpected shapes that pushed beyond traditional rectangles and circles. This bookshelf fits seamlessly into that aesthetic through its hexagonal base, a form that evokes both mathematical precision and retro futurism. The sharp angles and symmetry recall the experimental spirit of designers from that era, who often played with tessellation, repetition, and structural clarity. By opting for a rotating or hinged component, I also drew on the functional whimsy that defined much of the decade’s furniture, where interaction and sculptural form often merged. The result is a piece that, while grounded in modern build techniques, visually and conceptually echoes the playful geometry and tactile sensibility of 70s interior design.
Next Steps:
This bookshelf is now installed in my room and holds my daily reads and sketchbooks. I plan to build a second module using the same shape and hinge system so they can stack or align together, fulfilling my original goal of modularity.
This project reminded me that constraints don’t always limit creativity, they redirect it. By letting form and function evolve together, I created something that’s both personal and practical.
Assisted with chatgpt
Image 6 : https://clickamericana.com/retro-inspo/home-decor/dining-rooms/removing-wall-kitchen-dining-room-1950s-home