
As mentioned in Part One, I was inspired to create some form of user-driven product for my final project, one that combines my love for woodworking with my love for creative technology. With a special focus on aesthetics as part of this class, I also wanted the user’s contributions to add to the overall aesthetic of the project in a way that ‘you are part of the aesthetic that you create.’ As I continued along this pathway, I was led towards one of my personal aesthetic hobbies for boosting mental health and mindfulness: zen drawing.
Design Process
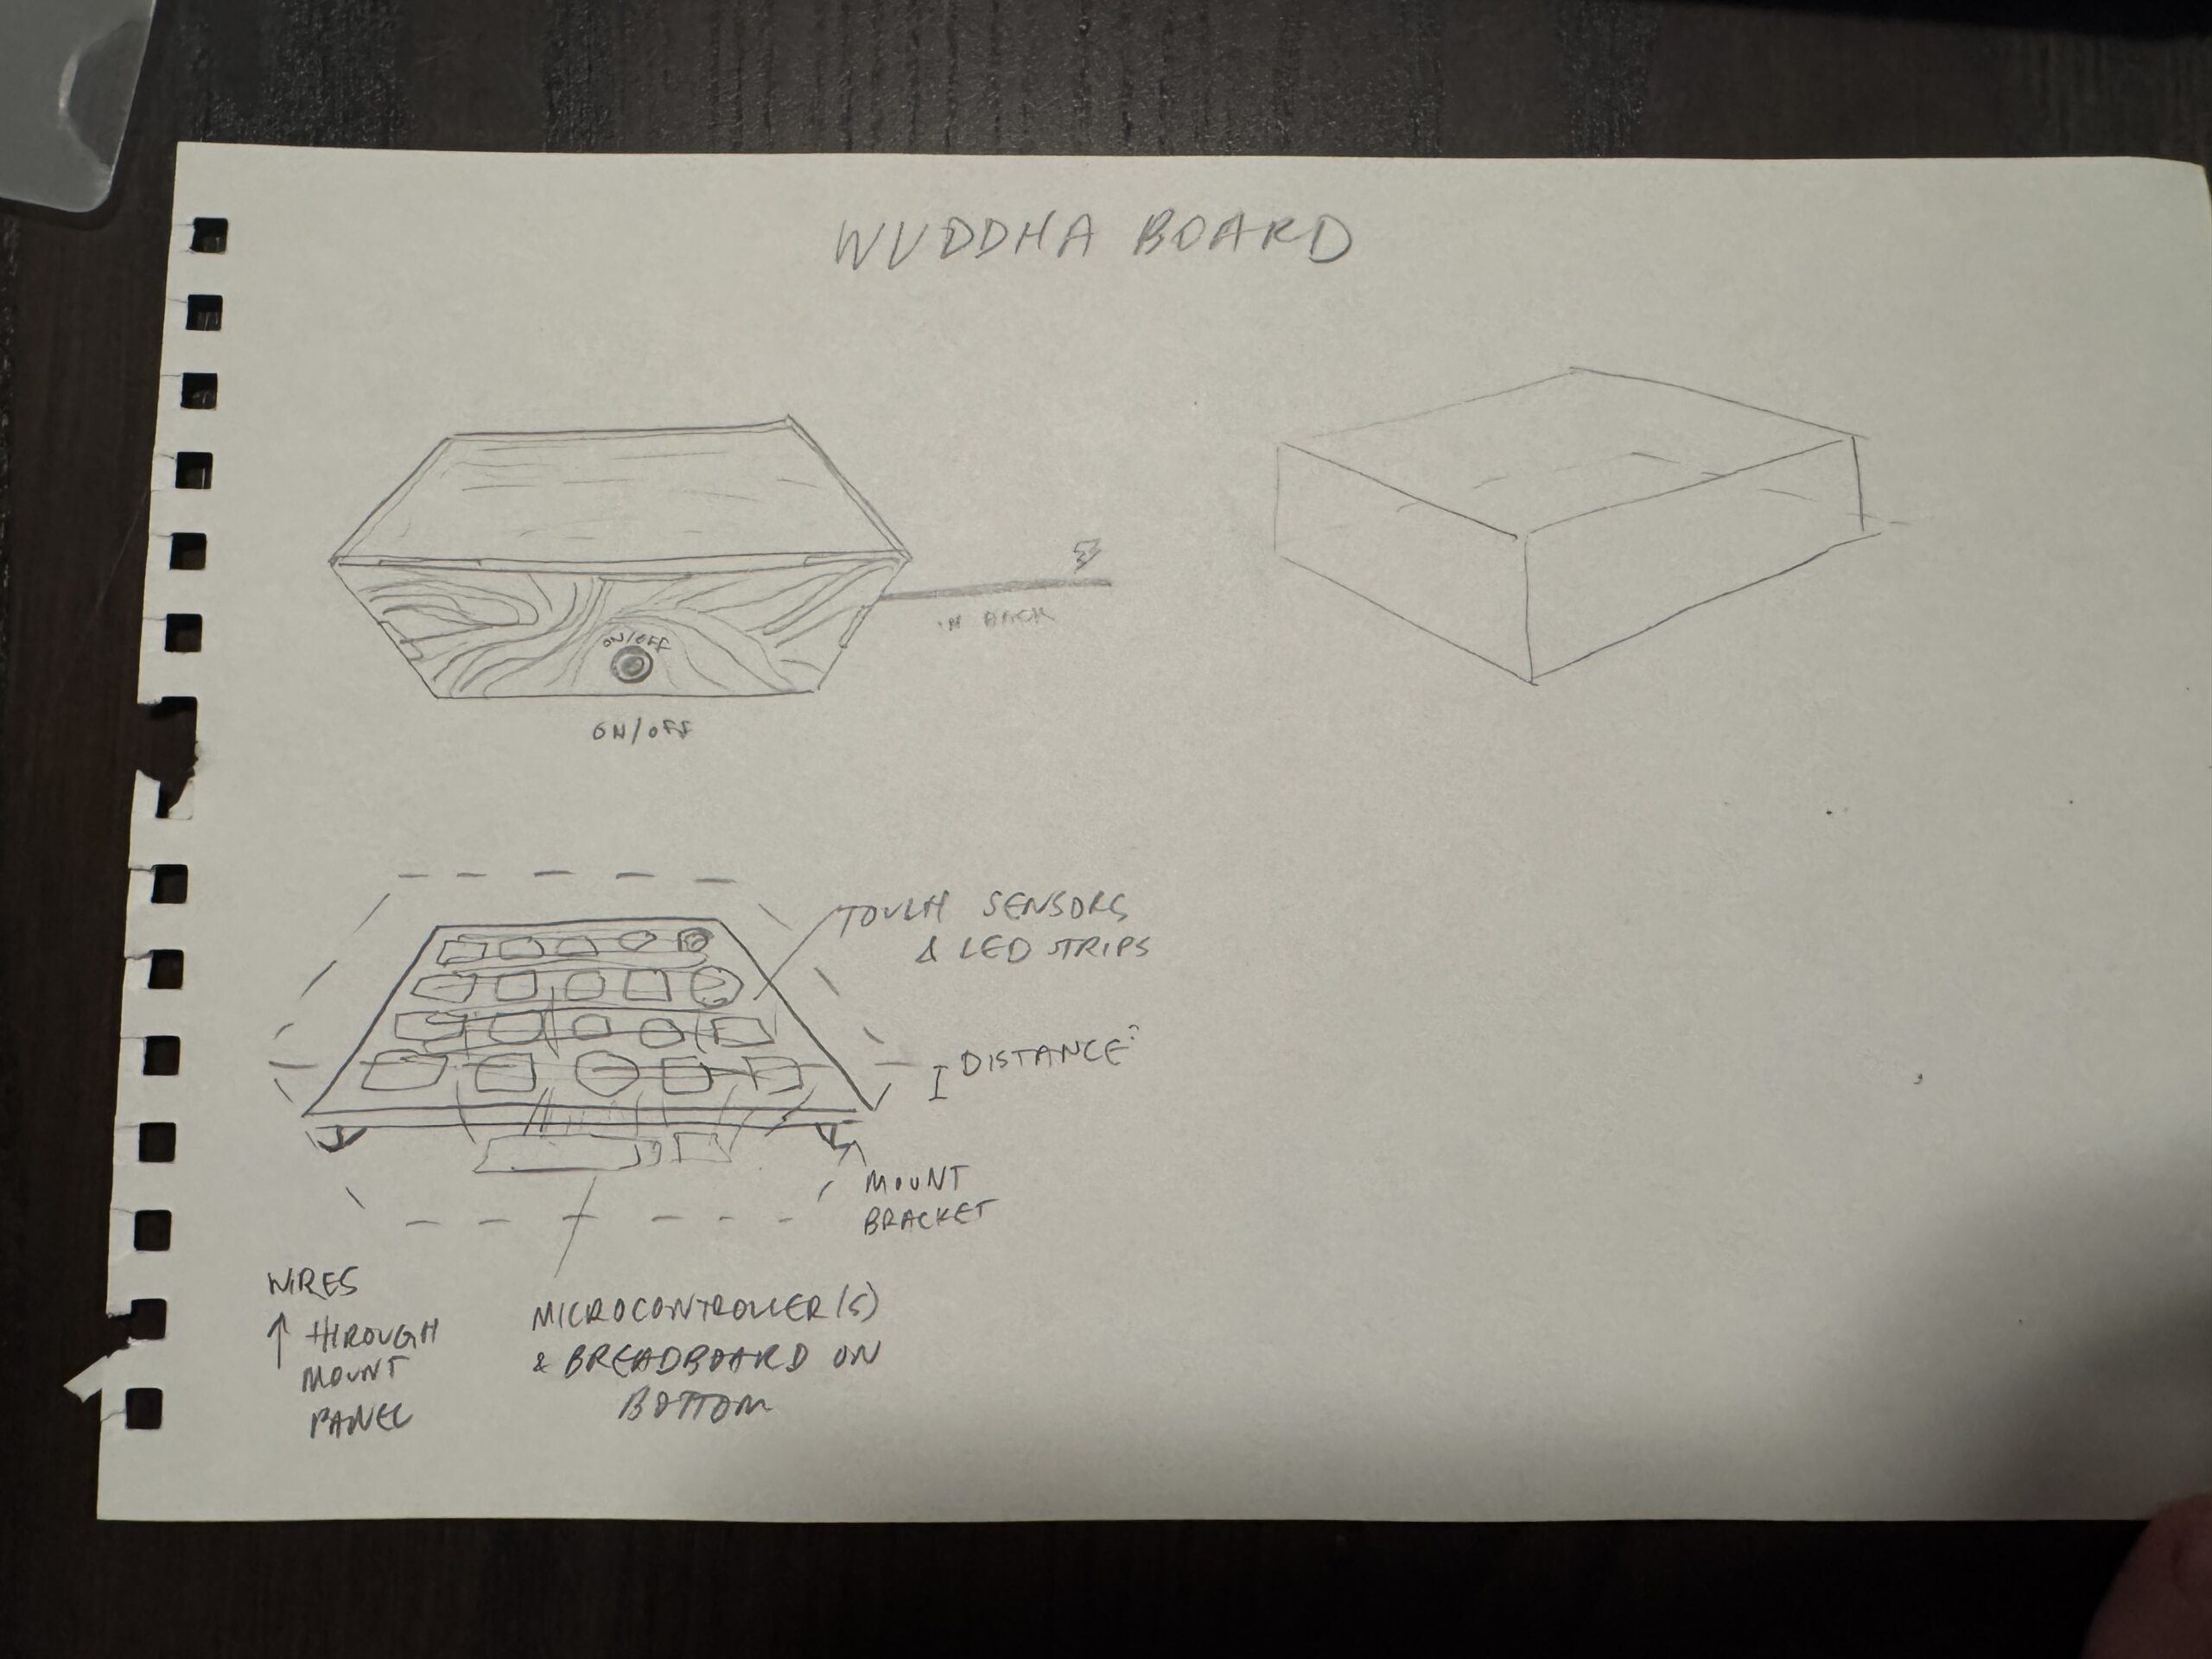
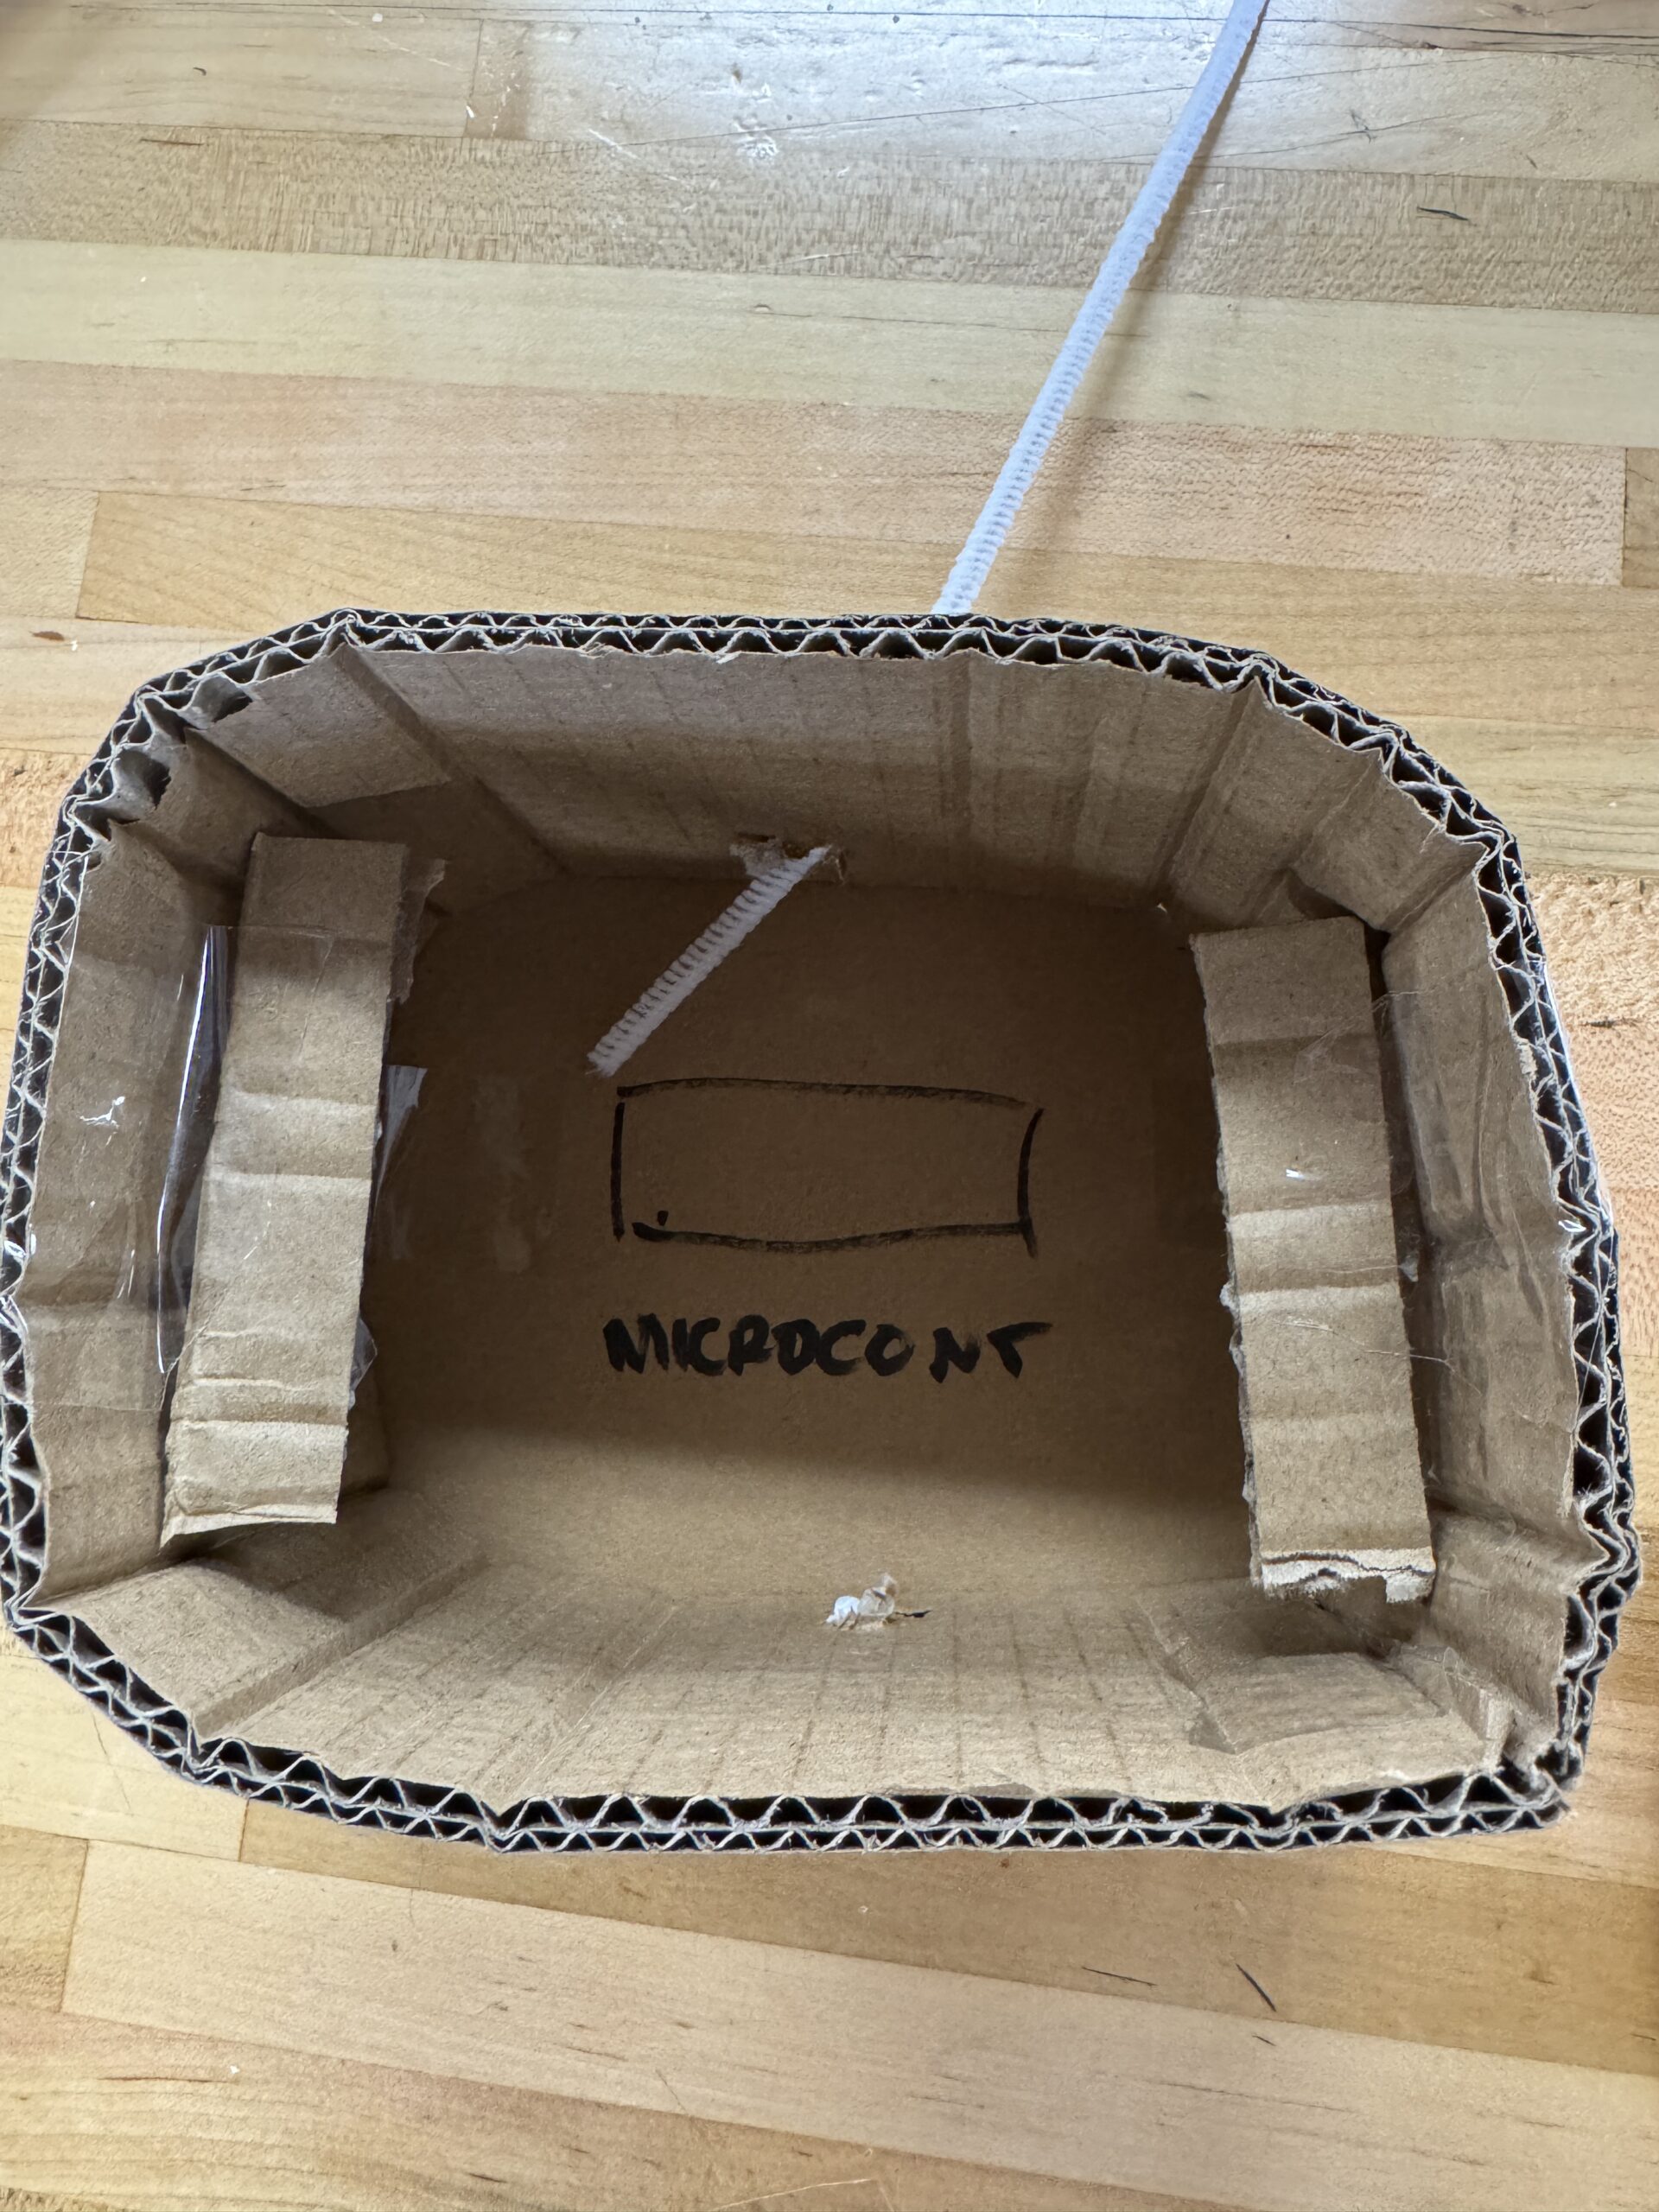
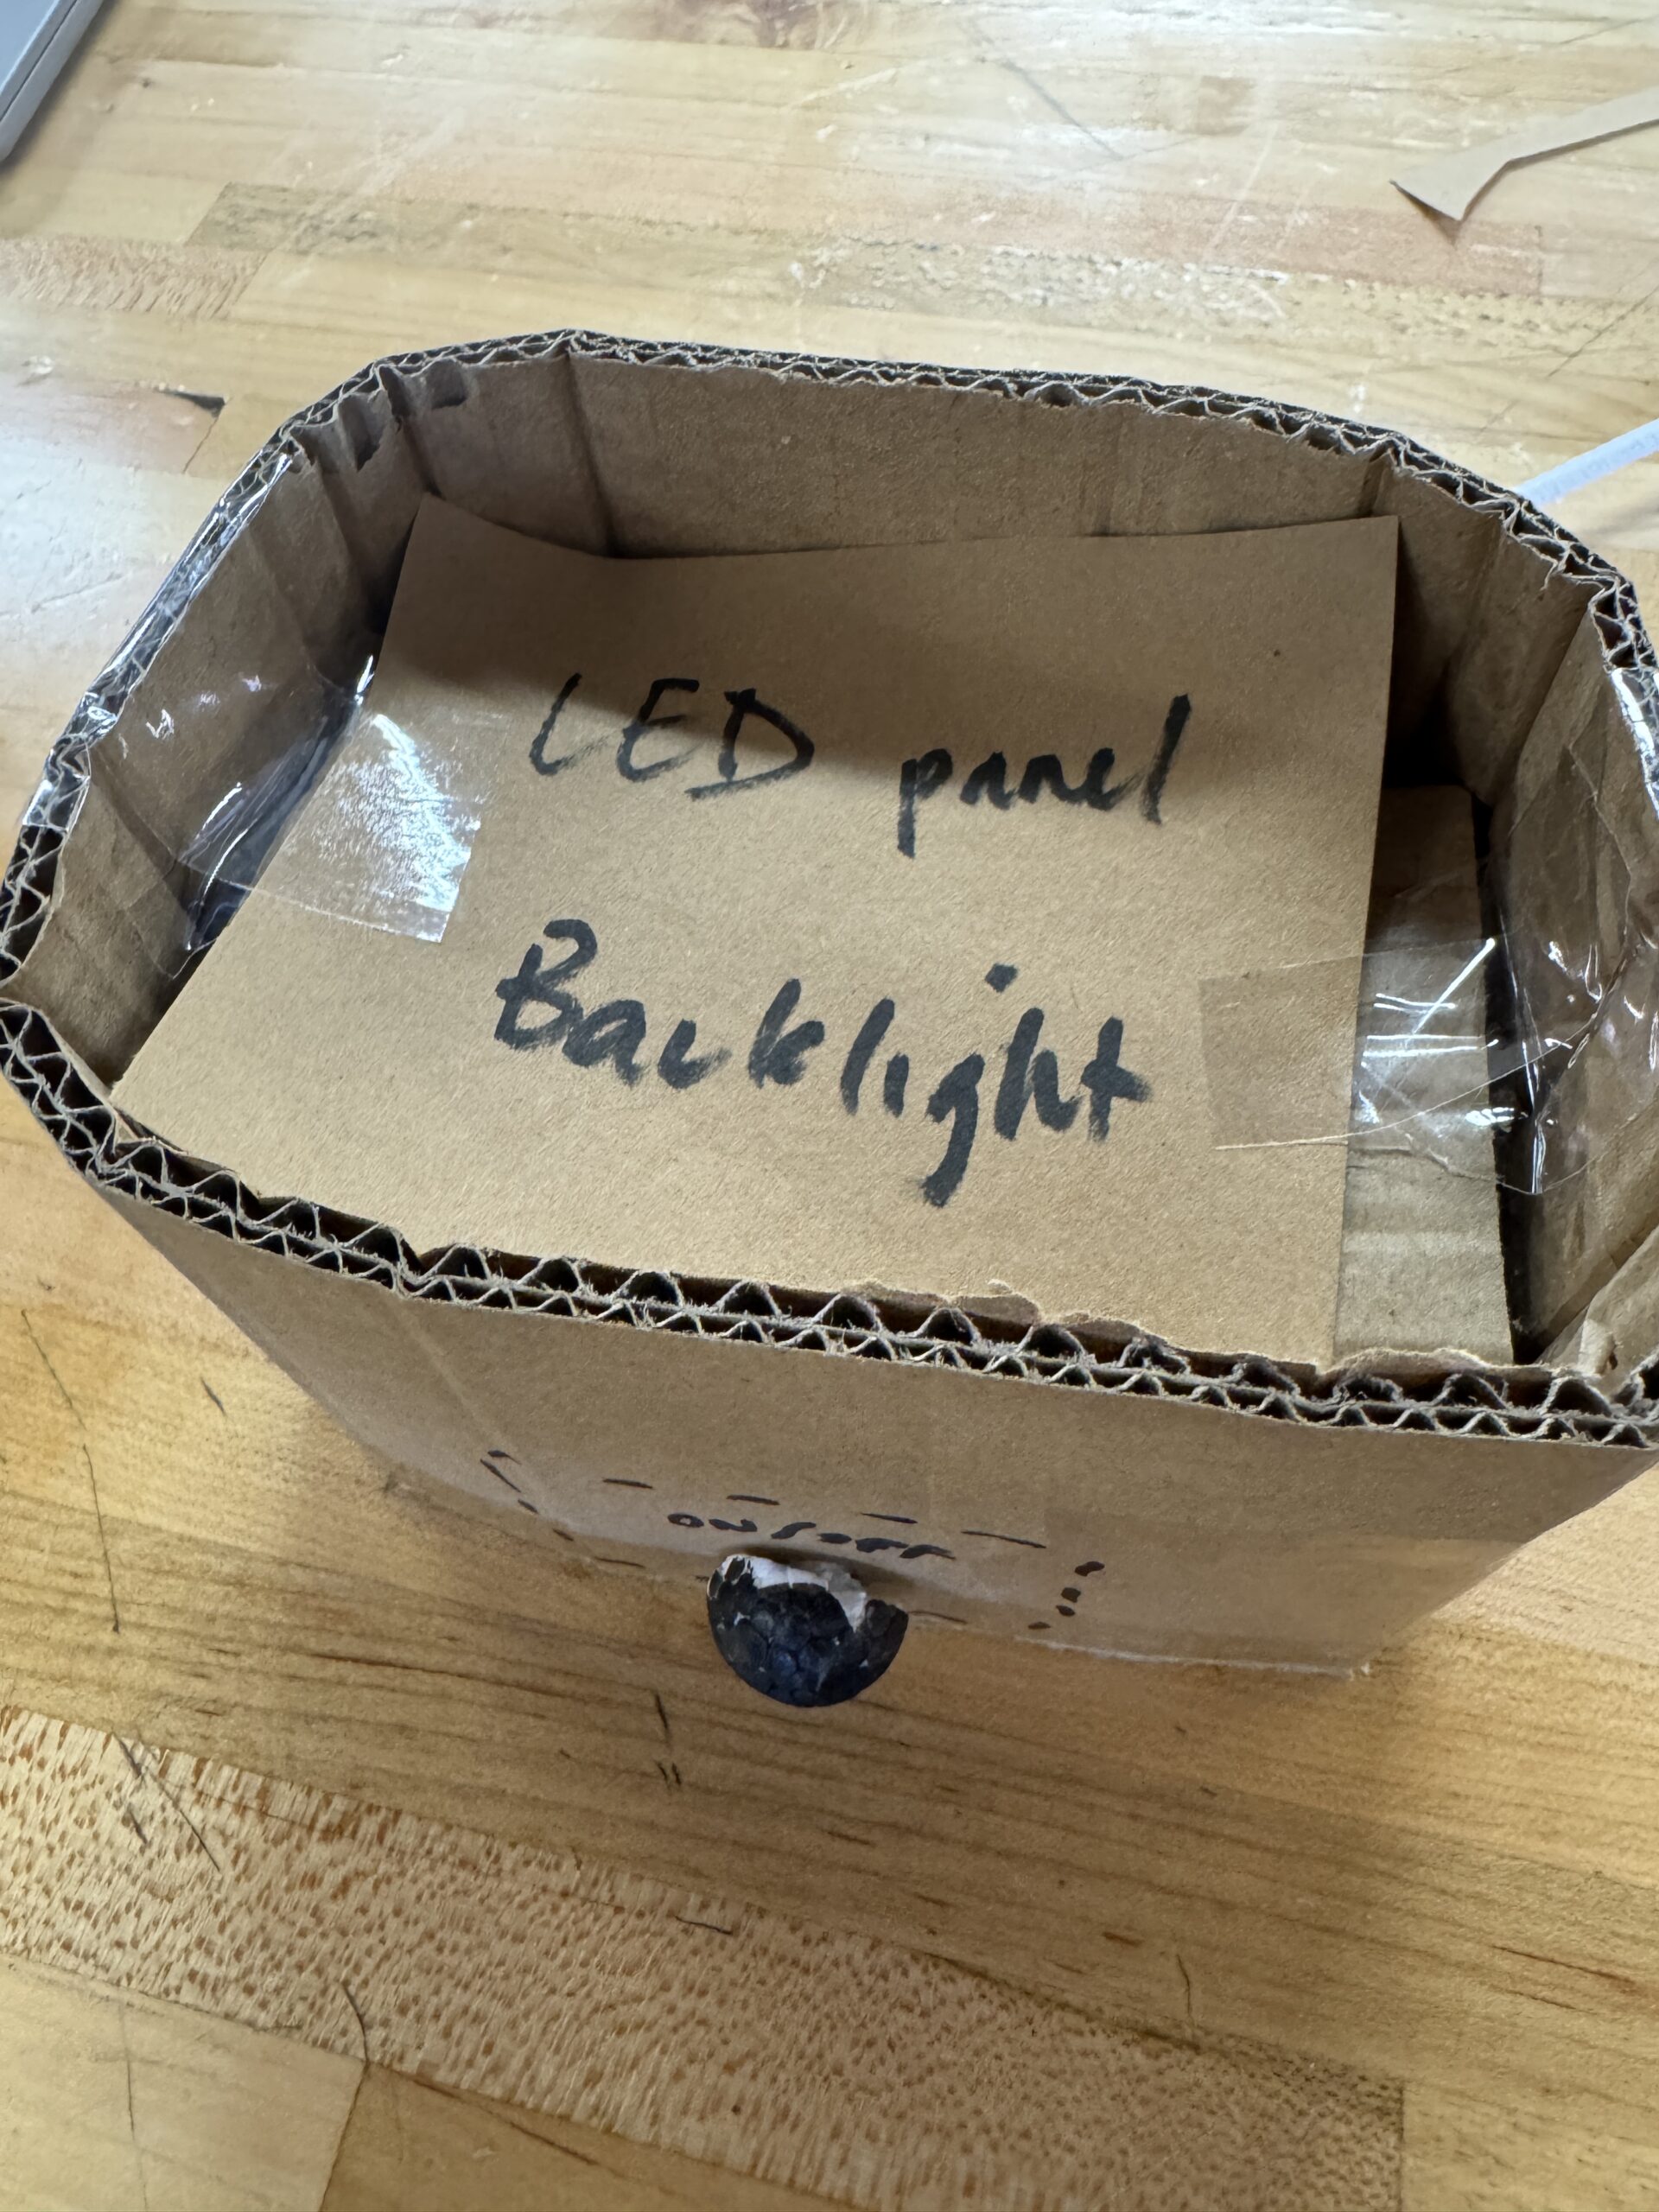
My process for designing the Wöddha Board began with an exploration of similar products for inspiration and a look at different aesthetics (further explored in Part One), including minimalist, industrial, and Bauhaus. Each inspiration and aesthetic gave me valuable insight as far as what I wanted the final product to look like, which allowed me to move into sketching and prototyping my idea using cardboard and tape:

Fabrication Process
Once I had an idea of the shape, aesthetics, and general function of my project, I was able to develop the following fabrication timeline to guide the rest of my project’s creation (surprisingly, I actually stuck to this timeline!):

Breaking these timeline notes into specific steps, I first began gathering and ordering supplies alongside my cardboard prototype. Before making any purchases, I foraged my personal space and was able to ‘upcycle’ some leftover 3D printing filament, birch plywood sheets from my garage, an Arduino Uno, and several meters of LED strips. From there, I eventually had to purchase a larger battery, the resistive touch screen, an on/off switch, and eventually a small 16×16 pixel LED panel from the interwebs.
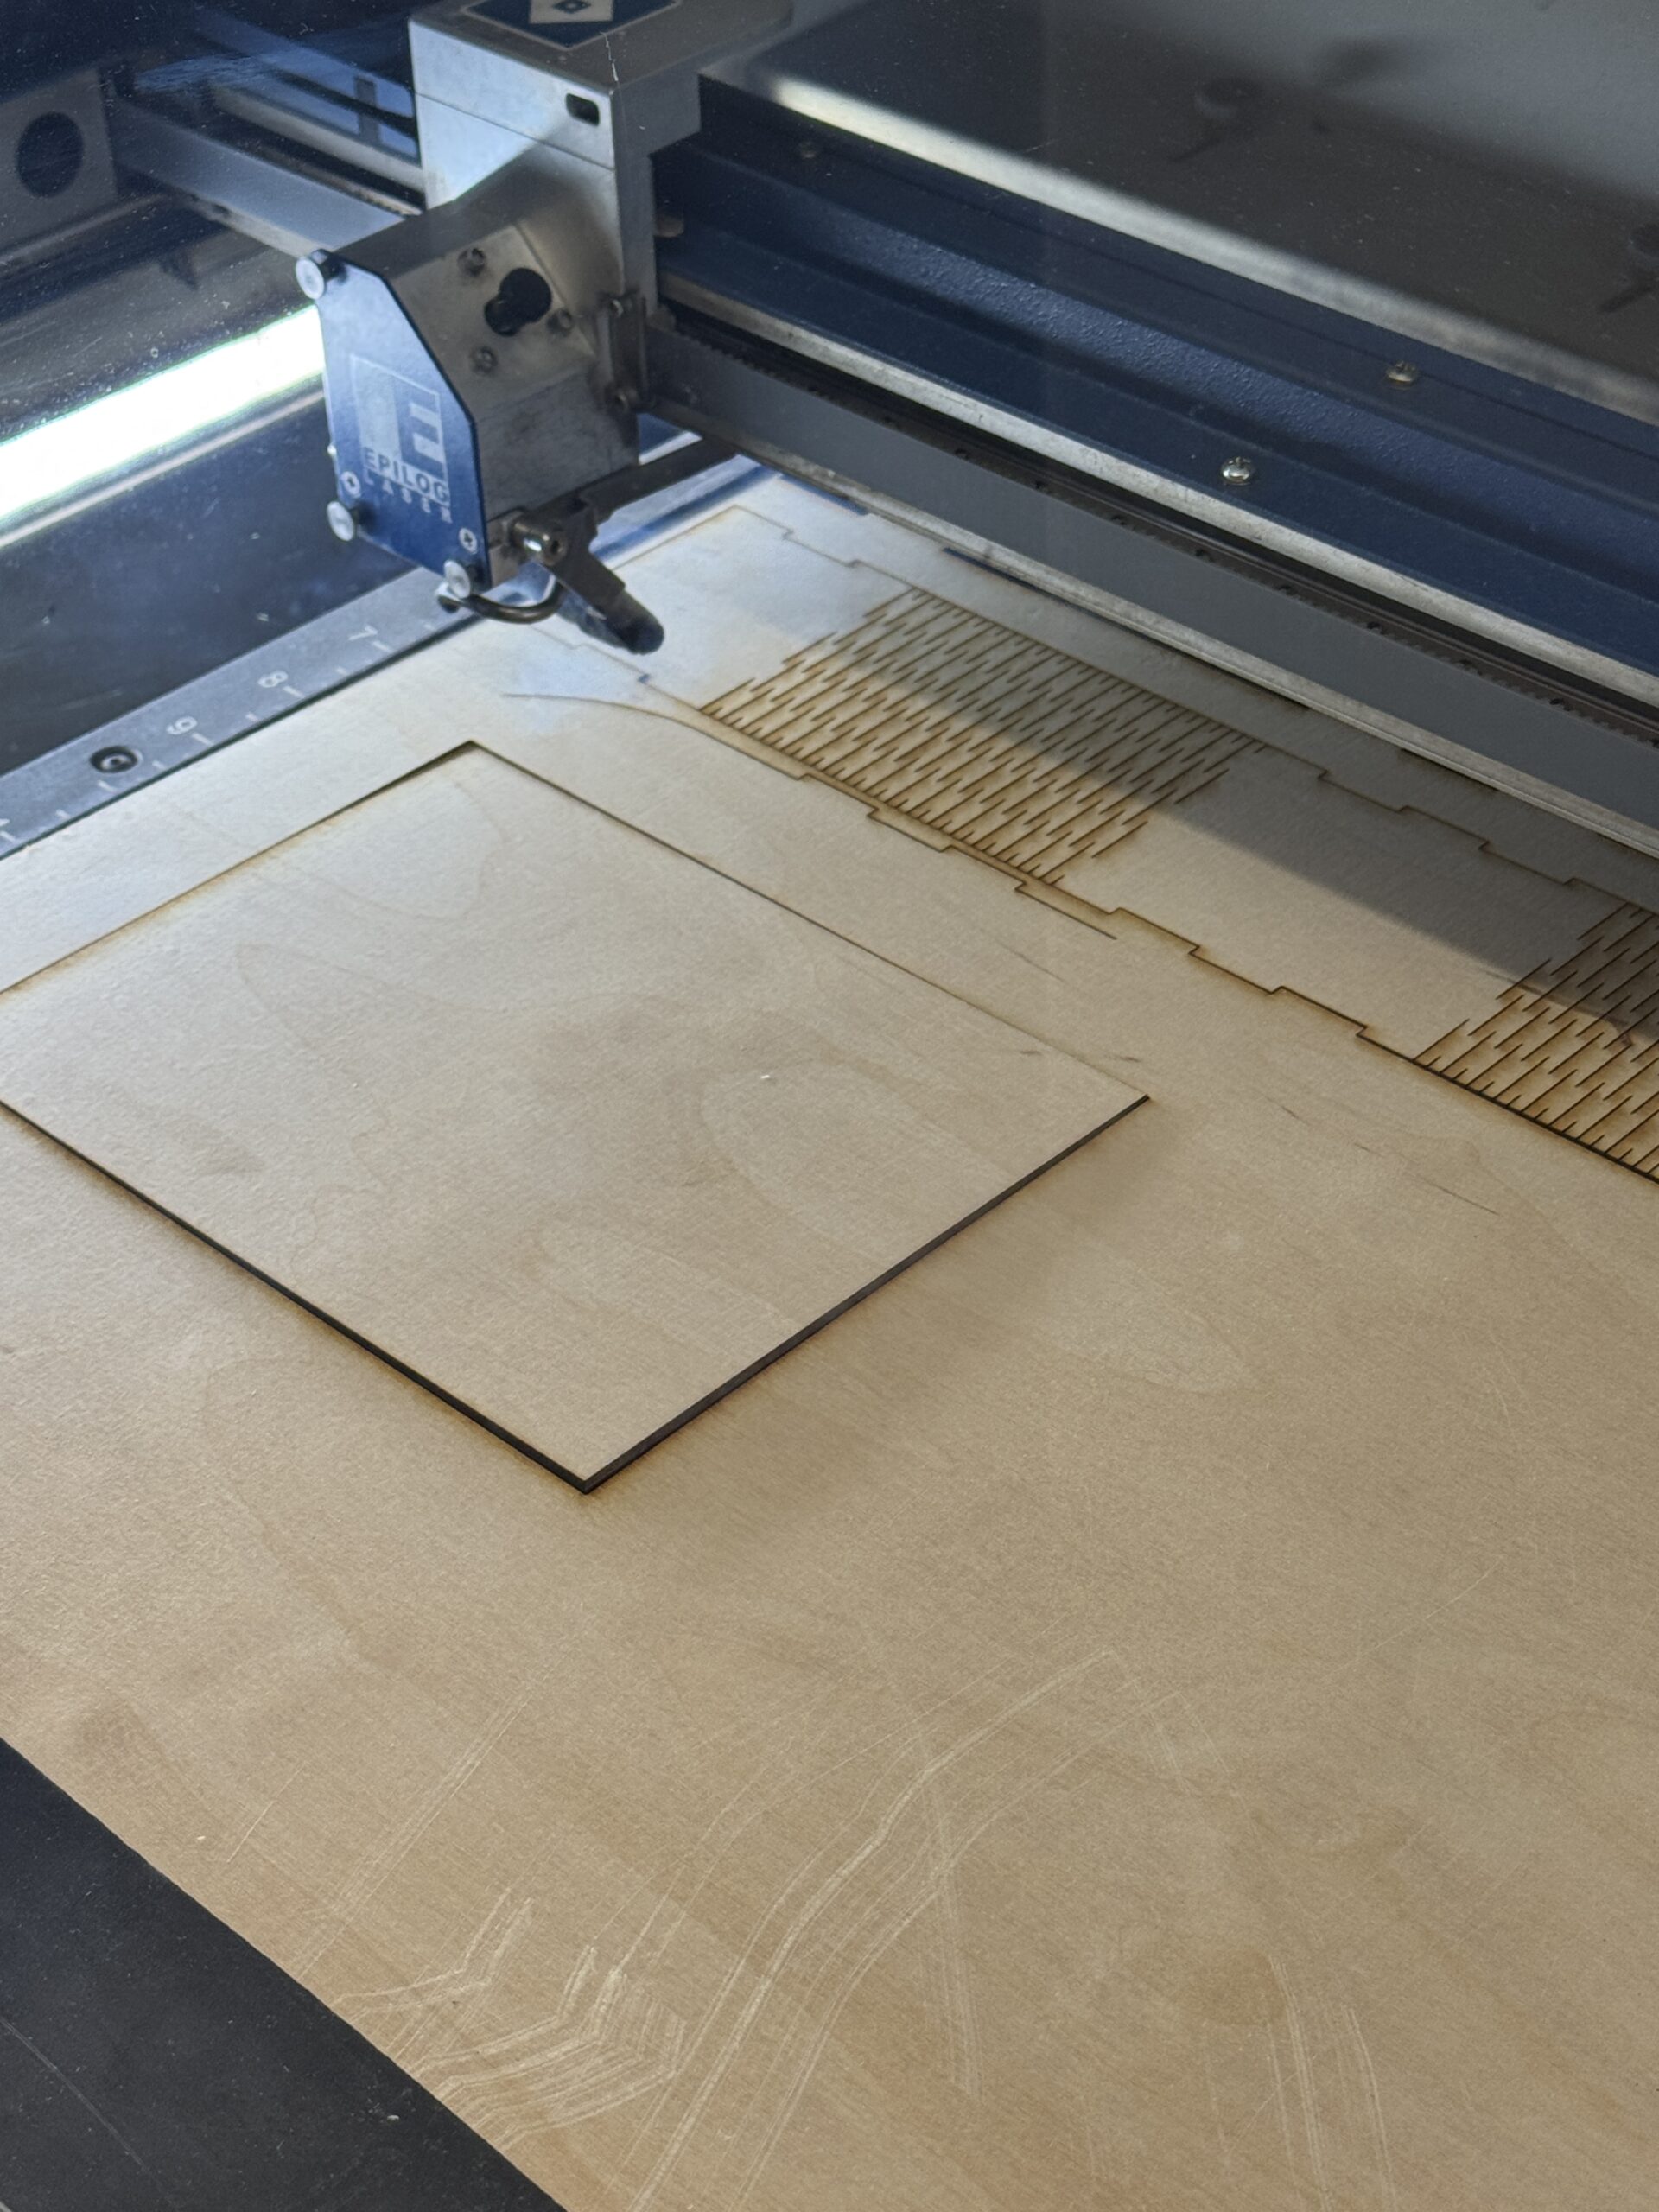
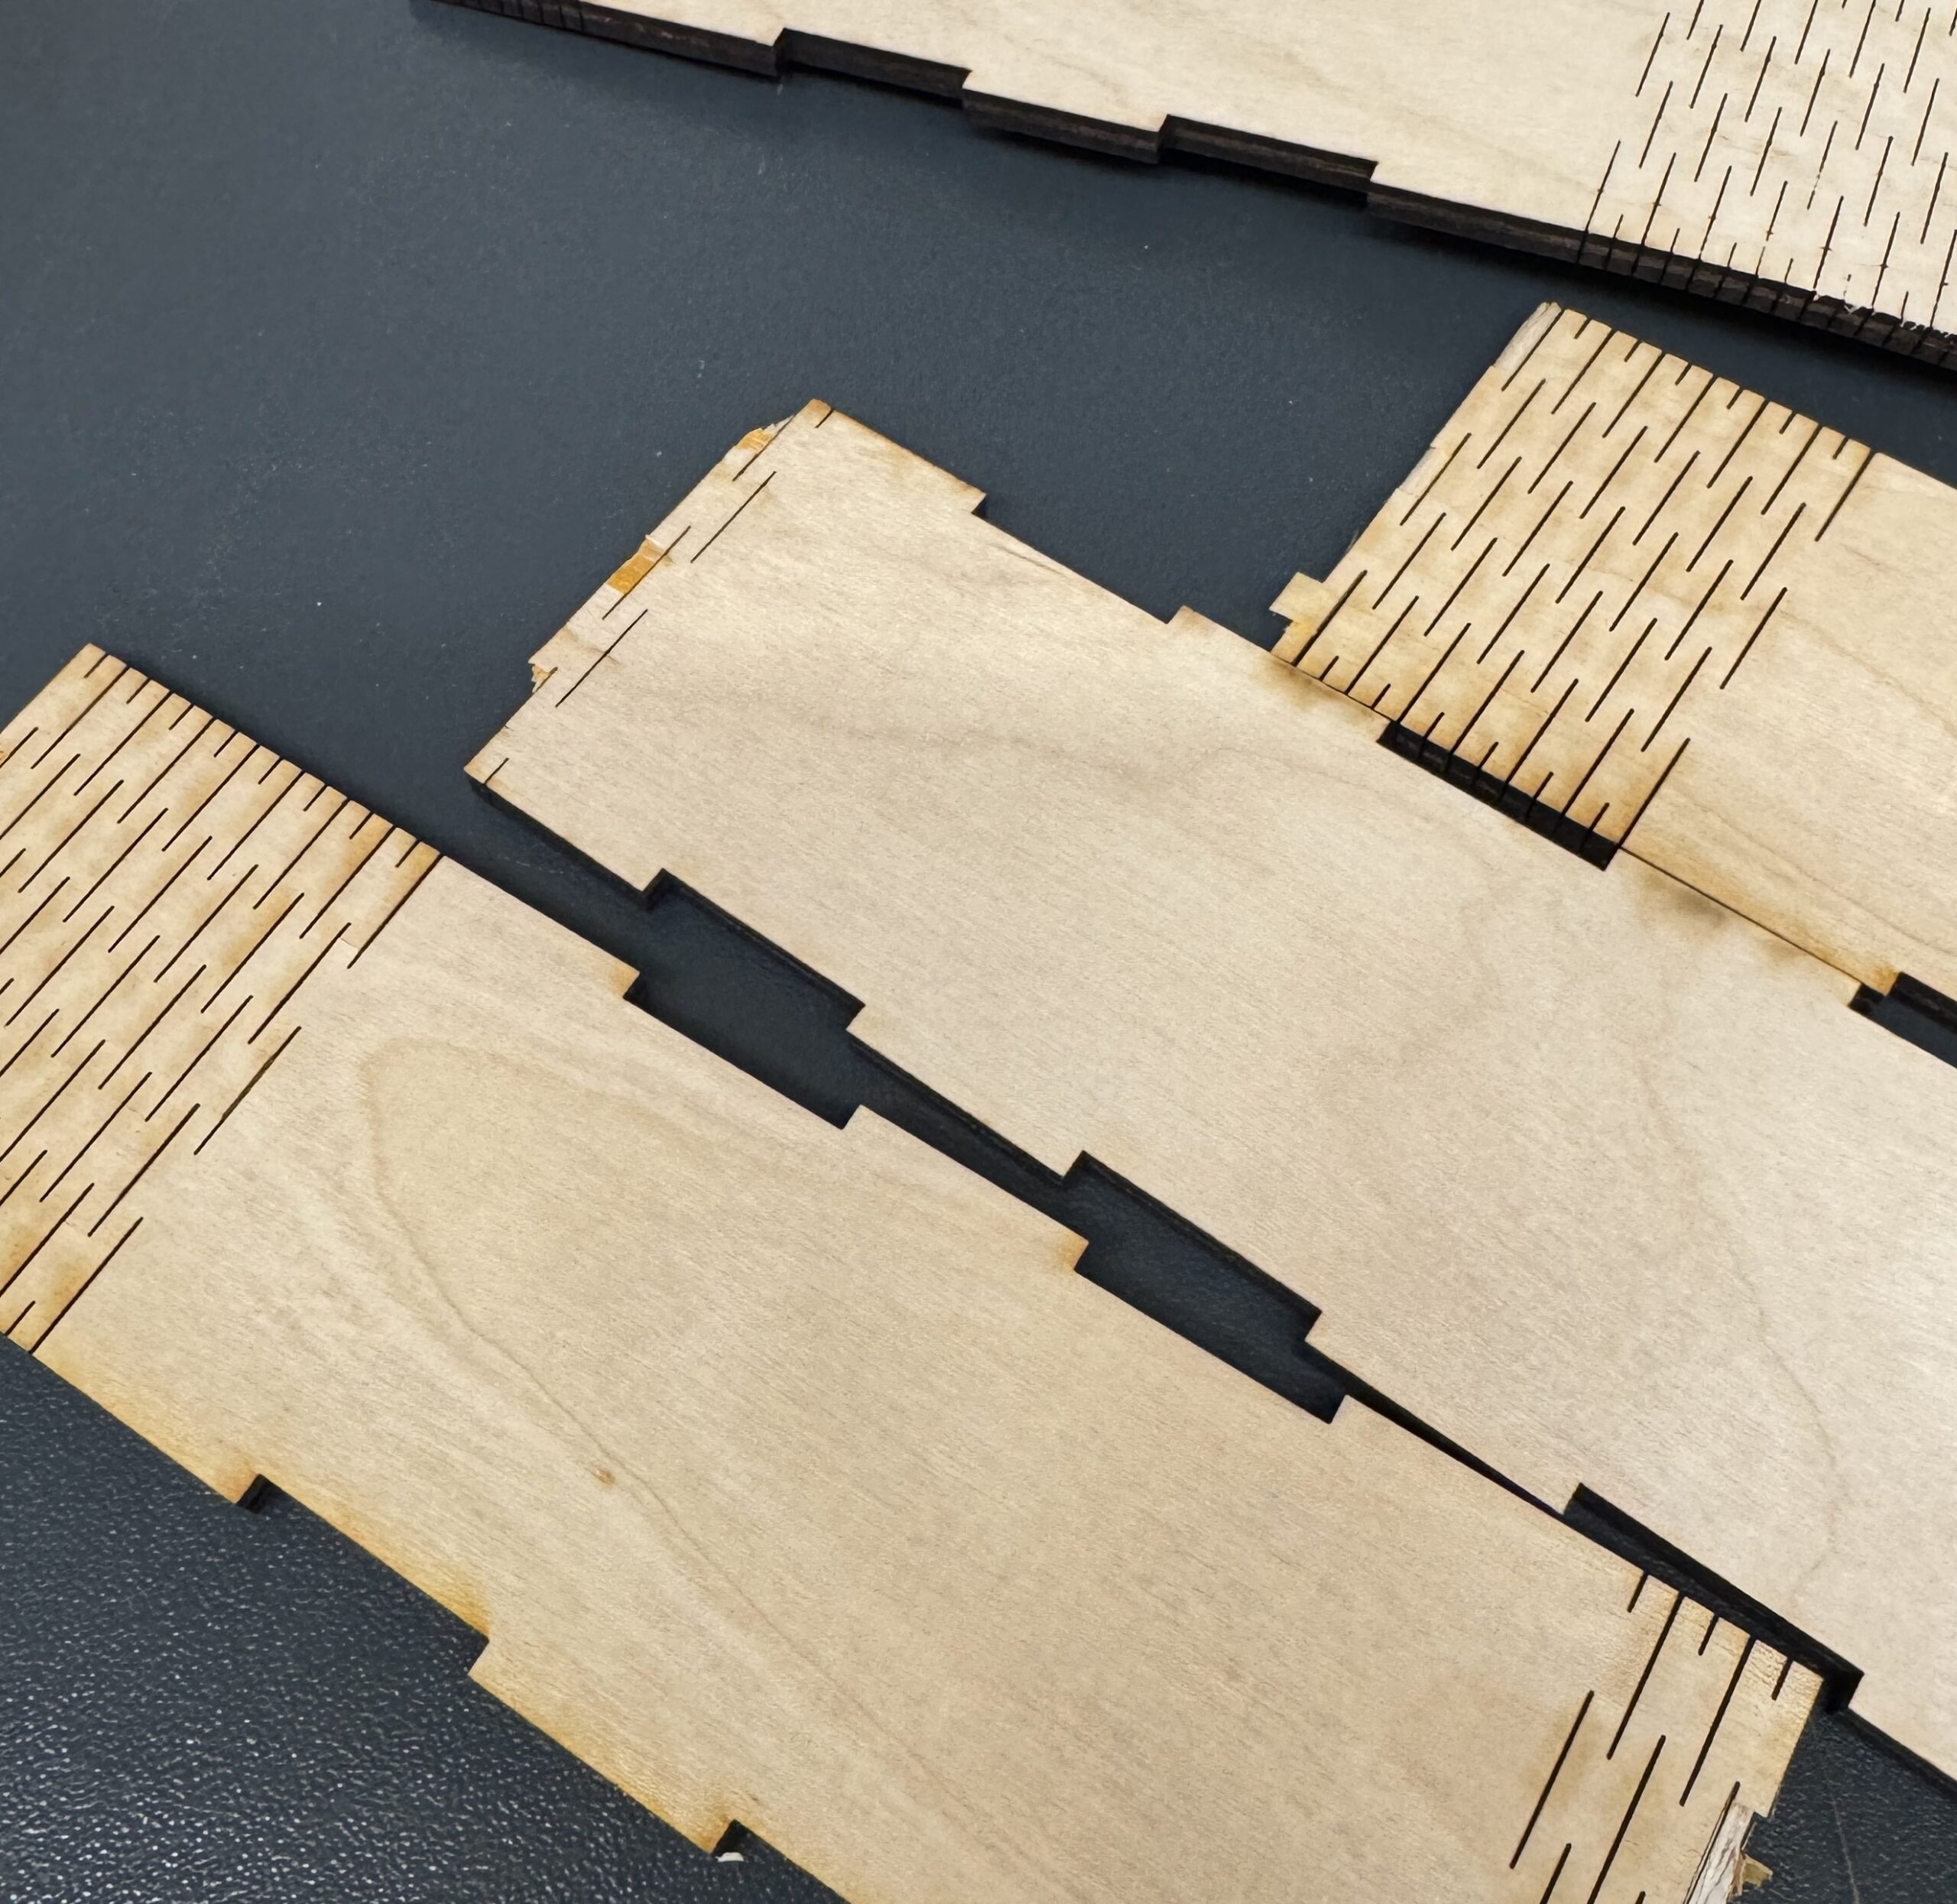
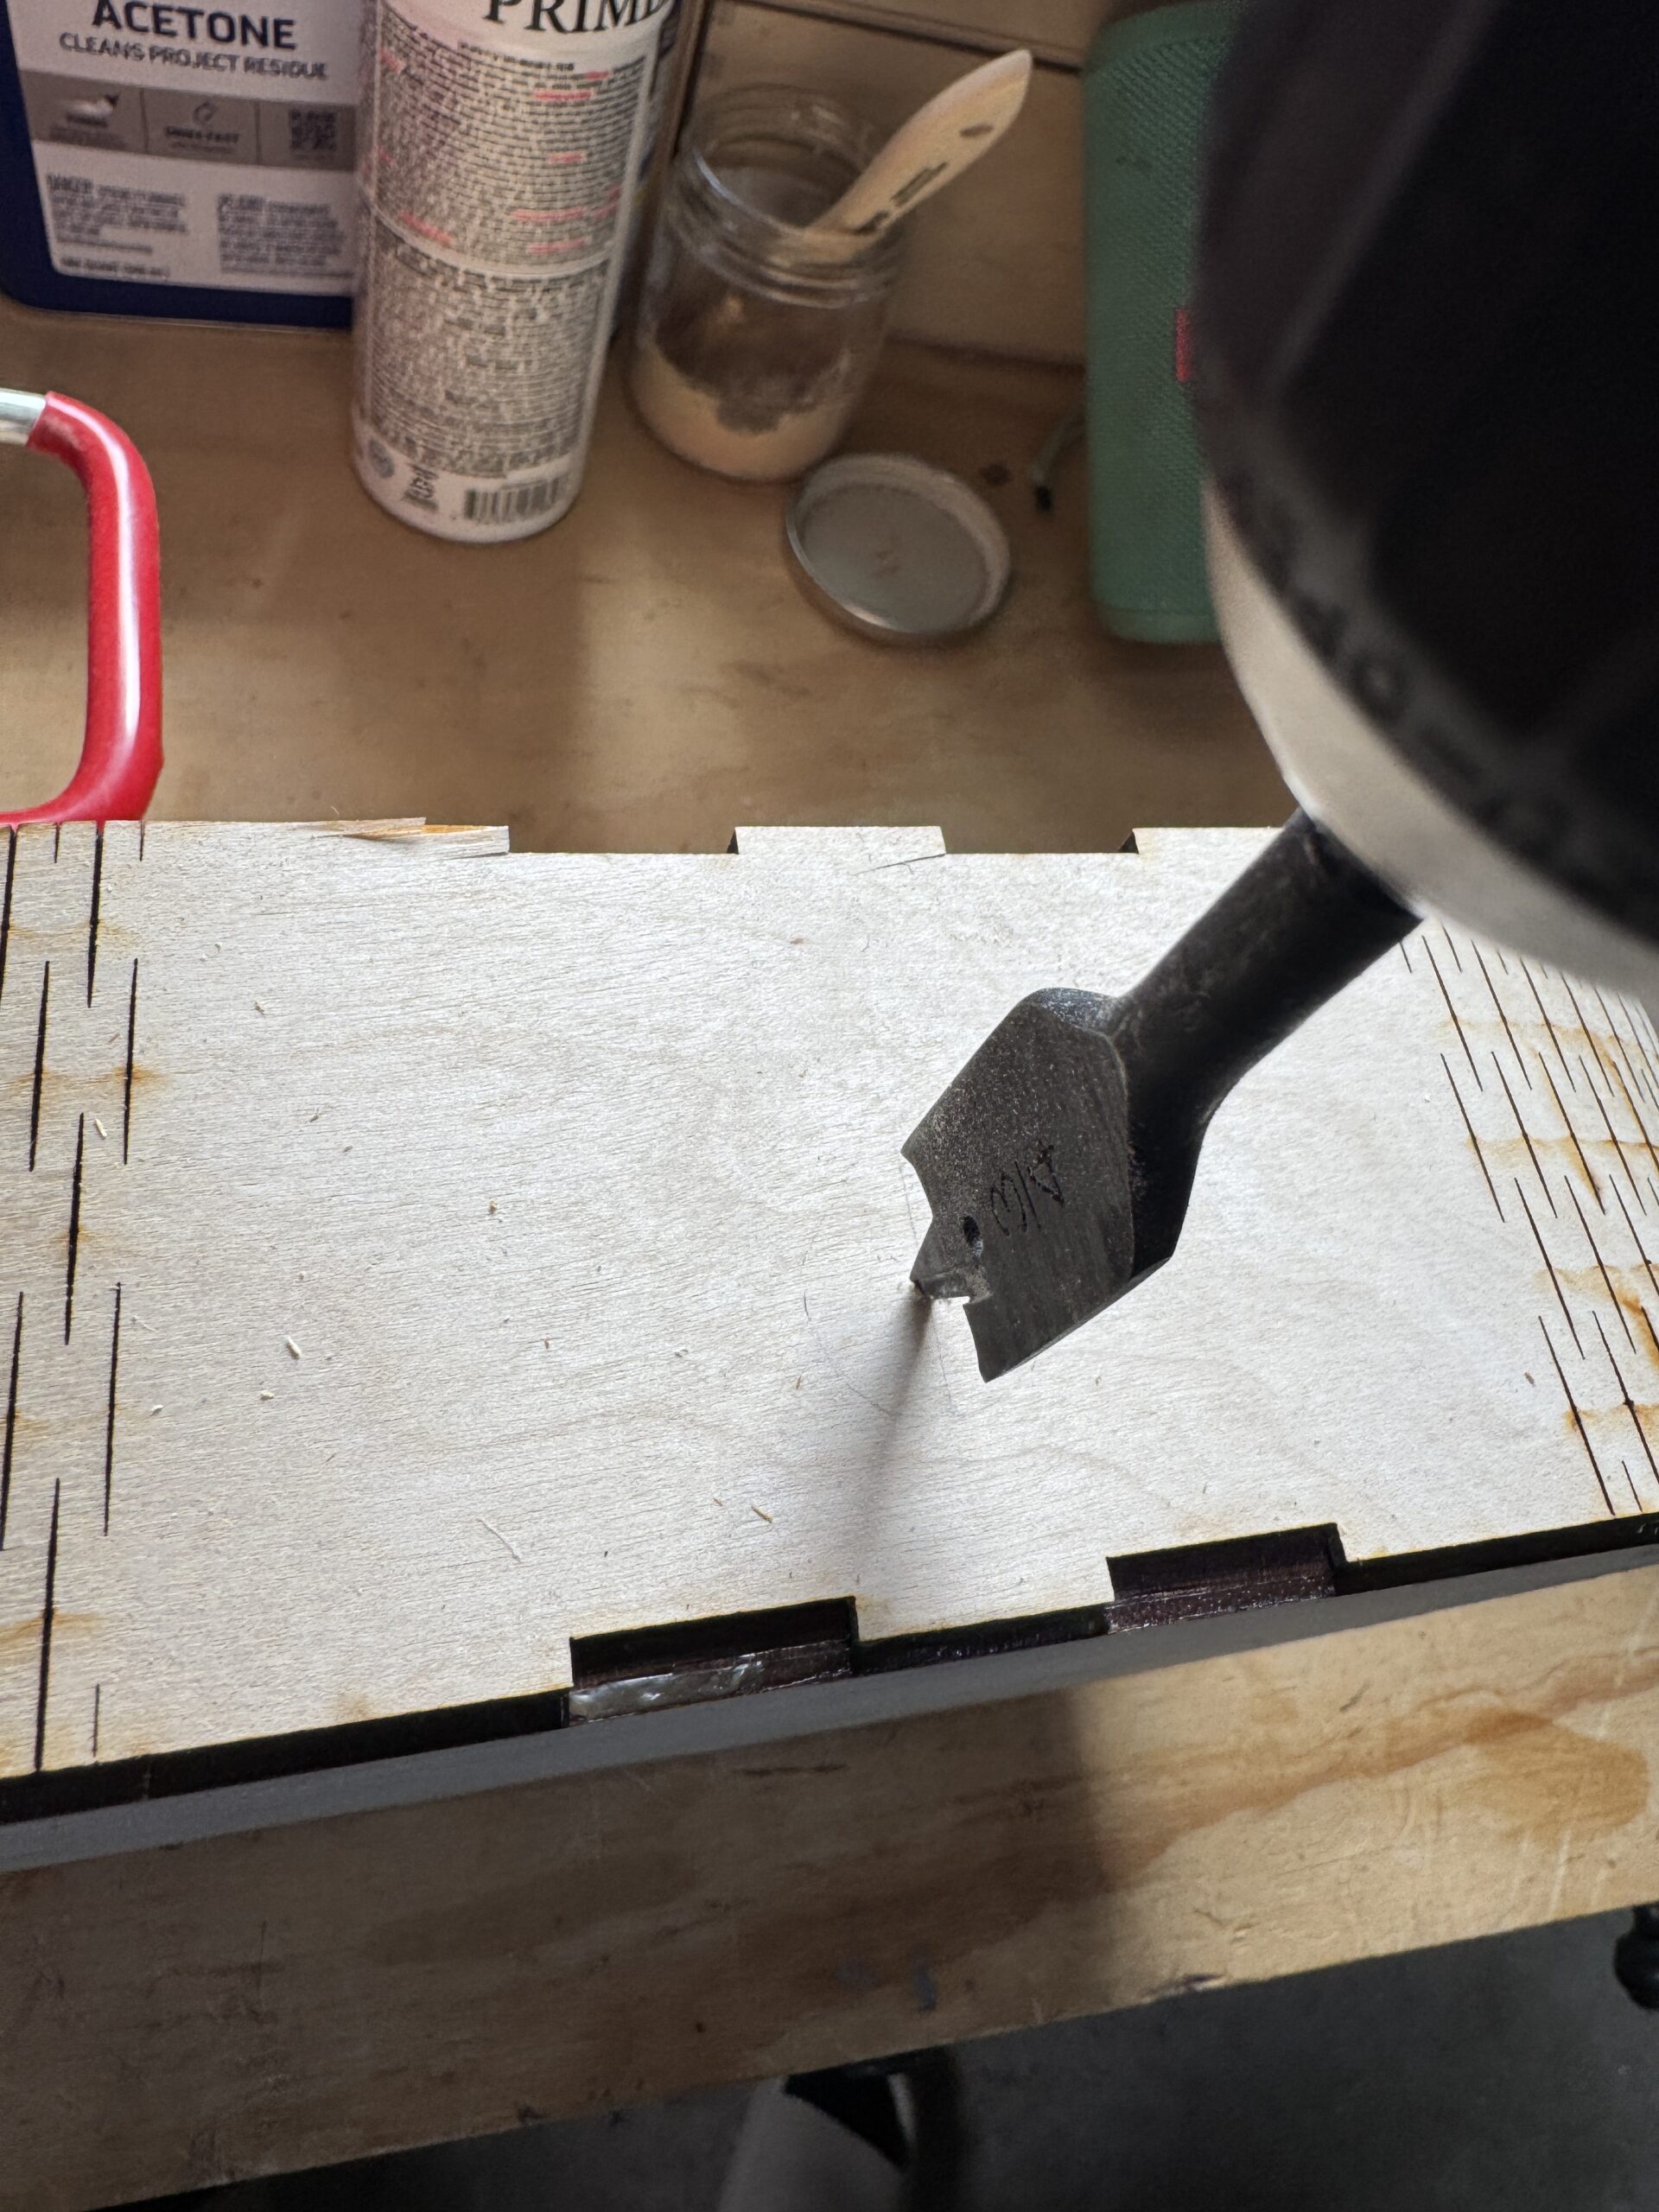
Moving onto the next step of fabrication, I started by modeling my final box shape on Rhino and laser cutting this shape into my plywood in the Blow Things Up lab on campus:

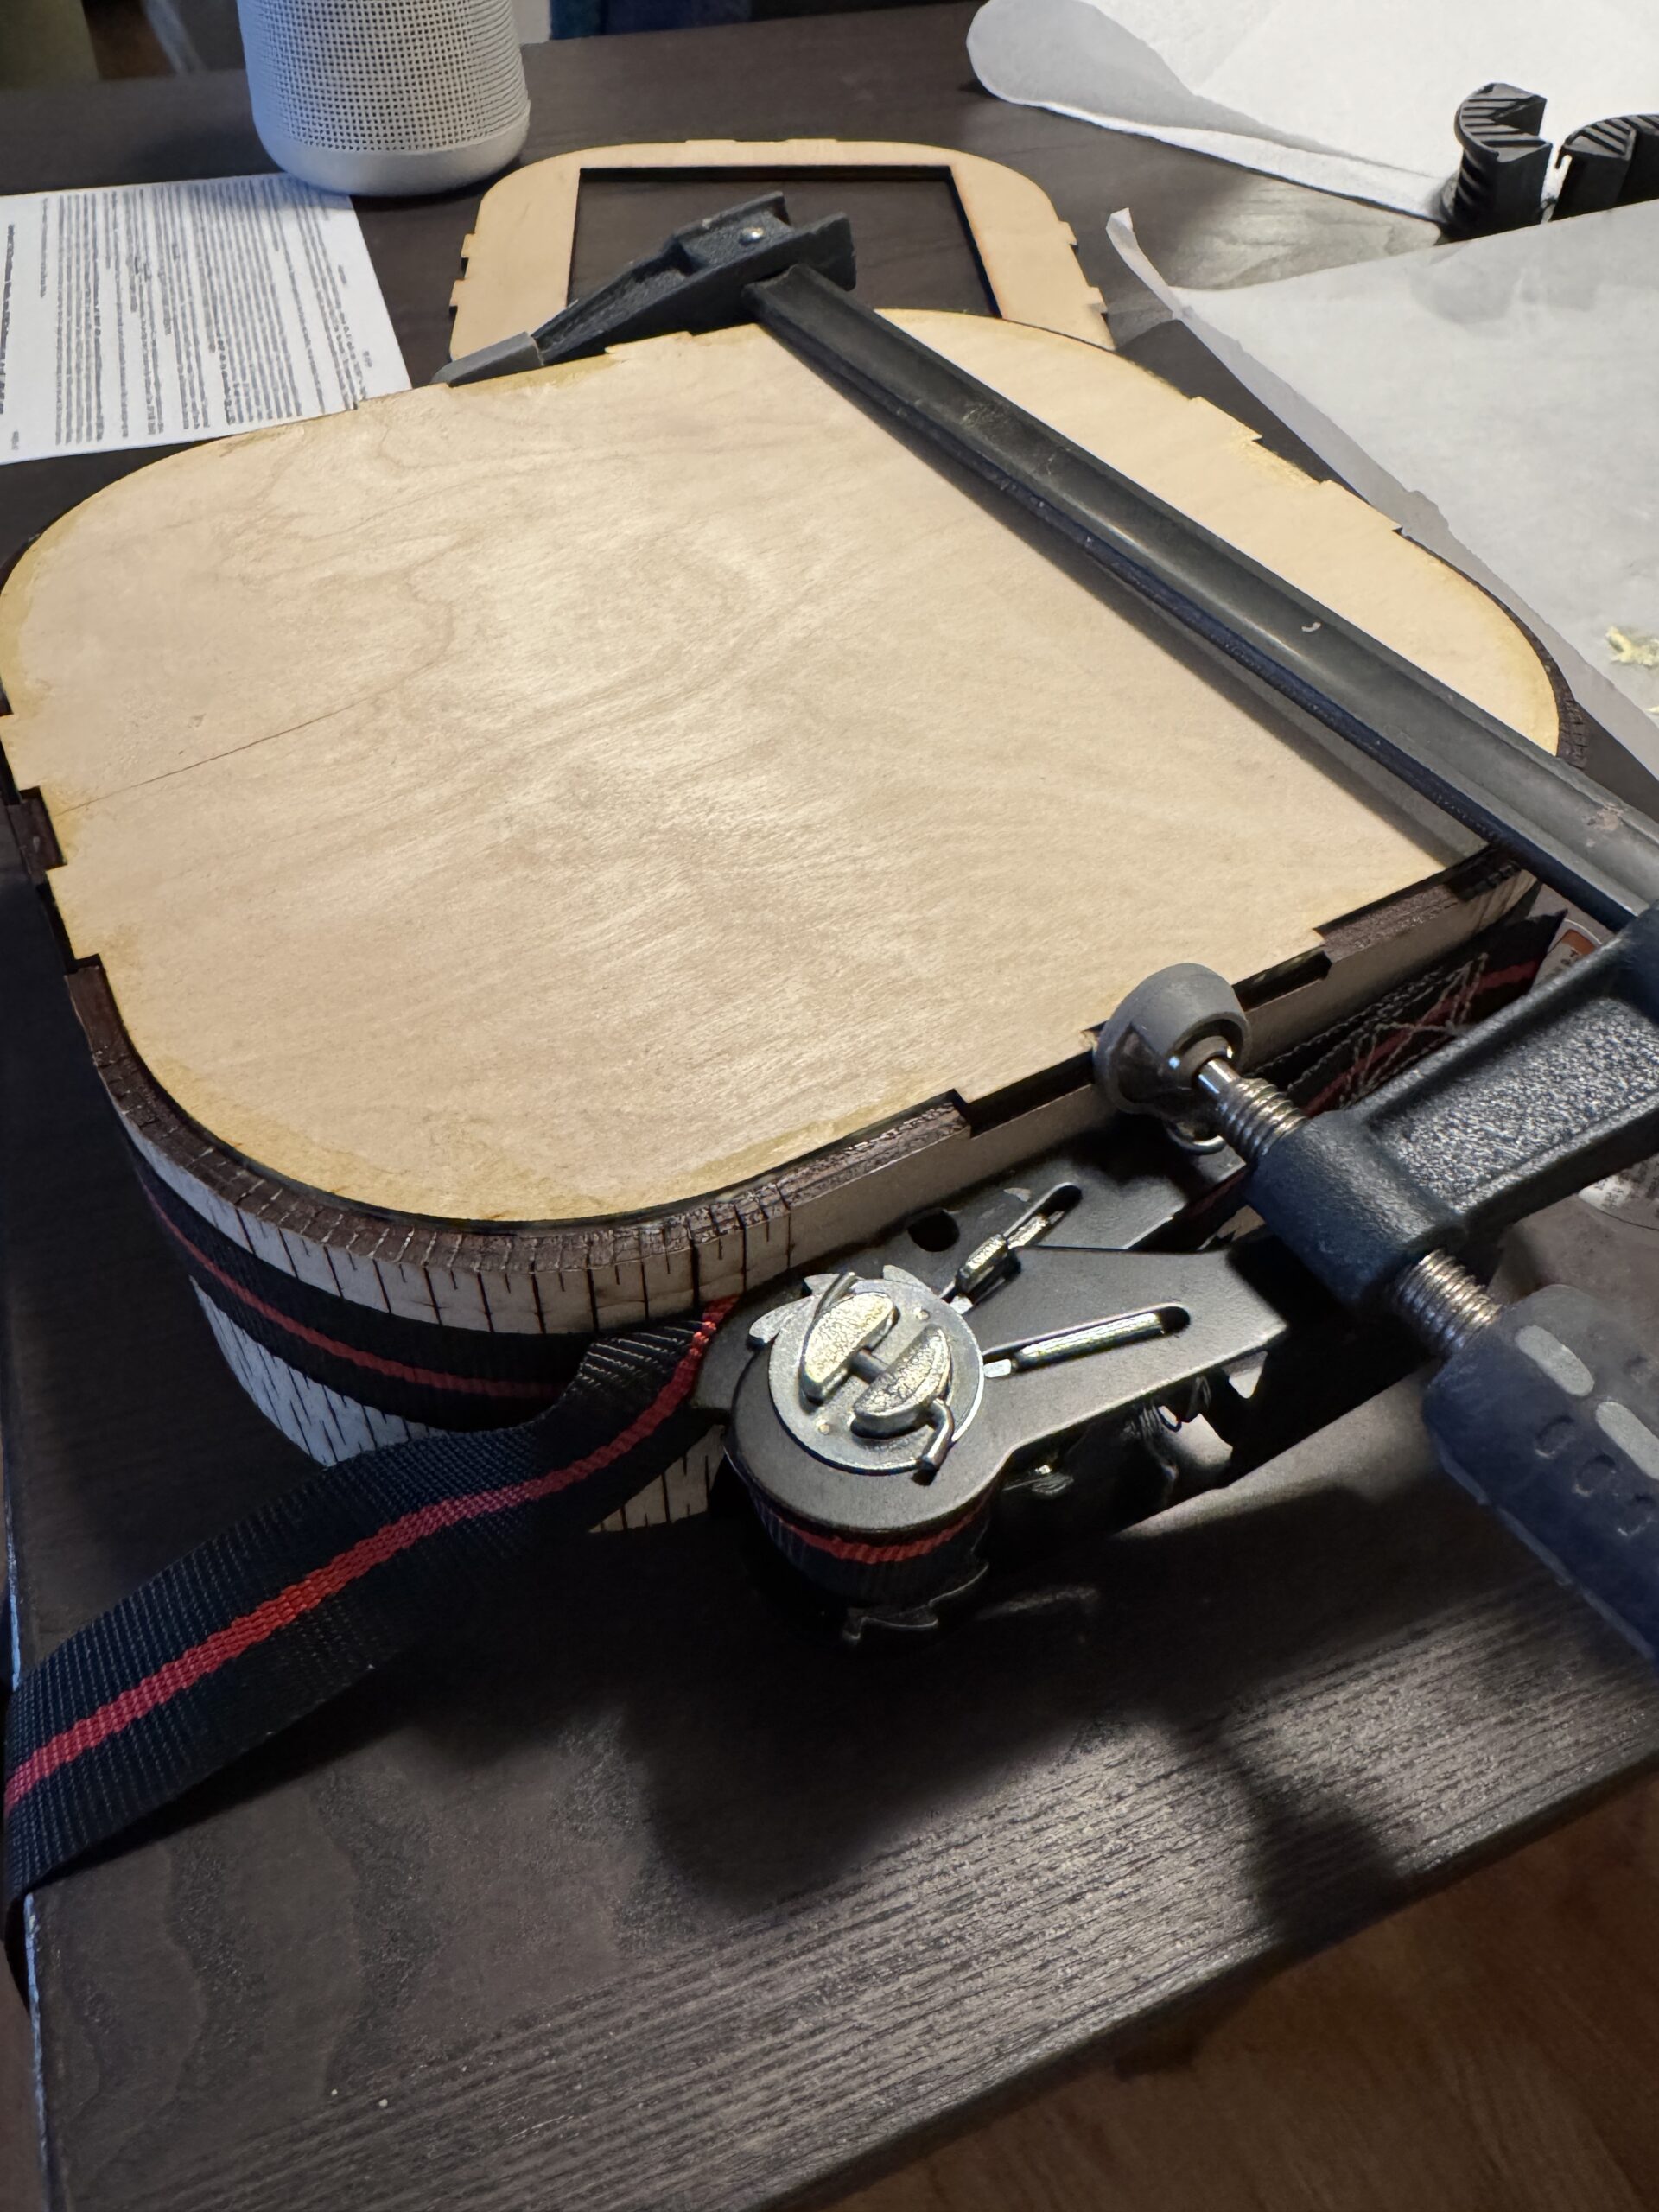
Tale as old as time, this step of my project that took much more time than expected. My initial tries to assemble the bending corners of the box (noted in blue in the Rhino sketch above) ended up snapping immediately and diminishing my hope of rounded corners. It took three prints altogether, one entire piece of my plywood, to reach a usable bend radius and move onto box assembly:
Once the glue had dried on the clamped box shell, I moved onto my third step of experimenting with the electronics. Having never worked with a touch screen before, I was excited to gain some new skills despite the looming fear that I would 1) scratch or ruin the touch screen during the process, and 2) be unable to make it work. I tried to quell these worries through a lot of internet research and digging through Arduino forums, as well as small bursts of trying different code with the touch screen as I worked to put together a 12×12 LED panel:
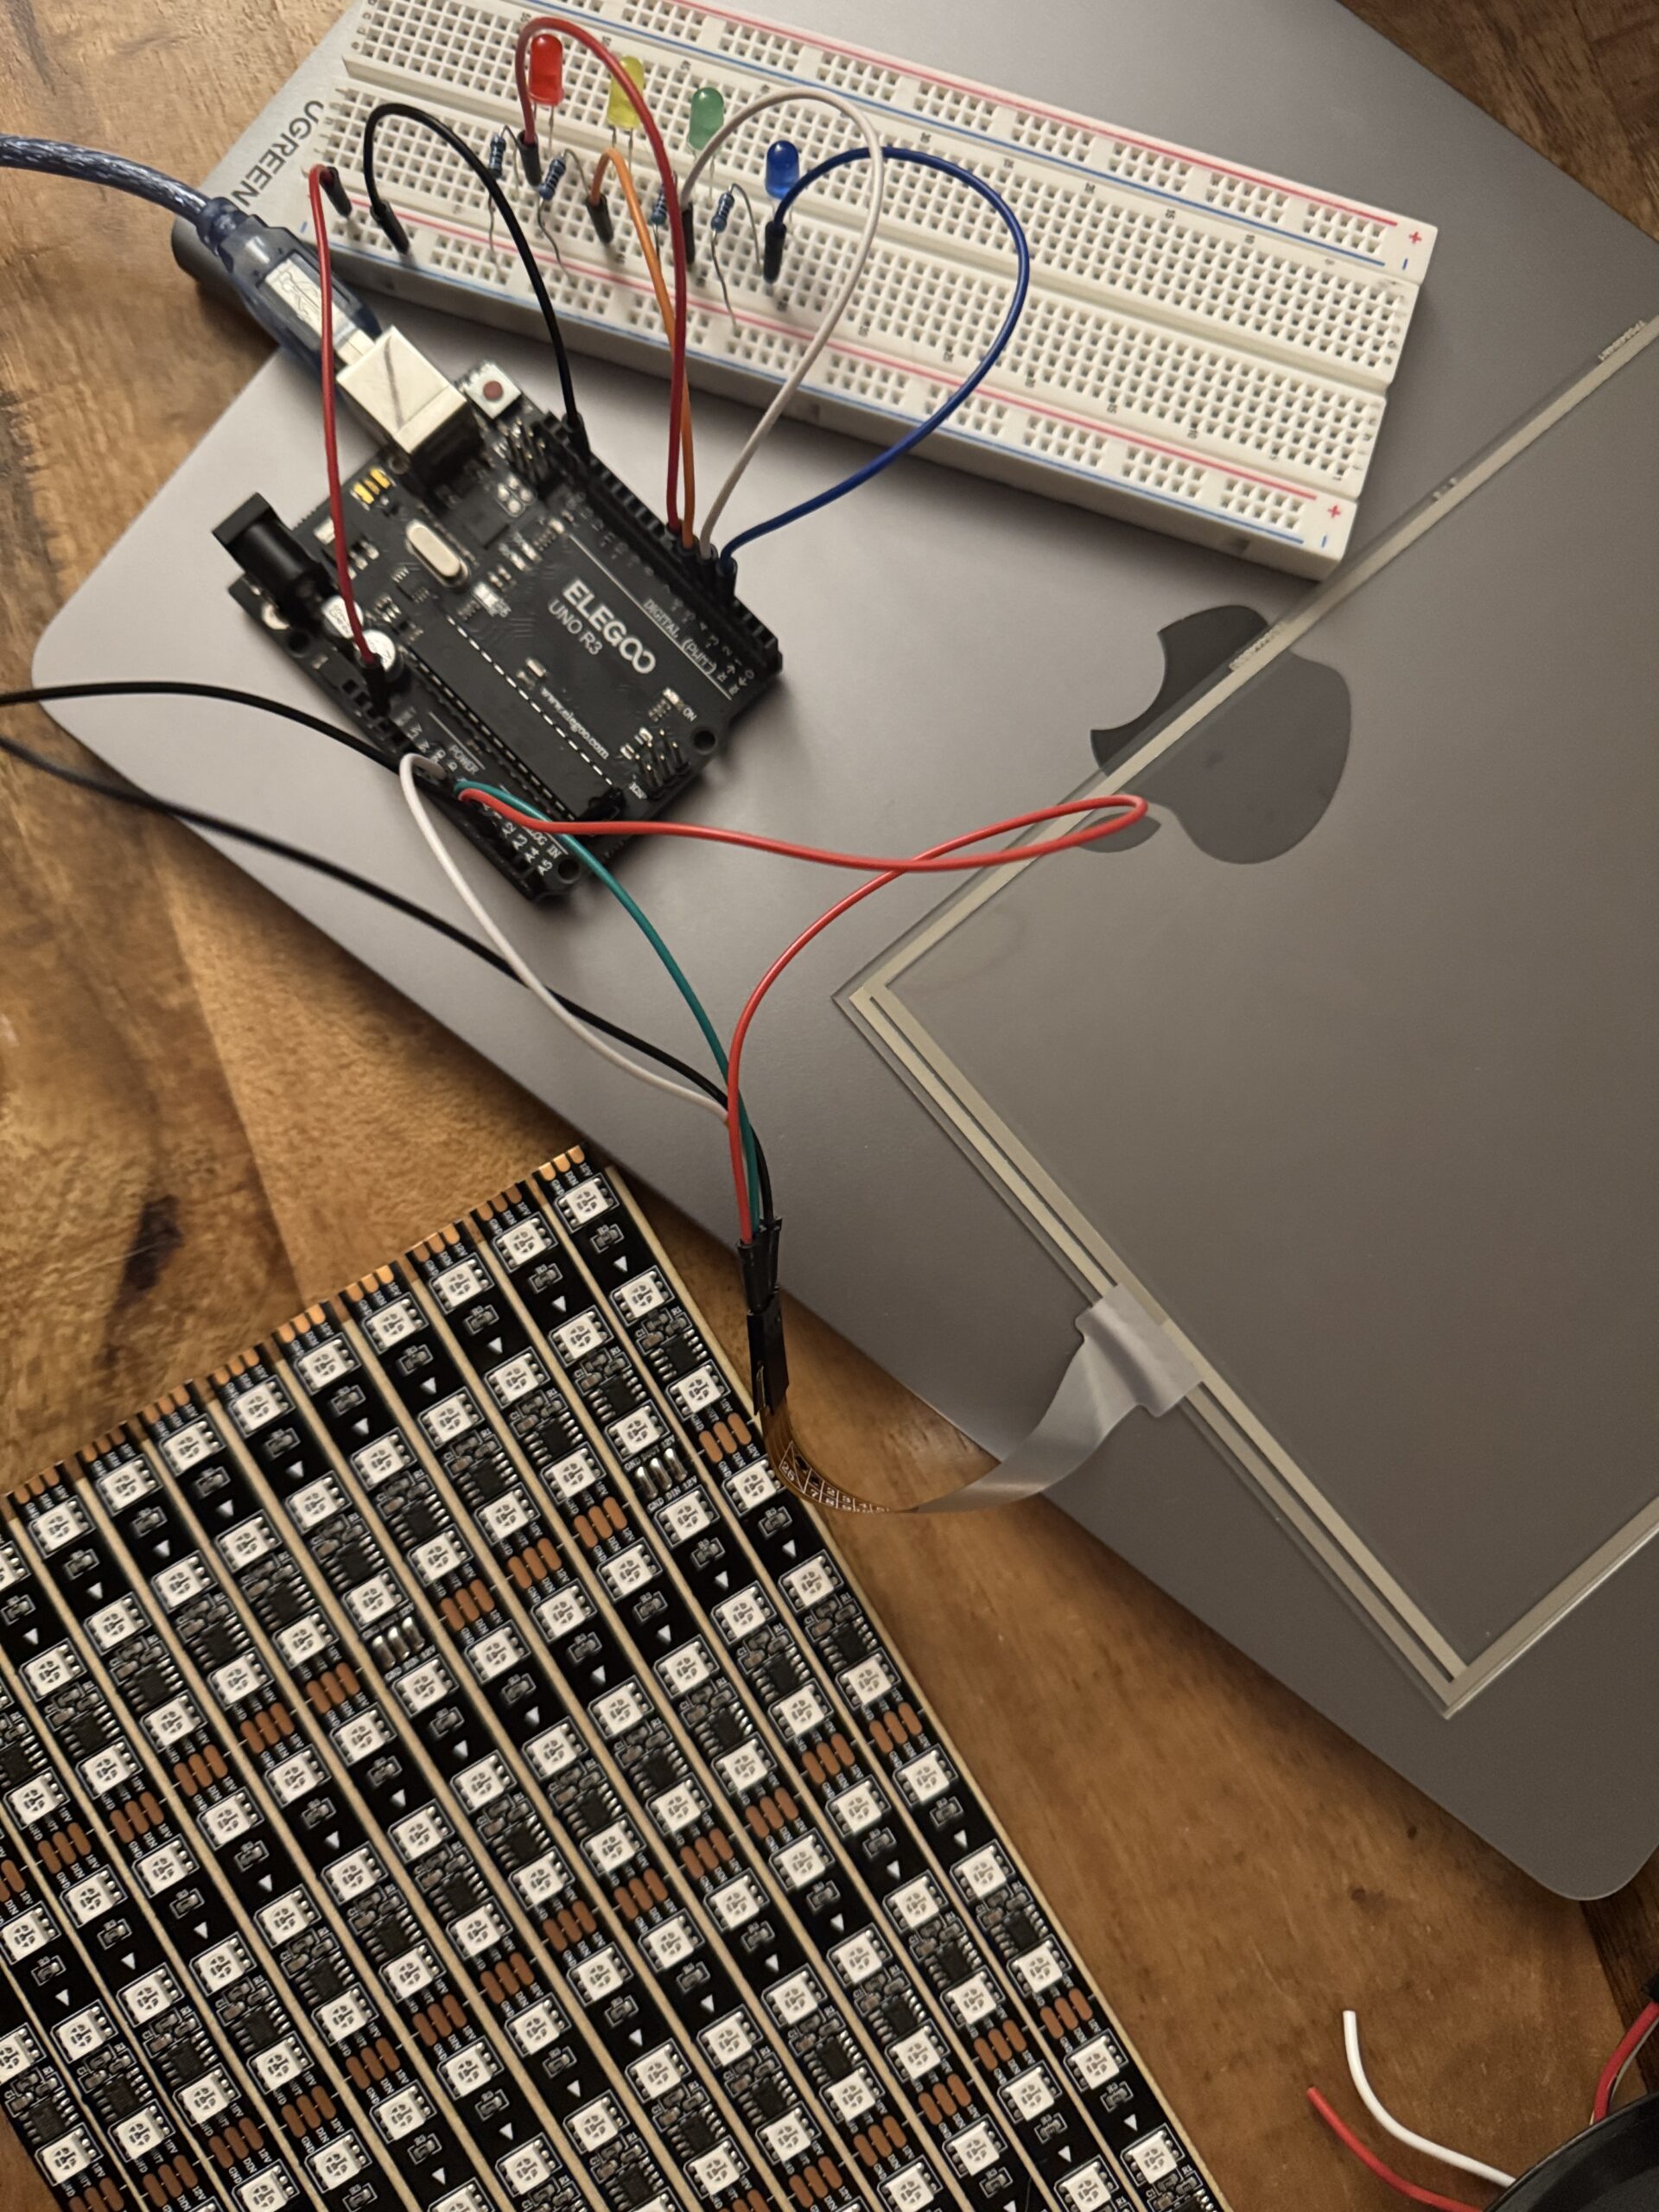
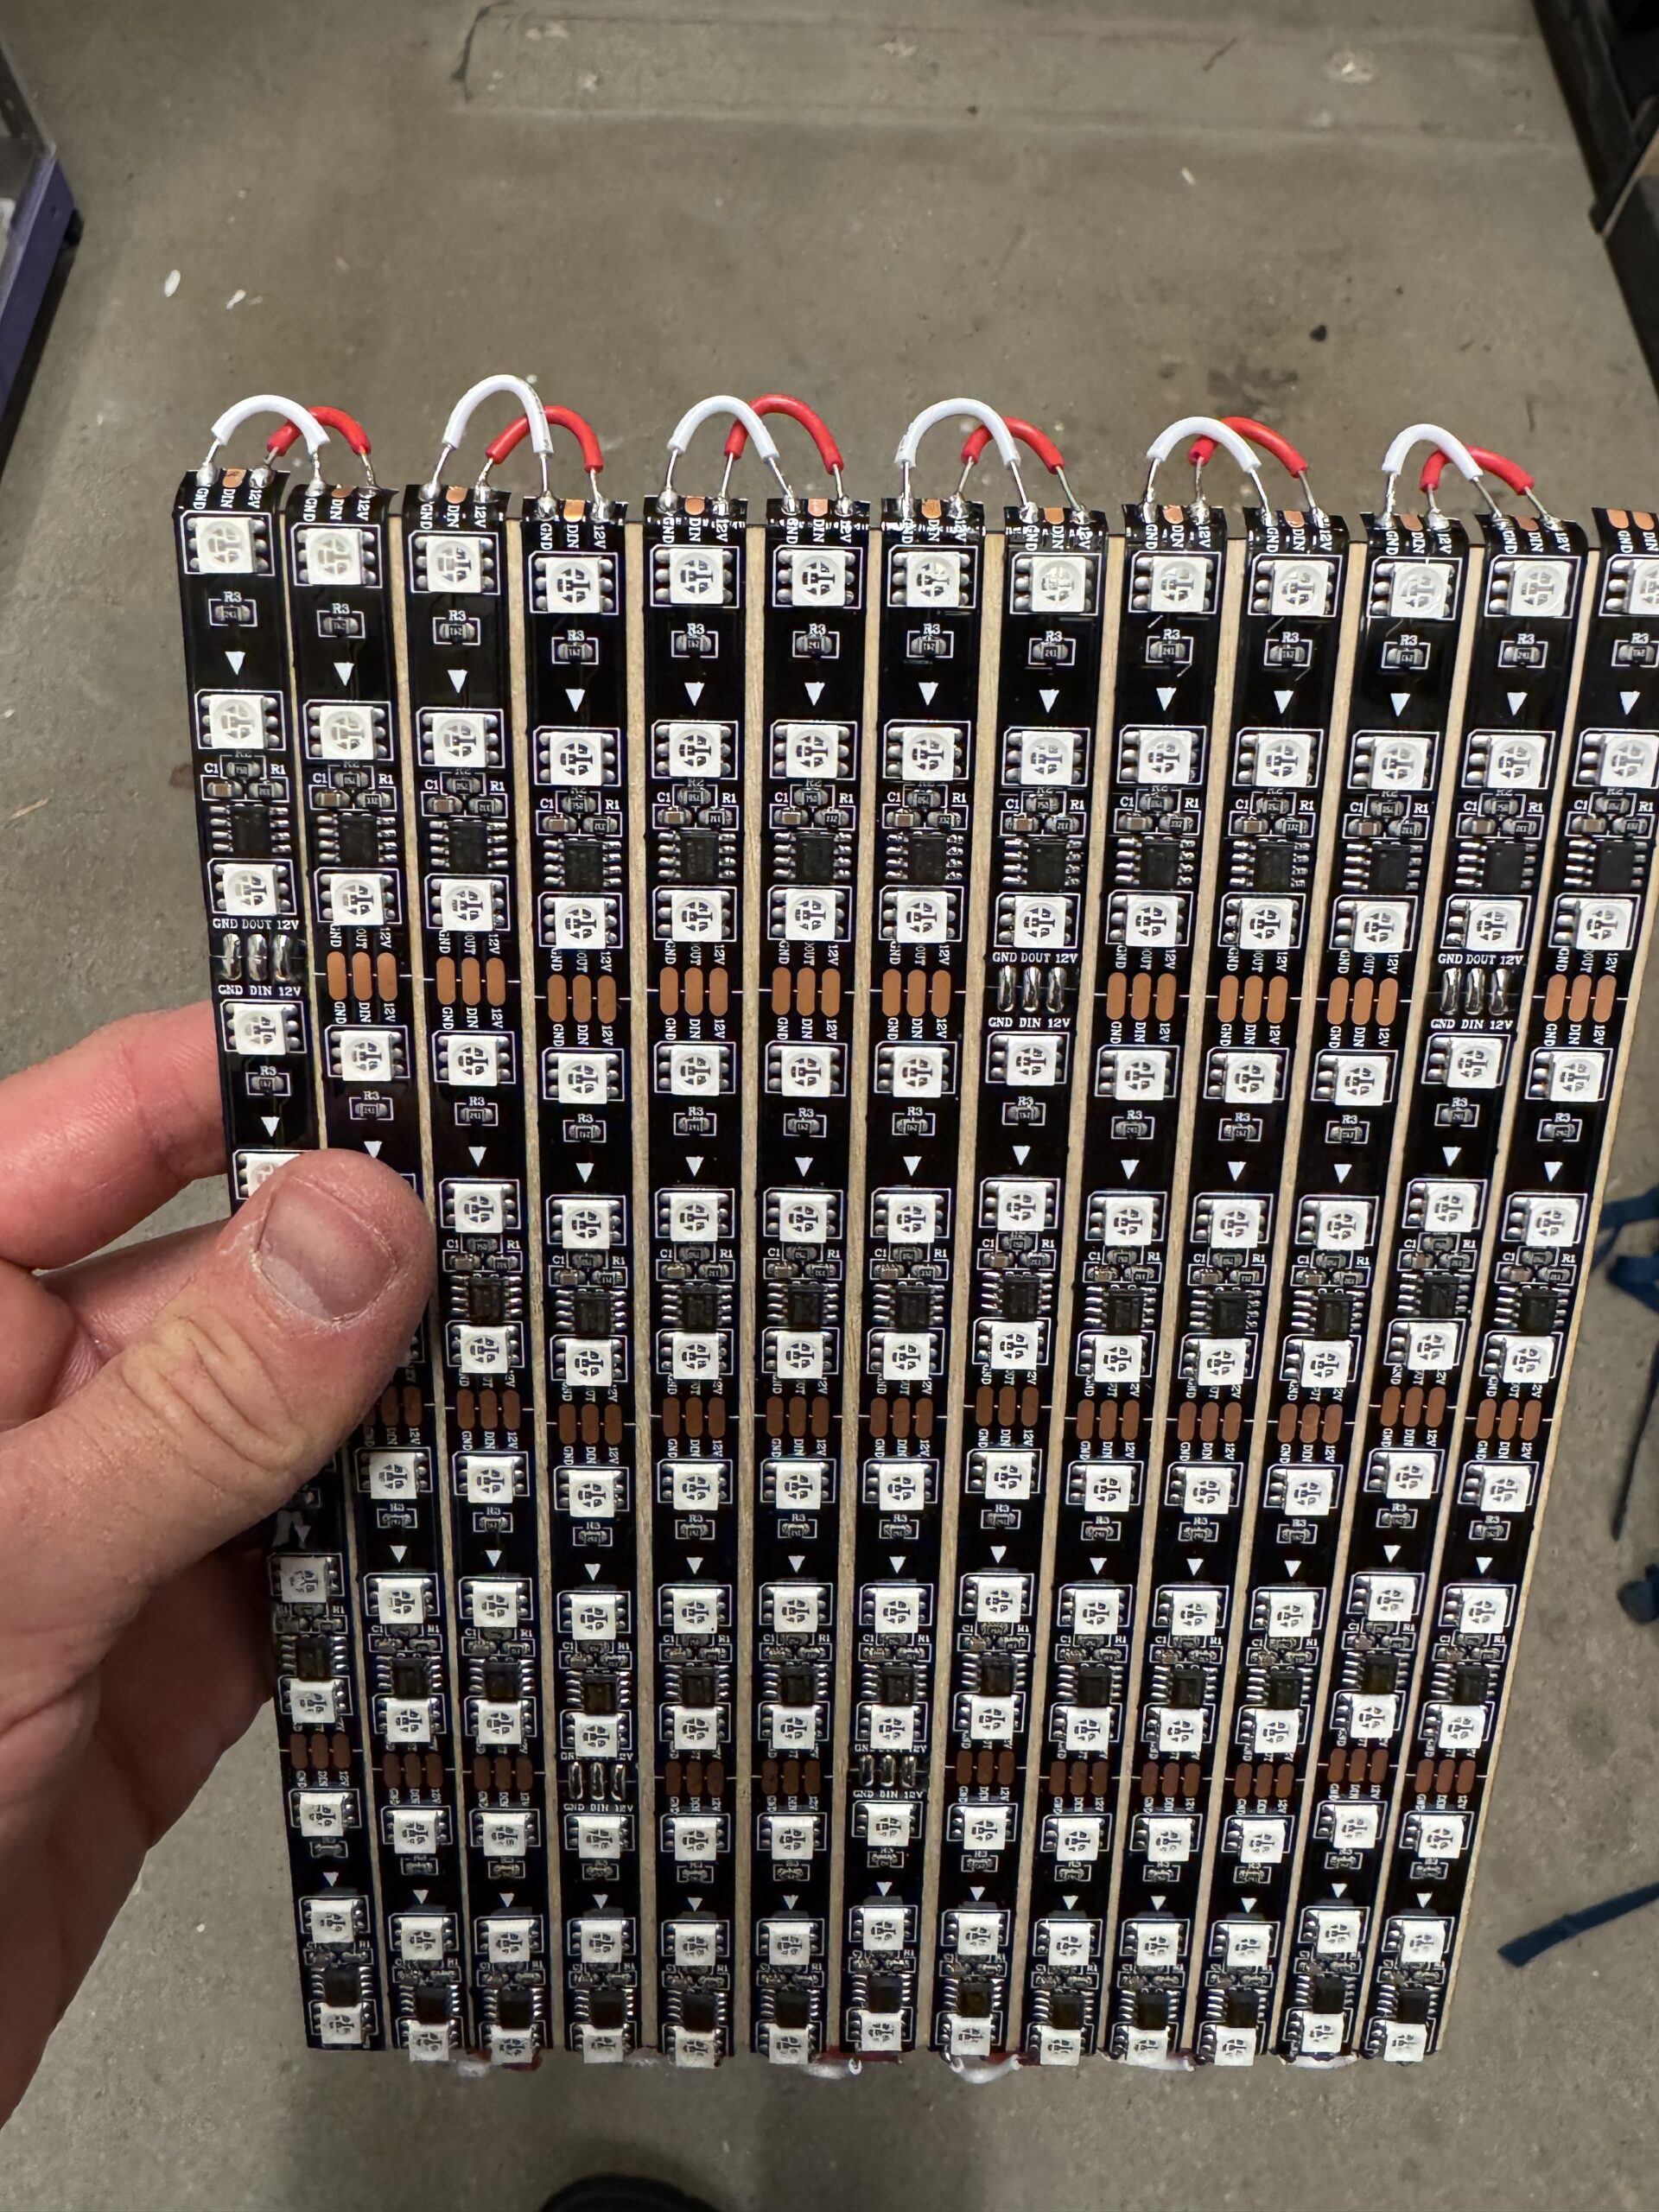
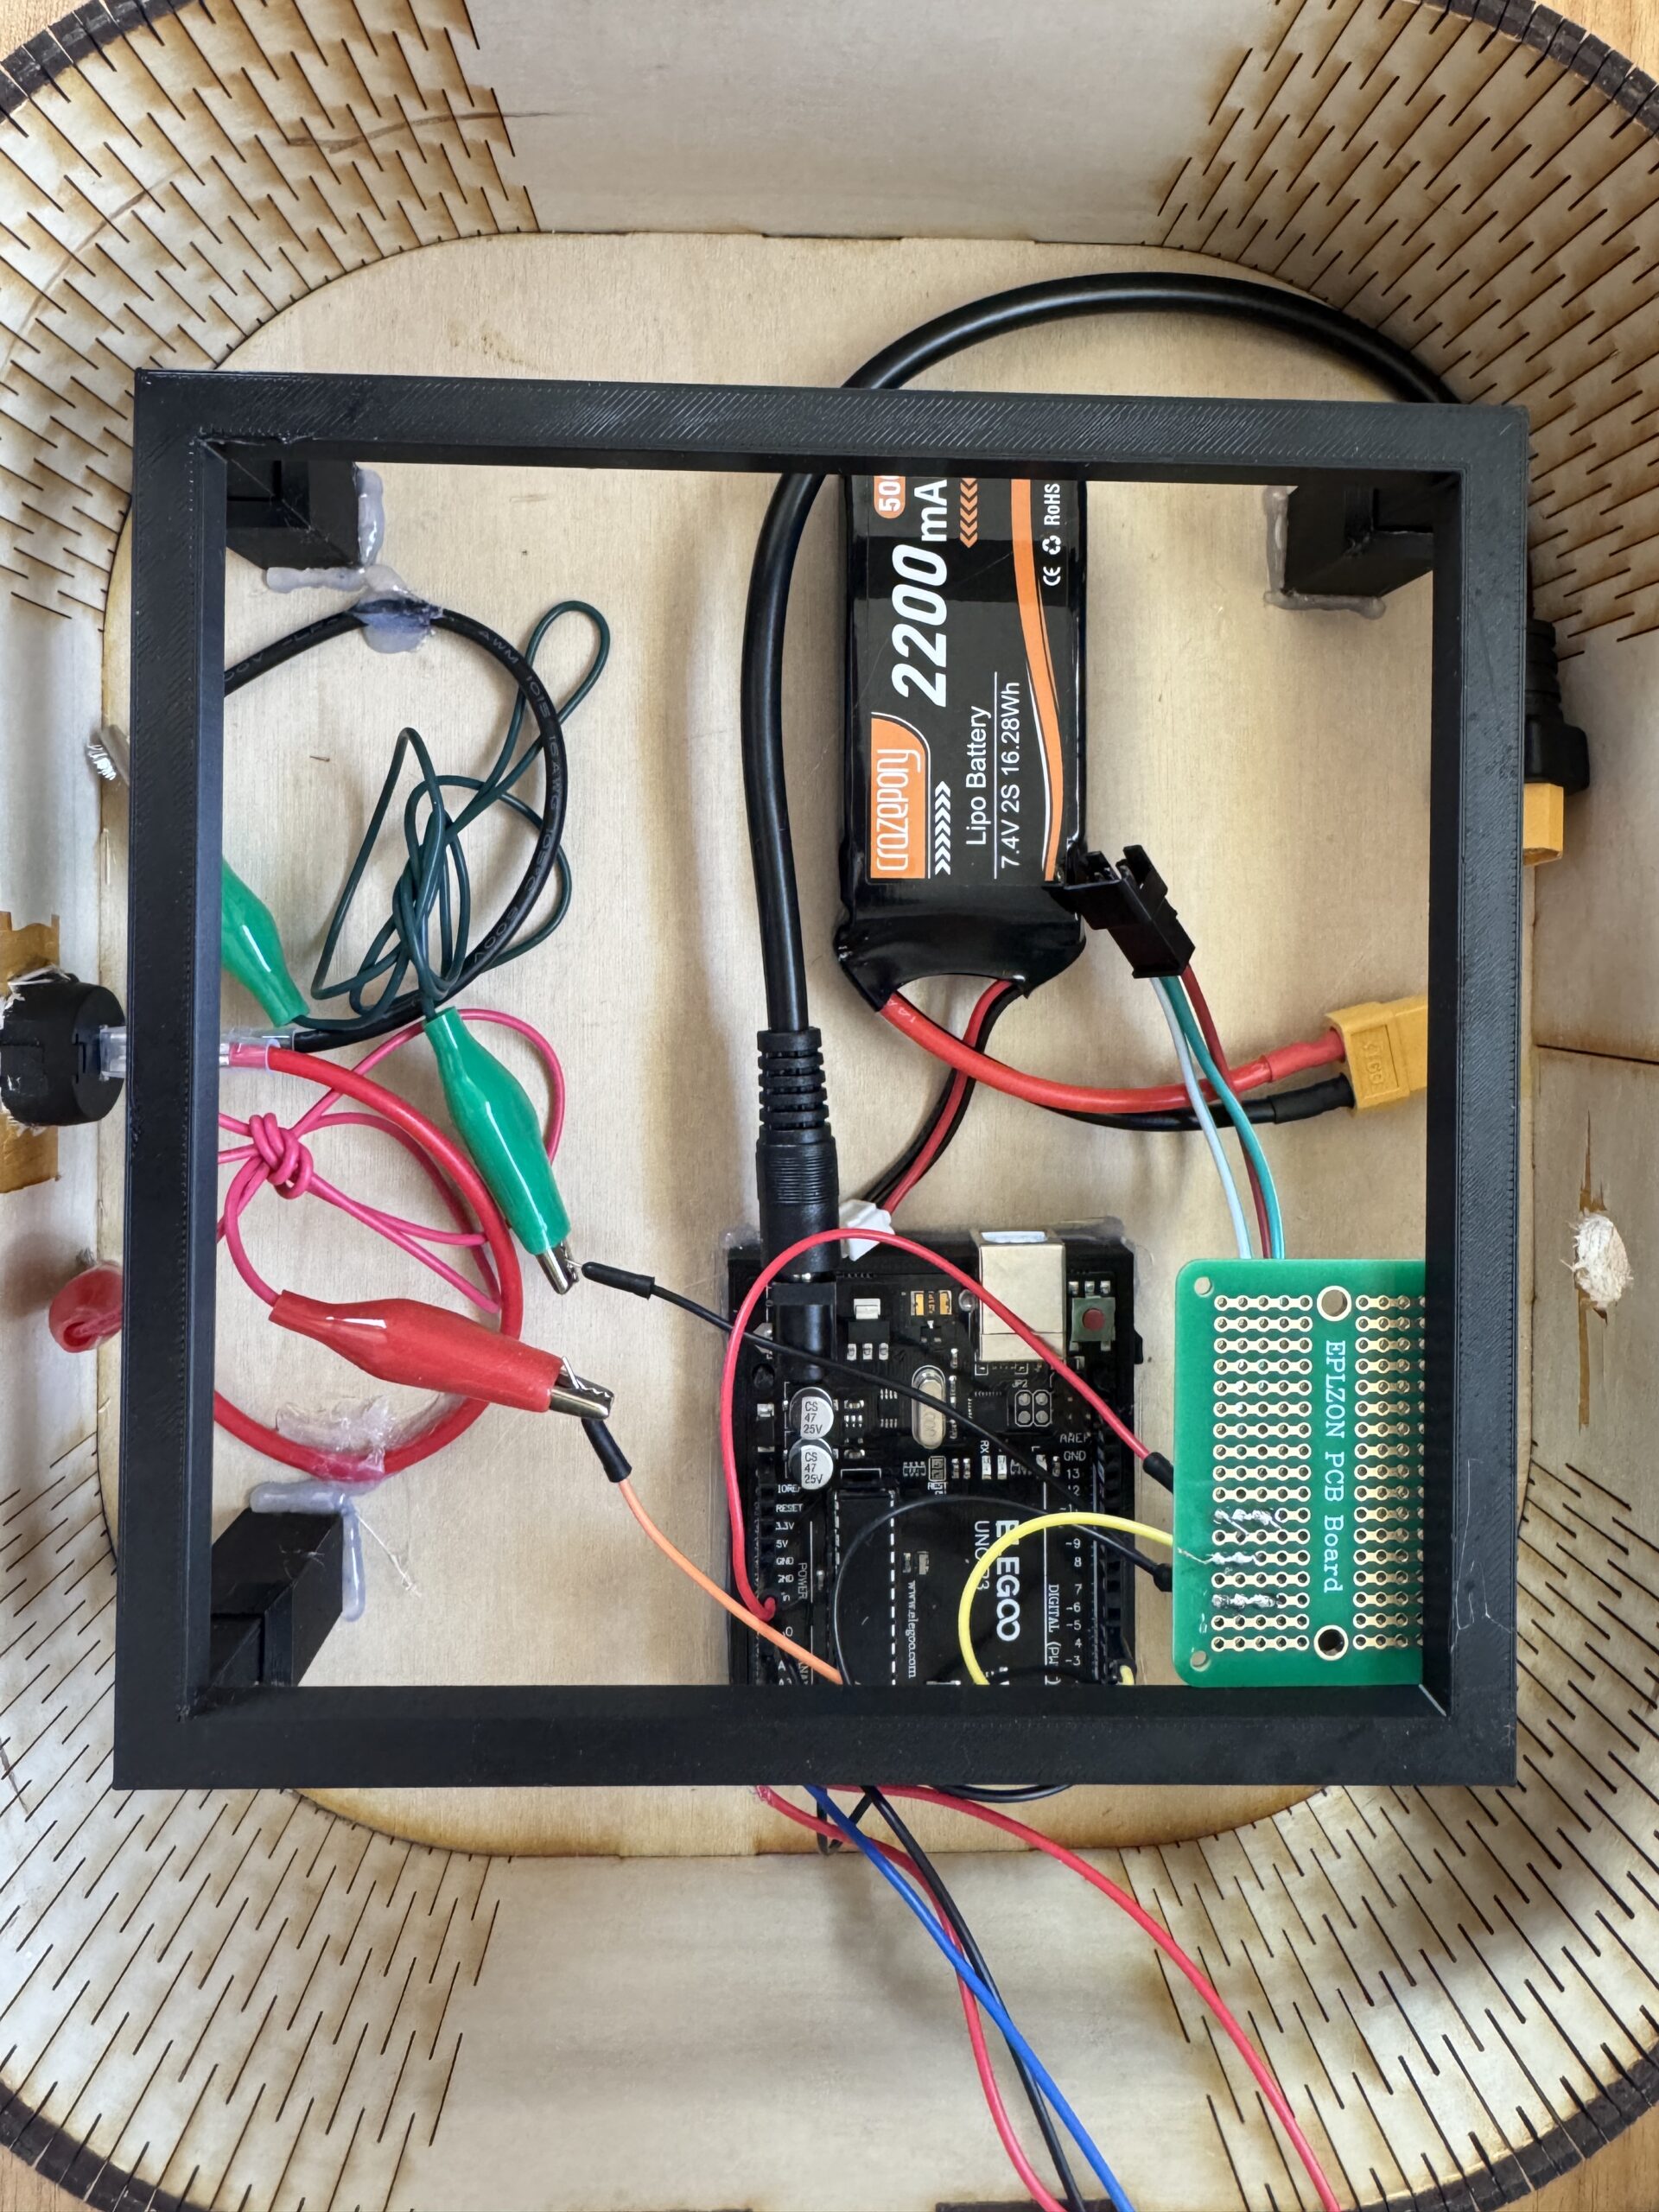
Then, the bulk of my remaining project time was spent on the next step of assembly and testing. Unfortunately, my first time making an LED panel happened to involve me wiring the strips in parallel rather than series, so I spent a good deal of time unsoldering and resoldering several connections before graduating the touch screen from four test LEDs (one for each quadrant) into the full light show. Several hours later, we were ready for testing:
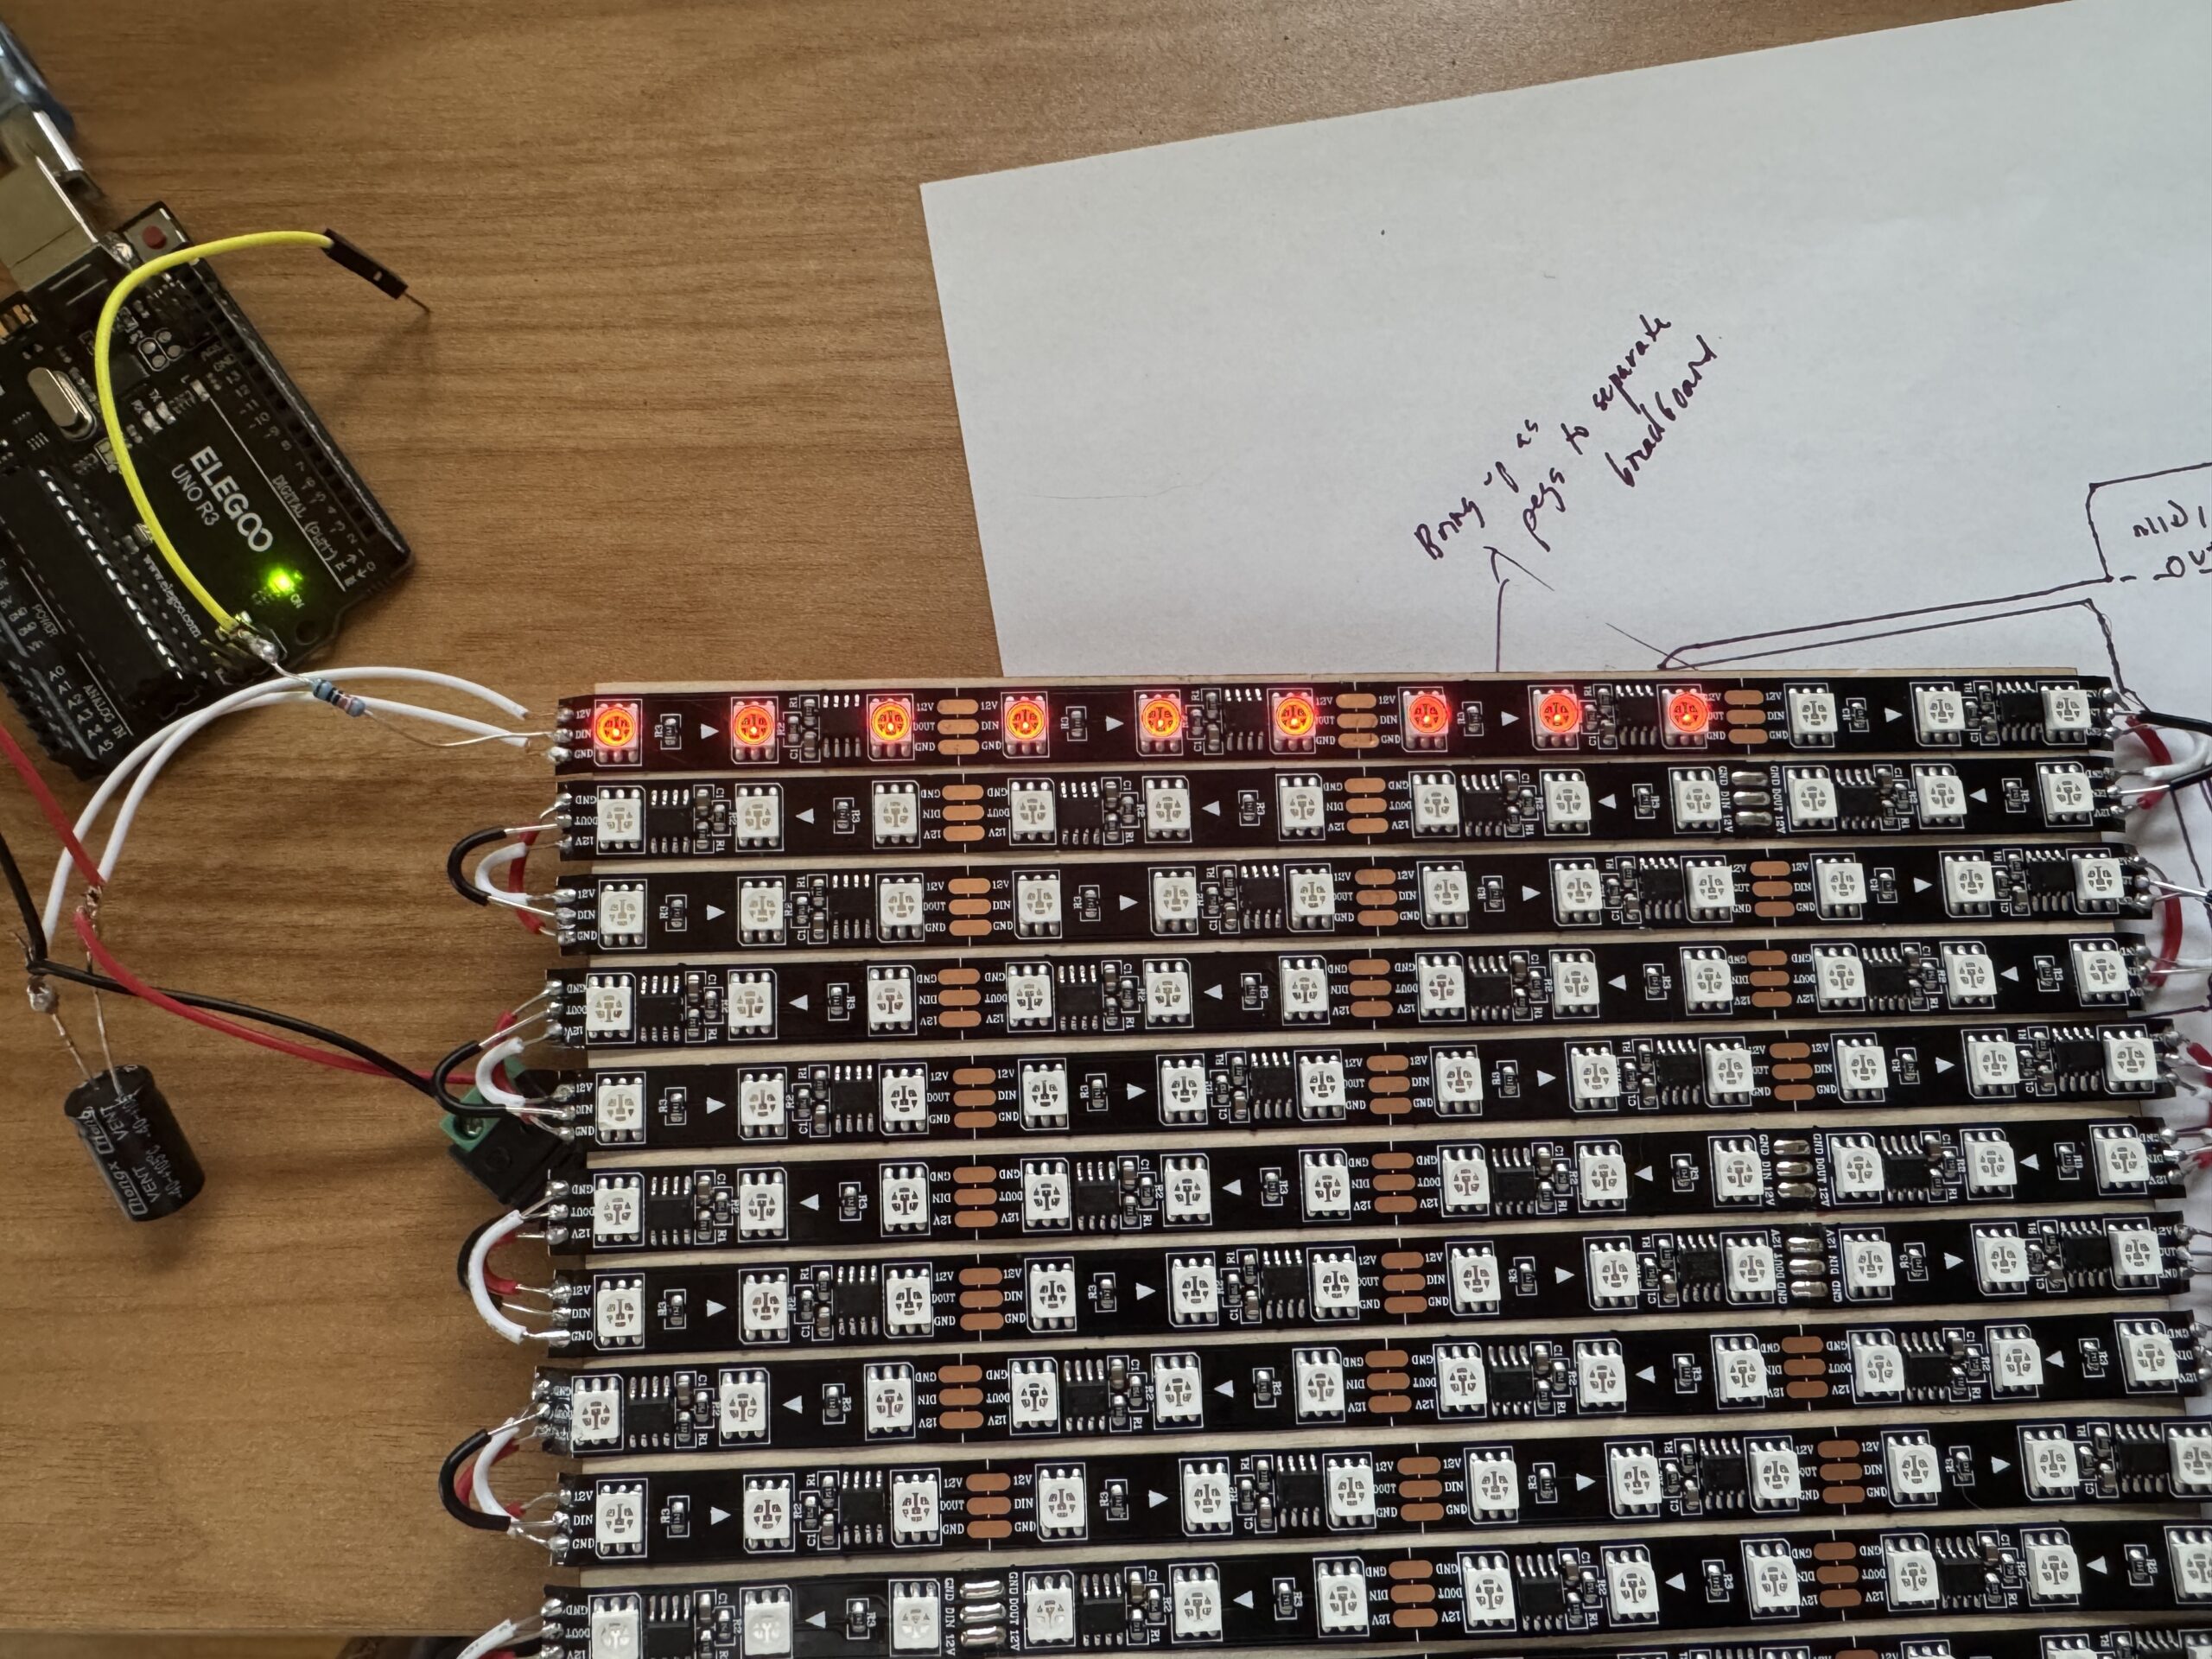
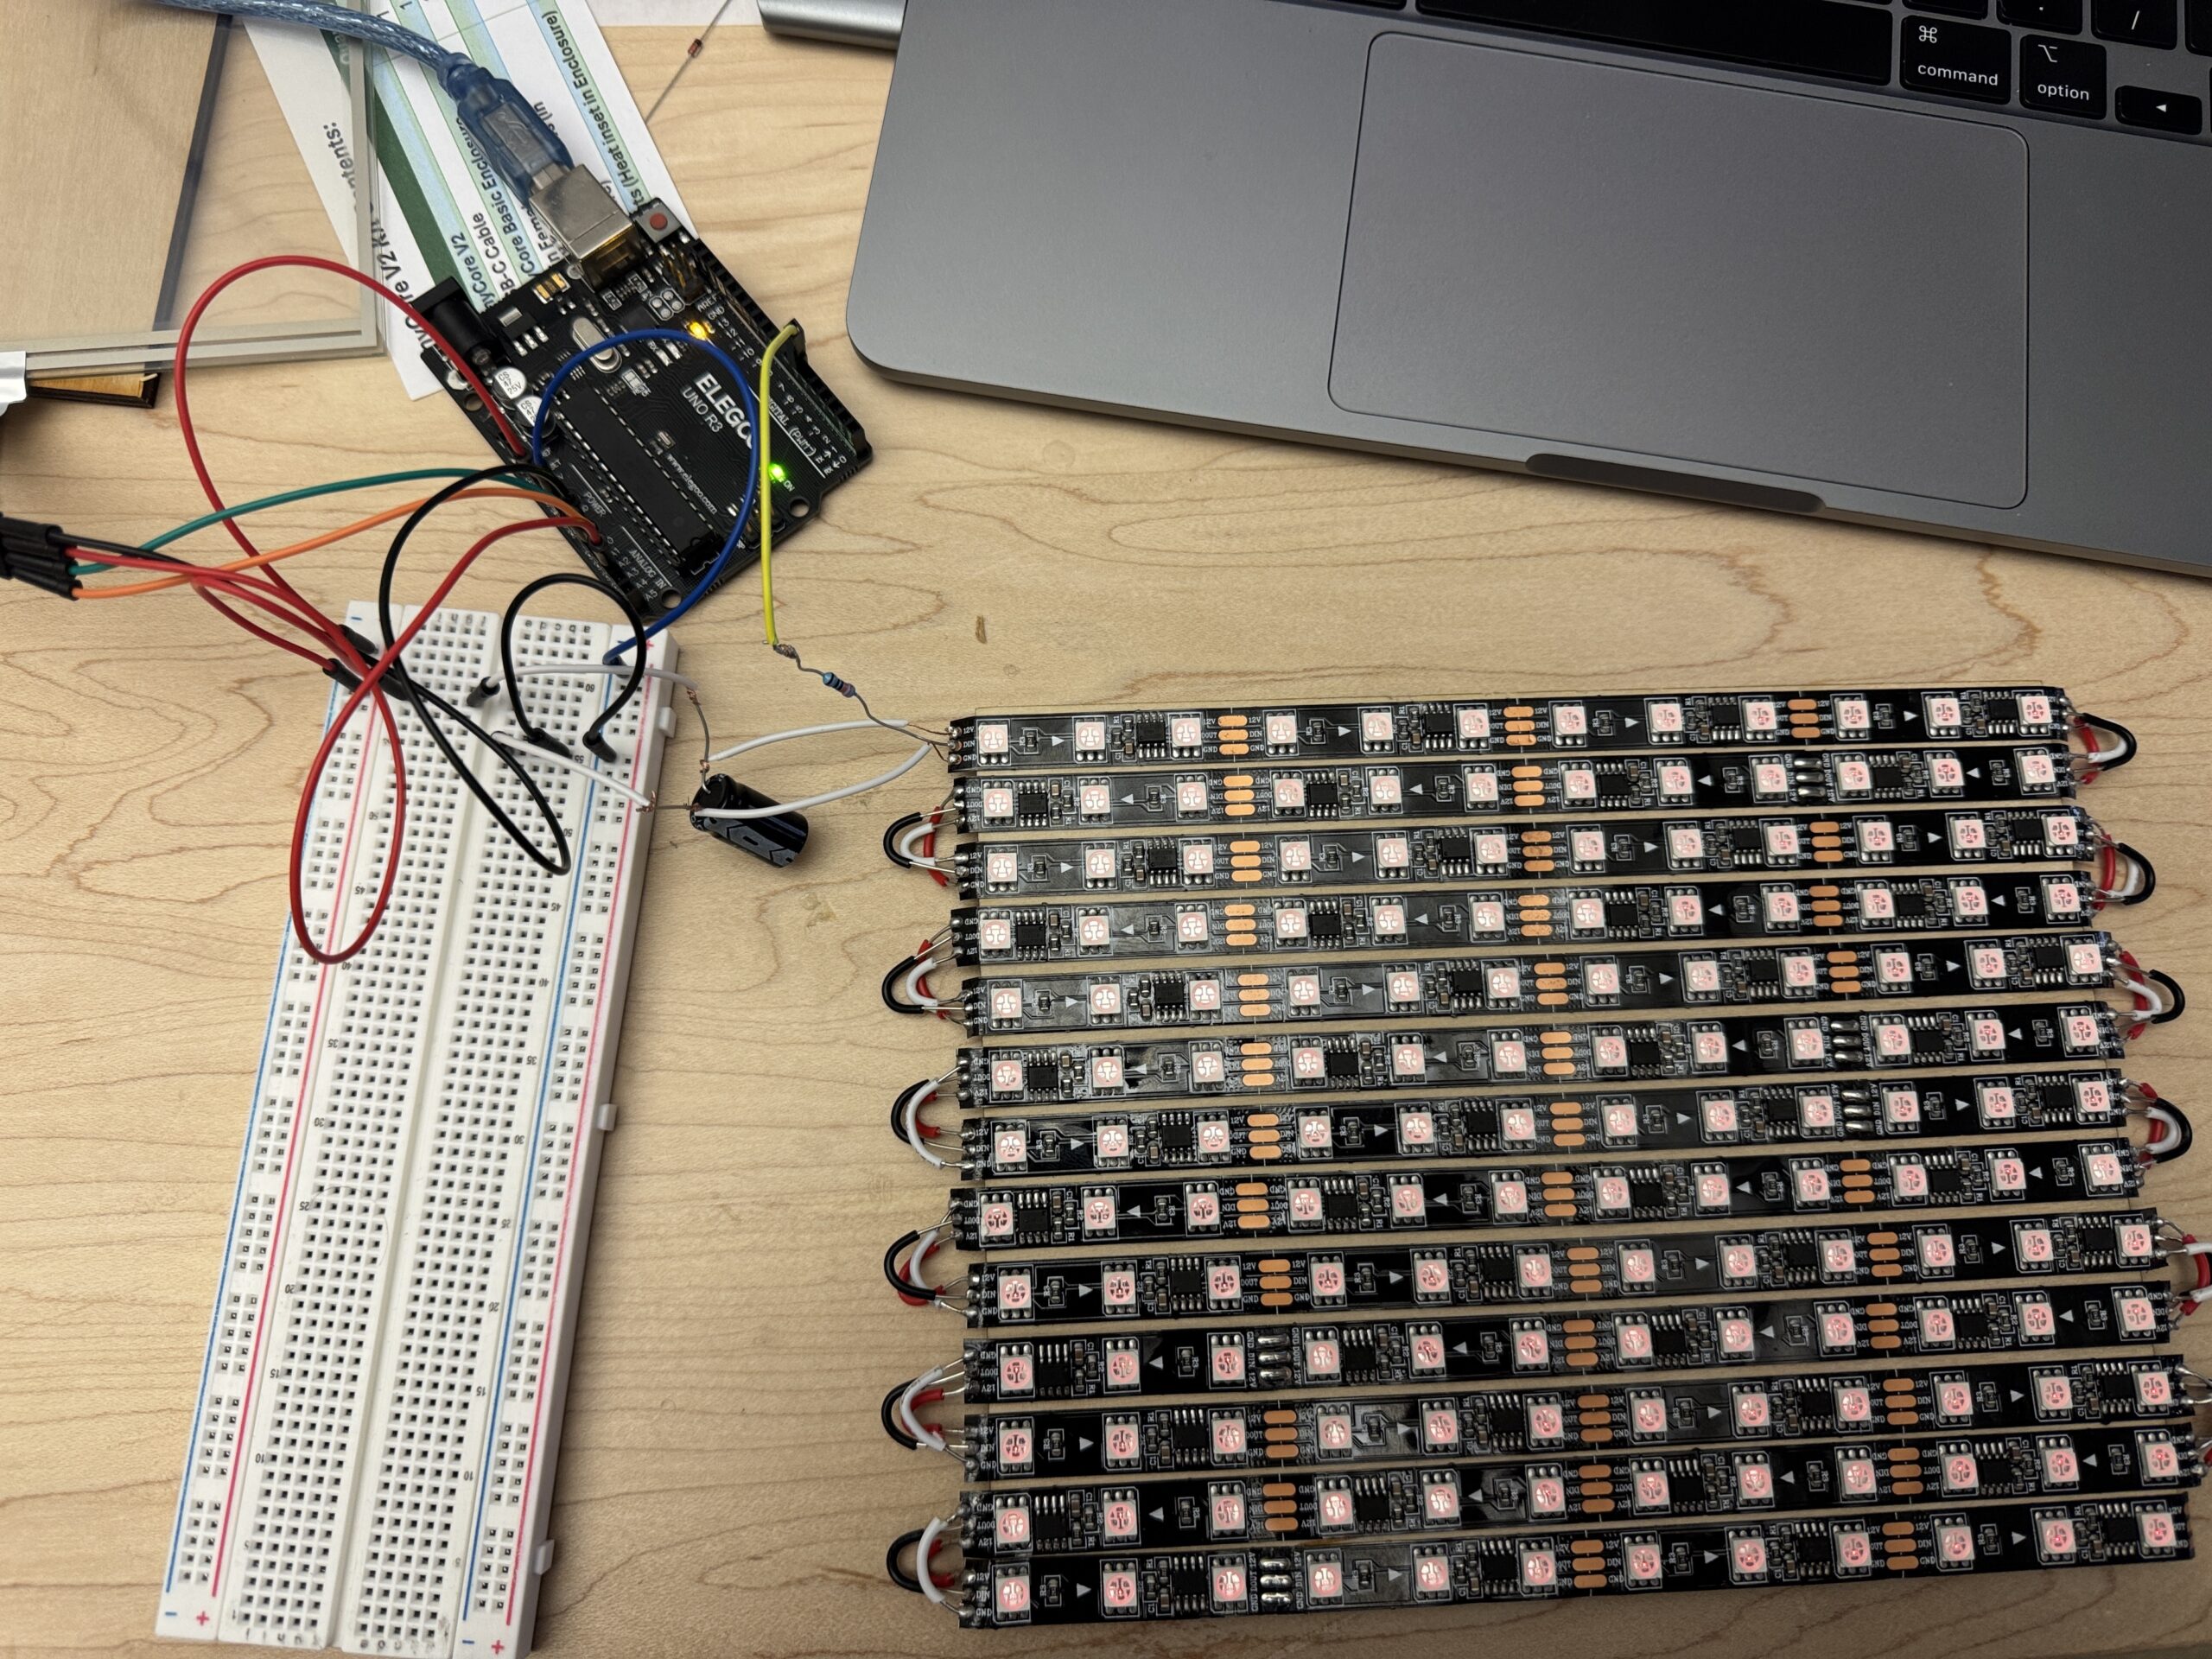
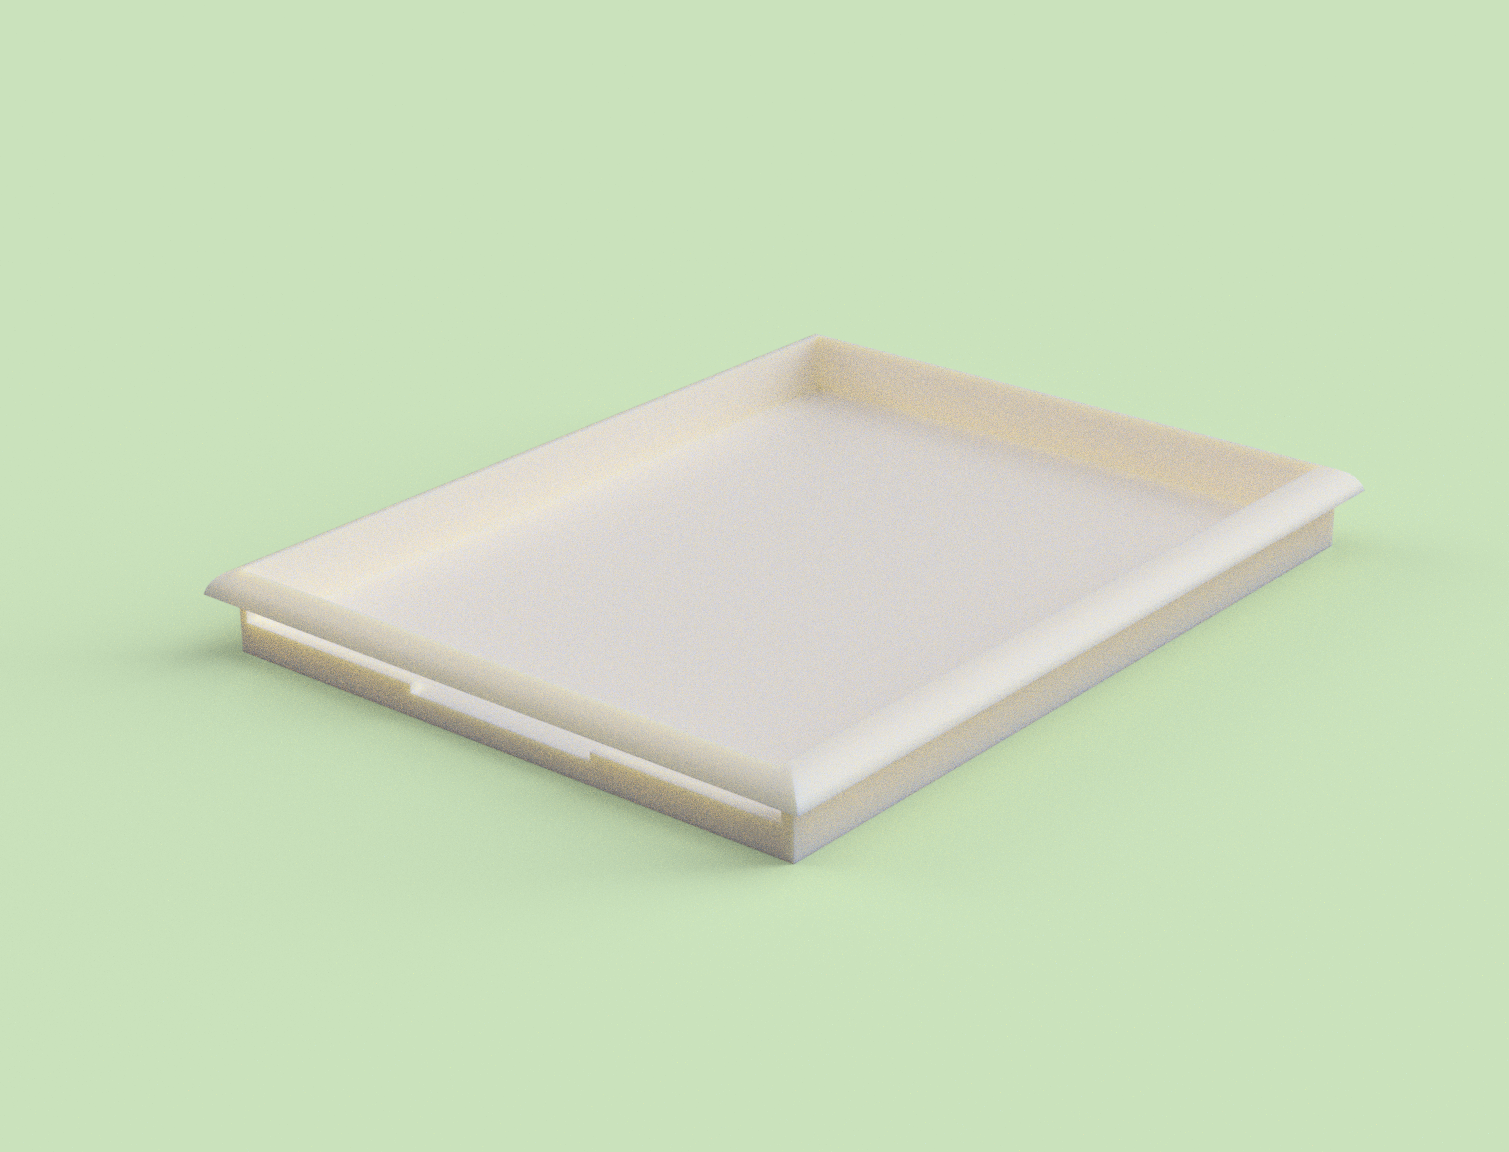
As you can see in the photos, this step brought up some more questions for me – I couldn’t get the panel activated at full brightness without sacrificing pixels along the way. For my own sanity, I took a pause and moved onto figuring out how to get my glass touch screen to fit within the top face of the box. To solve for this problem, I measured and modeled a sort of screen holder in Fusion with an opening for the screen’s X and Y wires to stay hidden underneath the top face:
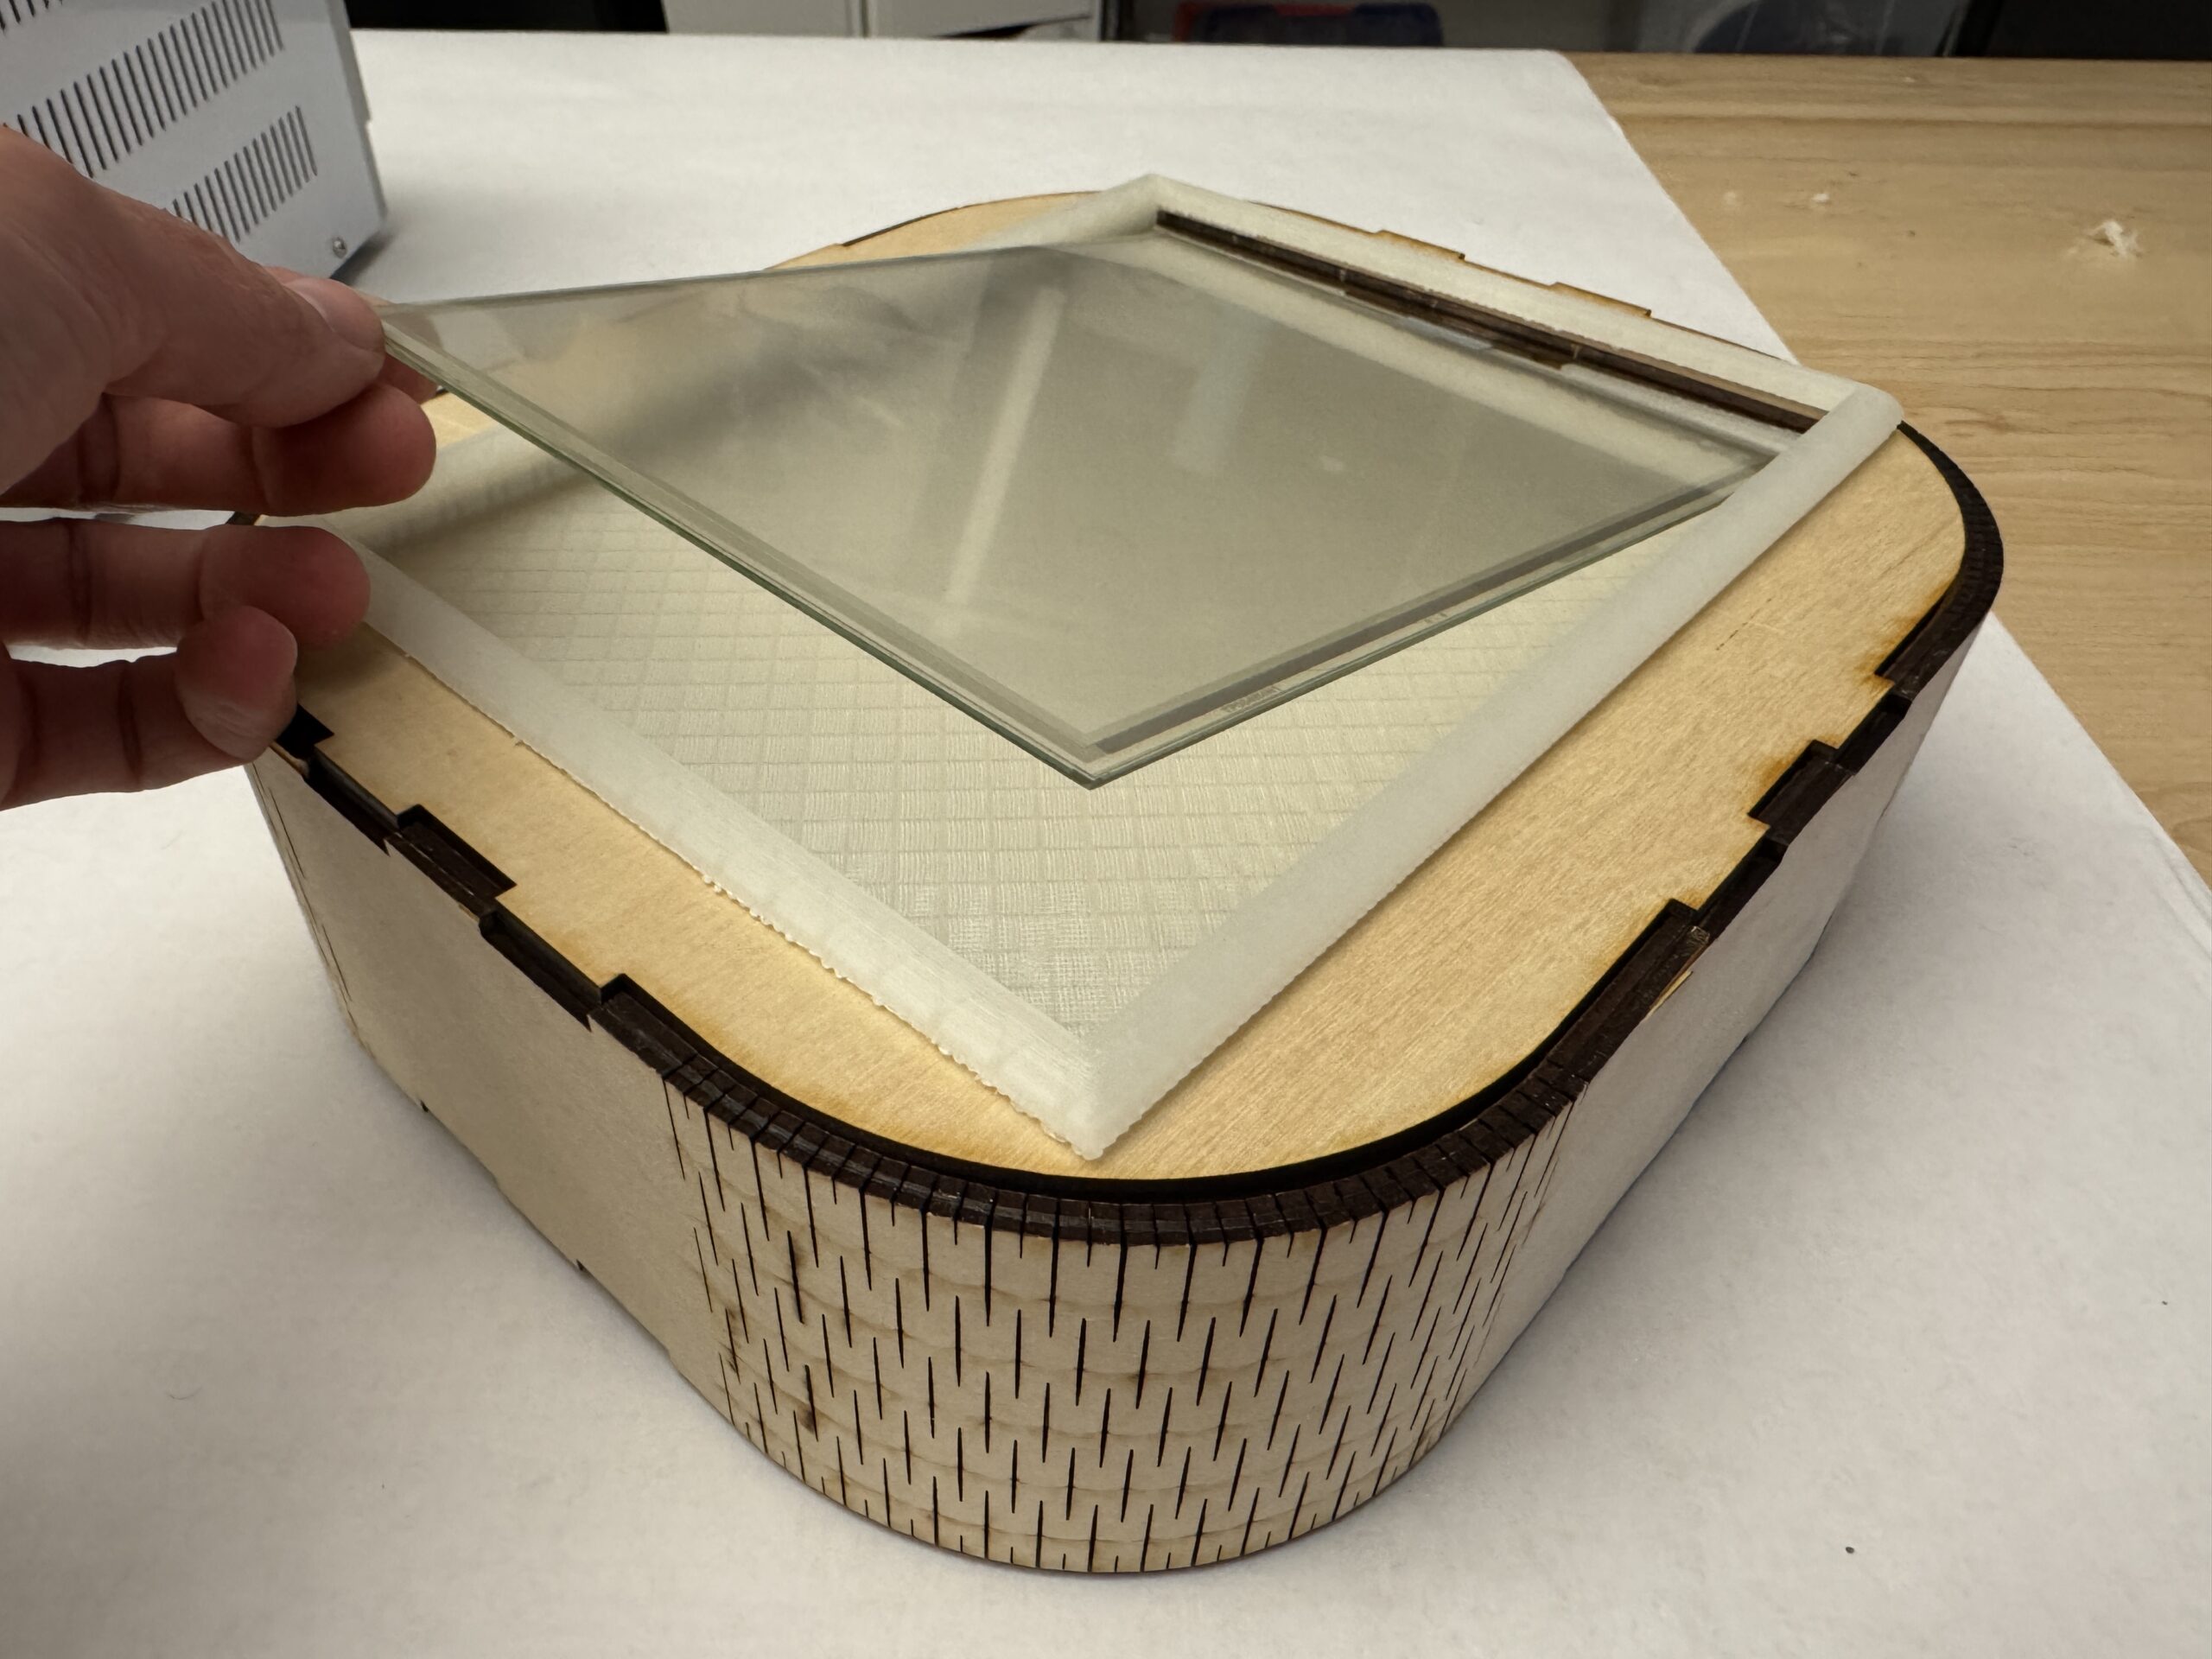
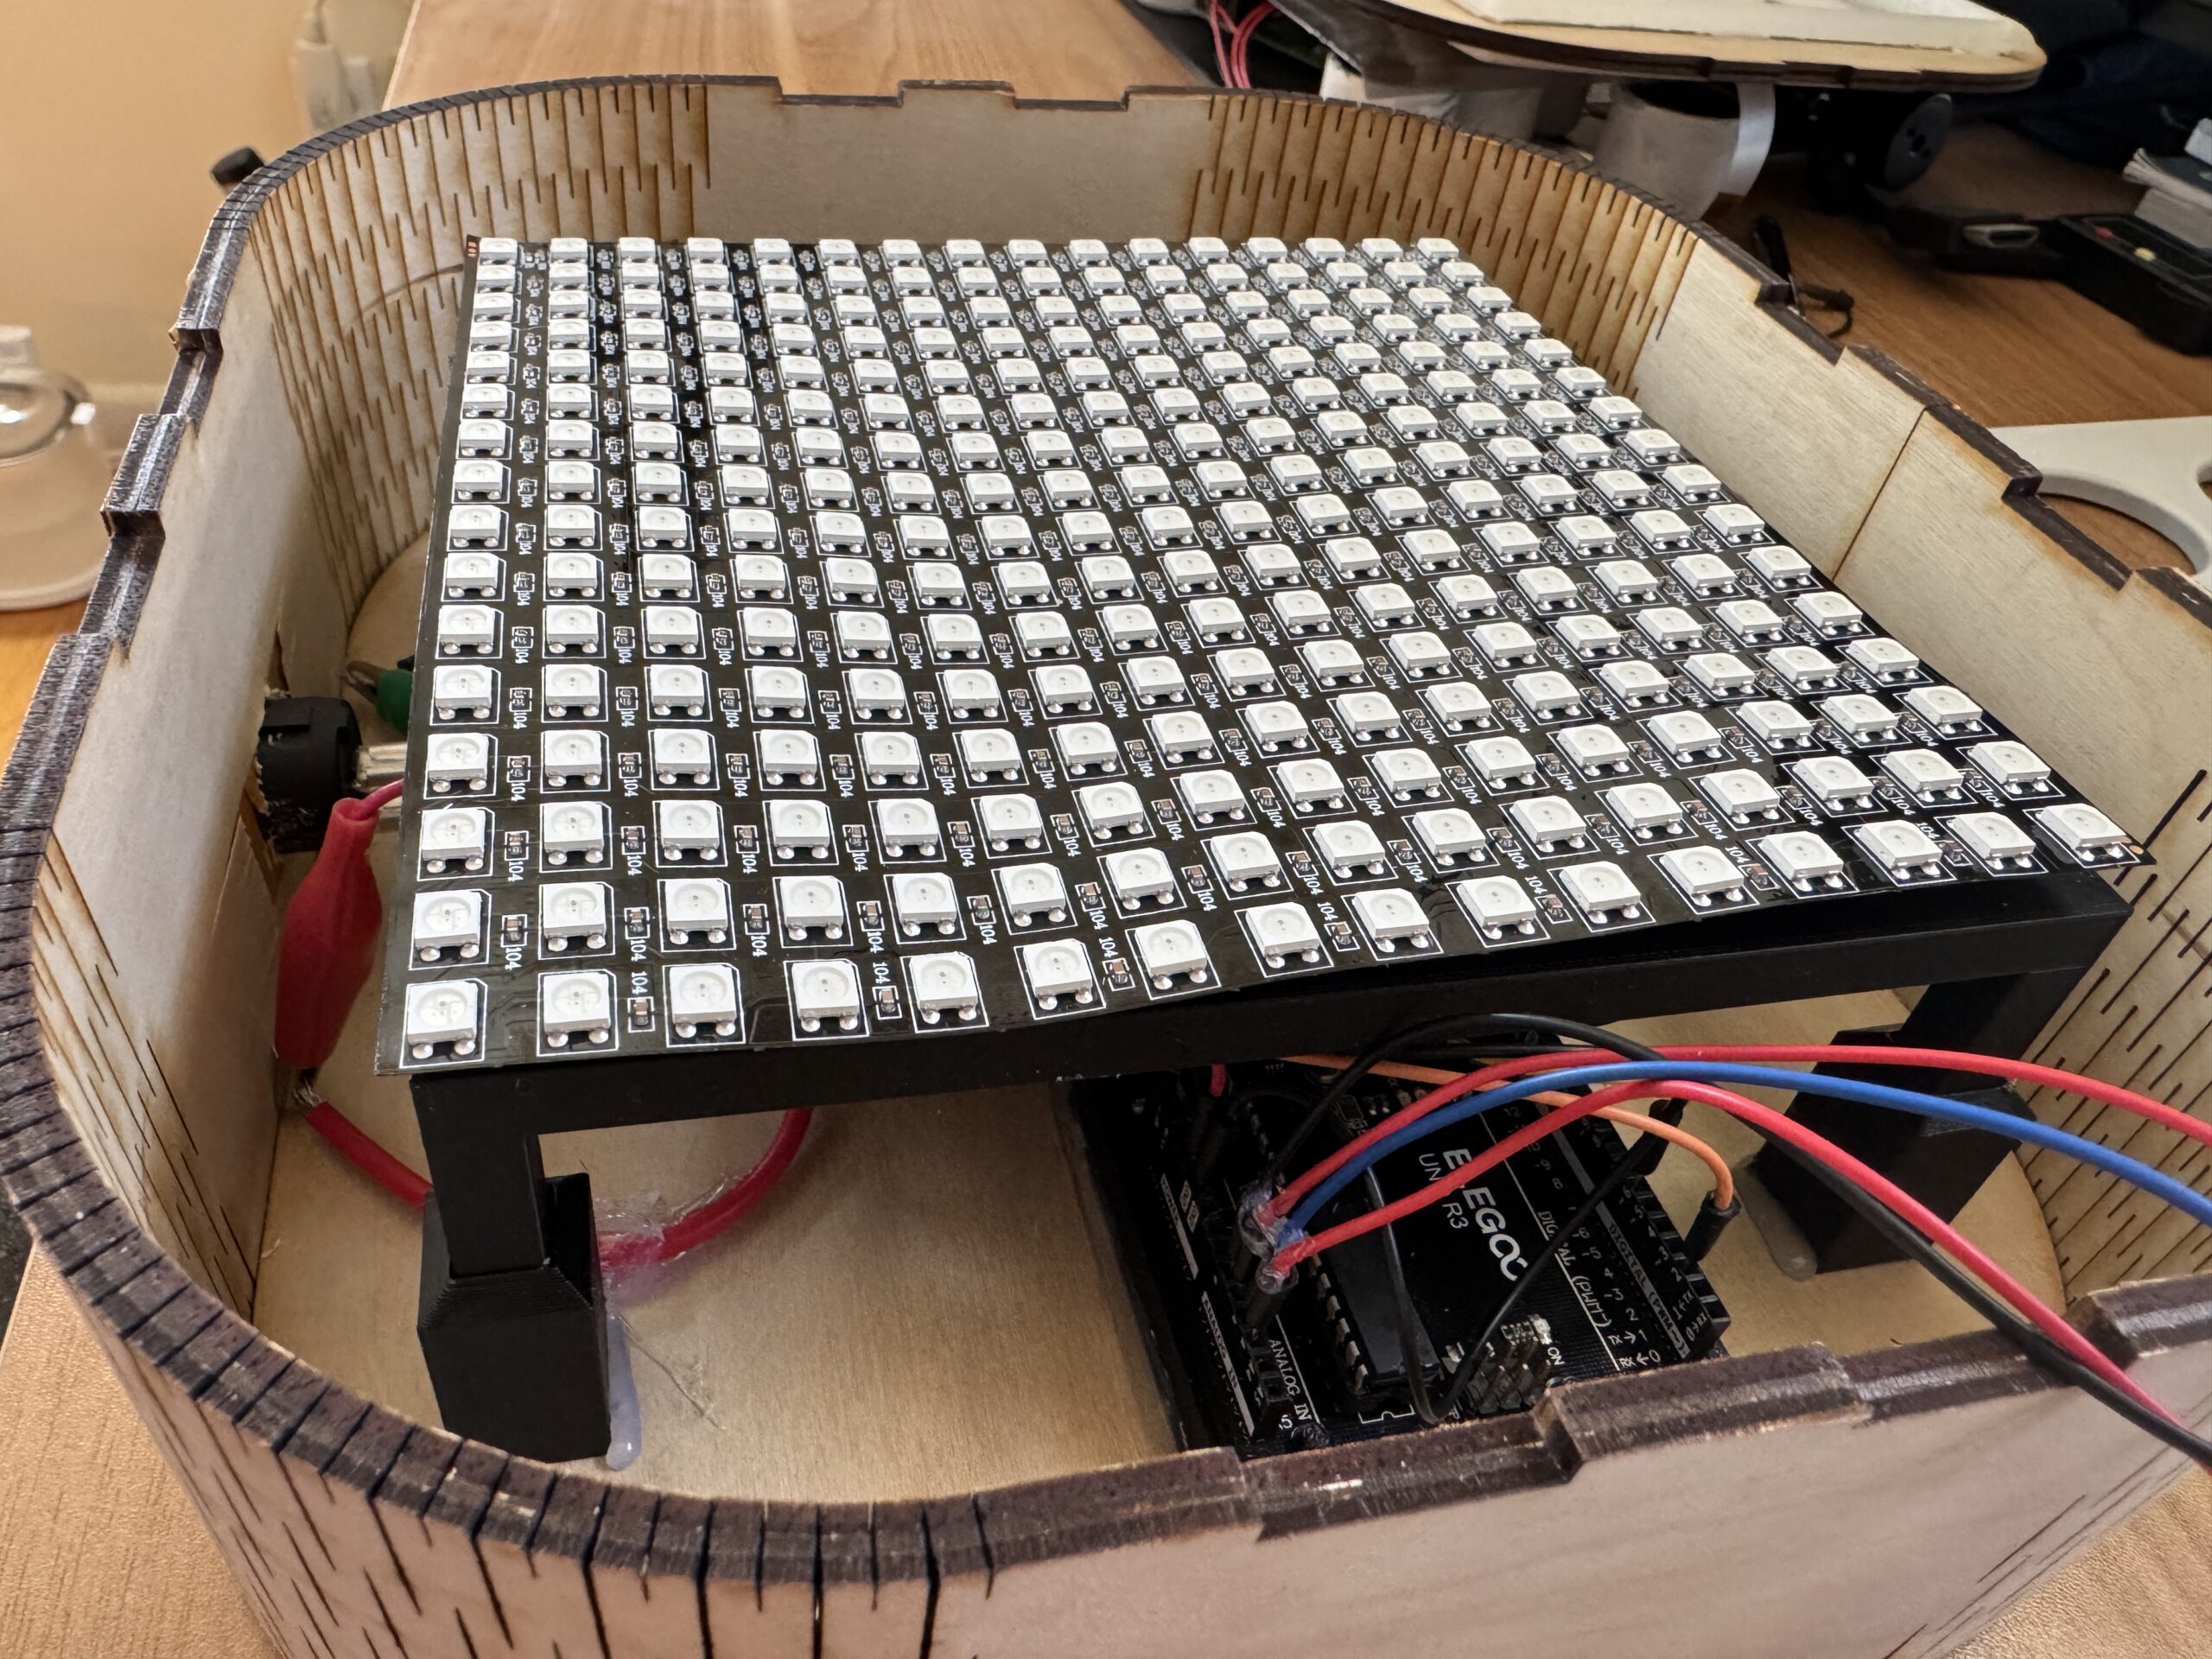
Once this was printed using some leftover transparent 3D filament and assembled into the box, my spirit was cleared enough to return to the electronics. As I laid my handmade LED panel to rest, I took the purchased 16×16 grid and modeled and printed a stand for it to rest just underneath the screen holder. This brought the lights right to the surface of the screen and wood, plus allowed me to ‘cover up’ the messiness of the circuit below, which I tried to keep as organized as possible! (Including a printed holder for my Elegoo Uno microcontroller).
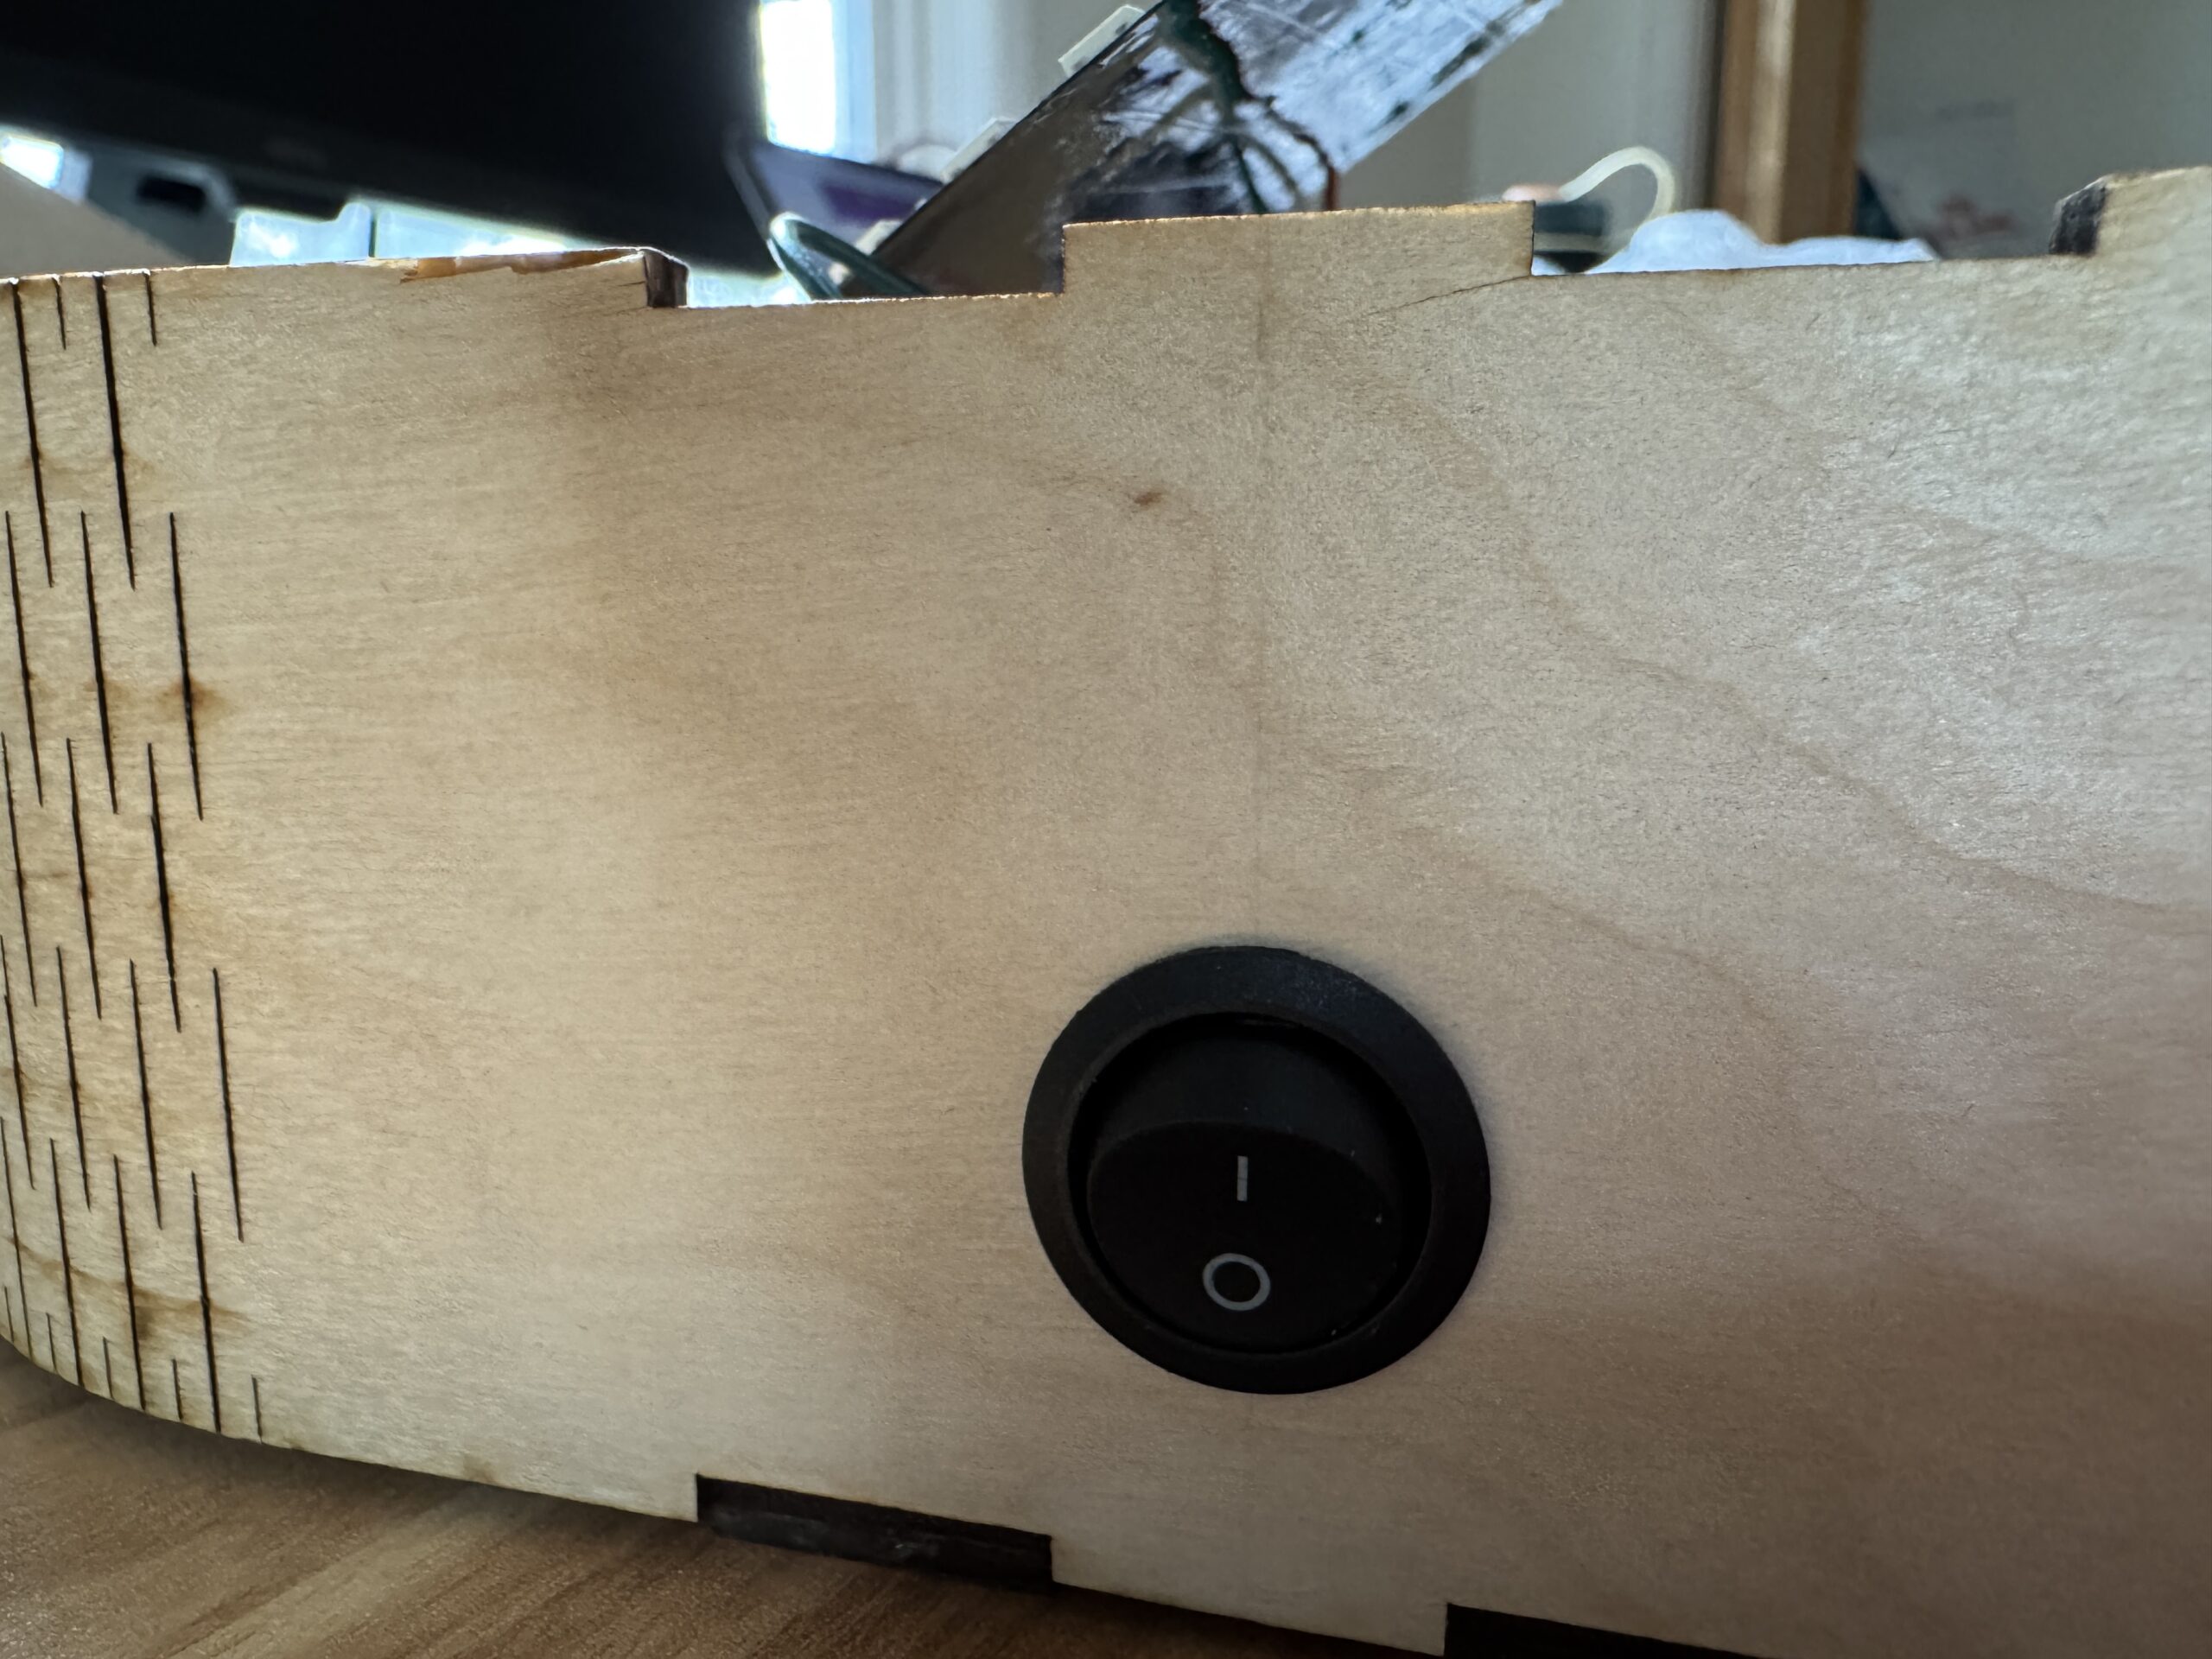
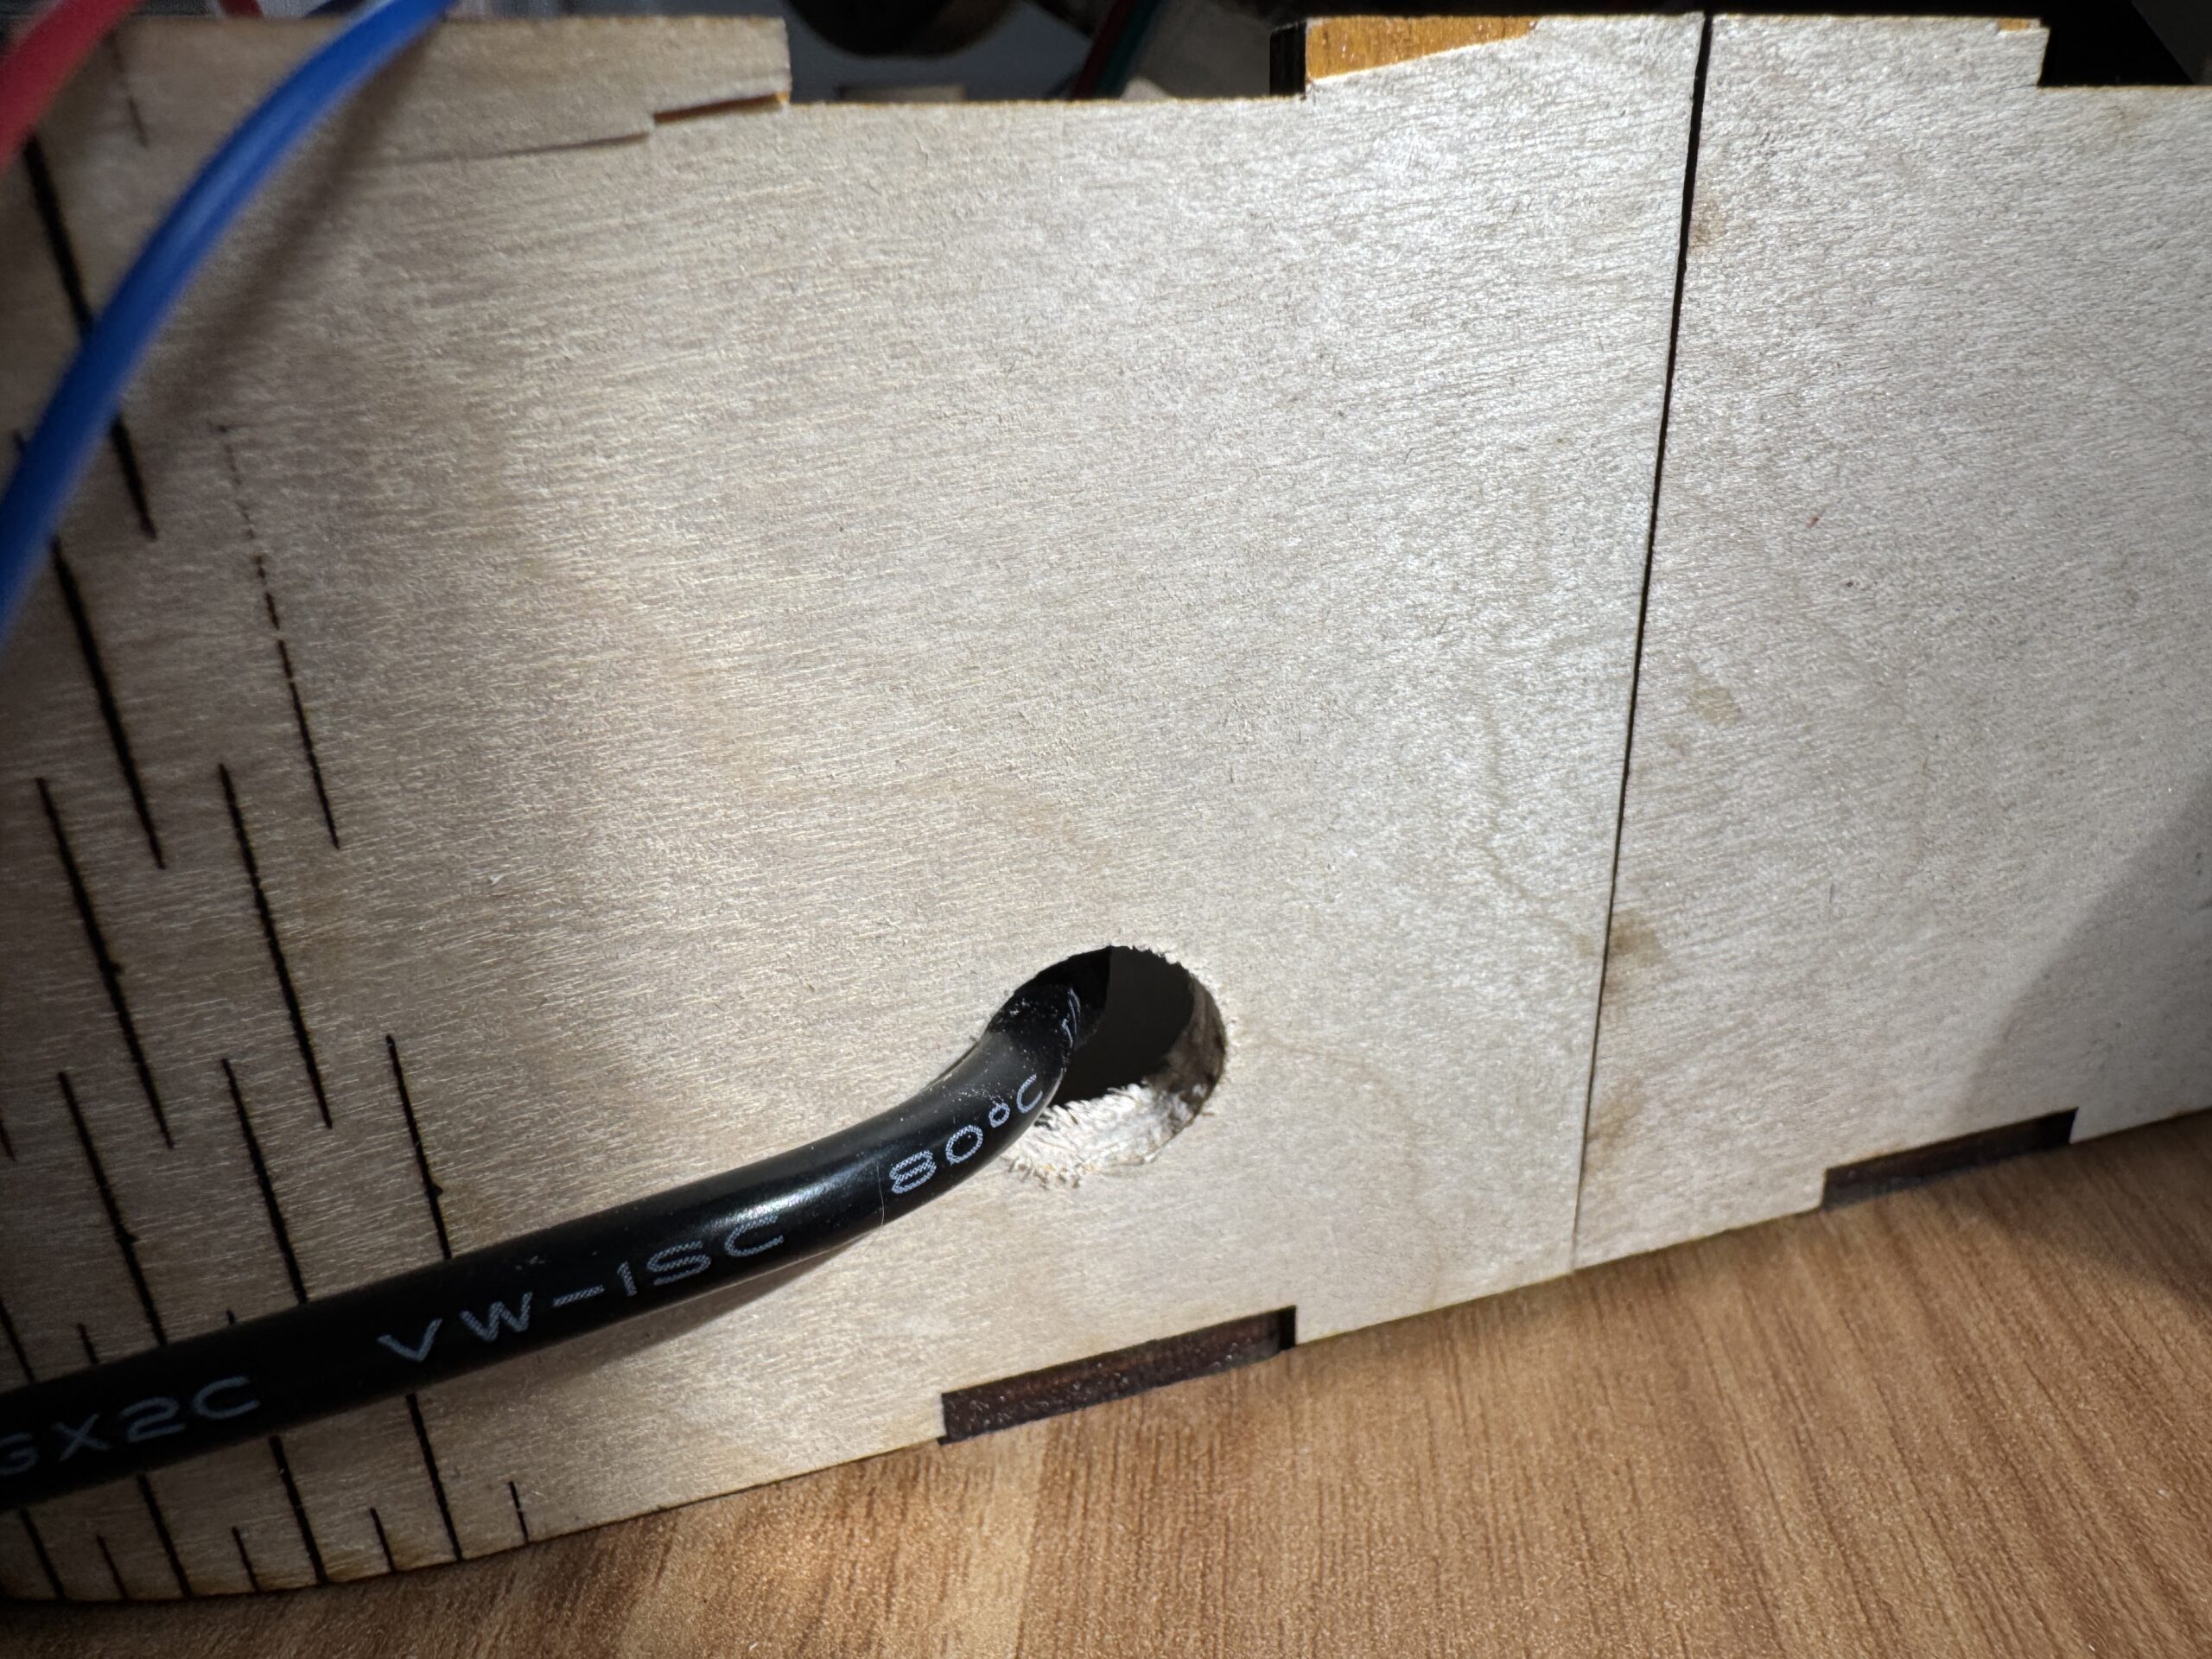
With some more testing to go, I moved towards the exciting last step of final touches. I drilled holes for the front On/Off switch and rear power cord, then started sanding the overall exterior of the box. Unfortunately, this led to a few chips in the edges of the plywood, which I hope to fix in the future somehow:
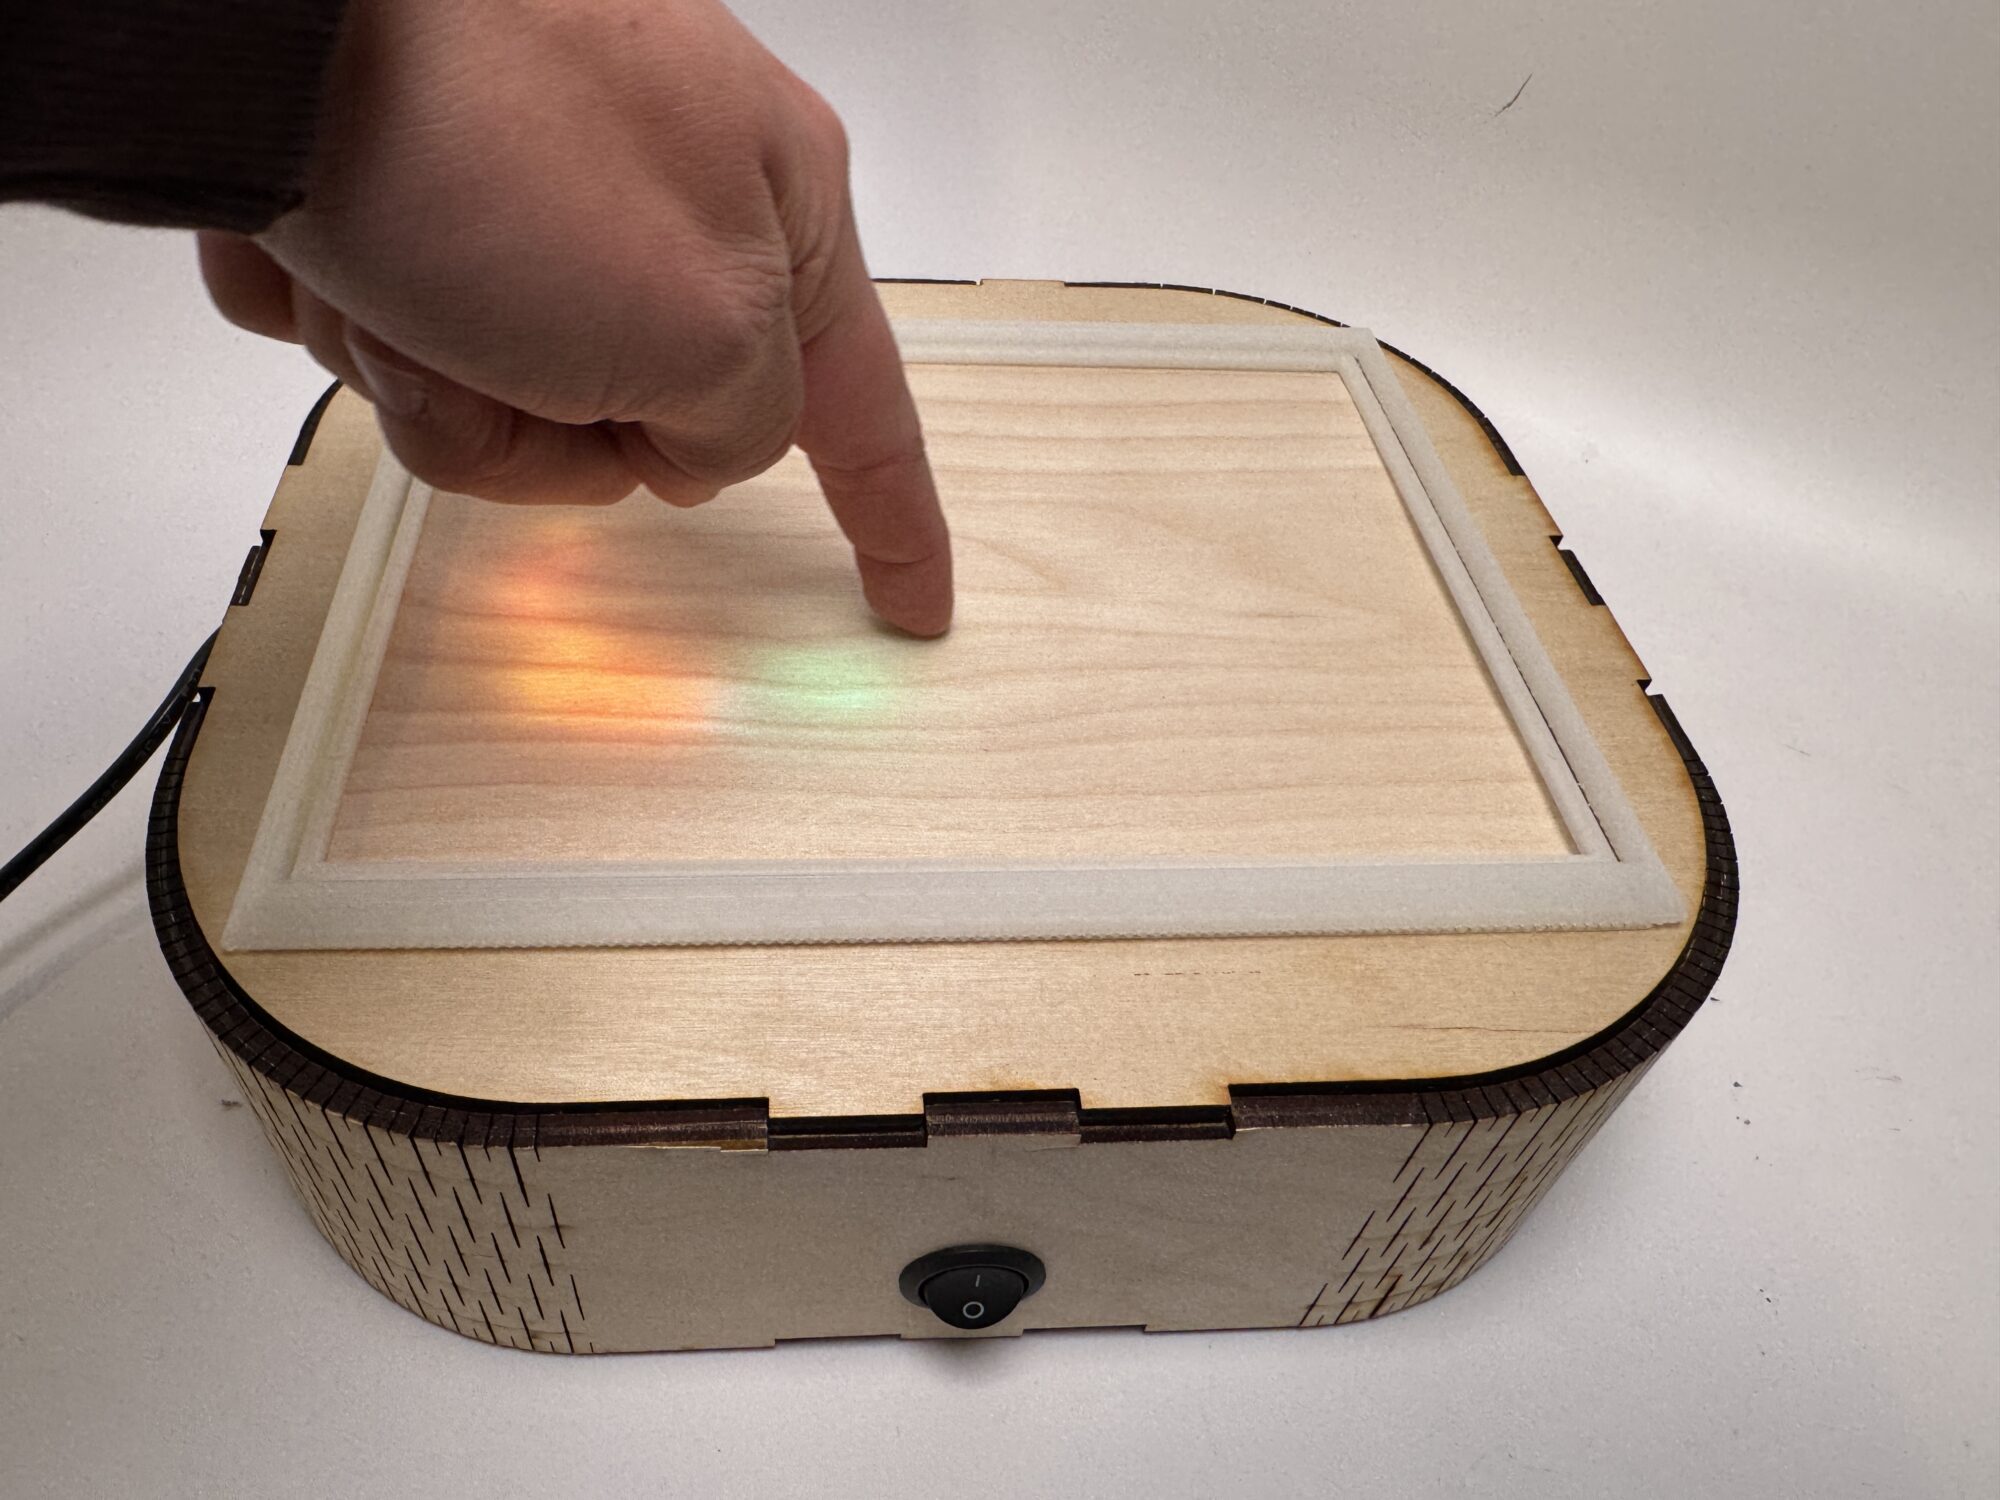
A look at the final, minimalist form of Wöddha: IMG_9804

What’s Next
As I look ahead to ways that I could reform my idea, even considering bigger and better wood-light combinations, I would like to try to:
- Prototype smaller and larger sizes: To expand upon my aesthetics, I want to consider making a smaller hand-size version and a full desktop version. Maybe even a portable version!
- Experiment with the veneer top: The veneer atop the touch screen feels loose and unfixed despite being measured, sanded, and glued precisely. I also received feedback from my classmates that the screen holder could be more flush and/or less sharp around the edges to better fit minimalist aesthetics.
- Add external pizzazz: As I mentioned in my aesthetic considerations, I would like to experiment more with the idea of etched patterns or images into the sides of the box. Or consider another aesthetic altogether!
- Polish external features: I want to continue to sand the external features of the box to make sure it’s uniform in feel, as well as add a 3D printed protector around the hole for the power cord:
Reflections
Compared to where I started, this month-long process has taught me that aesthetic designs will always include a healthy blend of mistakes, research, and extra time. As I dedicated many long nights to this artifact’s livelihood, I may have been frustrated and occasionally doubtful, but I was certainly never bored!
As far as what to do with my finished Wöddha Board, I first plan to refine the touch screen response ahead of the ATLAS Expo on May 1st and our class Expo on May 7th. I am looking forward to sharing this creation as part of both events and learning more about strengths and potential improvements that can be made in the eyes of other users. Then, over the summer, I will think about the next iteration of the Wöddha Board.
In the long run, I want to move towards expanding this idea to furniture and installation art. Perhaps the Art, Engineering, and Making class that I’m taking next semester will be the perfect chance to do so. In the meantime, I am certainly fueled to approach some of my other woodworking projects (especially those left unfinished in the garage) more creatively! Above all, I am grateful for the content of this course and the generous feedback and attention from my classmates that has led me to become a better designer and engineer over the past four months.
5 Comments. Leave new
[…] Compared to where I started at the beginning of the semester, this month-long project taught me that aesthetic exploration and fabrication will always include a healthy blend of mistakes, research, and extra time! I faced many challenges in integrating the lights and touch screen appropriately, but am really proud of how it came together as a functioning piece of artwork and engineering in the end. Similarly, this project serves as a foundation to expand this idea into furniture and/or installation art, perhaps through my Art, Engineering, and Making class next semester (Fall ’25). For more on Wöddha, check out my full write-up here. […]
Sick project! This style of project is exactly what I think of when I think of engineering. I think the touch interface that this project focuses on is unique, and I’m excited to try it out at the expo! I think you should think about bringing your cardboard prototype to the expo, since it shows that super fun, janky stage of design. This kind of design has the possibility to expand in a ton of ways, but I like your idea of putting it in furniture like a tabletop where board games would look super cool with the dim under lighting. Congrats on a great project!
Hi Zoe! Thanks for your thoughts – I love the idea of a tabletop with board games or something similar. I am excited to take this idea and run with it into different versions, so I’ll have to try that out! Also I’ll be interested to hear your thoughts at expo because I have some ideas and want to improve the top wooden interface. See you there!
LOVE the Woodha board. It was such a fantastic concept and so well executed. You should trademark this
Hi Sylvia! Perhaps I will look into some IP or TM processes, that could be fun! In the meantime, I definitely want to improve the top wooden piece, maybe trying to route out a space for the screen instead of cutting through and filling with a 3D print. Let me know if you have ideas and thanks for your Wöddha support!