
For my final project, I wanted to try and create a special bedside lamp that contains a variety of useful features making it not only aesthetically interesting but uniquely functional as well.
The Problem:
I currently have a small electric candle by my bedside that I use as a low level light while I”m getting ready for bed. It is battery powered, which makes it portable. I love the portability of it as I find it handy to take with me into the bathroom while I brush my teeth and shower, using its dim light instead of the bright bathroom lights to help my brain wind down and prepare for sleep. I also occasionally carry it with me throughout the house as a small flash light because I don’t like needing to turn on a bunch of lights late at night if I just need to run a quick errand to the kitchen for some water or a midnight snack. The biggest issue with this candle is that the switch on the bottom is difficult to find, and when the batteries run out, it can sometimes take me weeks to remember to replace the batteries, since I only really think about it the moment I need to use it.
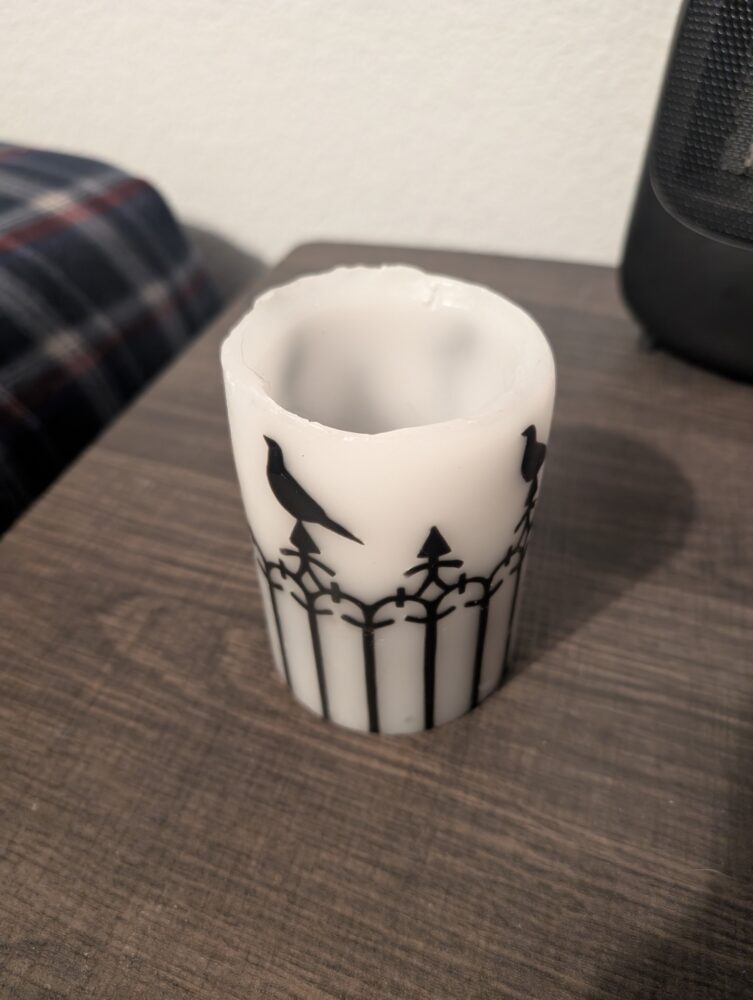
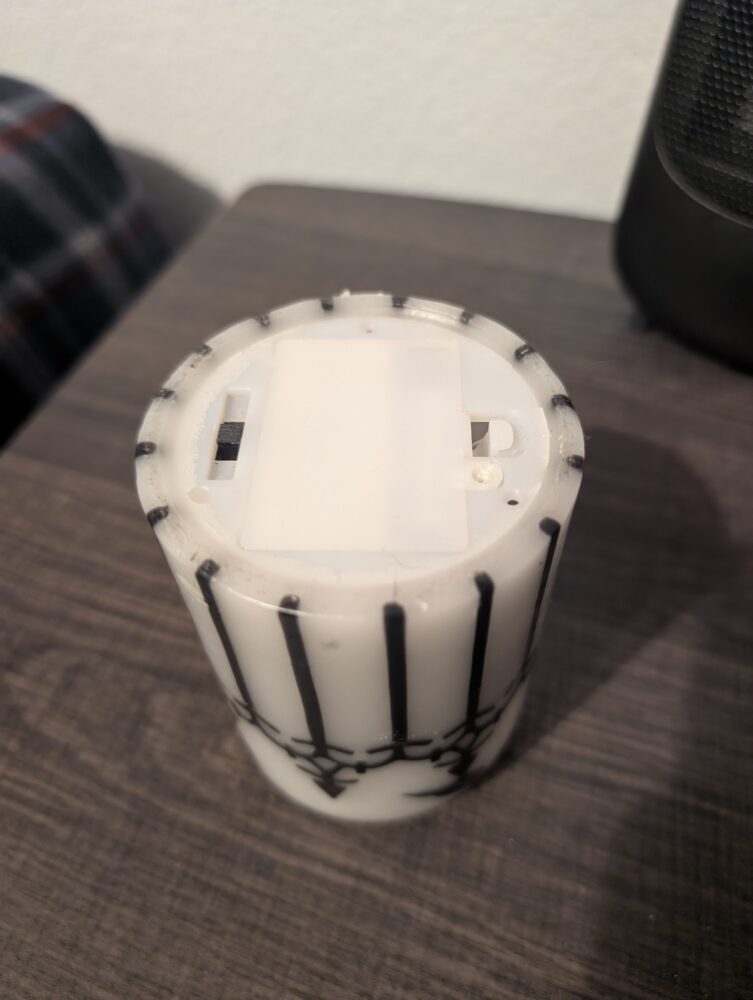
The switch on the bottom is really hard to find in the dark.
The Inspiration:
I am a huge fan of medieval fantasy like Lord of the Rings, D&D, Elder Scrolls, all that jazz. While pondering this problem, I thought about how in fantasy media, you often see castles or dungeons lit with torches along the walls. But these torches are also removable, so the hero can take the light with them as they walk around! I realized that I strongly desired a light fixture that “had a special place” like a spot on the wall, but could be taken down easily and put back at the users convenience. Clearly, it would be cool, but unsafe to have open flames as light sources in my house, so I thought about a more “magical” source that still fit the medieval fantasy aesthetic. That’s when it hit me: A Soul Gem!
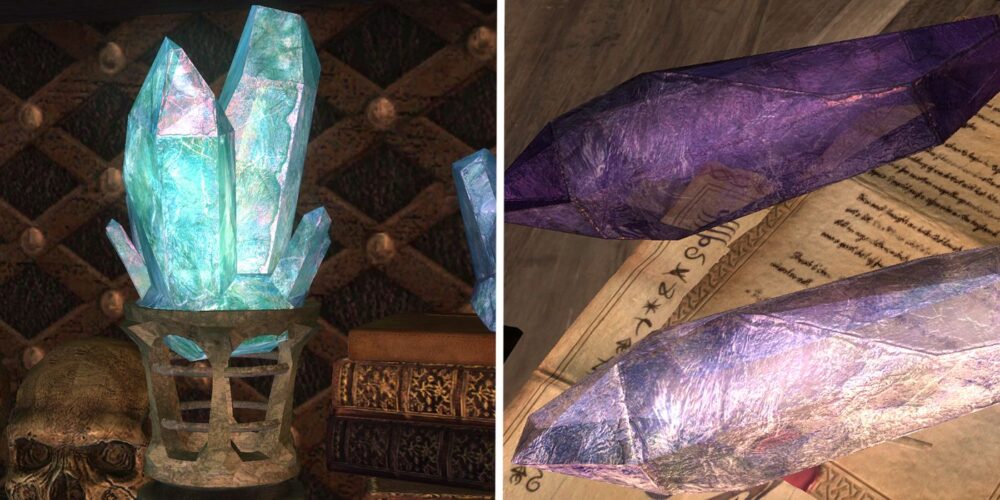
These magical crystals are specifically from the video game series Elder Scrolls. They are a magical crystal that can be used to harvest the soul of a creature or person you kill, and use their soul to power your enchantments. However, magic crystals more generally are also commonly found in medieval fantasy, as well as in modern paganism and witchcraft, and I think that a large glowing “magic” crystal is an awesome idea for a portable lamp.

The Solution:
I would like to make a lamp that has the following features:
- Rechargeable battery
- While were at it, I don’t even want to have to remember to plug it in. I would rather it charge automatically when I set it down, and since we live in the future, lets just do it that way. So lets make this a wirelessly rechargeable battery.
- Advanced gesture controls – Feel magical
- I’m tired of fumbling for a little switch. If I pick it up, I want it to turn on immediately.
- If I set it down for a while, I want it to get dimmer and eventually turn off.
- If I shake it, I want it to get brighter.
- Why do I even need to touch it? If I wave my hand over it I want it to also turn on.
- If we have that lets also adjust the brightness/turn it off with a wave of my hand.
- Speaker in the base station
- Since the lamp will need some kind of fixture to recharge, and this fixture is already going to be powered by a wall outlet, lets just throw a speaker into it too
- Make it Bluetooth/aux cord compatible
- Throw in some built in ambient sleep sounds/white noise so you don’t even need to connect to it with a different device.
The Design
As I state above, I would like this to look like a large glowing crystal. Like a rough chunk of amethyst or aquamarine. My initial sketches were of a simple geometric pattern that slots into some kind of rustic sconce as the base station.
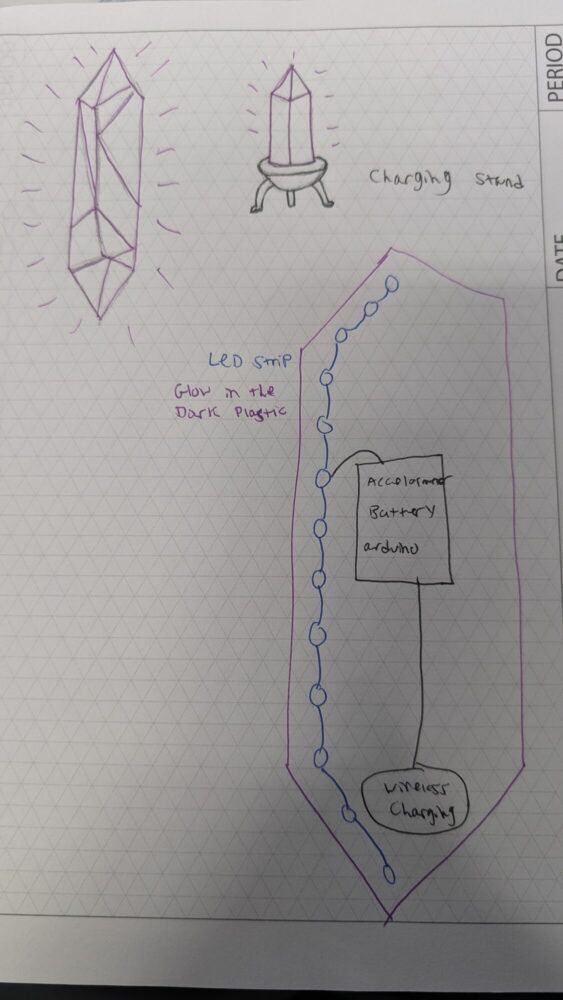
After that, I went into SolidWorks to see how difficult it would be to create a random geometric crystal pattern for the outer shell. It turned out to be pretty easy and gave me confidence that I would be able to create an organic looking shape that fits whatever dimensions I need. I also used this as practice to see if I could make a perfect negative of the shape cut into what would become the base station.


I still hadn’t settled on a design for the base station, so I looked around for sconces on the internet, and found this nice looking rustic wooden sculpture that I am really drawn to. I like the way the arms come up and can potentially help stabilize the crystal if it’s standing on its end. And I think it would be fun to experiment with including magnets in the arms and in the crystal, either to facilitate some magnetic balancing, or just to give it some “weight” or a slight resistance feel when you take it out. Just some kind of energetic resistance to add to the magical feel of the lamp (or maybe it feels like it jumps into your hand).
(I have this picture saved but I can’t find its source anymore, unfortunately)

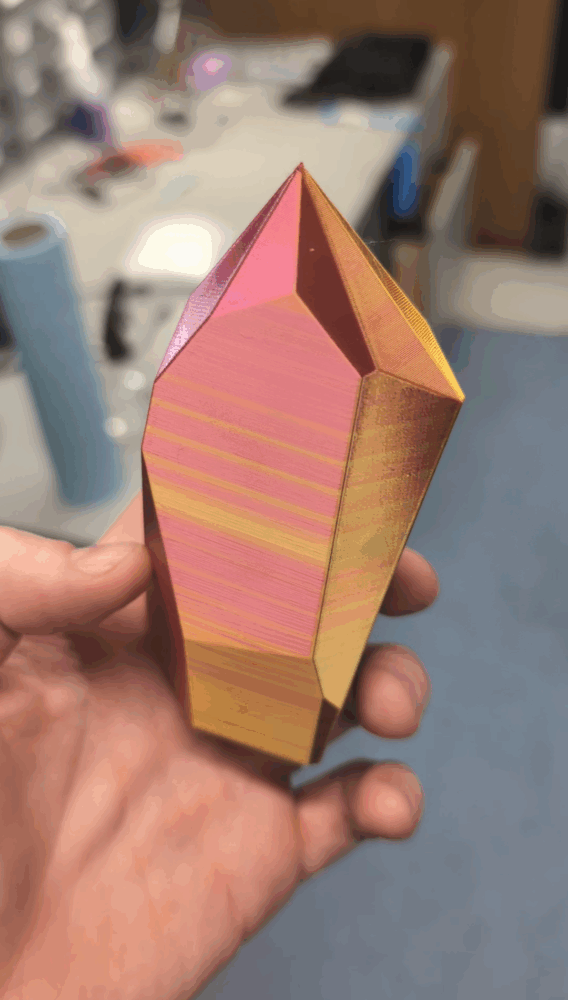
After all of this, I tried making the outer shell of the crystal itself. My original plan was to 3D print everything using a purple glow in the dark filament I found online. I also tried some multicolor filament I had laying around just to experiment.
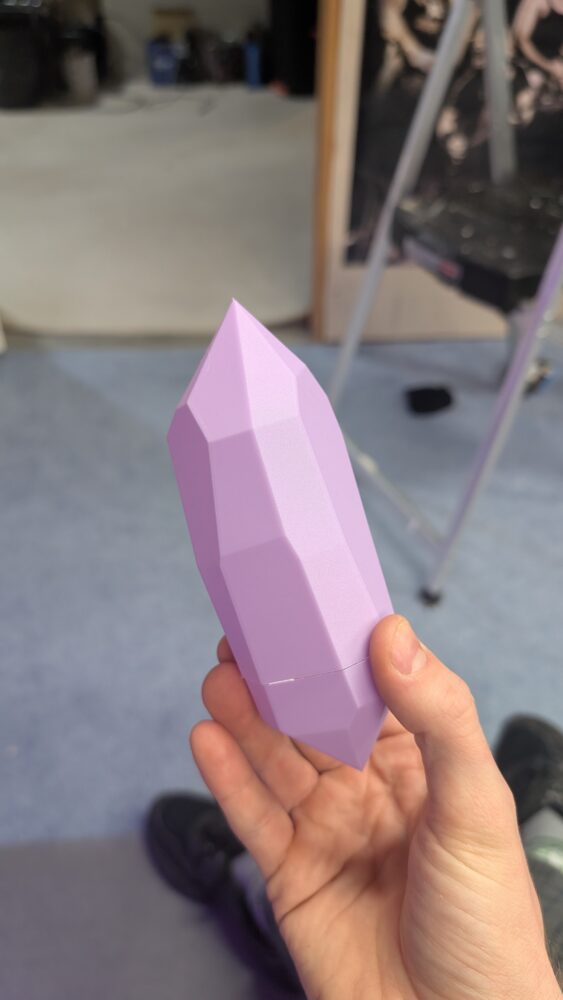
However, these results looked really cheap and plastic-y. They didn’t diffuse the light the way I wanted too. They weren’t “‘giving crystal”‘ as the kids say. I continued to ponder the issue, and eventually I stumbled on this lamp at a small magick shop in boulder.
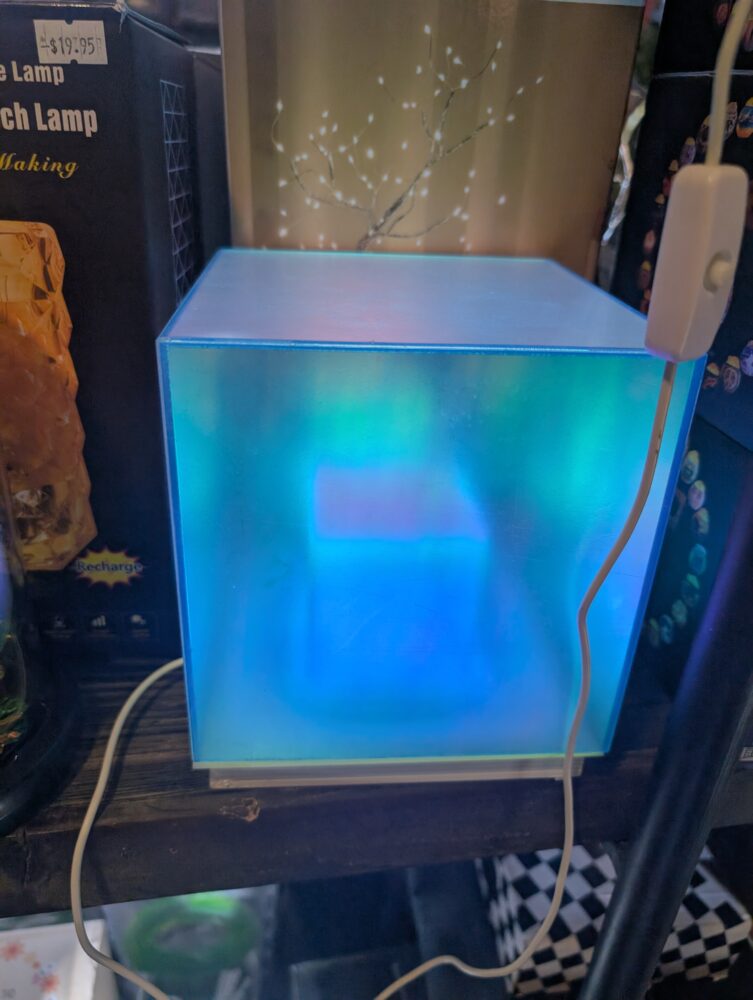
I loved the properties of this lampshade. It was dichroic film over some kind of clear acrylic. It was basically the exact effect I had in mind for my lamp, but to get this, I would need to somehow make my crystal shell completely out of acrylic or something like it, which would be pretty difficult, and take a lot of time on a laser cutter.
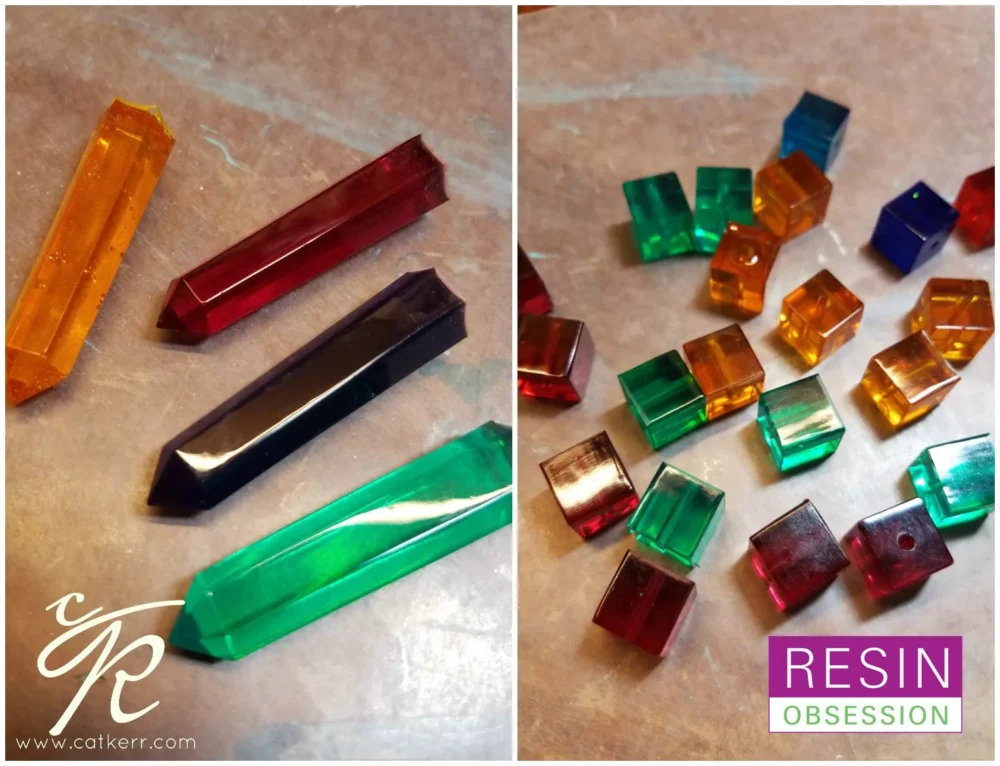
Then, someone in class gave me the idea to cast the shell out of resin. Resin casting is super popular and cool and you can make all kinds of interesting glass-like objects from simple silicon molds.
After researching resin casting, I realized this was perfect, and exactly what I needed. So now my plan is to 3d print a few more prototypes, and really figure out the placement of the electronics within the lamp, and perfect how they interact with the user and the base station. After that design work is done, I can create a silicon mold of my outer shell and use all kinds of fun dyes and sparkles to make the shell look really magical and fancy, while giving the lamp the right mixture of opacity and translucence.
I am really excited to continue working on this project. I just need to get a job and get about $500 together to buy enough prototyping materials to finish this project.
A single finished lamp should only cost about $50 to make, but I know me, and I have prototyped multiple designs and products to market at this point, so I know its going to take a few tries and a few broken lamps to dial it in. I would really like to get this production to a point where I can make 5-10 at a time so I can sell them on Etsy and other marketplaces. But for now, this is where I’m at with the whole thing.
The How
Honestly, I might not actually get to finish it this semester, because I will need to buy components and iterate through prototypes, I don’t think I will have enough time to make a final design in the human meat space. But I will lay out my design plans and instructions so that anyone reading this post may build it (including myself later).
The first thing I thought of using was this old electric toothbrush I have. It already has wireless charging and a powerful battery built in, so I disassembled it to investigate if I could salvage some of its innards for my project.
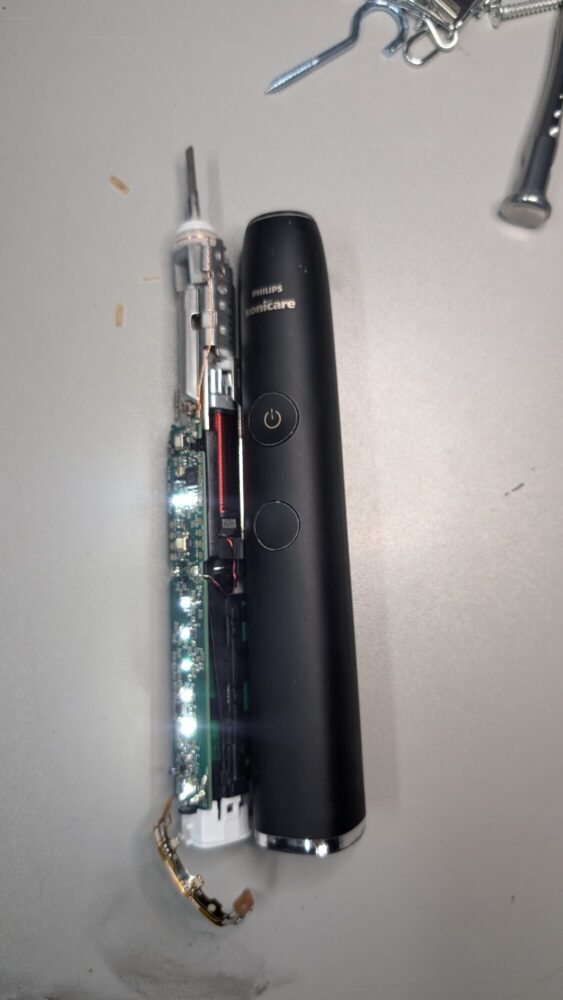
Sadly, the charging circuit is integrated into the mainboard of the toothbrush, and it would be more trouble than its worth in my opinion to try to get this to work for what I need. So we will build this from scratch instead!
Components needed:
This is what I plan on using, mostly because I have these components laying around already, but you can swap them out with similar parts if you know what you’re doing. Otherwise you will have to follow along exactly to this. These might not be the most optimal part selection for this project, however, they are mostly free for me because I already have them.
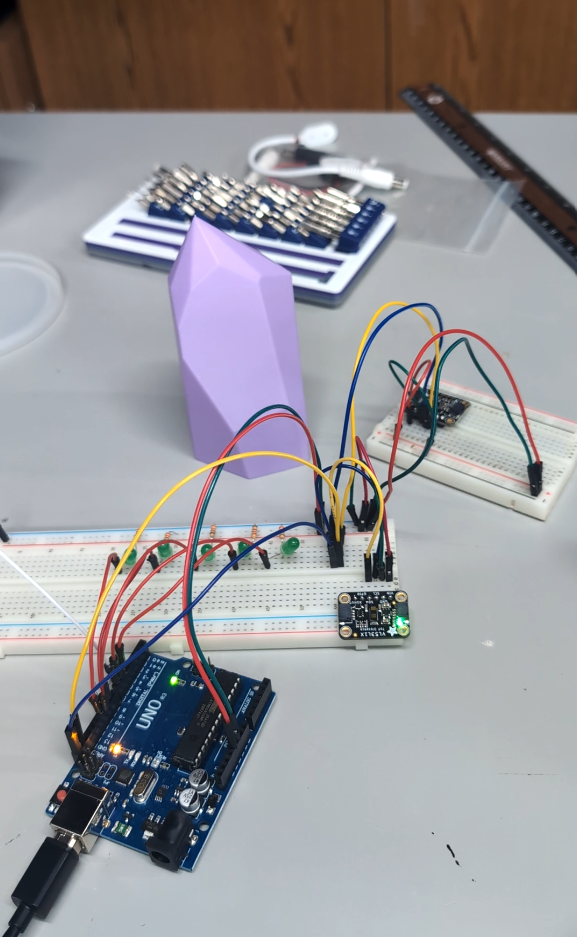
- 2X Arduino Nano
- WS2812B Individually Addressable RGB LED Strip Light
- Qi Wireless Transmitter
- Qi Wireless Receiver
- BNO055 Absolute Orientation Sensor
- VL53L1X TOF Sensor
- 2X NRF24L01+ 2.4GHz Wireless RF Transceiver
- 3D Printer
- Purple glow in the dark 3D printing filament
- Black 3D printer filament
- Assorted wires, soldering iron, electronic manufacturing tools, etc.
- Computer with Arduino IDE
You’re also going to need some pretty decent programming and debugging skills.
Since I don’t have all of the components in front of me, I can’t write code that I know will work without testing it out and playing with things first. I’m sure there is a better programmer out there who can do that, but it is not me. However, I will write a logic map and psuedocode for the project so that you know the jist of how I want this lamp to behave.
Arduino Code
References:
Soul Gem: https://static1.srcdn.com/wordpress/wp-content/uploads/2021/12/Skyrim-Soul-Gems-for-Enchanting-Weapons-and-Armor.jpg
Magic Crystals: https://i.pinimg.com/736x/b3/7d/b6/b37db606d34162a59117ecb434cebe6c.jpg
Resin Crystals: https://i1.wp.com/www.resinobsession.com/wp-content/uploads/2017/06/D-with-mark.jpg?resize=1546%2C1185&ssl=1
2 Comments. Leave new
Hey Adam – it’s been great to follow along with your project after landing in a few class breakout rooms with you. I am impressed with your attention to detail throughout the entirety of your design process, especially your attempts to try to upcycle an old electric toothbrush first! Have you tried to create a resin mold yet, and if so, how’d it go?
Hello Adam! This is an awesome project, and I am truly amazed by the level of craftsmanship. I specifically enjoyed how neat your wiring was. Did you have any issues making your code work with your design?