
For my final project for Aesthetics of Design, I built a cabincore car bed suitable for camping that can also fold to fit behind the back row of seats in my car. Through several design iterations better covered in my last post, I came up with a design that uses hinges to allow five different top panels to fold onto each other, and several supports underneath to retract into the foot of the bed. The design process began with me first taking a large sample of measurements of my car, and creating a rough outline of the size I wanted to make my design. I then took the design process to Solidworks, which allowed me to have not only an accurate picture of my project at all times, but specific sizes and dimensions at the ready.
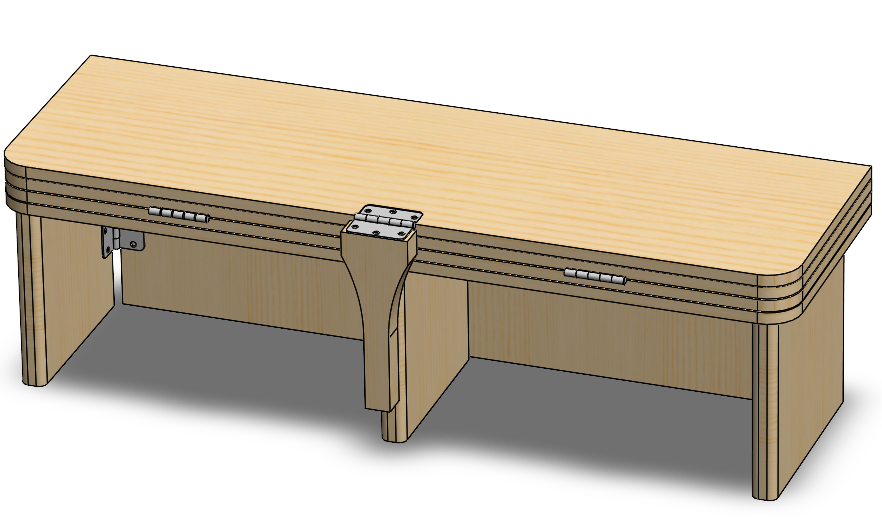
CAD Design – Folded
Before beginning any construction or assembly for this project, I first had to procure materials. As cost was one of my larger concerns for this project I kept my eye out for any ways in which I could find any materials I needed for cheap/free. So, when my friend mentioned that he had a decent amount of .5in wood panels from an old project of his, I jumped on it. I was able to get all of the wood I needed for the top bed panels for free from my friend. However, all the panels were an indeterminate wood and already stained much darker than I wanted.

Wood Cut to Rough Size
After procuring the bed panels I was able to get all of the wood I needed for the supports with just one 2″x12″x12′ board from the hardware store, and while I was there I also purchased a pack of 12 door hinges and some .5in screws. After acquiring all of my materials I first started by cutting everything to its rough shape. I did not want to cut anything to its final shape until I could double check the sizing of everything inside my car. While I had done a thorough job taking measurements of my car, I did not account much for the curvature of my back door, or the slant at which my back seats sit at when stood up.
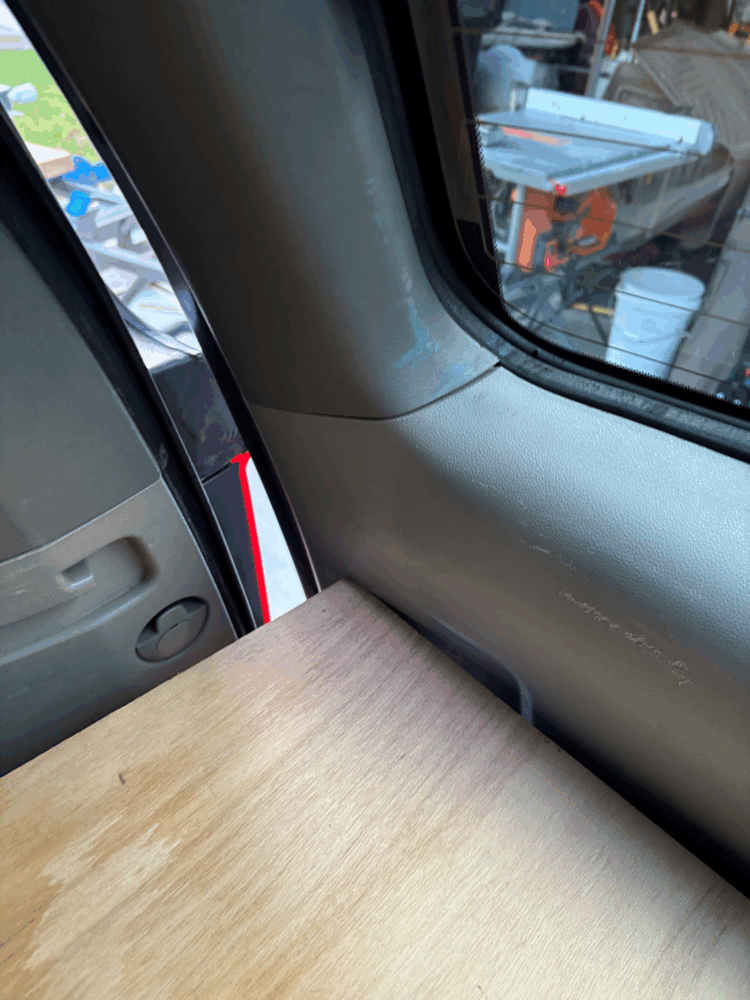
Bed Panels Pressed Against Back Door
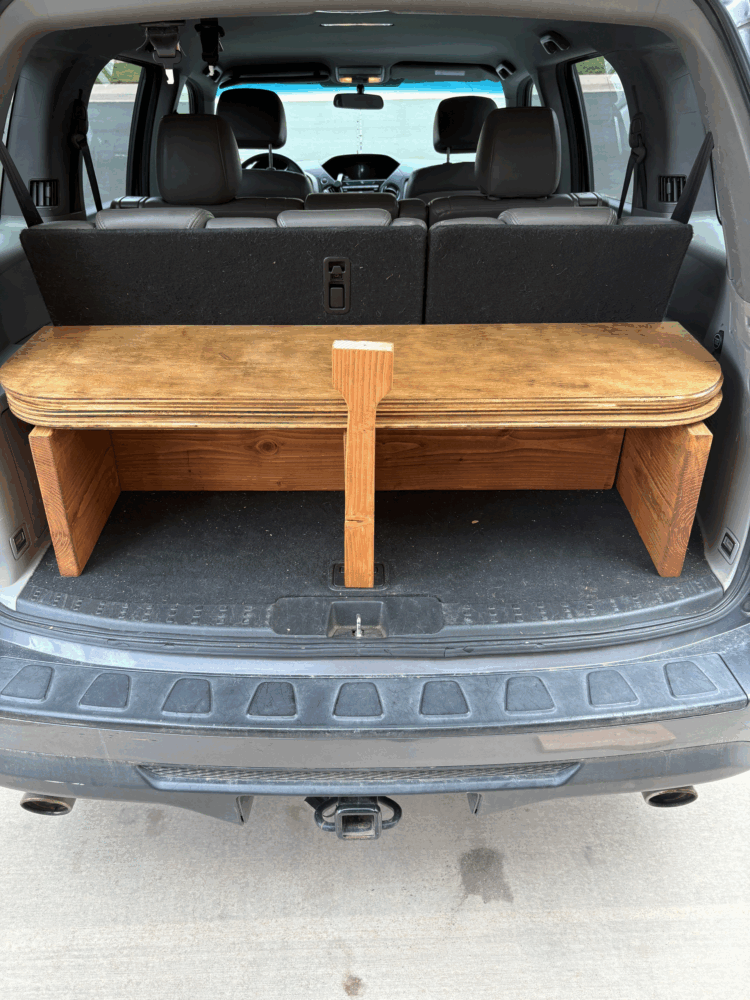
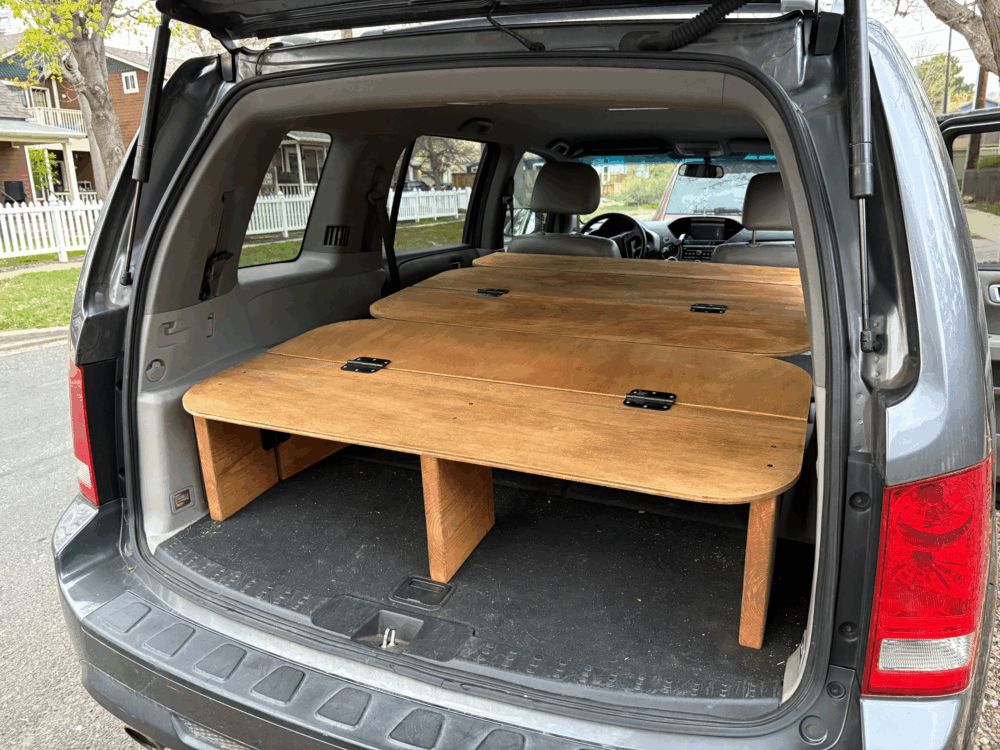
While I expected to have to take off more material than my original measurements suggested, I was not expecting to have to take off two entire inches from the panels to make everything fit. However, with a generous radius on all of the panels, I was able to get the entire assembly to fit really snugly inside of the trunk of the car.
Rough Fit-up
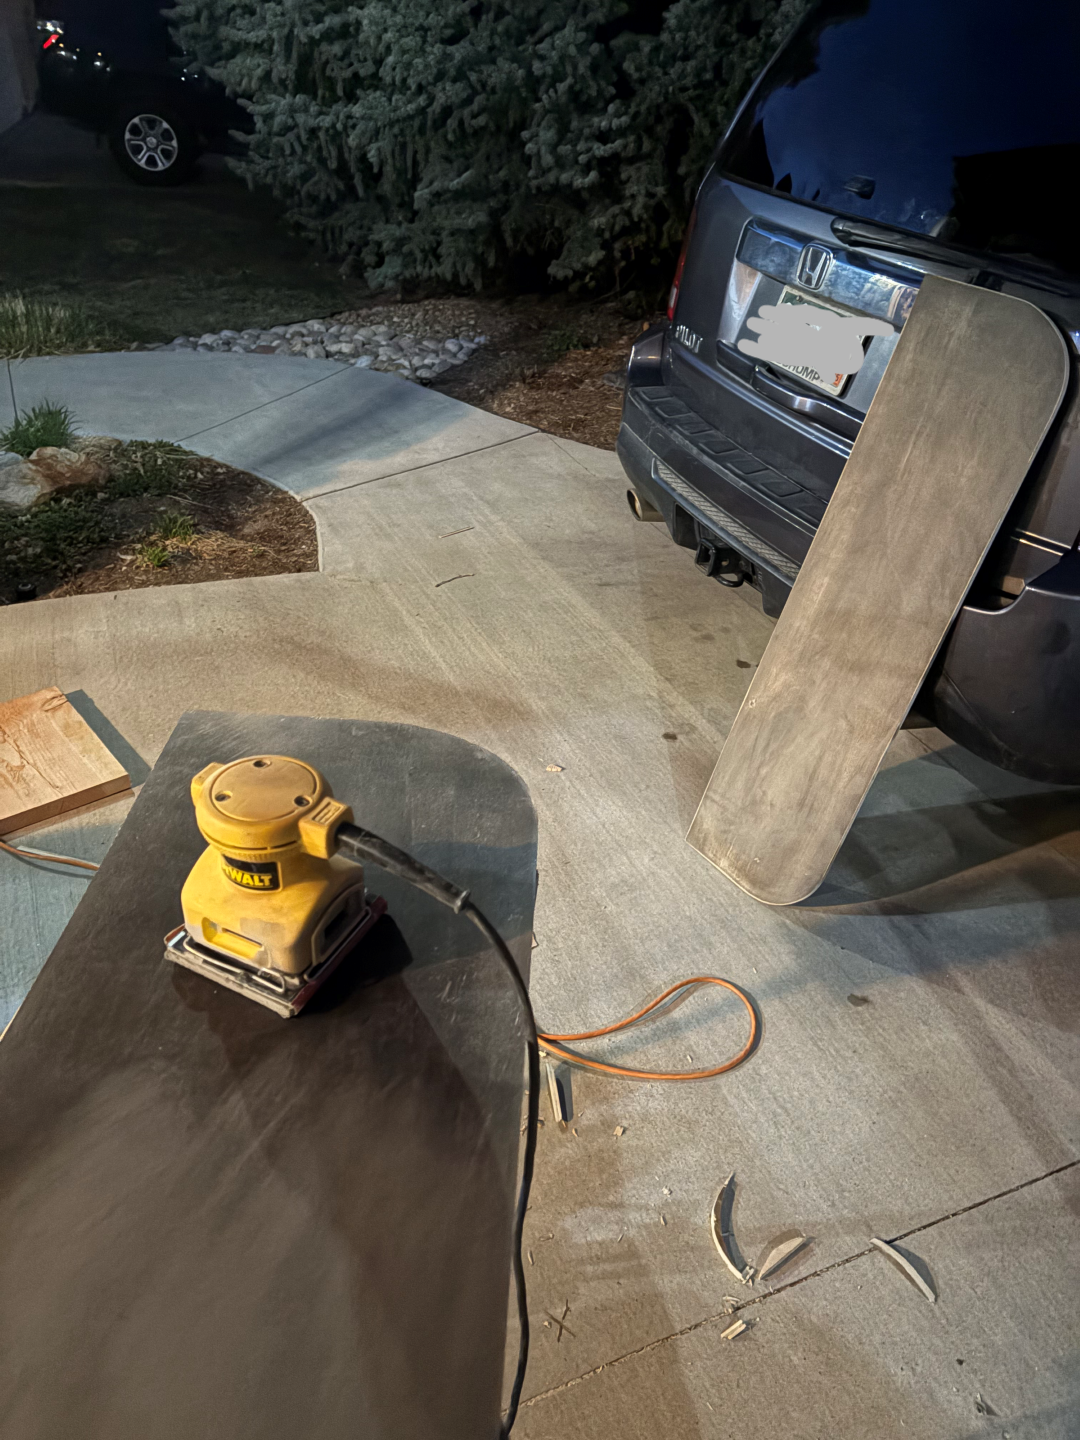
At this point I began by far the most tedious part of the project, the point where I attempted to sand off the majority of the stain from the pre-stained bed panels. While I appreciated the look of the pre-stained panels, they really did not match the aesthetic I was going for, and I did not have any of the stain to use on the supports. I found while sanding that I could not get the stain completely off, but if I was patient I could get it to a point where only the deeper grains really showed too much color.
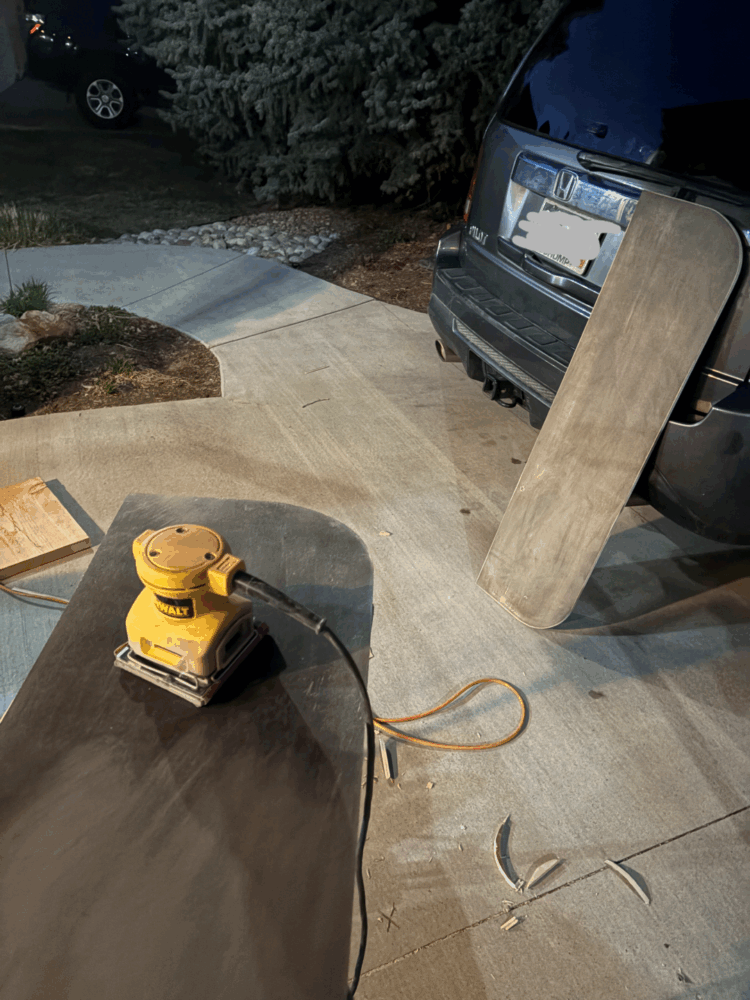 Sanding Snapshot
After sanding I hung up everything up and began to paint everything with stain. I was lucky enough to be able to use my Dad’s garage and tools for the majority of the manufacturing for this project, and because of that I was able to look through the unused stains that he had available. This is where I found the Golden Oak stain that I used on every piece of wood for this project. I felt that this stain perfectly matched the warm and colorful tone I wanted for my project to match a cozy cabin environment.
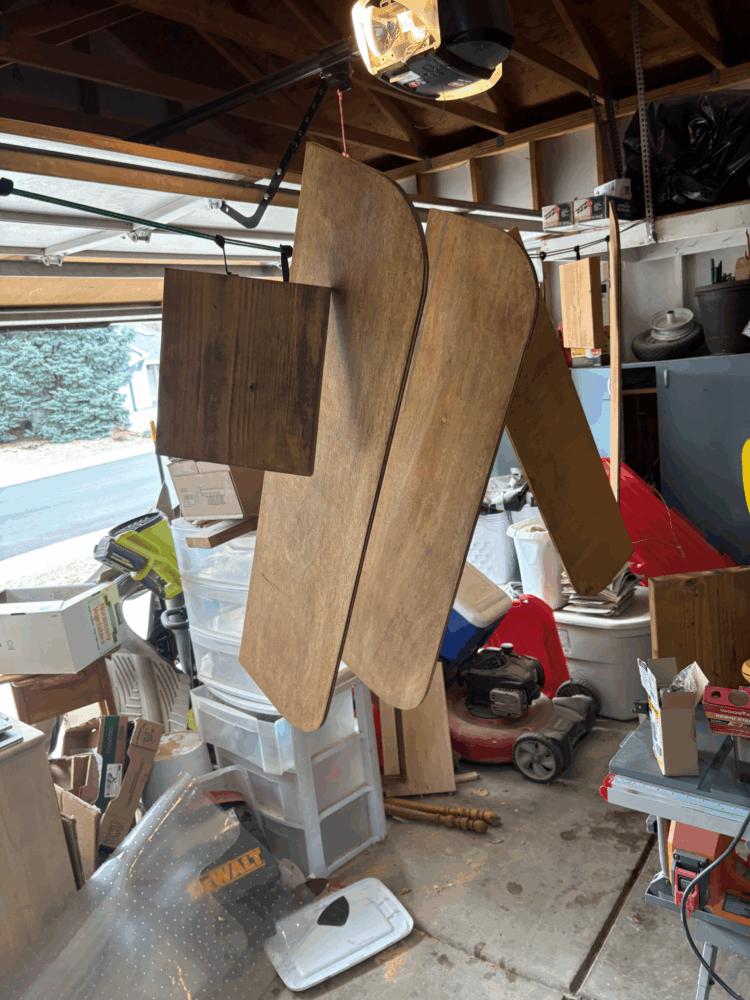
Wood Staining
With everything cut to the correct sizes and stained to the desire color, I was able to get a really good picture of what the final product was going to look like.
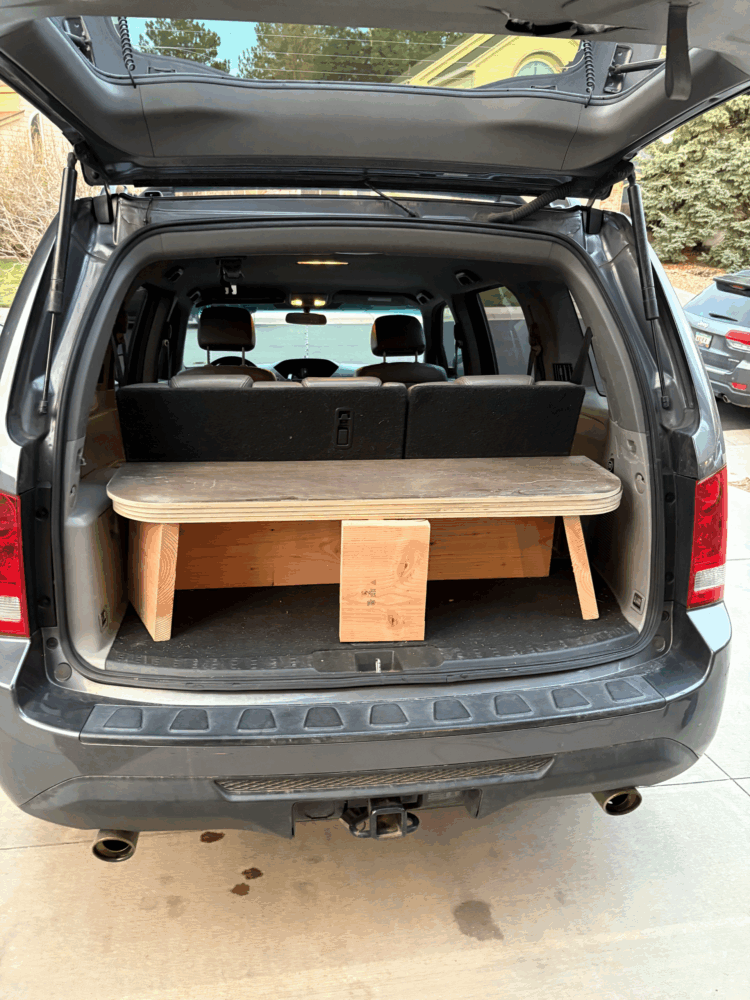
Dry Assembly
After seeing the full layout with everything stained and all but the head support cut to final shape, I became even more excited to see the final form of this project.
I kept the head support cut extra long because I had some concerns about the placement of the part. In my initial design I had he support hinged to the front of the top-most bed panel. However, because the panels had to be cut 2 inches shorter than I had first hoped, the final length of the bed was going to be incredibly disappointing. However, I was ablet to cut five panels from the .5in stock I had, allowing me to extend the length of the unfolded bed, but also making it impossible to attach the head piece in the same way I had originally planned. So, as a precaution I gave myself extra length to play with.
From this point assembly began. This consisted of attaching hinges to all of the upper panels and separately to the hinging supports. The to panels were rather inconvenient to put together, as hinge alignment is not only important for the function of the bed, but also for the lineup of all the bed panels when the bed is folded.
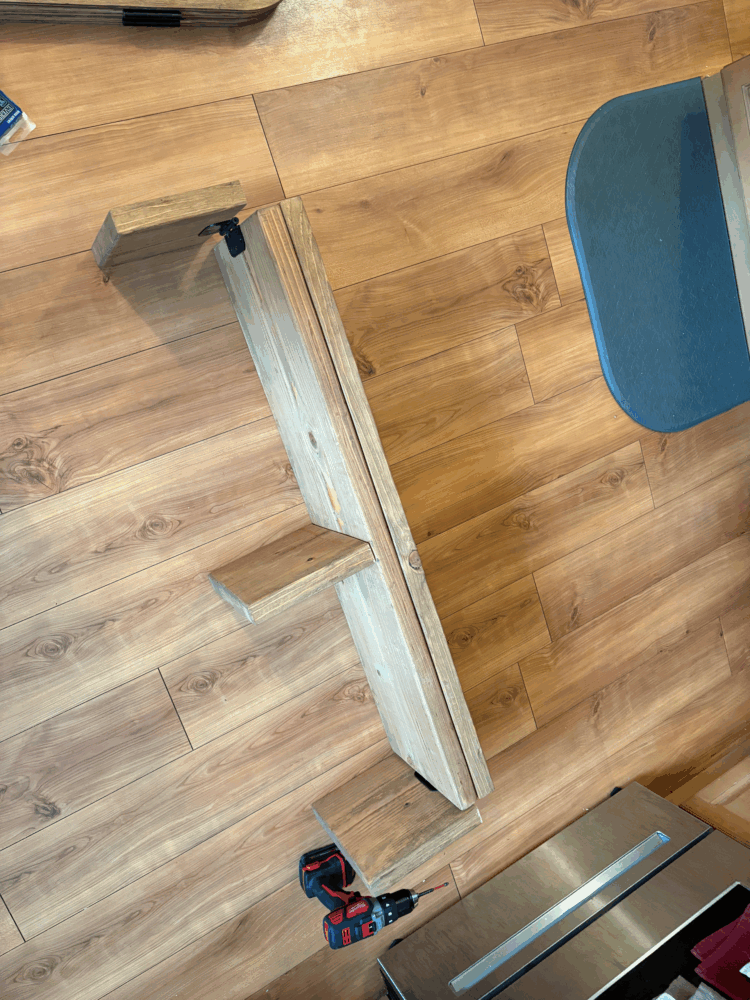
Support Alignment
The final step for the assembly was simply aligning the three separate parts of the supports to the bottom panel of the assembled bed panels. This was done with a lot of double checking on the measurements and alignment, as making this all mount symmetrically with all of the radii was rather difficult. Luckily enough, this step did not any major problems, and the full bed came together really well. The final extended bed came to a rough size of 67″ long and 48″ wide, and when collapsed the bed fits within a 15″x48″ area.
 Full Assembly
This project was a ton of fun to work on. From the free-form design phase, to being able to work hands on and get myself covered head to toe in sawdust, I found it really exciting to make this functional aesthetic piece.