
The How
Bringing my matcha stand to life from my CAD Model was a journey of learning, problem solving, and a whole lot of glue. In this post, I’ll walk through how I actually built it from skill acquisition and material prep to finishing details and reflect on what I learned and where I ended up. As someone new to woodworking, every step was a mini adventure (sometimes a stressful one), and I’m proud of how far I’ve come for this being my first woodworking project.
Timeline Graphic
| Week | Task |
|---|---|
| Week 1 | Collected inspiration, drew sketches, studied aesthetics |
| Week 2 | SketchUp Modeling & Wood Shop Orientation |
| Week 3 | Sourced wood from BTU, tested finishes |
| Week 4 | Practiced cutting, sanding scrap wood |
| Week 5 | Cut panels, began assembly/glueing |
| Week 6 | Sanded everything smooth |
| Week 7 | Documented project, wrote posts, planned presentation |
Fabrication Process
Sketches
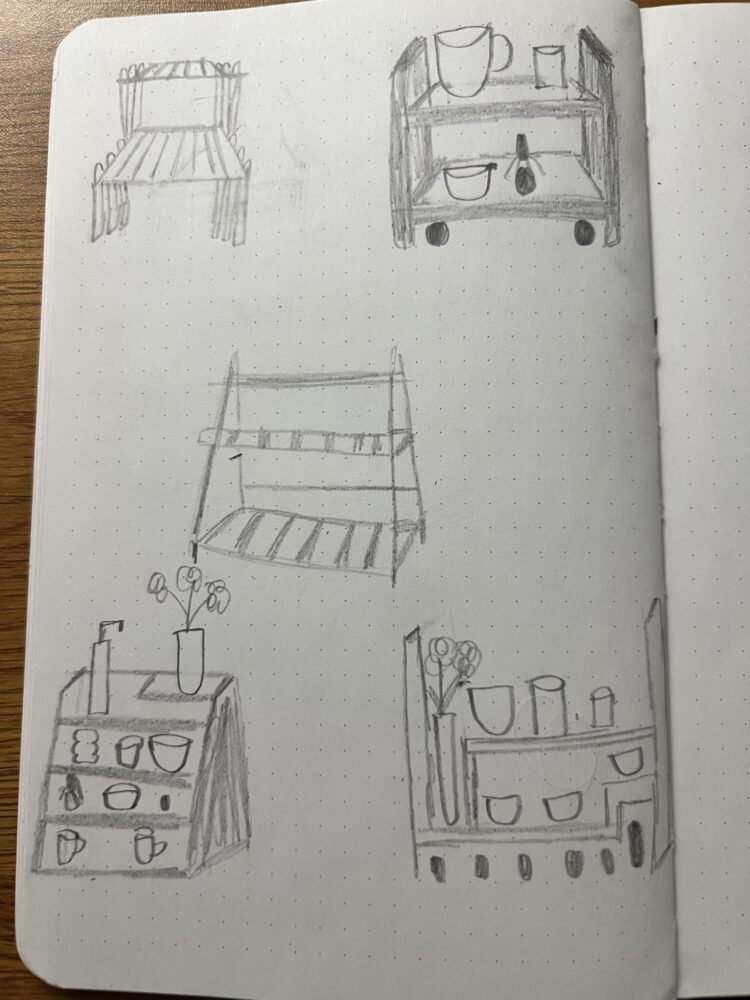
I developed multiple sketches to explore different layouts, focusing on multi-level shelvingto keep the setup visually interesting and functional. From the picture of my sketch above, I decided to go with the design a lot like the ine in the upper left corner. I thought this design really leans into my aesthetic and I also thought it was enough of a challenge for me to take on. Some key features:
- Top shelf – for displaying the matcha bowl, mugs, and some sort of plant
- Middle level – for matcha canisters, whisk, and frequently used tools
- A lower space – to store smaller additional items and maybe smaller mugs
The layered height adds a sculptural quality and invites movement as you interact with it.
After figuring out which design I wanted to do, I modeled it in Sketchup. During this process, I made sure to keep my model to scale so I would know exactly how much wood I needed and this helped me a lot.his was incredibly helpful in minimizing waste and ensuring the proportions felt balanced. I based the CAD model off my hand sketches, and the final render in SketchUp really helped me visualize the aesthetic goal I was aiming for.
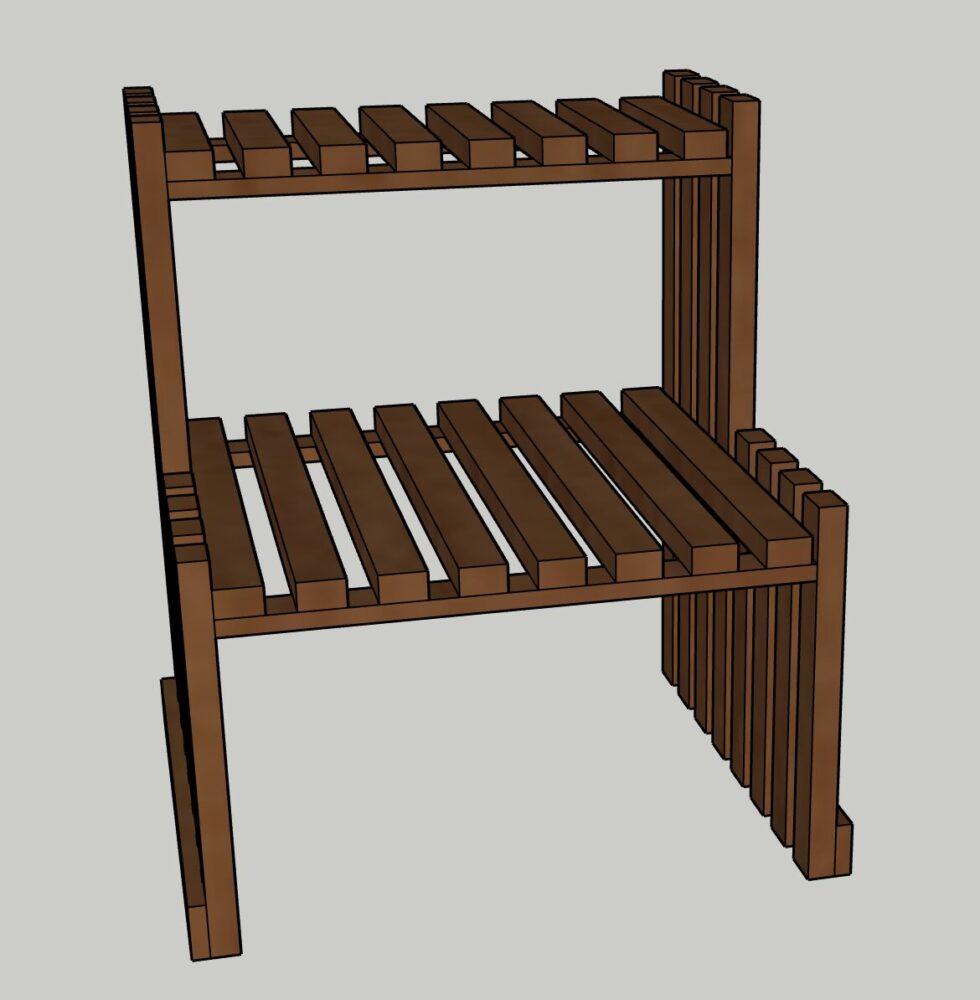
As I pointed out above, this is a design that helps me fit all of my little goodies into one small nice looking space. I wanted something that was nice to look at, with and without things there to decorate it. Obviously, it is supposed to look better with all of my things on it but even without them I was going for a look that satisfies the eye.
Specifications & Artistic Vision
The stand is designed to fit comfortably on a countertop without overwhelming the space. It’s lightweight but sturdy and should be portable if needed. Everything has a designated place to avoid clutter. My specifications were:
- Aesthetic: warm, natural, serene
- Clean Look With No Effort: The stand should feel like it belongs in a peaceful moment like something I’d want to wake up to on a slow morning. It should make the process of making matcha even more soothing and special.
- Go Off Sketchup Model
- Stain: I do plan on staining my wood. When looking through the BTU scraps, I found wood that works good for me but the color is too light for my liking and for the aesthetic I am going for.
- My goal is to get more comfortable and gain more knowledge about woodworking.
- Must fit: a whisk, 2–3 matcha bowls, 2 canisters, a mug, and a small plant
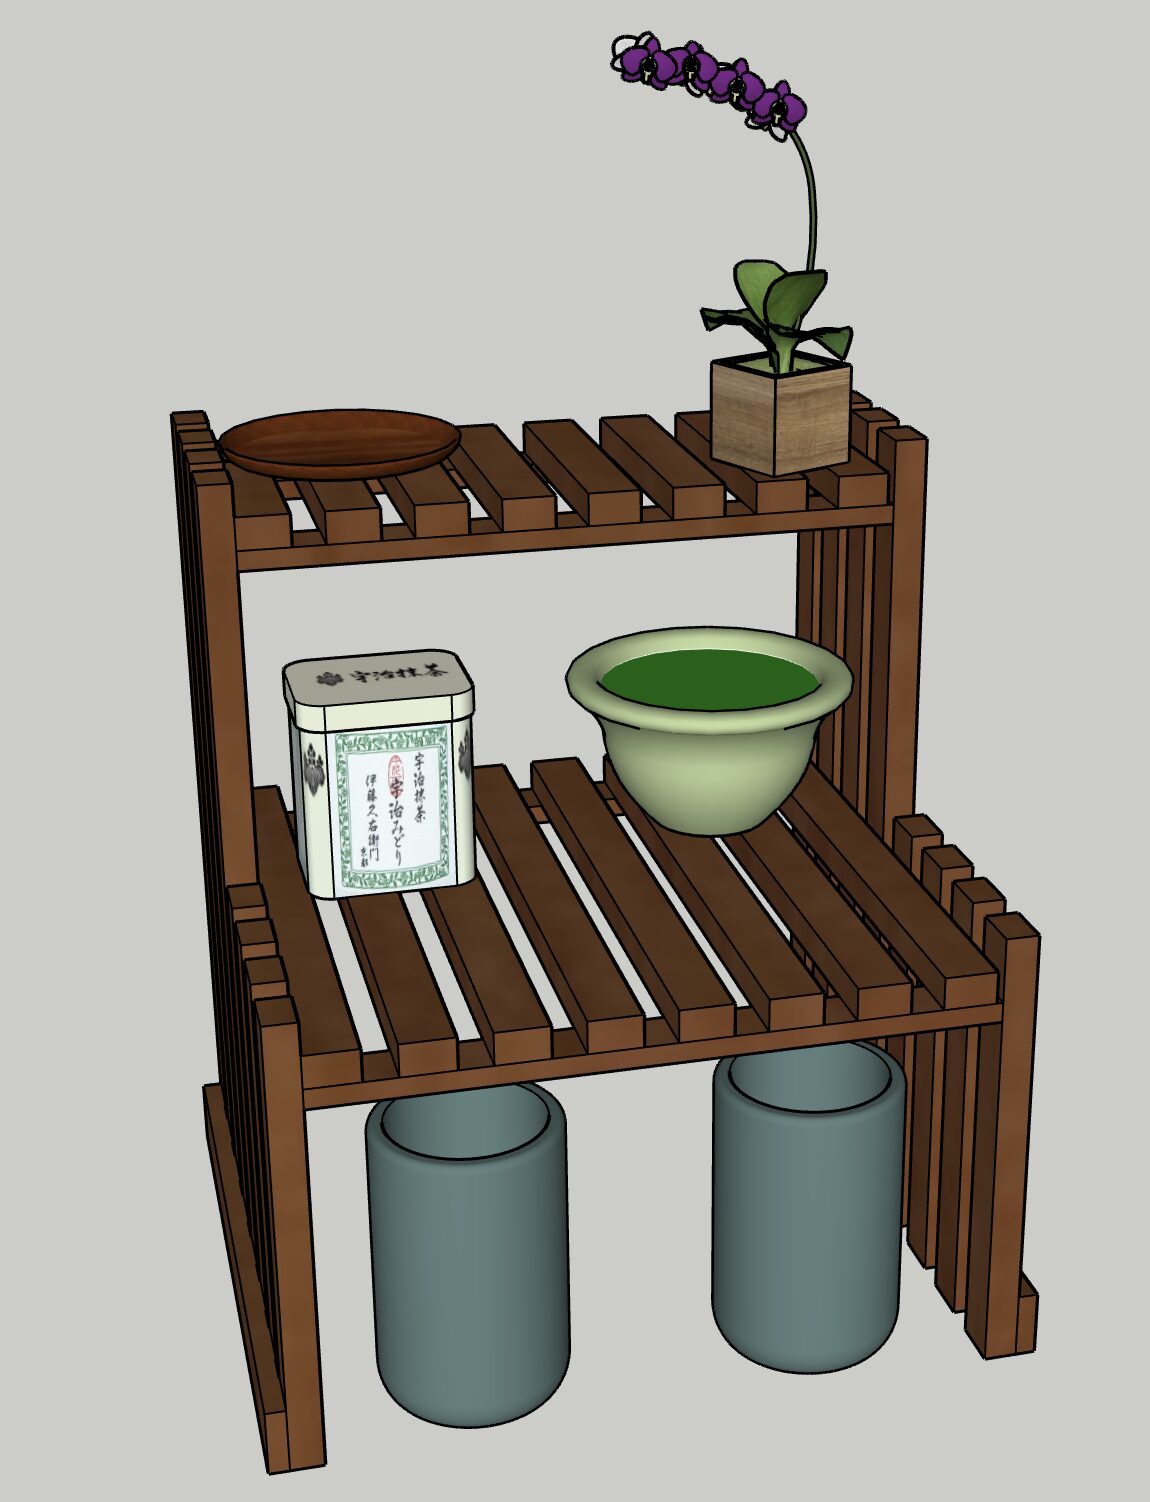
I also wanted some more decorative additions so I want to include a small orchid or a purple succulent for a subtle pop of color. I still need to go find a plant that fits this description and like in my model and also that will match my aesthetic.
Orientation & Early Tests
Before getting started on this project, I did have to go through my first wood shop orientation. This was a good experience, I was a little scared and hesitant at first but after using all of the machines, I was excited to get started on my project! I was also a little nervous because I do like to have my nails long when I do them and running the wood through the machines did seem a little scary when testing them out. I wanted to do a lot of prep work before starting any cuts on my wood that I got. This was mainly because 1. I’ve never really done a project like this before using wood and heavy duty tools, and 2. because the wood I got from the spare wood pile in the BTU was very limited and after doing some measurements, I realized I had just enough for what I was planning on using for my build. So I was very careful when cutting and measuring exactly what I needed. After going through my whole project, I am very pleased with how it came out. I did hit some obstacles along the way which I talk about later in this post.
Cutting & Shaping
I used the table saw to cut all of the panels. After cutting, I sanded each piece with progressively finer grits using hand sanding for edges.
Assembly
This part took the most time. I used wood glue to join everything together. I clamped all glue ups to stay place to dry overnight. The layered construction made the piece feel visually dynamic, but it also made the build more complex than a typical shelf.
One issue I ran into was I made the two legs the same instead of the inverse of each other. This was an issue because the reason these supports are supposed to be on the inside to the legs, is because the shelves sit on the supports and the supports are what keep the shelves straight. So I had to pivot from this and ended up adding supports on both sides of both legs. This also meant I had to find some more wood that matched the thickness and width of my wood I already had on there. Like I said earlier, I only had enough wood for what I had on my model so I had to cut more wood multiple times and sand it in order for it to match my other panels. It turned out still looking good, but I think it does take away from the aesthetic of minimalism that I was originally going for.
Final Touches/Styling
I added my matcha bowls, whisk, canisters, and even found a small purple succulent that fit perfectly on the top shelf. The result felt curated but calming—a visual reward for the work that went into the build. I staged it near a window to capture some natural light and took final photos for documentation.
Final Thoughts
This project was an exciting challenge for me since I’ve never worked on a woodworking project alone. Overall, I spent no money on this project and just used all resources and tools from school. So this project could have been apart of the upcycle project too. I am happy to gain hands on experience with fabrication techniques and be able bring my vision to life. My SketchUp model helped immensely. Without it, I would’ve struggled to visualize how the tiers would stack and where I wanted objects to live. I relied on it throughout the cutting and assembly phases and referred back to it constantly.
Future Works
For now, it lives proudly on my coffee & matcha making station, fully stocked with my matcha tools. Even when I’m not making tea, I love looking at it because it feels like a little moment of peace in my space. The design doesn’t scream for attention, but it invites a slower, more intentional pace.
More than anything, this project showed me how form and function can be balanced with care. Every decision I made like every cut, and glue up was a way of shaping not just wood, but an experience. And that’s what makes design so powerful.
Thanks for reading & following my process! 😀