
Background:
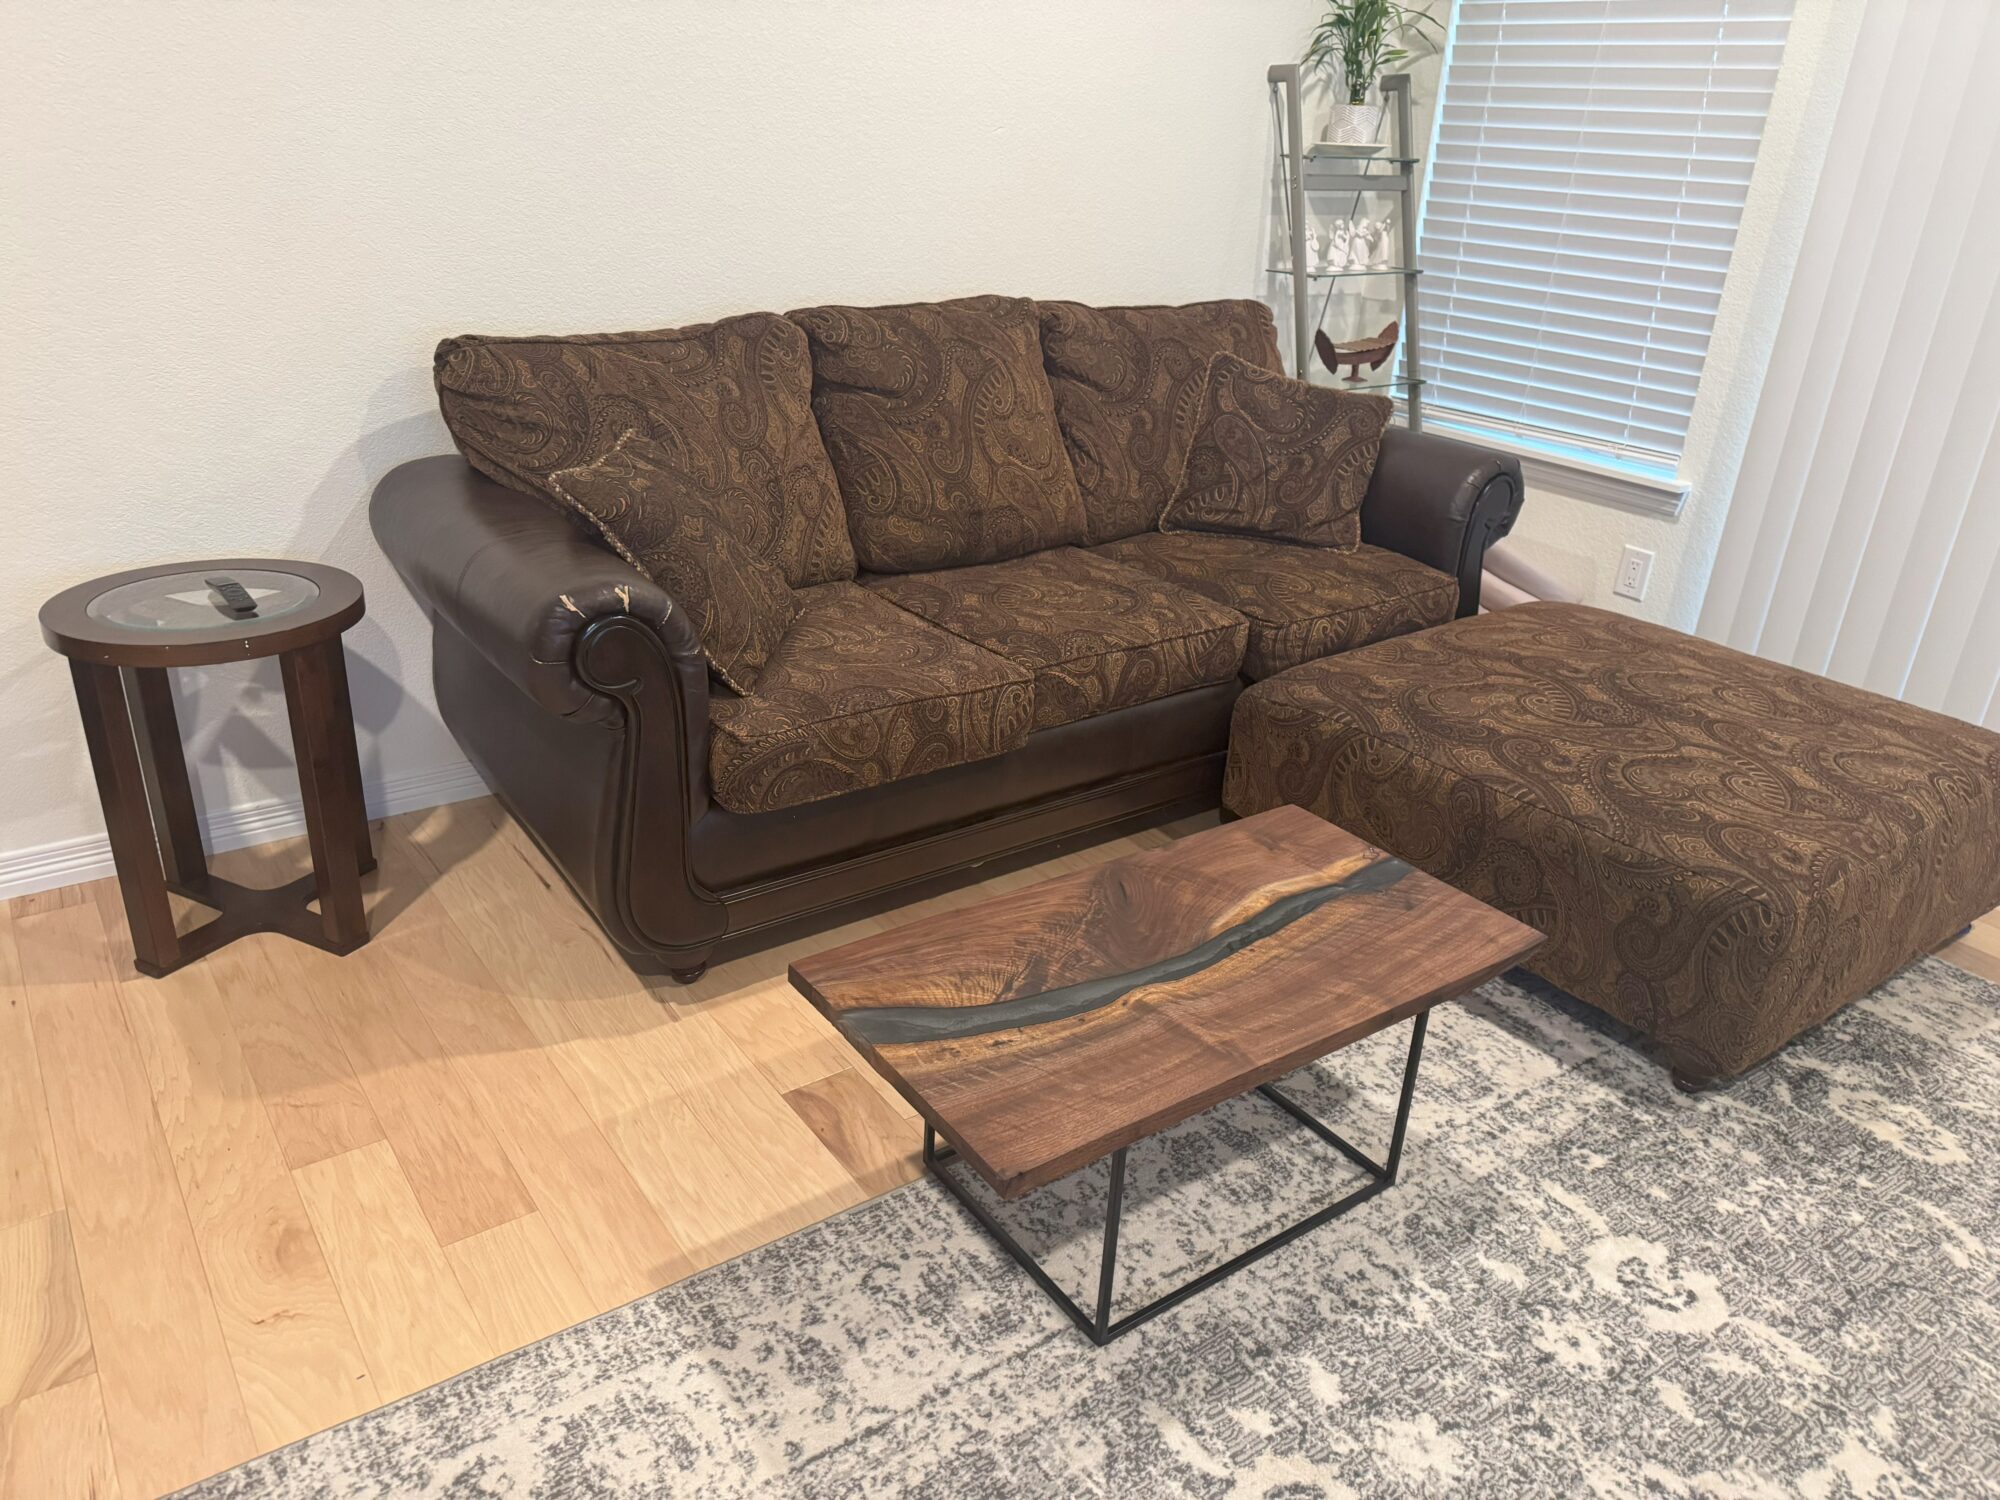
For my final project, I constructed a river epoxy table. This has always been a dream of mine to do as I grew to love wood working after creating a camping kitchen box for my Invention and Innovation class here at CU boulder. This was the first time I really worked with wood and went through all of the process from planning, purchasing, prepping, cutting, planning, and soo much more. What I feel in love with the most was being able to create art work with my hands and I did that with my team. The name of the piece will be “Cherished River” as this has brought so many new friendships and memories along the way. The aesthetic of a river epoxy table can be described as combining rustic and contemporary artistry. I believe I reached this goal as the touch of nature is exemplified by the texture and grain of the wood that is accented with the center river.
Timeline:
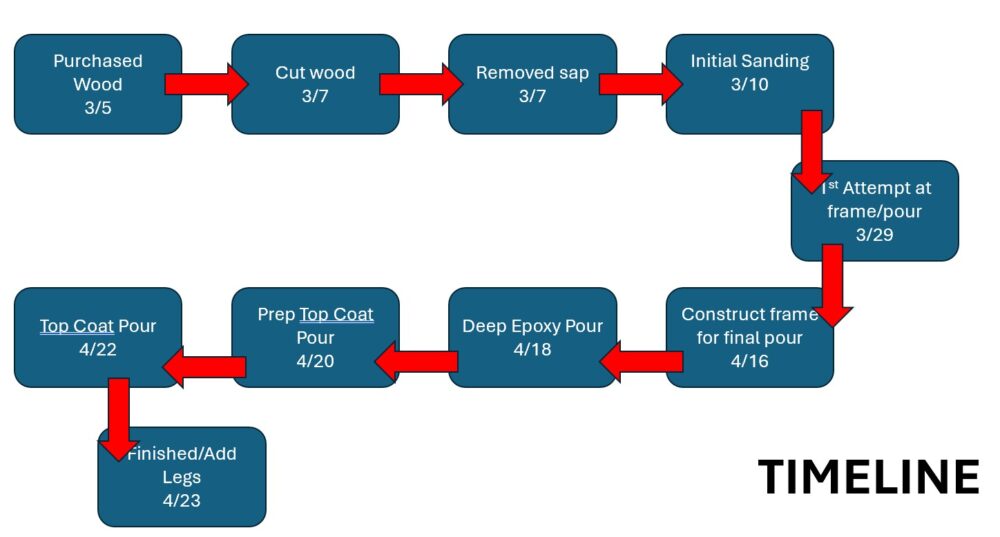
My initial timeline wasn’t met but I was able to improvise and accomplish my final project. I tried to follow the schedule as best as I could but I eventually just started working on it when I could and on free time.
Fabrication Process:
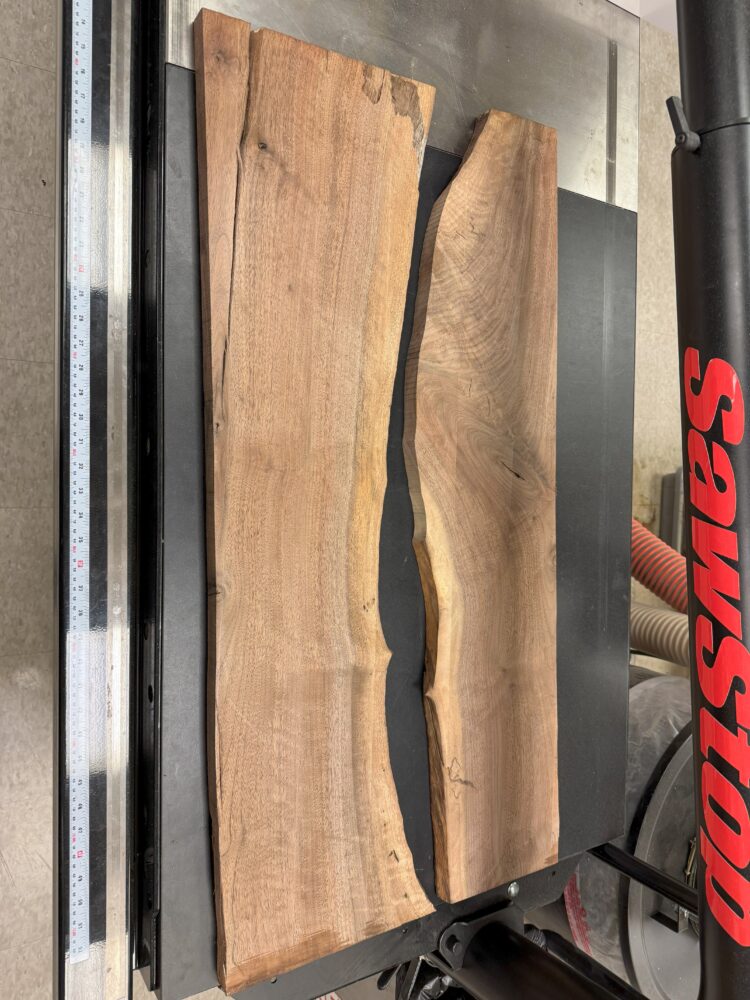
Initially, I drafted plans with dimensions for my piece and I found Collector’s Specialty Wood in Denver, CO as I was looking for an exotic piece of wood. I wanted to go with walnut in the begging but as I roamed around the yard I found a black walnut piece for good price and size.
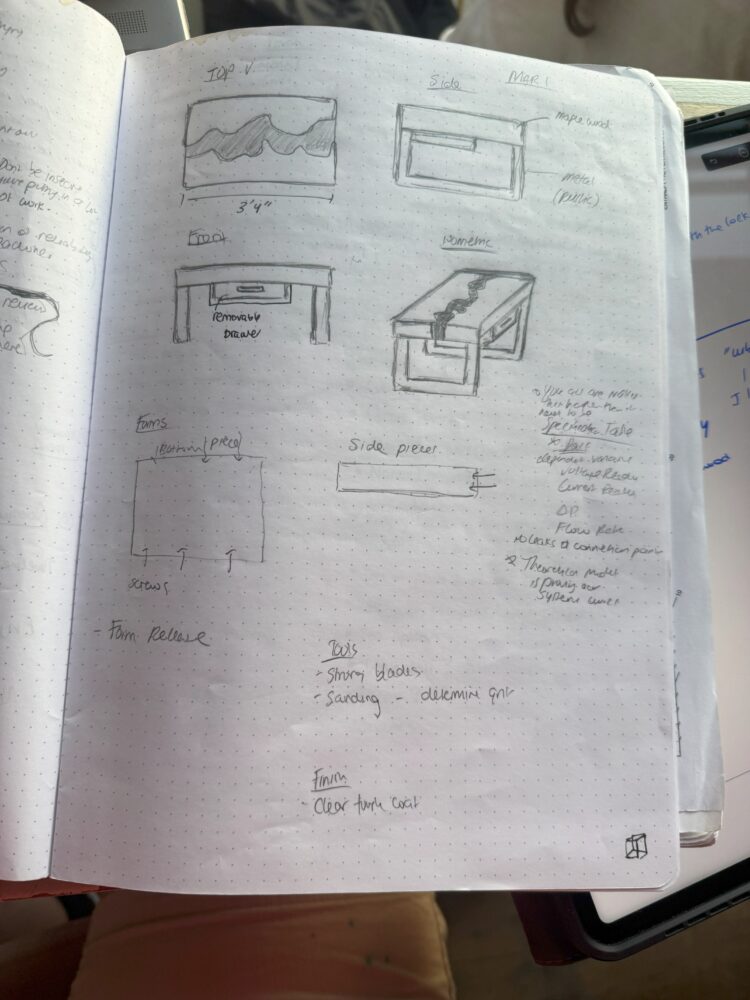
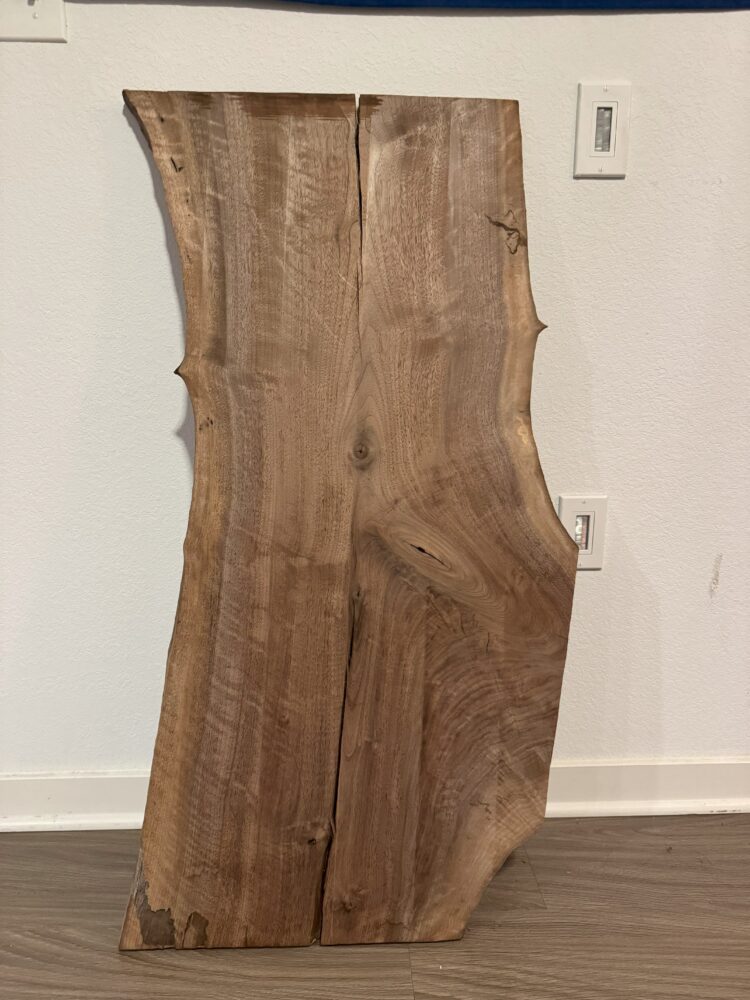 From here, I need To cut the piece to the dimensions I wanted which were 3’6″x1’8″. This was kind of based off of how large the piece was and cleaning it up.
Initially sanding took place and later on I realized that I actually needed a planner to get it more level for pouring which I found out with the first attempt.
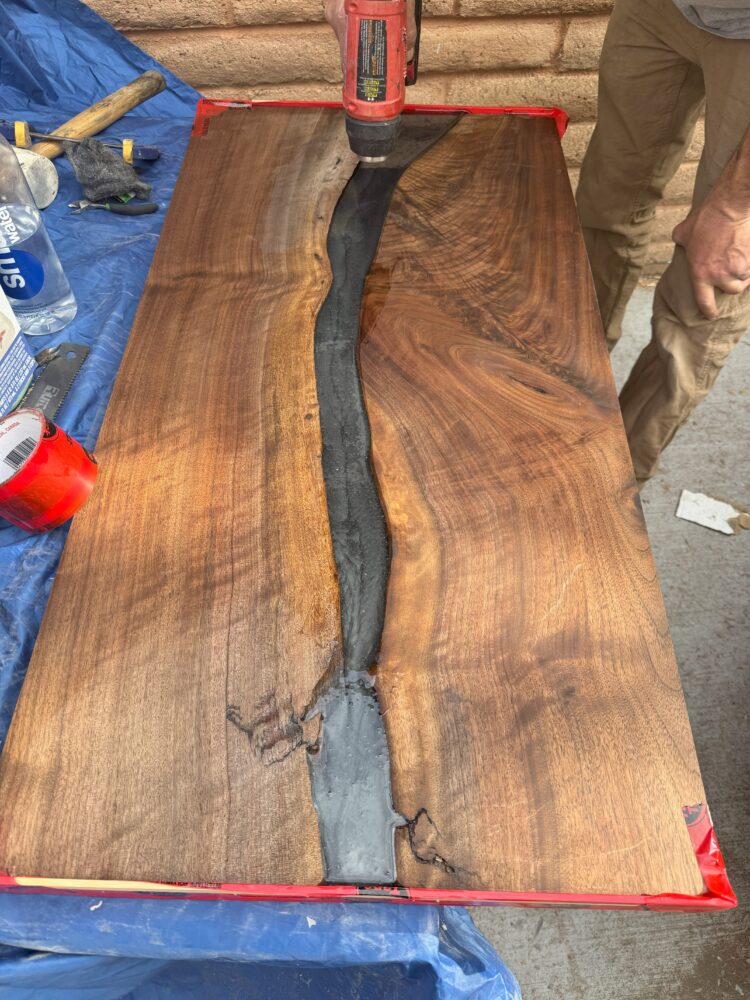
For my first attempt, I constructed a frame to size but not to the flush face of the edges of the wood which caused some trouble as well as not sealing the frame completely. This led to leakage through the cracks of the frame and eventually failure.
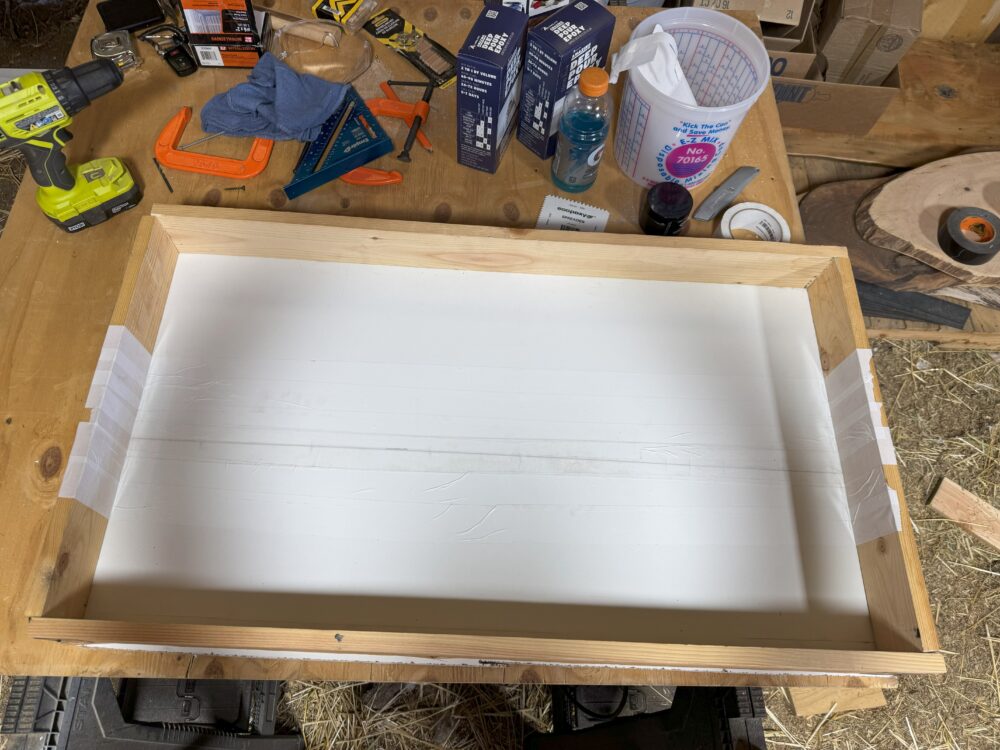
 My 2nd attempt, I took more time with planning, using a friends planner, constructed the frame to where it was flush against the edges and applied muck tape as a mold release for the form.
This came out successful for the 2nd deep pour which I mixed a metallic grey pigment for the river. Initially, I wanted to go with black to really give the attention to the wood but I found so many more options at the store which I was more fond of. Keep in mind, the wood needed to be weighted down to prevent the wood from floating during the pour.
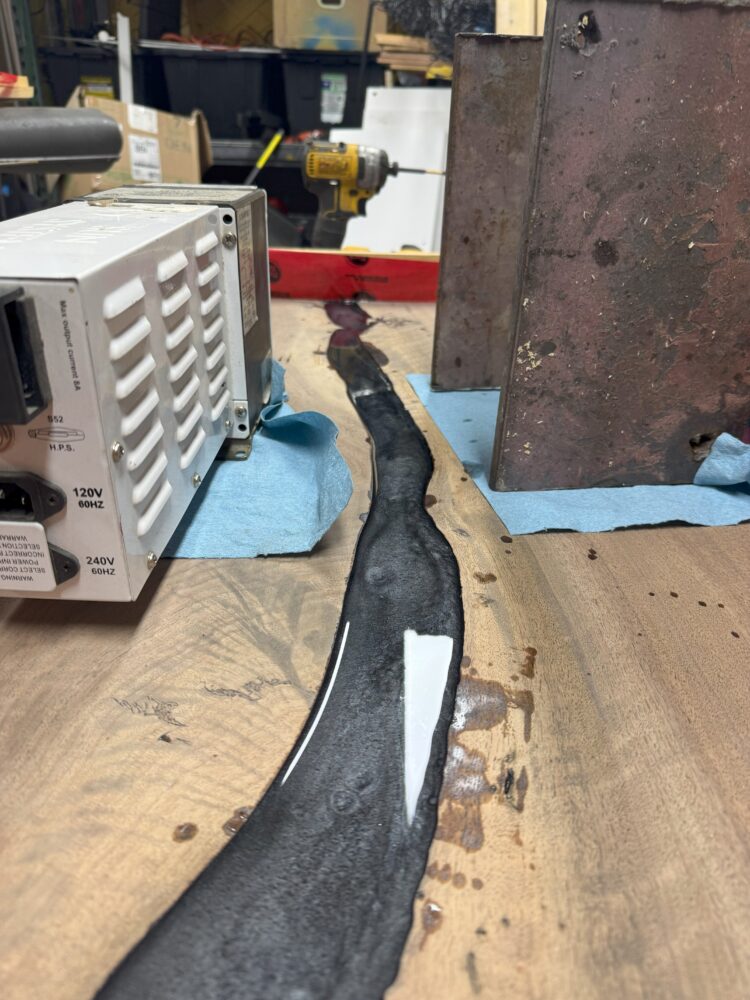
Once the deep pour set after 3 days, I was able to remove the excess epoxy with sand paper starting with 80 grit and moving up to a 220 grit. Once this was done, the top coat was able to be poured which sets within a day and has a thicker consistency for it’s durability.
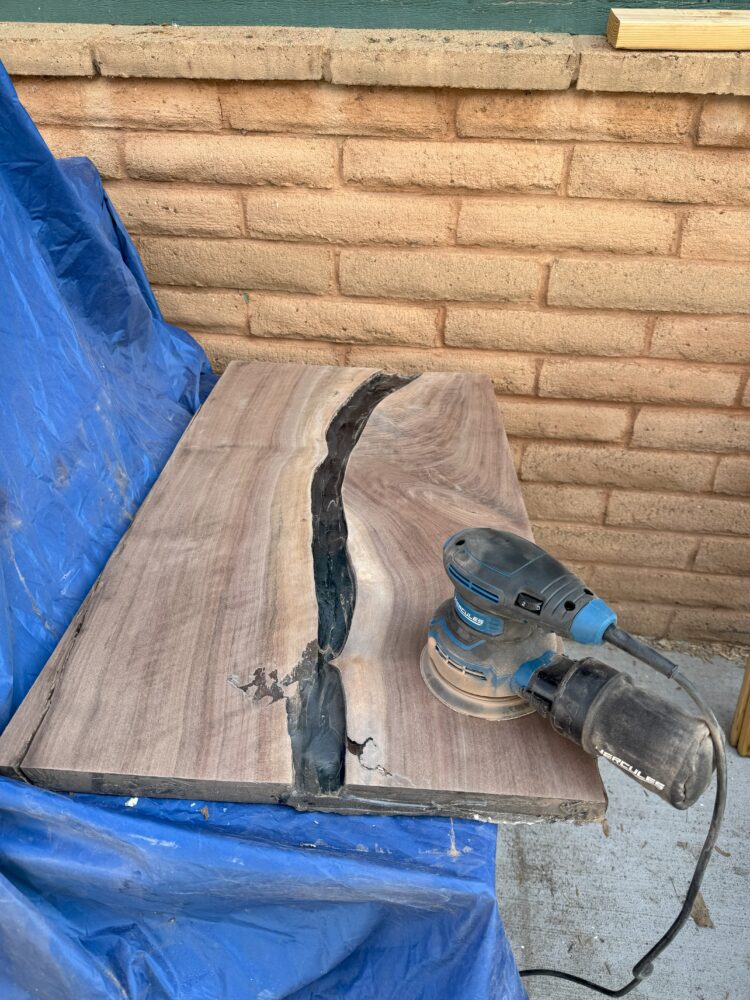
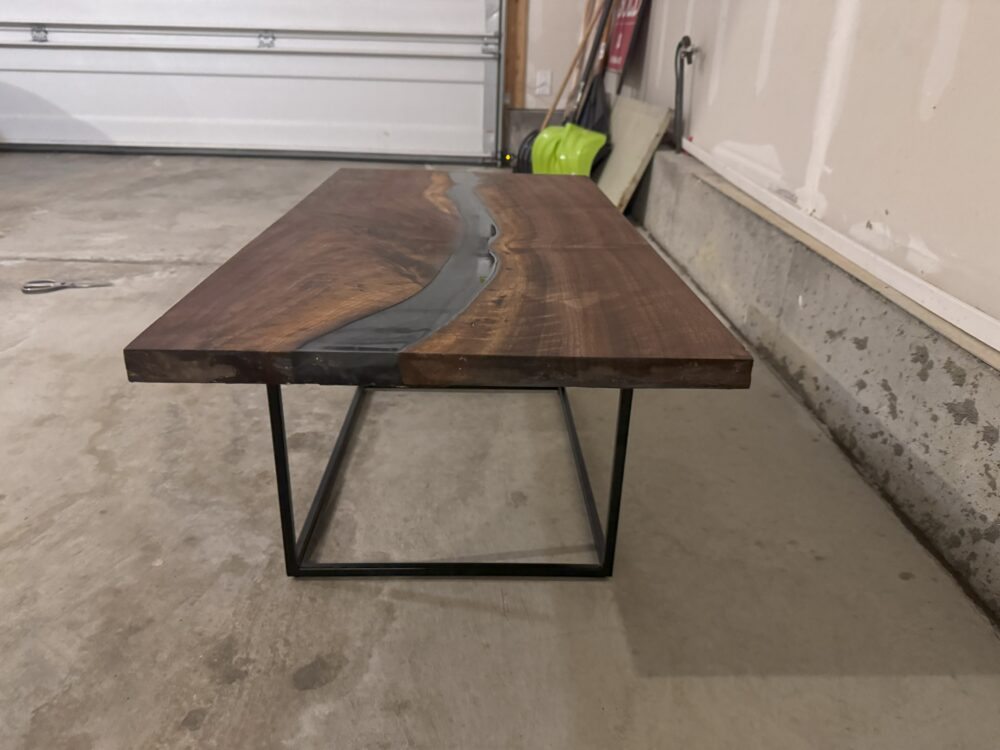
The final touch was removing excess epoxy once again, polishing the wood, apply butcher block oil to the top, and adding legs.
 Conclusion:
Overall, I’m happy with the way it turned out and I’m so thankful for all of the memories I created along the way. In the future, I plan on welding my own legs for the piece to give it a more custom presence and potentially adding lights underneath the epoxy to bring it more life.
1 Comment. Leave new
Hey Pisay,
This table looks amazing! I really like the choice of using walnut with black epoxy, and I always enjoy when woodworkers don’t use stain but instead showcase the natural grain of the wood itself. I think making your own legs would be a great way to elevate this project, and the lights could be really cool too. I would consider how well the light will travel through that black epoxy, as I think just adding a light feature could detract from the great product you have already. Great job!