
Introduction
Every project begins with an idea, but turning that idea into a physical object is a journey filled with decisions, pivots, trial and error, and a lot of improvisation. This clothing rack began as a vision: a rugged yet refined piece of furniture that could bring together industrial and vintage aesthetics in a way that felt cohesive with my personal style. I wanted something functional but also a piece that I could imagine not only in my current bedroom but also in a future apartment, maybe even a New York City loft. While that vision helped guide the overall look and purpose of the project, the actual process of creating this piece required constant adaptation and problem-solving. In this post, I’ll walk through how I built the rack, what tools I used, how I adjusted my design to meet real-world constraints, and what I learned through each step of the build.
Matching my desired aesthetic
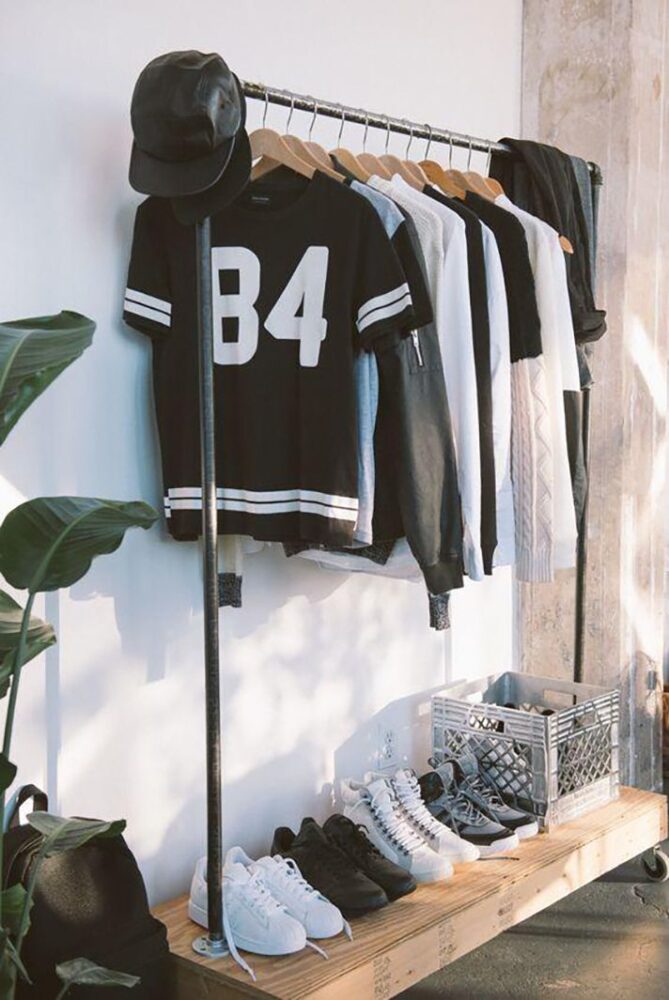
Before I picked up a single tool, I spent a considerable amount of time researching and refining the concept. Pinterest was my go-to platform for collecting references. I searched terms like “urban furniture,” “vintage bedroom,” and “men’s industrial room decor,” and slowly began compiling a folder of inspiration that reflected the mix of raw materials and minimalist forms I was drawn to. One image that really stuck with me was a rack made entirely from matte black piping. It was sleek, functional, and had that urban-industrial vibe I was going for. But the more I looked at it, the more it felt too clean, nothing like the NYC style I was going for. I wanted something with more personality and texture, something that looked like it had a story. That’s when I pivoted toward more rugged materials: raw steel, reclaimed wood, weathered finishes. A specific coat stand made from plumbing pipe and mounted onto an antique wood pallet caught my attention. This fusion of steel and wood became a design cornerstone. It offered the contrast I wanted, tough and soft, modern and vintage. While the Pinterest boards gave me direction, I knew I’d need to tailor the final design to my own spatial needs and budget. Along with the time constraints of finishing the project this semester.
Initial Sketches and Planning
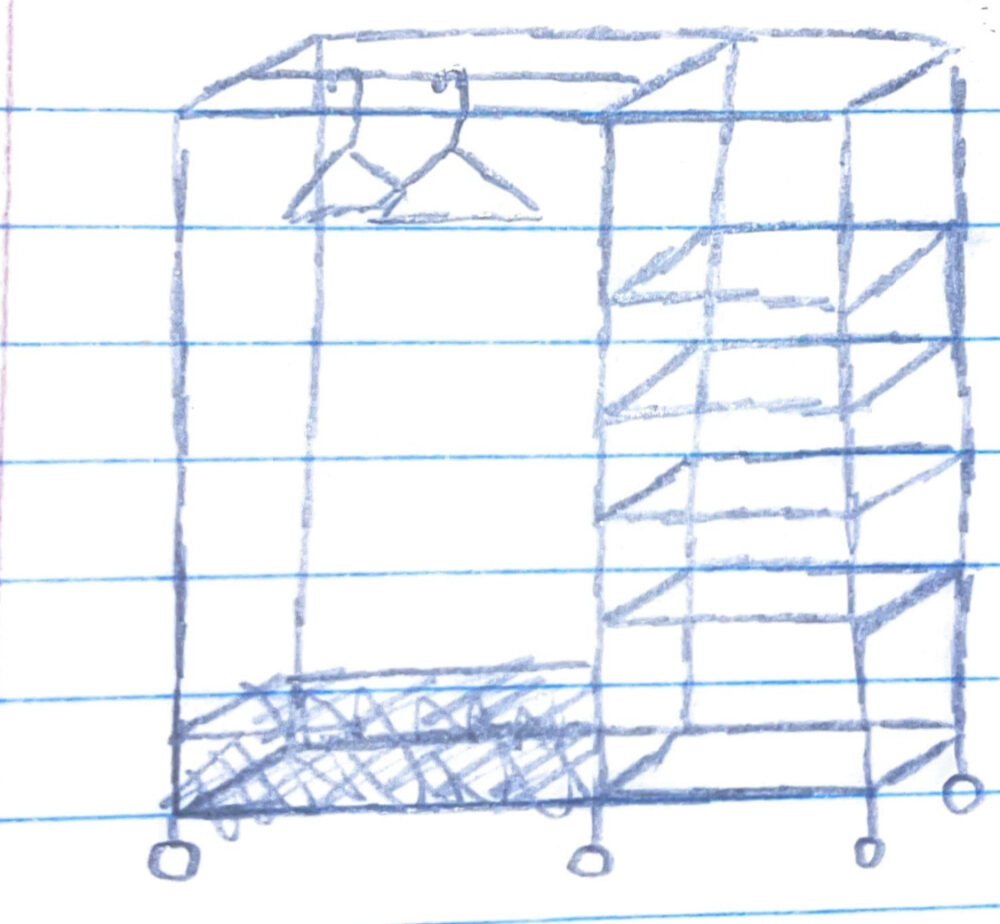
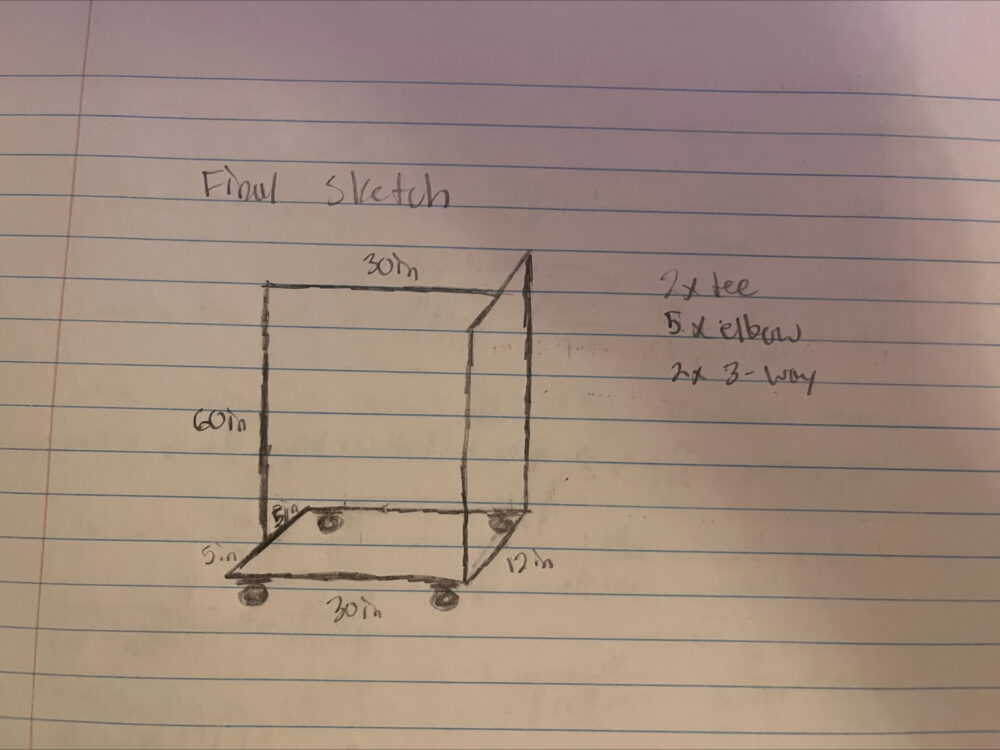
With an aesthetic direction in mind, I turned to paper. Sketching was my way of problem-solving visually. I made several iterations, playing with the placement of hanging rods, the inclusion of shelves, and the possibility of adding caster wheels for mobility. My sketches helped me figure out proportions based on my room’s layout, a roughly 5-foot-wide, 2-foot-deep space.
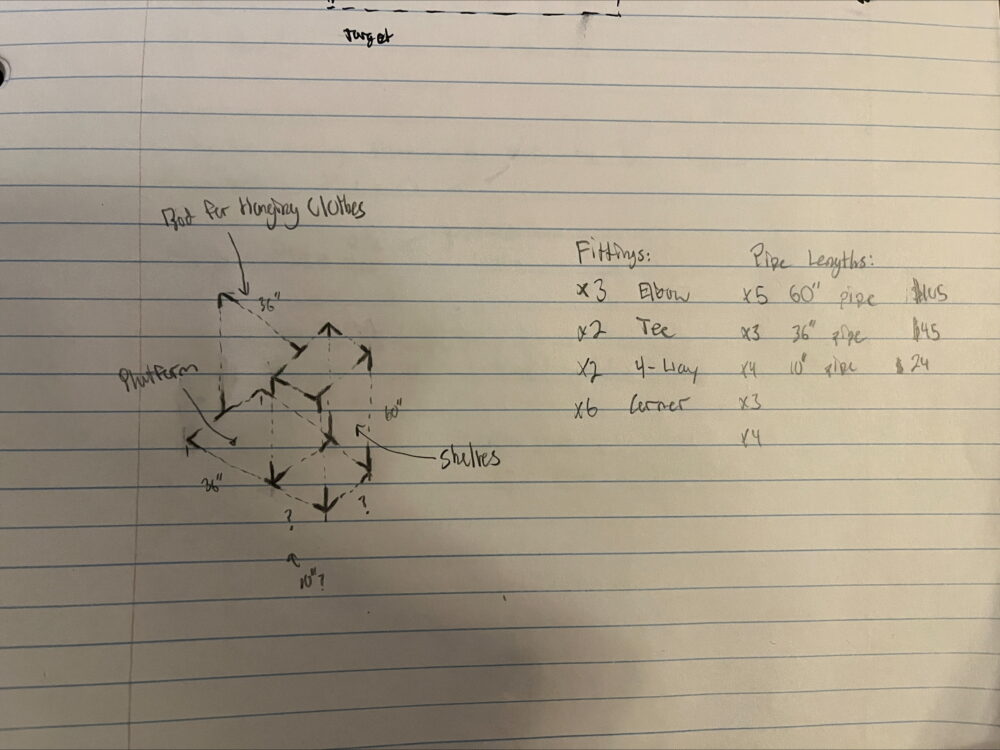
At this stage, I also made a rough parts list. I broke down the project into components: pipes, joints, wooden boards, wheels, and tools. I knew I had to stay under a $150 budget, which immediately influenced the kind of materials I could consider. I also started thinking about how modular the piece could be. I wanted the flexibility to move or even reconfigure it in the future, especially if I ended up taking it to a new space.
Prototyping and CAD Modeling
Once I had a clearer vision on paper, I explored digital modeling. I used basic CAD software to test dimensions and proportions more precisely. This helped me identify potential weak points in the structure and allowed me to visualize how the rack would function. Where clothing would hang, how much space folded items would have, and how it would all balance. However, the CAD phase also brought up some questions. How would I anchor the shelves? Would the structure be too top-heavy? Would caster wheels hold the weight without tipping the rack? These were technical issues I couldn’t fully resolve on the computer, which meant I’d need to experiment during the build itself. I also couldn’t get parts to properly connect in SolidWorks, so it didn’t end up being as helpful as I thought for visualizing the project. But it was still useful for dimensioning and getting my thoughts onto media.
Sourcing Materials: From Online to In-Store
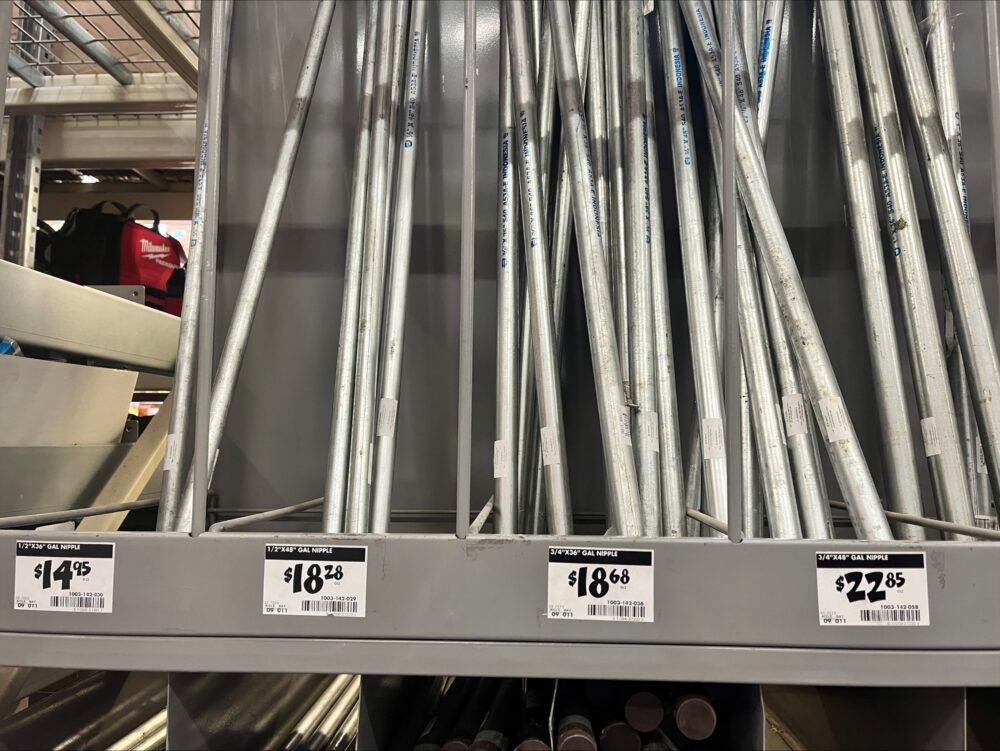
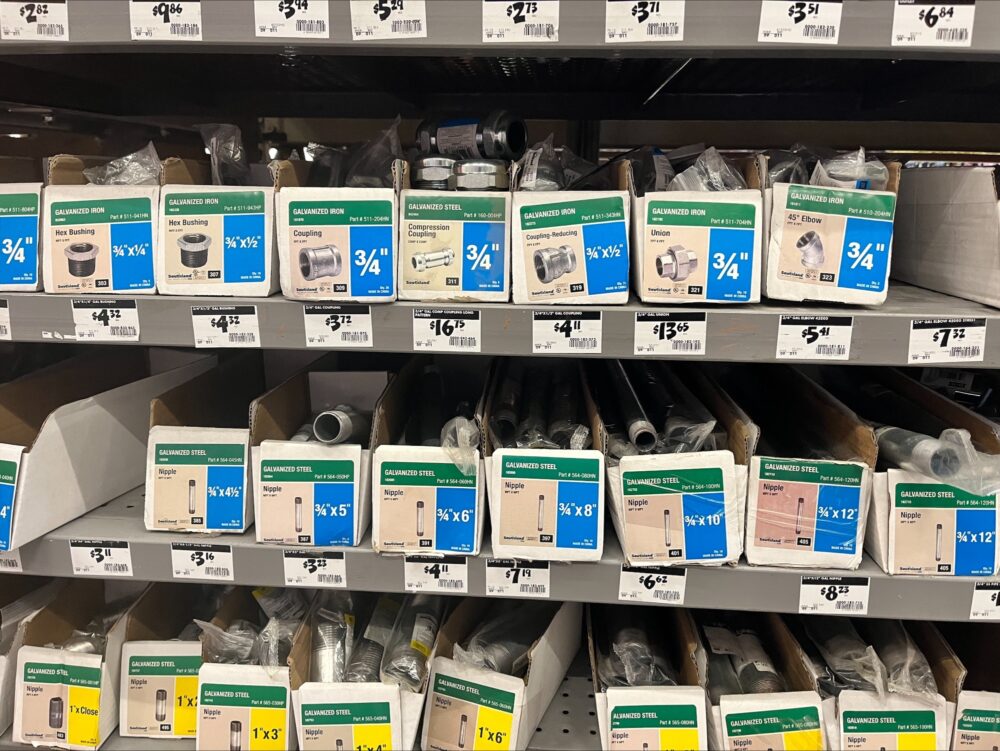
Originally, I had planned to source everything from McMaster-Carr a go to supplier for industrial hardware, and where I sourced the CAD part files. But when I actually started browsing their inventory, I quickly ran into a problem: cost. The four-way pipe fittings I needed for shelf supports were either too expensive or not available in the sizes I needed. Buying everything from McMaster would’ve pushed the project well beyond my budget, and didn’t have a great selection for pre-threaded pipe. So, I adapted. I decided to head to Home Depot and see what they had on the shelves. This ended up being a turning point in the project. The in-store inventory didn’t match my original design plans. Several fittings, especially the four-way joints, weren’t available. But I saw it as an opportunity rather than a setback. If I couldn’t build the exact rack I sketched, I’d simplify. Instead of incorporating built-in shelves, I shifted focus to creating a streamlined clothes-hanging system with a single crossbar. This also meant I could reduce material costs significantly while keeping the core function intact.
The Build Process
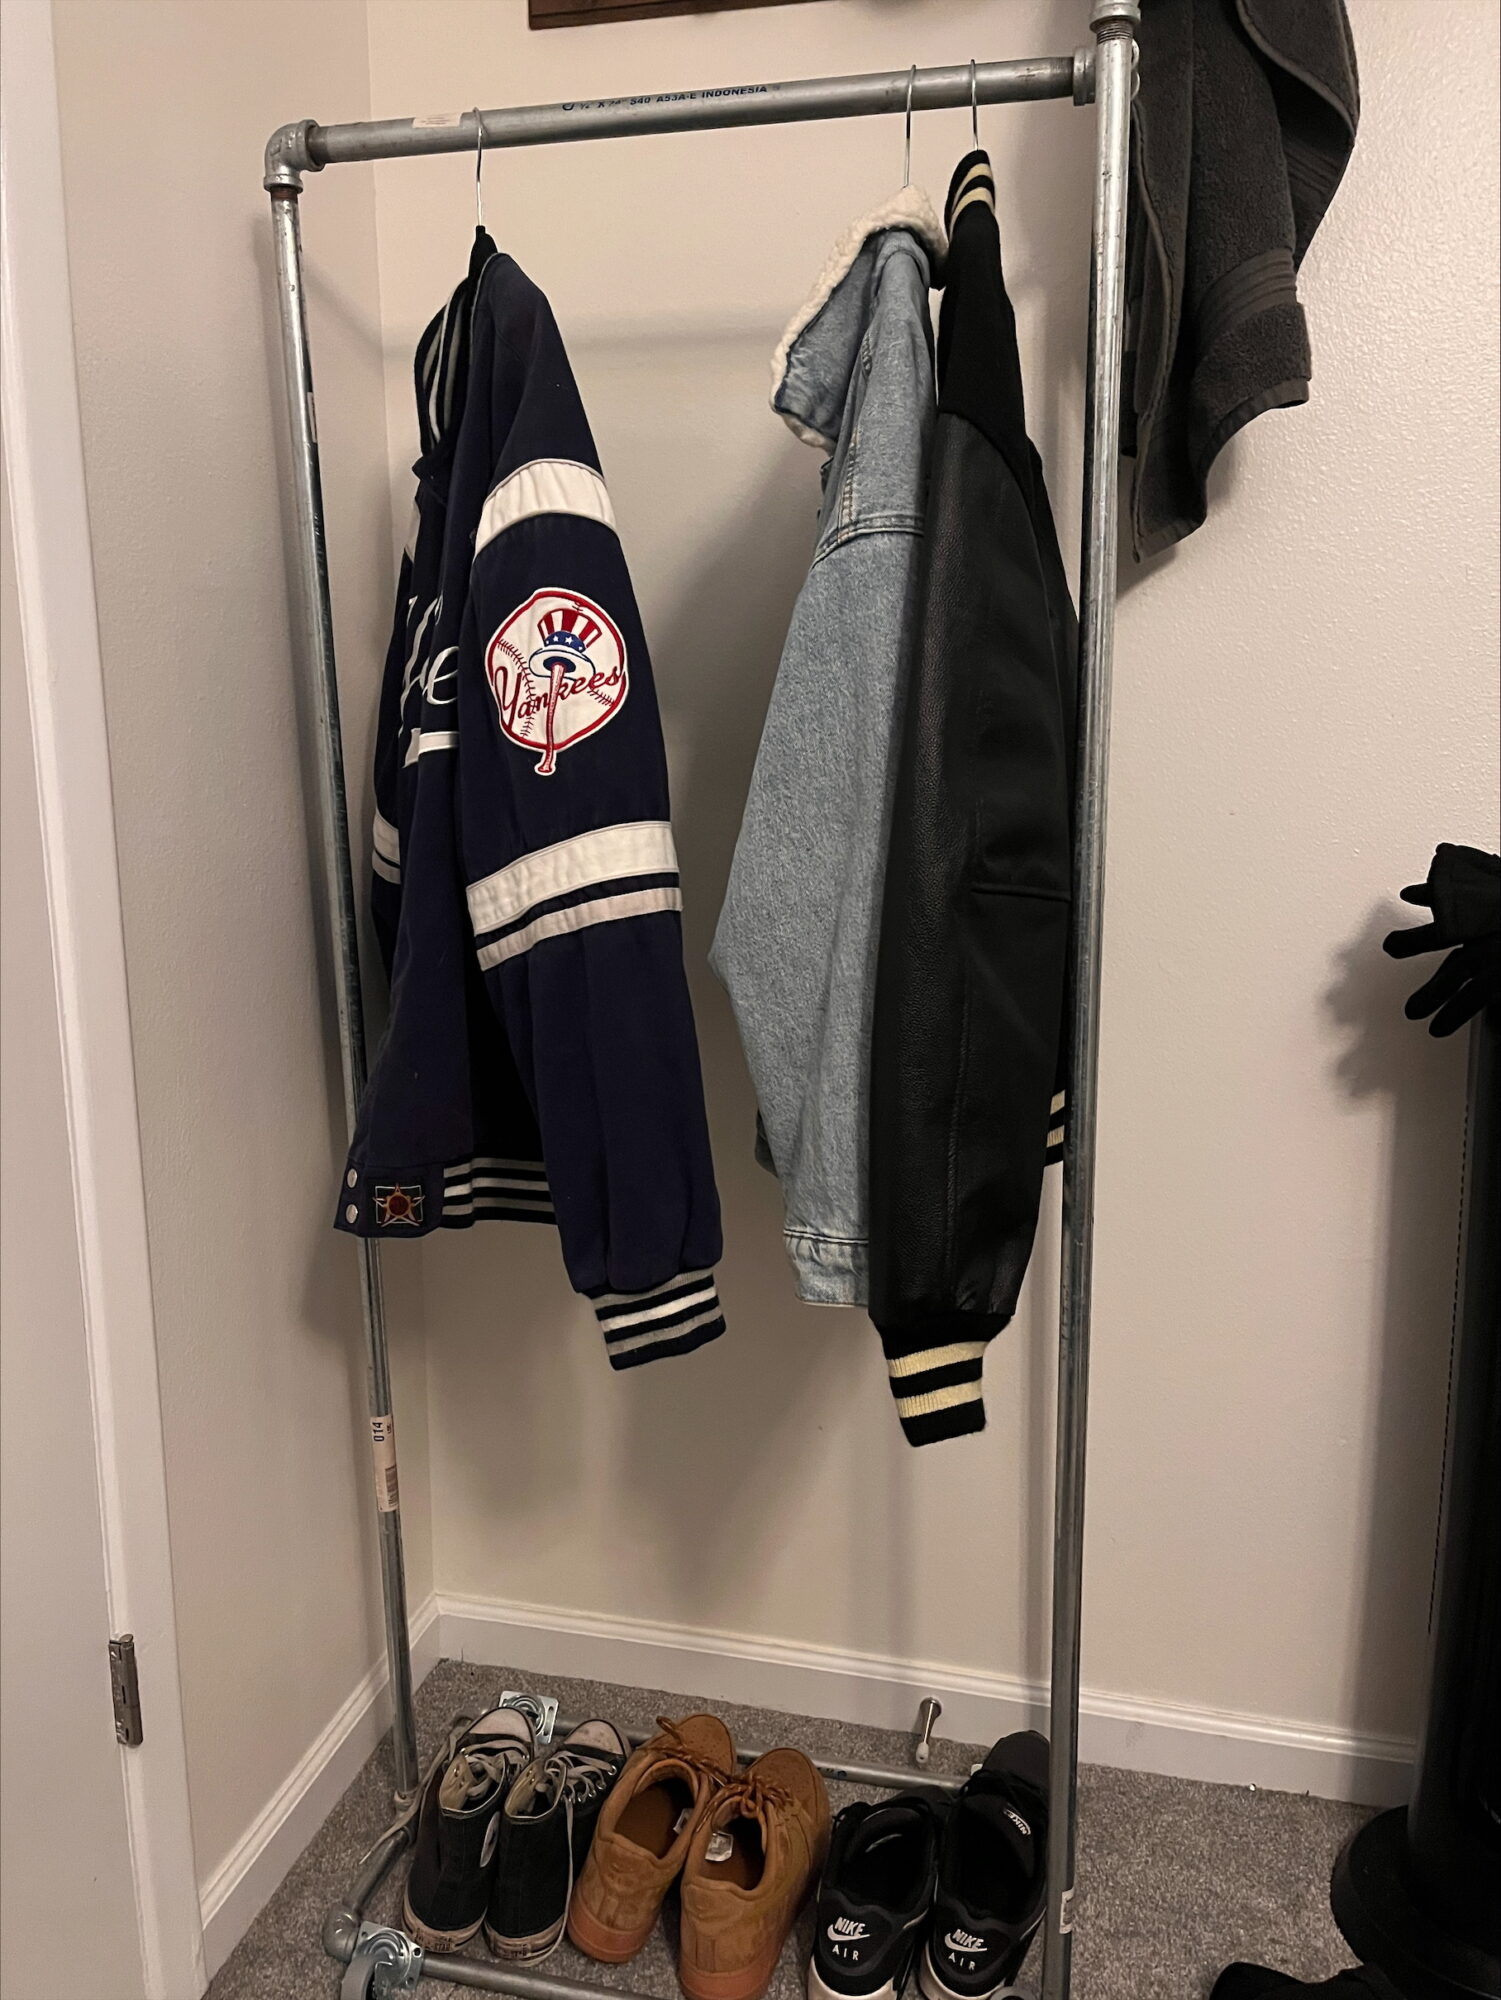
Once I purchased all the materials, steel pipes, elbow joints, and caster wheels, I brought them home and started laying everything out. I did a dry-fit first, assembling the pieces loosely to confirm that the measurements were correct and everything was balanced. This early step was crucial. It helped me double-check that the proportions worked in my room and allowed me to spot any issues before committing to a final assembly. Unfortunately, I ran into some issues that could’ve been resolved if I’d done more research. This is because when making a rectangle or loop of threaded pipe, the last pipe you tighten is going to simultaneously loosen on the other end. The only real solution to this is by using a fitting called a “union” which allows you to tighten two pipes together at the same time. I explored some alternate solutions like only tightening certain thread 3/4 of the way, but this ended up making the rack unsteady, so I had to go back to the drawing board. I had to return some of the pipes to Home Depot, in exchange for two two shorter pipes and a union so that I could fix this issue. Next came the full assembly. I tightened each joint carefully and mounted the rack onto the caster wheels. Stability was a concern, so I tested the rack’s strength by loading it with jackets, jeans, and a few pairs of shoes. The steel pipe held up well, which is one of the benefits of using industrial materials. One unexpected problem I had was that the caster wheels didn’t roll well on my carpeted floor. I had imagined the rack as this mobile, dynamic piece, but in practice, it didn’t move smoothly. Still, I decided to keep the wheels in place, knowing that future apartments, especially the hardwood-floored NYC loft I dream of, would allow the rack to function as intended. I also didn’t have time to source a metal drill bit and drill block to be able to secure the caster wheels with bolts. This is a modification I would like to make in the future to make the rack sturdier as well.
Reflecting on the Process
This wasn’t just a furniture project it was a design challenge, a construction lesson, and a creative exploration all rolled into one. While the finished rack is simpler than my initial sketches, I actually think the limitations helped focus the design. Stripping away the shelves forced me to emphasize clean lines and strong function. It also left room for future add-ons. I’ve already thought about adding a top shelf down the line or attaching hooks along the side for accessories.
The project also made me appreciate the value of flexibility in design. In the classroom or on Pinterest, you can get caught up in the “ideal version” of a thing. But in the real world, materials run out, fittings don’t align, budgets get tight. Being willing to adjust on the fly, not just accepting change, but embracing it was probably the biggest takeaway for me.

Conclusion
Building this clothing rack taught me far more than I expected. It was a crash course in material sourcing, structural design, budgeting, and problem-solving. It reminded me that good design isn’t just about how something looks on paper, but it’s about how it performs in real life, how it adapts to constraints, and how it reflects the environment it’s built for. I set out to create a piece that fit both my current room and my broader lifestyle goals. In the end, I built something that not only organizes my clothes but also tells a story of how I took an idea, reshaped it, and made it real. The imperfections in the process are what make the finished product feel personal. And while I may revisit the design in the future and add more features, I’m proud of what this version represents: a grounded, well-executed step forward in my own creative process.
References
BuzzFeed. (n.d.). 23 ways to turn your garment rack into actual home decor [Pinterest pin]. Pinterest. https://www.pinterest.com/pin/23-ways-to-turn-your-garment-rack-into-actual-home-decor–163888873925577470/
All other images and work are my own.