
The How Behind the Build: Fabricating the Cozy Cabin Perk-a-Cola Display
This blog is all about the how—the behind-the-scenes process of actually designing and building my Cozy Cabin Perk-a-Cola Bottle Display. From testing switches to painting fake moss onto a 3D print, this was a hands-on project where I learned a lot just by doing. I used what I already knew, picked up new skills along the way, and looped through several design cycles to make everything work together smoothly.
This post will break down my full timeline, show how the design evolved, and go step-by-step through the fabrication process. I’ll also talk a bit about what changed from my original plan and where the final project is headed.
Timeline of the Process
Below is a breakdown of how the project developed over time.
(Insert timeline graphic here – can be a horizontal bar graph or calendar layout)
| Week | Focus |
|---|---|
| Week of 3/17 | Finalized concept and aesthetic, created early sketches, started BOM |
| Week of 3/24 | Ordered electronics and basic materials, tested early parts |
| Week of 3/31 | Started CAD modeling and 3D printing tests, tested end switch setup |
| Week of 4/7 | Integrated electronics with 3D-printed bottle holder, soldered everything |
| Week of 4/14 | Finalized tolerances, printed working prototype |
| Week of 4/21 | Printed remaining parts, started painting and adding decor |
| Week of 4/28 | Assembly, debugging, aesthetic finishing touches, documentation |
| Week of 5/5 | Final photos, blog posts, and reflection write-up |
Each week had its own cycle of exploring ideas, buying materials, testing components, fixing mistakes, and moving forward. I didn’t always stick to the plan perfectly, but each loop helped make the project better.
Step 1: Planning and Sketching
I started by sketching out the general idea of the shelf: five bottles, spaced out across about two feet, with lighting and audio triggers underneath. I also drew out rough ideas for how the wiring would be hidden, where the speaker would go, and how to mount the back panel.
These sketches weren’t perfect, but they helped guide my CAD modeling and gave me a clear starting point.
Step 2: Shopping and Parts Testing
I ordered:
-
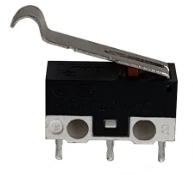
End switches (the ones with a satisfying “click”)
-
White LED strips
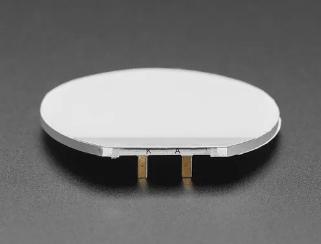
-
A small 3W speaker
-
A DFPlayer Mini sound module
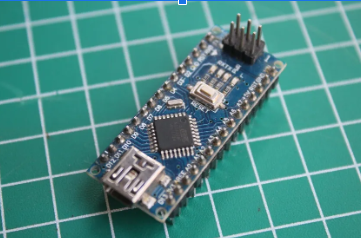
-
An Arduino Nano
-
Lithium-ion batteries + a charging board
-
Wood-tone PLA filament
-
Faux moss and mini pine trees
Once everything came in, I tested the parts on a breadboard. I made sure the end switches triggered correctly, the speaker played audio off a microSD card, and the LEDs could be controlled with simple digitalWrite commands.
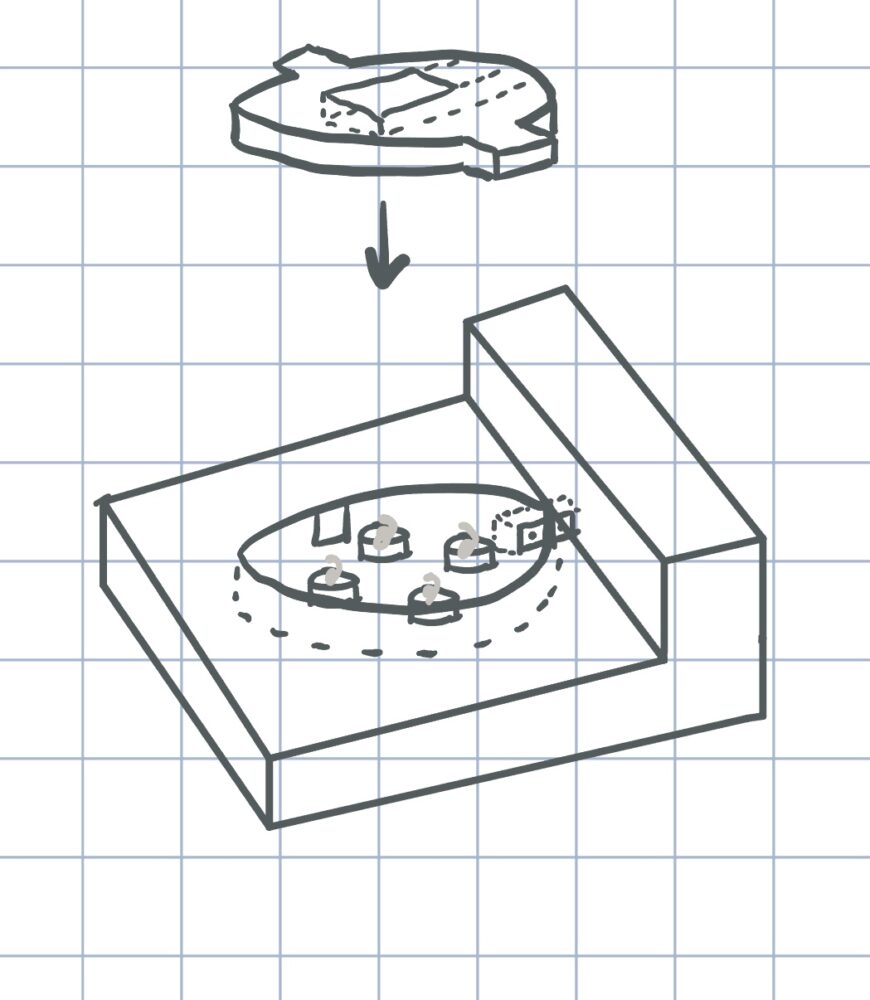
Step 3: CAD Design and Tolerance Testing
Using Fusion 360, I modeled:
-
The base shelf
-
Coasters that slide up/down and press the end switches
-
Slots for bottles and space to hide the wiring
-
Back panel with tree cutouts and space for decor
-
Logo plates that would sit in front of each bottle
The coaster mechanism was the most important part to get right. I printed several test pieces until I found a fit that moved smoothly without too much slack. If the coaster didn’t move correctly, the switch wouldn’t trigger—or it would stay stuck. Once it felt smooth and responsive, I moved forward.

Step 4: Electronics Integration
After confirming everything worked separately, I soldered all the wires together:
-
Each end switch runs to a digital pin on the Arduino
-
Each LED strip runs to a transistor (to keep brightness consistent)
-
The DFPlayer Mini is wired to TX/RX on the Nano
-
Power comes from a 2-cell lithium-ion battery with a charging module
I programmed the Arduino so that:
-
When a bottle is placed (switch pressed), the LED turns on
-
When the bottle is removed (switch released), a specific audio file plays
Each slot has its own logic, with delays and sound lockouts to avoid overlaps.
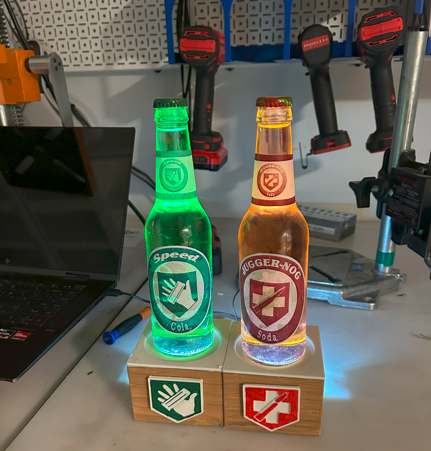
Step 5: Making the Bottles
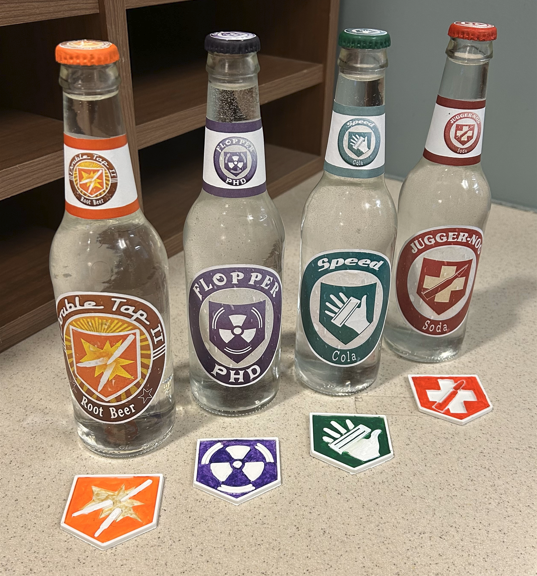
To recreate the Perk-a-Cola bottles, I reused clean glass bottles and printed out high-res logos on paper. I cut each one out by hand, glued them to the bottles, and sealed them with matte clear coat. The result is a simple but effective replica that looks great under lighting.
I also 3D printed each perk logo in resin and hand-painted them to match the in-game designs. These sit on the front of the shelf and help identify each bottle’s slot. They also add a lot of personality to the display.
Step 6: Decorative Touches
To bring out the cozy cabin aesthetic, I printed:
-
Faux wood siding to attach to the sides and bottom
-
Stylized pine trees for the back panel
-
Mounting brackets in matte black
I also added patches of faux moss to the edges of the display using hot glue. The idea was to make it look like a shelf you’d find in a quiet cabin, where nature is starting to creep in.
Every piece of wiring was routed through hidden channels to keep things clean and focused on the look, not the electronics.
Step 7: Final Assembly
Once all the prints and electronics were ready, I mounted:
-
All five bottle coasters with springs and switches
-
LED strips into the recessed slots
-
Speaker and sound module behind the back panel
-
Moss and tree elements as a final touch
After testing all five bottle positions and their matching sounds, I closed it all up, added a main power switch, and took final photos.
Reflection and Conclusion
When I first started this project, my goal was pretty simple: build a cool display that lights up and plays a few sounds when bottles are placed or removed. But as the project came together, it became a lot more than that. It turned into a piece that not only functions the way I hoped—it feels finished. It looks like something you’d actually want to hang up, and more importantly, it reflects a mix of my interests: engineering, gaming, and design.
What Worked
A lot of the foundational stuff—like wiring up LEDs, writing the Arduino code, and getting sound playback through the DFPlayer—went surprisingly smoothly. I had worked with these components in previous projects, so that part of the build felt pretty comfortable. Once everything was wired and soldered, I was able to test each feature quickly and move forward.
The aesthetic also came together really well. The wood filament, painted perk logos, faux moss, and miniature trees helped nail the cozy cabin feel. I think the biggest success was keeping the electronics hidden—everything feels clean and intentional rather than looking like a DIY science fair project.
What Was Hard: Tolerancing
The biggest challenge by far was getting the mechanical tolerances right, especially for the bottle coasters. These are the small platforms that the bottles sit on, and they needed to:
-
Slide down just far enough to press the end switch,
-
Return back up cleanly when the bottle is removed (thanks to a spring), and
-
Do all of that without binding, getting stuck, or wobbling.
At first, I underestimated how precise these tolerances had to be. My first few prints were either too tight and jammed immediately, or too loose and didn’t press the switch properly. Even a half millimeter made a noticeable difference. That led to a lot of test printing, adjusting clearances, and manually filing down parts just to get a feel for what worked.
There were also challenges in aligning the coaster’s motion with the spring force. If the spring was too strong, it would resist the bottle and feel unnatural. If it was too weak, the coaster wouldn’t return reliably. On top of that, the alignment between the switch, coaster, and bottle slot had to be nearly perfect, or the system would fail to trigger consistently.
I ended up printing three full redesigns of the coaster setup and multiple test blocks just to dial in the spacing. It was time-consuming and sometimes frustrating, but once I finally hit the right balance, the mechanism worked exactly how I wanted—and it was super satisfying.
This part of the build reminded me that sometimes the mechanical stuff is just as tricky as the electronics, if not more so. Coding can be debugged line by line, but tolerances have to be tested physically, and every iteration takes time to print and reassemble.
What I’d Do Differently
If I were to do this again—or build a second version—I’d make a few changes:
-
Start prototyping the coaster mechanism earlier: I jumped into CAD pretty quickly without fully testing how the switch, spring, and coaster would all interact in practice.
-
Use adjustable mounts for the switches: Instead of hard-mounting everything, I’d design slots or screw mounts that let me fine-tune the switch position once the coaster is in place.
-
Print smaller test sections: I lost a lot of time printing entire coaster assemblies when I really only needed to test small pieces like the slide fit or switch position.
-
Explore using different switch types: Tactile switches might have given me a bit more flexibility in placement and feel, depending on the motion I wanted.
That said, solving this part of the problem made the whole project feel more like an engineering puzzle. It was definitely the hardest part, but also the most rewarding once it worked.
What Happens to the Project Now?
The display is going to live in my space at home—probably mounted near my desk or game setup. It’s functional, but honestly, its main value is visual. It’s a piece that sparks conversation and taps into nostalgia. I’m proud of how it looks and how much personality it has. Even people who don’t know Call of Duty can still appreciate it as a cool, interactive shelf.
I may add more polish later, like a remote power switch or even a sixth bottle slot if I want to expand it. But for now, I’m happy with where it landed.
Looking Back
What started as a basic electronics project turned into something way more creative and meaningful. It brought together everything I’ve learned in college—basic circuits, 3D modeling, design thinking—and let me apply it in a way that’s personal. The tolerancing issues nearly threw me off, but they also pushed me to problem-solve and stay persistent.
The finished product isn’t just functional—it’s a real object that blends art and engineering in a way I never would’ve guessed when I made those original bottle props in middle school. That full-circle moment made all the time and effort worth it.
Final Thoughts
This wasn’t just a build—it was a way to bring together everything I’ve learned in college and channel it into something personal. It’s not perfect, but it works, it looks cool, and it means something to me. That’s all I really wanted.
Stay tuned for final photos, the project video, and maybe a future upgrade or two. Thanks for reading!