
Timeline
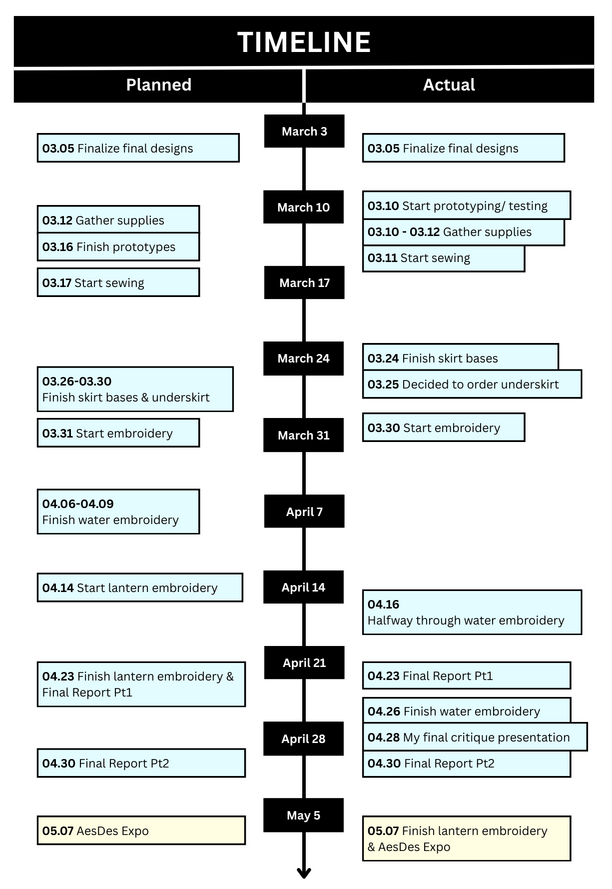
Because I had expected my project to take a long time, I had to settle on a design and buy the supplies as soon as possible. I anticipated that I would need to spend extra time understanding how to sew and figuring out how to use the sewing machine. Hence, I rushed to get my initial supplies and start sewing.
Comparing my intended timeline and my actual timeline, the sewing portion was on track and wasn’t too difficult to learn. While some aspects of the skirt base could’ve been improved, it was a success overall. However, I underestimated the time, effort, and materials required to embroider a skirt. I had planned on embroidering two skirts, but I only finished one.
Process: Supplies
I began by gathering the main materials I needed. Over the course of this semester, I had planned on sewing something for a project, so I bought some sewing tools and embroidery tools. Moreover, I had some embroidery floss from previous projects. Hence, I only had to buy the fabric for the skirt base. After researching, I noticed that there weren’t many fabric limitations for skirts, so I decided to go with the most comfortable fabric: polyester/spandex knit fabric. Fabric can be pretty expensive, so I budgeted most of my money on the fabric. Despite being on sale, it was still expensive because I bought enough fabric for three skirts (one extra incase I messed up the first one).
Process: Sewing Bases
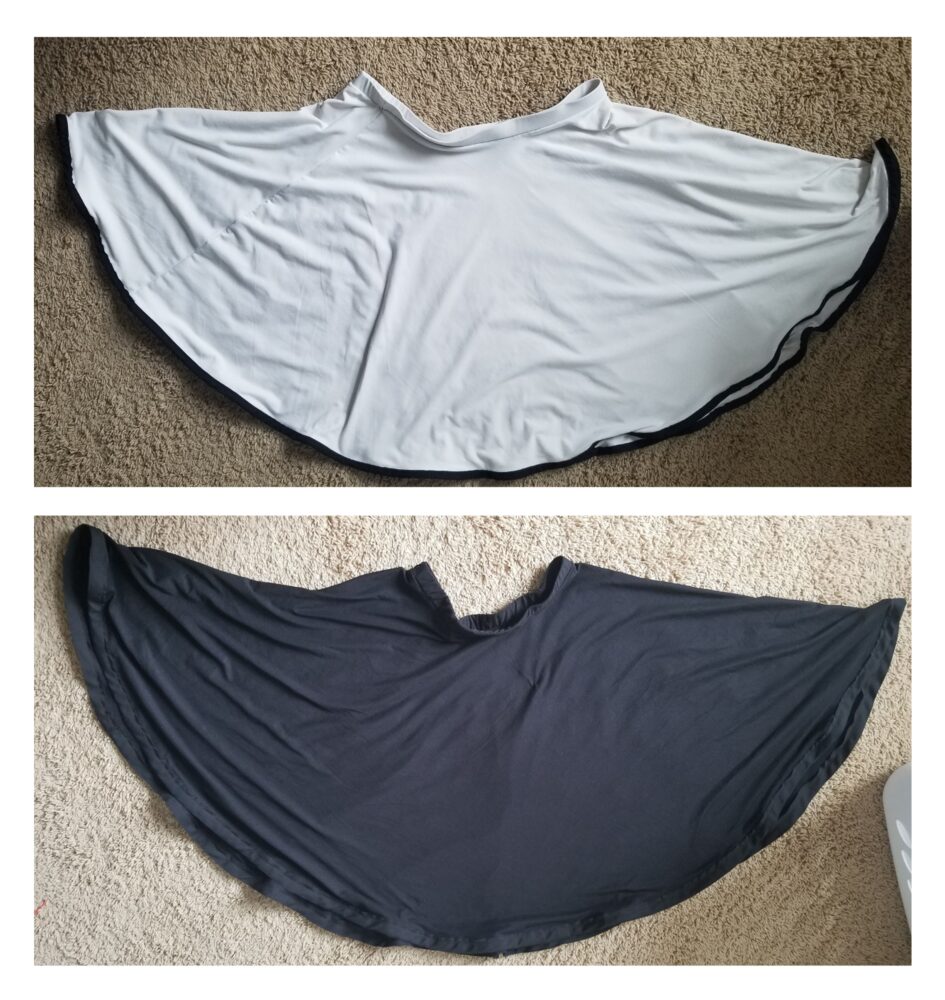
Soon after purchasing the fabric, I started working on the skirt bases. I measured my waist (because it was the only measurement that really affected skirt fittings) and cut out the circle doubleskirt pattern: a donut shape for the main skirt and a long strip for the waistband. After testing out the first skirt, it felt a little wide, so I decreased the inner radius of the second skirt to make it fit better,

I began with the white skirt base. First, I borrowed my cousins’ iron to flatten the waistband to shape. Then, I sewed a long straight stitch to create a tunnel. I turned the right-side out and sewed the waistband to the skirt base. Afterward, I threaded the elastic through the waistband and finished the ends with a mostly invisible stitch. I repeated the same process with the black fabric.
From there, the last step was hemming, but I wasn’t confident in my ability to hem straight, especially on a curve. Hence, I decided to use bias tape, specifically extra-wide double-sided black bias tape. I bought a pack, but that wasn’t enough for one skirt. When I went to buy two more packs, the store was out. Since I wanted to finish the bases soon, I bought some double-sided black quilt bias tape (which was wider than normal bias tape) and wide single-side bias tape.
The difference between single-sided and double-sided bias tape is that single-sided is used for decorations while double-sided can enclose the raw edges of fabrics. The wide single-sided tape was about twice the width of the double-sided, so I attempted to fold it in half and use it as double-sided bias tape. I ironed the strip and sewed it on. It worked. The quilt bias tape was an extra option in case this failed. Moreover, I planned on using it for the black skirt (which I did).
After finishing the skirt bases, I tried to sew an underskirt using tulle fabric. I failed because I couldn’t/didn’t understand how the underskirt worked and fit together. Moreover, it was taking a while to sew, so I decided to scrap it after two attempts and order one online. Embroidery was a large aspect of my project, so I decided to prioritize that instead of figuring the underskirt out.
Process: Embroidery
As someone with little embroidery experience, I decided to do more research about how people embroider clothing. It was then and only then that I learned that stretchy fabric is bad for embroidery. This is because the tension isn’t always consistent. Since the fabric can stretch, the embroidery will sometimes bunch up the fabric or be loose and hang off. However, it was too late to change fabrics.

Instead, I researched and tested methods of embroidering on stretchy fabric such as sewing with a hoop and stabilizer. In my tests, I noticed that the embroidery into the hoop didn’t need to be too compact because the fabric would shrink after the tension is released. Moreover, I decided to use a mix of chain and straight stitches because chain stitches cover the most area while using the least floss.
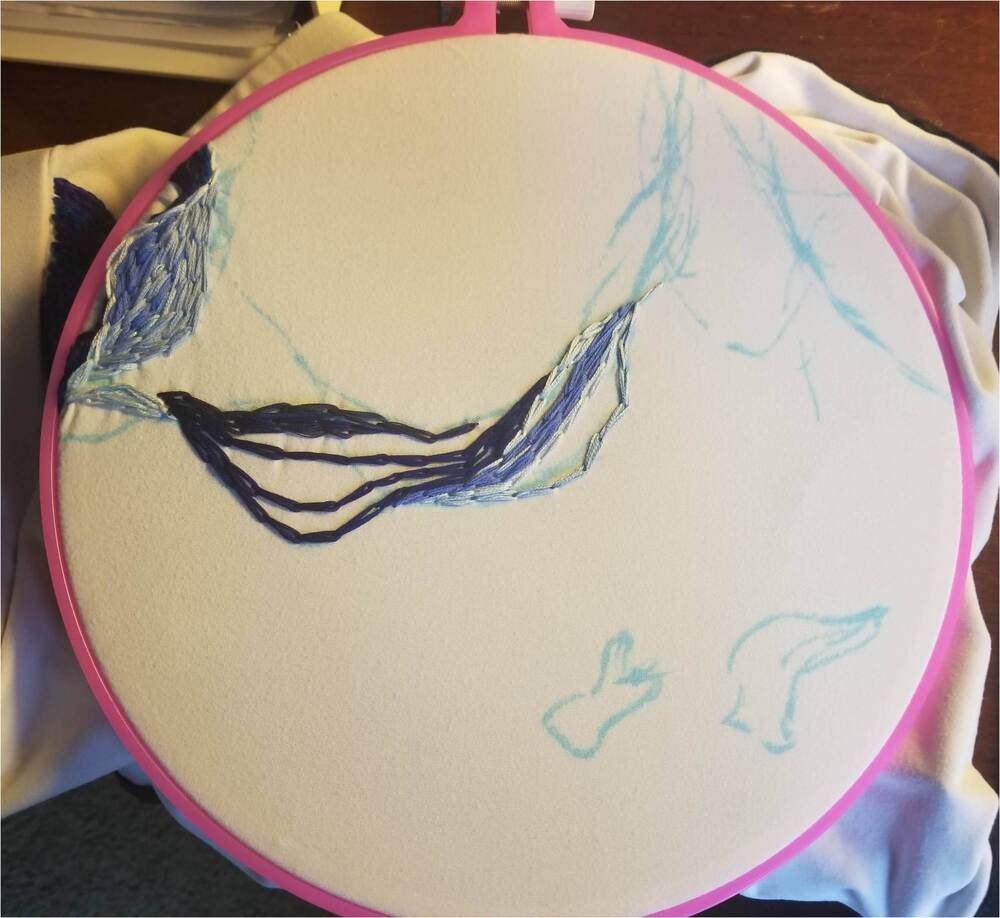
With the research over, I sketched the water-themed design onto the white skirt using a water soluble embroidery marker. Afterward, I used three strands of embroidery floss folded over to create thicker thread. Theoretically, I would need to embroidery less if I used thicker thread. I sewed chain stitches to cover most of the skirt and used straight stitches to create thinner lines. It was mostly just filling in the initial sketch.
Moreover, I had a pack of various embroidery floss colors. Since I didn’t have enough of one color and didn’t want to buy a lot of embroidery floss, I decided to use the multiple shades of blue to create a somewhat gradient effect from dark blue to teal blue-green. While I had originally planned on creating a speckled look, this was different from my initial concept. However, it worked… mostly. I bought some extra dark and light embroidery floss to make the entire design more coherent (and because I ran out of my darkest shades of blues).
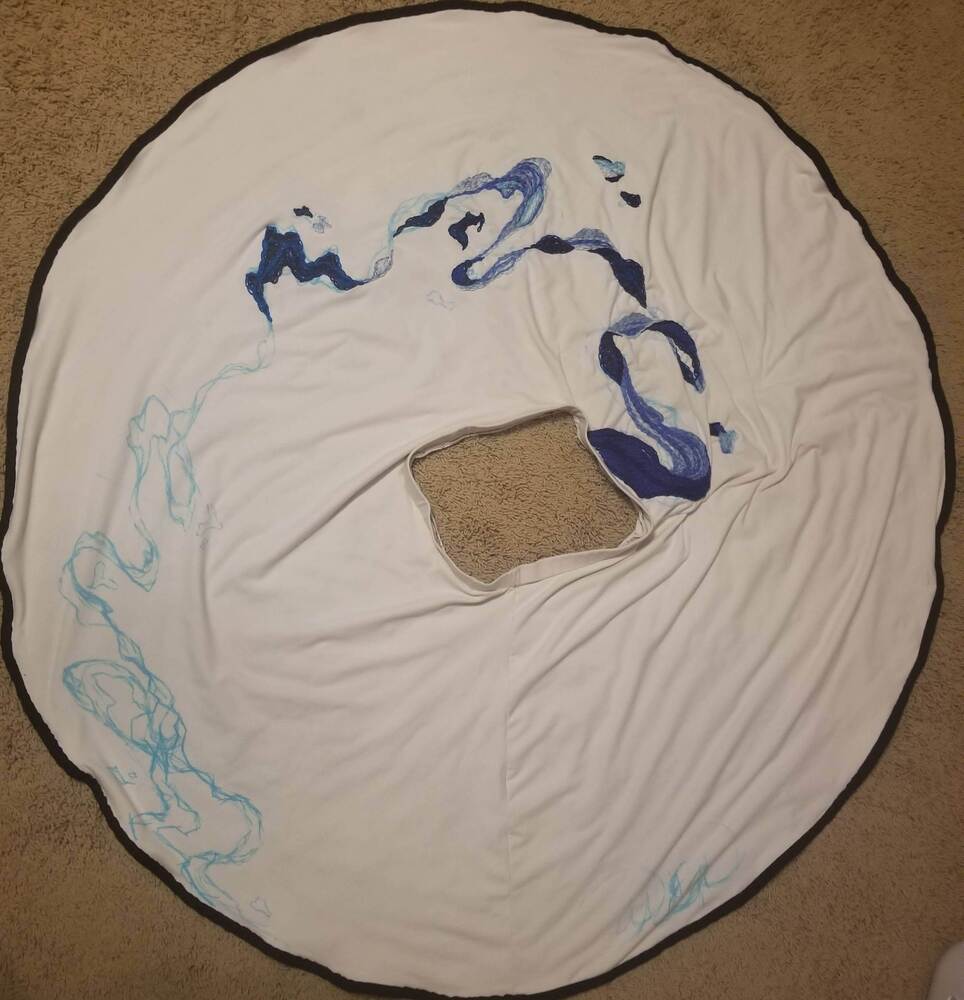
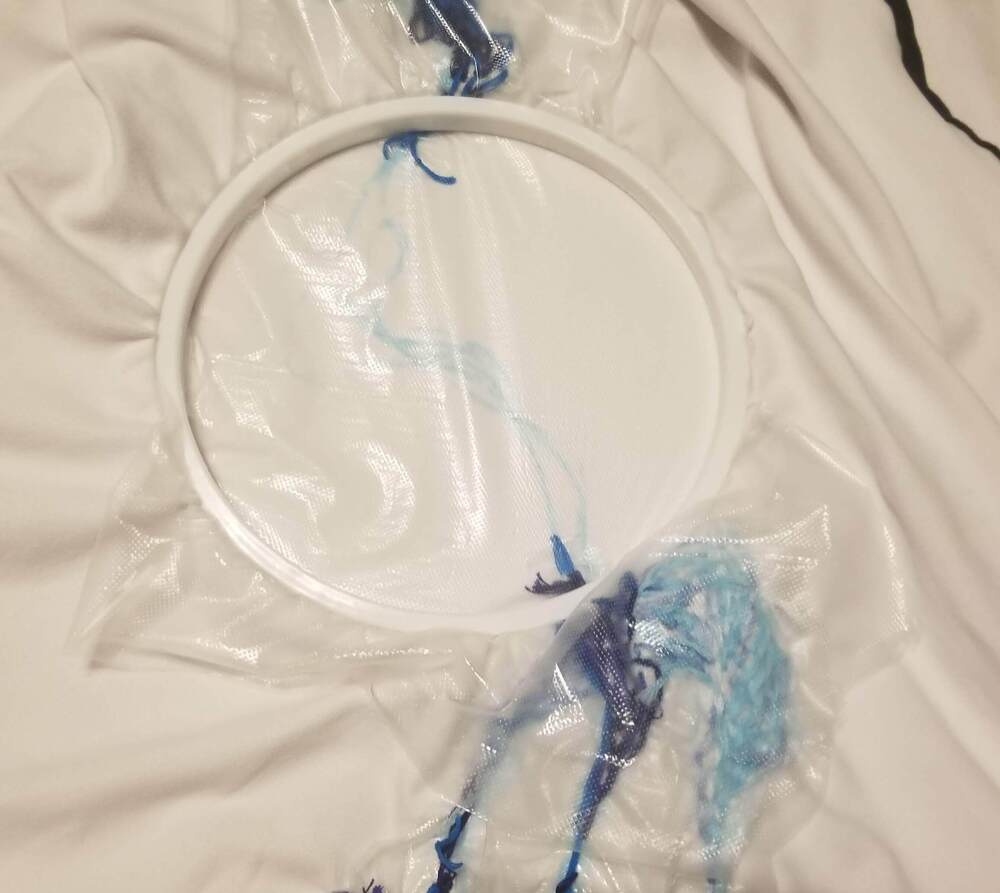
I stretched the fabric in the hoop with the embroidery stabilizer and sewed. Since the design was large, I moved the hoop multiple times. This caused some issues because the fabric with embroidery didn’t stretch as well as the fabric without embroidery, but it worked. The process took hours (don’t ask I don’t remember exactly how many). Additionally, the stretchy fabric also meant that there was more fabric to cover since it was longer when stretched out. It took me about two weeks of on and off embroidering to finish half the skirt, so I decided to cut some corners with the design. I decreased the curvature of some areas and shortened the ending portion.
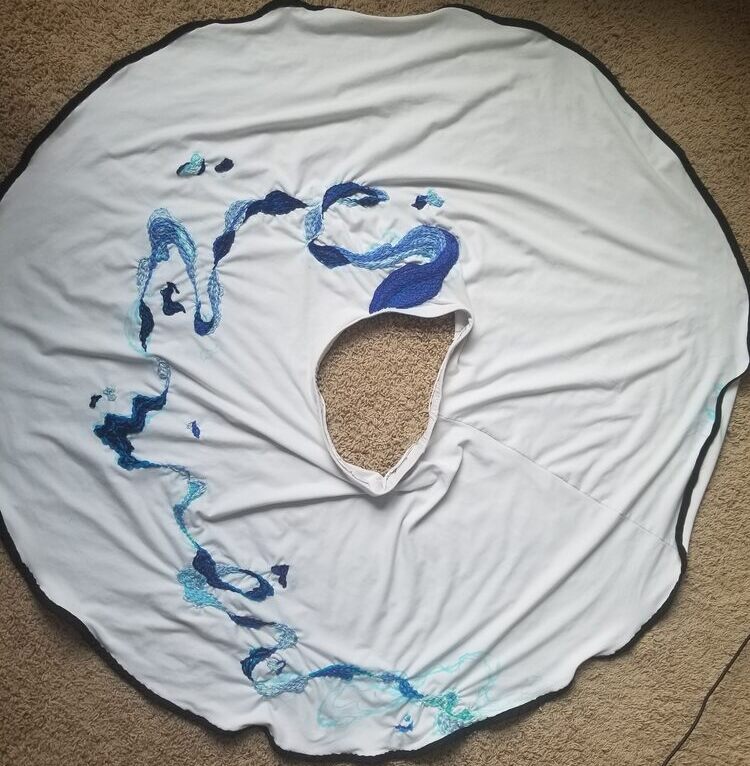
After the embroidery was complete, I dunked the skirt into soapy water and wash it. The embroidery stabilizer and marker were both water soluble, so they disappeared after some scrubbing, leaving behind a embroidered skirt.
Conclusion
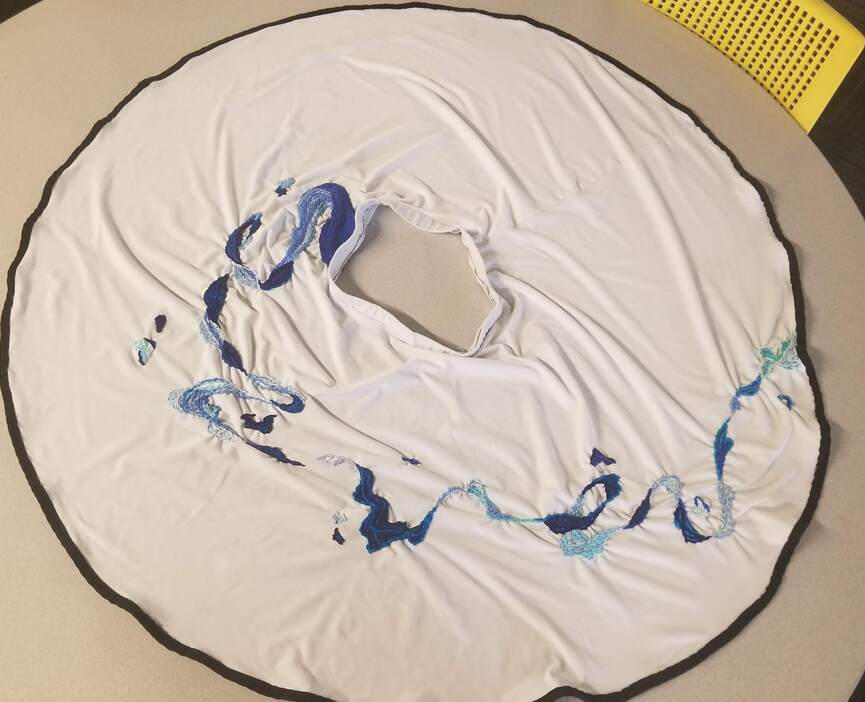
In conclusion, it turned out alright. I only finished the embroidery on one skirt and didn’t have enough time to embroider the other skirt. Furthermore, there are a few aspects of each skirt that could’ve been better such as a more stable hem and waistband stitches. The fabric choice and embroidery could’ve also been improved to be more even and clean. However, I’m pleased with the final results. Most of the imperfections are subtle, so they don’t really affect the final results. Moreover, my pod members agreed that the scrunching of the fabric isn’t noticeable when worn.
I think it matched my initial design pretty well and fit doodlecore with its imperfections and loose freedom. The different colors make it feel more playful, and the imperfections add character. I would’ve loved to incorporate more teal blue-green into the bottom portion, but I had cut that section short due to running out of time.
The second skirt would’ve been easier to embroider because it wasn’t a single continuous pattern. The sketch aspect meant that the lanterns didn’t need to be completely filled, leaving so much extra room. Since it was multiple sketch lanterns gathered together to create a scene, it would’ve been easier to add or remove some depending on the time constraint. A few missing lanterns wouldn’t have made the design look incomplete.
I plan on eventually embroidering the second skirt and not on a time limit because it was stressful. From this project, I’ve learned a lot about fabric choices, embroidery requirements, and how to use my sewing machine. It was pretty insightful and fun when I don’t consider the stress of embroidering on a time limit.
But all in all, I’m happy. I plan on sewing and embroidering other things in the future to further develop my skill.