
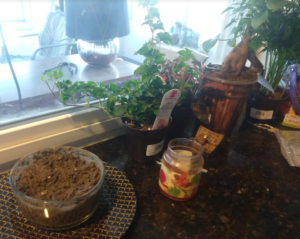
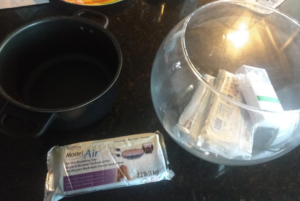
For my final project I created a terrarium in the shape of a snow globe. My initial plan for the base of the terrarium was to have it made of wood or to at least to look like wood. I realized very early on in the design process that this was not going to be possible. Instead I compromised and decided to make the base out of terracotta clay with an aged appearance. The supplies I bought for this project was:
- Terracotta clay that air dries-2 packages: $30
- Large glass bowl: $20
- Fairy lights: $5
- Miniature House: $2
- Wood Stain: $15
- Old Pot: Free-found in my house
- 4 Plants: $20
- Small Container: Free-from a burned out candle
- Soil: Free-from my backyard
- Hot Glue/Hot Glue Gun: Free-Pre-owned
The supplies listed above are shown below in the following two images.
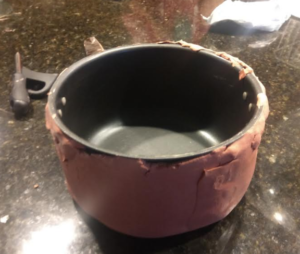
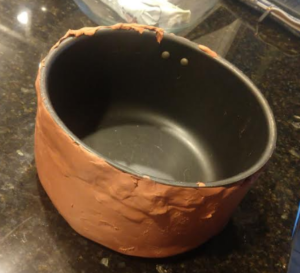
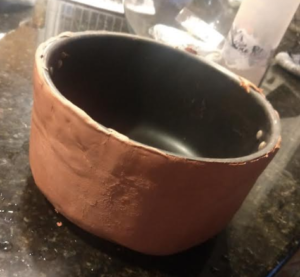
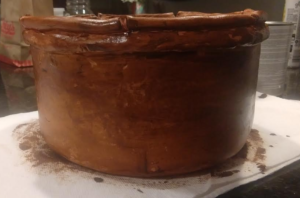
The first step in constructing my terrarium was was making the terracotta base. This was rather difficult because I had never worked with clay before. Originally I wanted to just use the pot, shown below, just as a form of structure when I was modeling the clay. The longer I modeled the clay I realized that I would not be able to remove the pot and have the clay stay in the shape I wanted it to be in or break, so I ended up keeping the pot inside of the clay. This process too k several hours to model and took several days to dry. Images of the process are shown below.
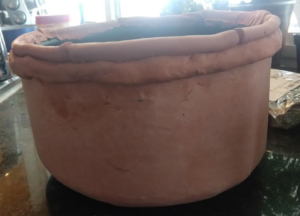
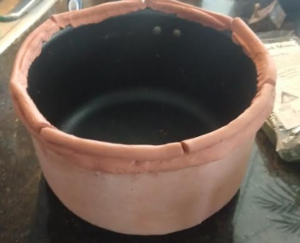
Once the initial base was made and dried I needed to make an upper lip to the pot that could hold the glass bowl on top of the pot and also stick with my aesthetic. I was unsure what shape I was going to use but as I was working with the clay I realized long thin strands gave the best appearance and support for the glass bowl. This step took about an hour to do and several days to dry.Images of the base with the upper lip done are shown below.
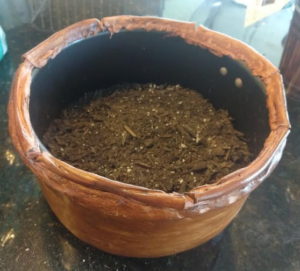
After the base was completely made I needed to start giving it the aged appearance I wanted it to have. I had no idea how to give terracotta an aged appearance so I found a couple of ideas on how to do it at [blank] created by [blank]. The idea I found the most interesting from this website was staining the terracotta with wood stain and then coating it with some moss. The process of staining the terracotta with wood stain is shown below. This process took about 30 minutes to complete and it took a couple of hours to dry.

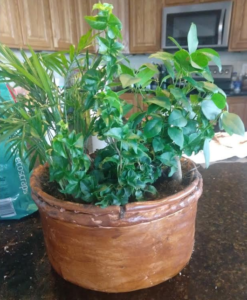
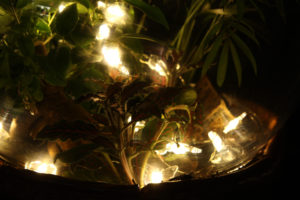
After staining the pot I was finally ready to plant the plants and put the miniature house and pond into the base! This process was very easy and worked out very well. It took approximately 20-30 minutes and added a whole new aesthetic to my project. It was a very exciting step to complete. Images of this step are shown below.
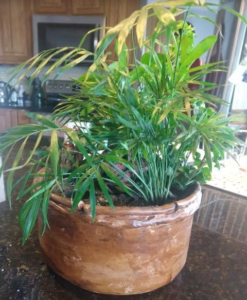
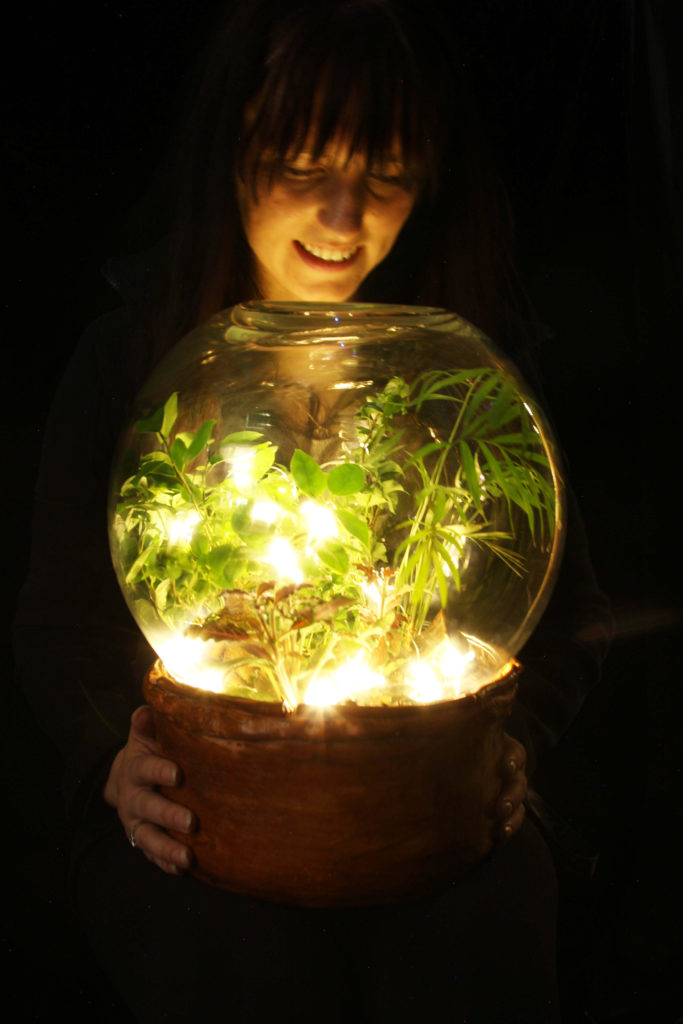
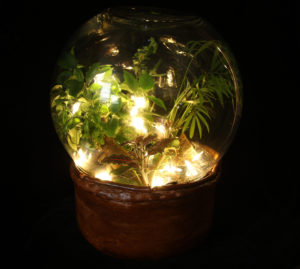
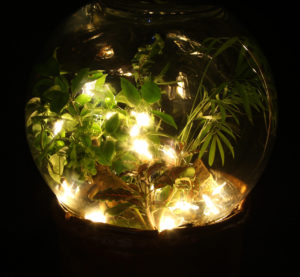
The final step was adding the top of the terrarium and the butterfly/fairy lights. I had to be very careful with this step because the glass bowl, for the top of the terrarium, is very fragile and breaks easily. The glass broke in the back, but it provided a nice space to allow the battery pack for the fairy lights to come out of. The final product is shown below.

The final presentation for my final project is linked below:
10 Comments. Leave new
The overall look of this came out really nice despite some of the minor obstacles that came your way. Good job working around them and using them to make the project better.
[…] Main Project Report Part 1: Terrarium Snow Globe […]
I think you did a good job of making the pot with a material you had never worked with. I like the choice of plants that you chose for the project. The string light also added a nice touch. You should post some of the finished pictures with all of the pieces on this blog.
Brittany, I like how you described your steps of making your project. But is there holes for water to be drained?
Hey Brittany good work on your terrarium. I like the different plants you have. I wish the house was a little bigger and the glass was completely round. Other than that everything else looks great. Good work using the bowl as the structure for the clay. Even without the glass bowl it looks really good.
Hi Brittany,
Great work on your terrarium. Your deviation from wood to clay was very smart. I think you achieved what you were looking for in the best way possible. Great work.
The overall look of your final object does feel very fairy-tale-esque. I especially like how the natural aesthetic of the plants meshes with the roughness of your container; it give the snow globe a certain charm. I also appreciate the smaller details, the house, and lights do a lot to add to the “wonder”, so to speak. Great job!
Brittany, I am a huge fan of the rustic way that this looks. Terra cotta is a really interesting choice of material because of the uses that it has around the world. I like how you added wood stain to the terra cotta and I had no clue that you could actually do that. I was wondering how the glass effects the plants inside the bowl.
Your terrarium turned out so well! Even though you wanted to work with wood but realized it wasn’t the best option, I think the clay with the wood stain looks good! I also think that the string lights were a good touch.
Brittany, excellent work with your globe terrarium. I really like how you explored working with clay. Putting lights on it was a great idea I think it looks very cool. The presentation was good however you jumped into the technical details too quickly and lost me as to what you were even doing to start with.