
Below is the timeline I created for the design preview post, and while I largely followed this closely, I was a little too ambitious with what I could get done in that time frame with all the work I had on my plate from Senior Design and other classes. While I did follow this timeline somewhat closely, after a conversation with a laser cutting expert from the Idea Forge at CU I did have to pivot from laser cutting as the method of cutting my wood down to size, since what I picked up from Resource Central would’ve taken too long and been to dangerous to laser. With that setback, I decided to hand saw the wood just because I knew I could do it since I had experience with the upcycle project, but looking back now I probably could have cut out the pattern I wanted using the band saw in the ITLL.

With the slight adjustment to the time frame thanks to the laser cutting delay, my final timeline is more closely represented by the one below. As mentioned in my previous post, once I had my plan established and aesthetic chosen I took a trip to Resource Central and found three pieces of wood that I thought would work well for the display stand I was trying to create.
I was looking for wood that wasn’t painted or altered with screws, nails, or staples, and was able to find two large boards that would work well for the sides of the project, as well as a butcher block that would make and excellent top panel. Below are the pieces of wood I was able to find, and once I had the material, I began to plan out how I would cut them to make the staircase that I envisioned.

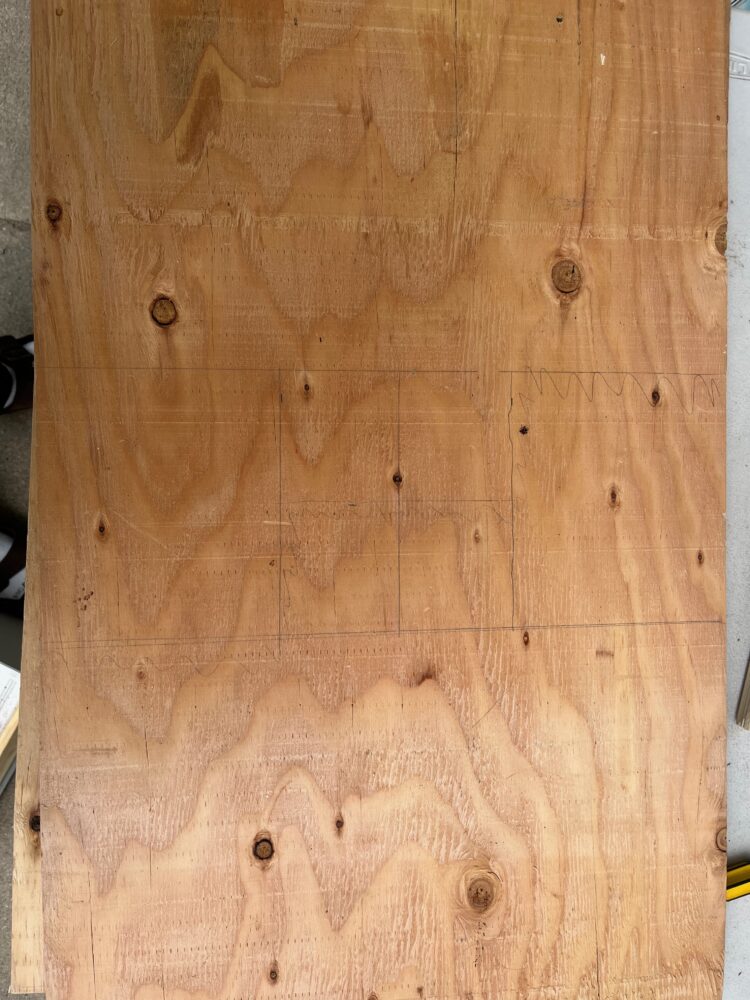

Below are the drawings I created to show the scale between the top board and the two other boards. I planned on cutting the saw pattern out of one board, and using the two resulting pieces as the sides of the stand. With the second board, I planned on cutting out strips of wood to use as the sides and tops of the staircase. You can see in the image above the result of cutting the staircase pattern out of the first board. While I planned on laser cutting the wood for precise tolerancing, the wood I had purchased was too thick and too old to be safely cut with the laser cutter, so I hand sawed out each board. Since I had to use a saw, I had to cut out the staircase pattern through one of the sides, but I was able to cut out the pieces that would’ve made up the pattern on the other board (also seen above) and I planned on fastening these pieces together with glue later in the process.

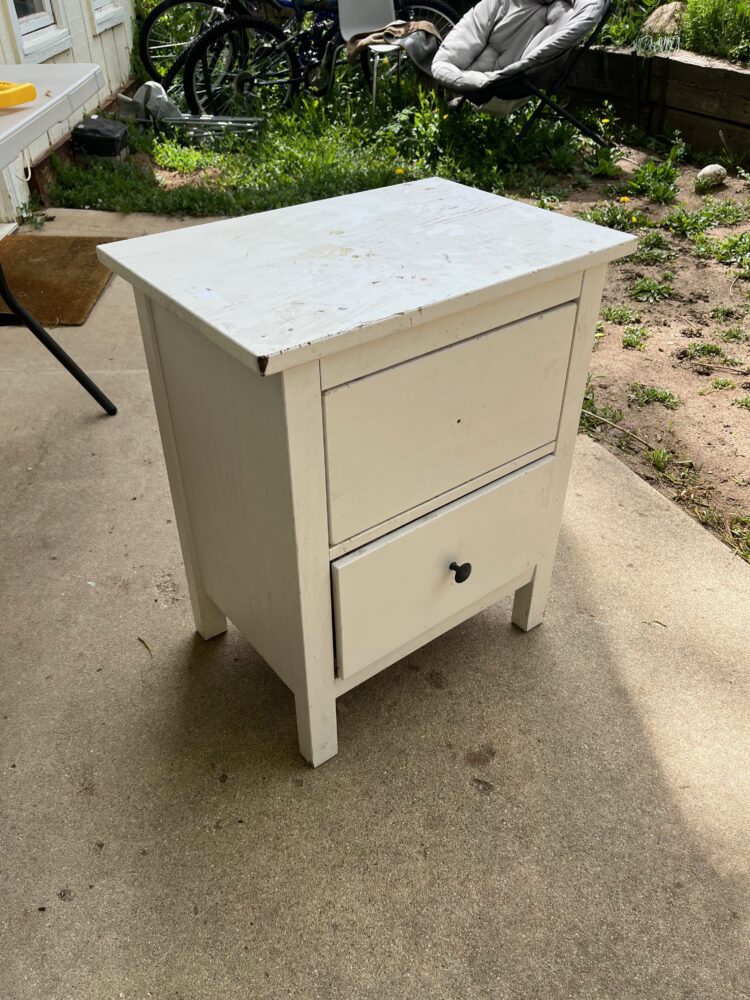
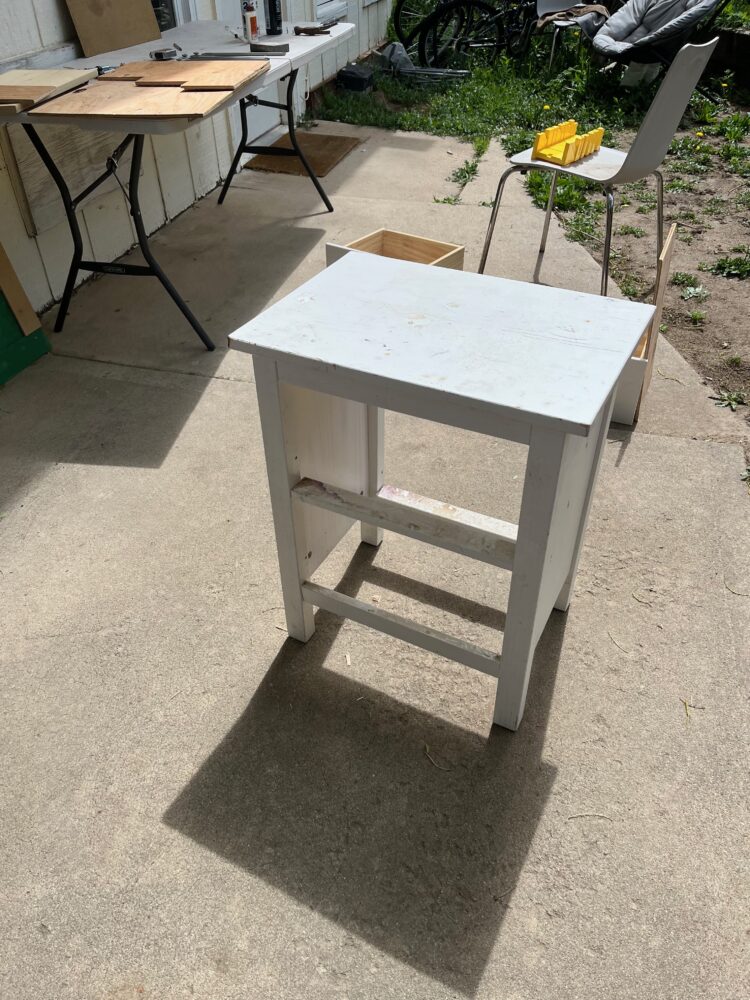
One other thing that I picked up from Resource Central was an old side table with two drawers, seen below. I planned on removing the rails from the drawers to use for my own drawers, but decided that using the drawers that I already have would save me a lot of time and effort. One of the drawers didn’t have a knob but that didn’t matter since I only needed one.
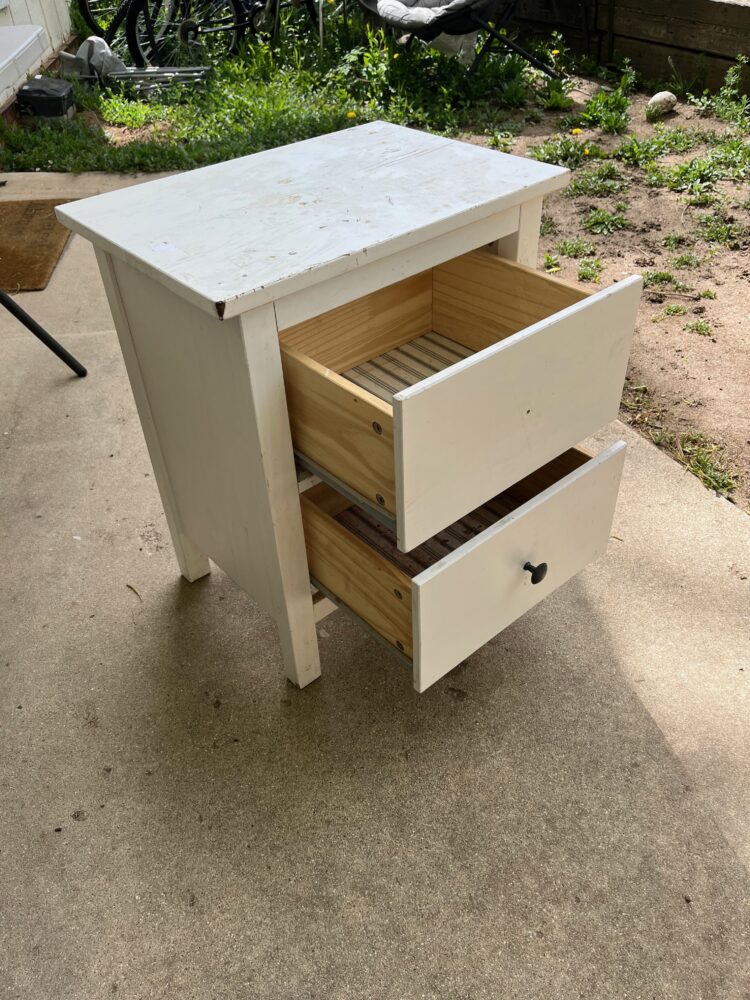
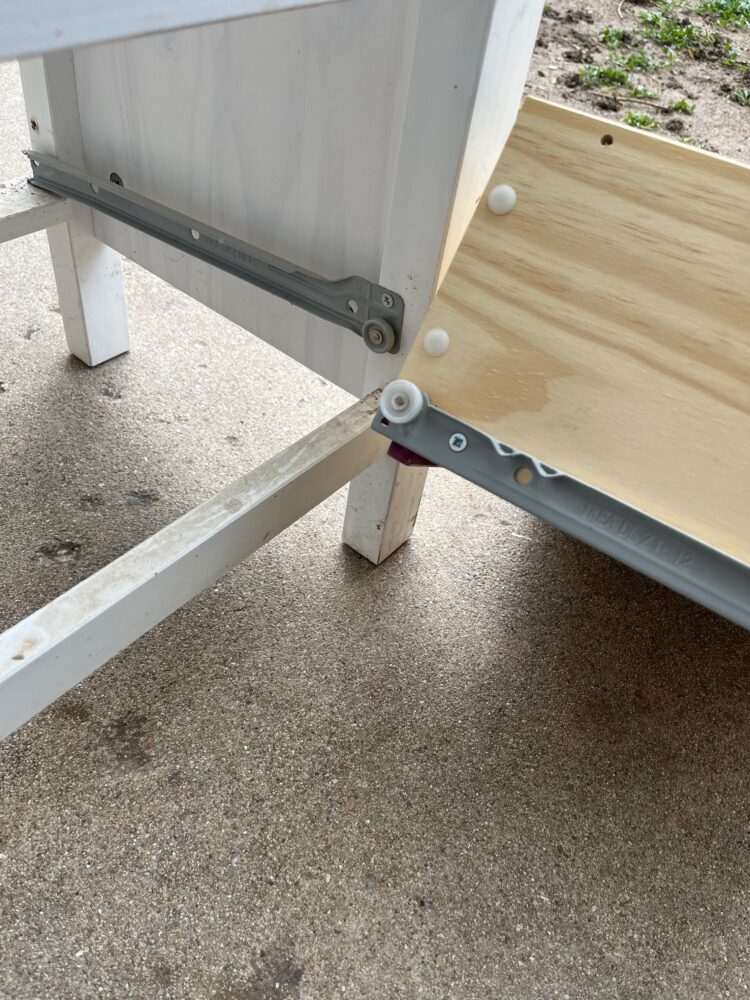
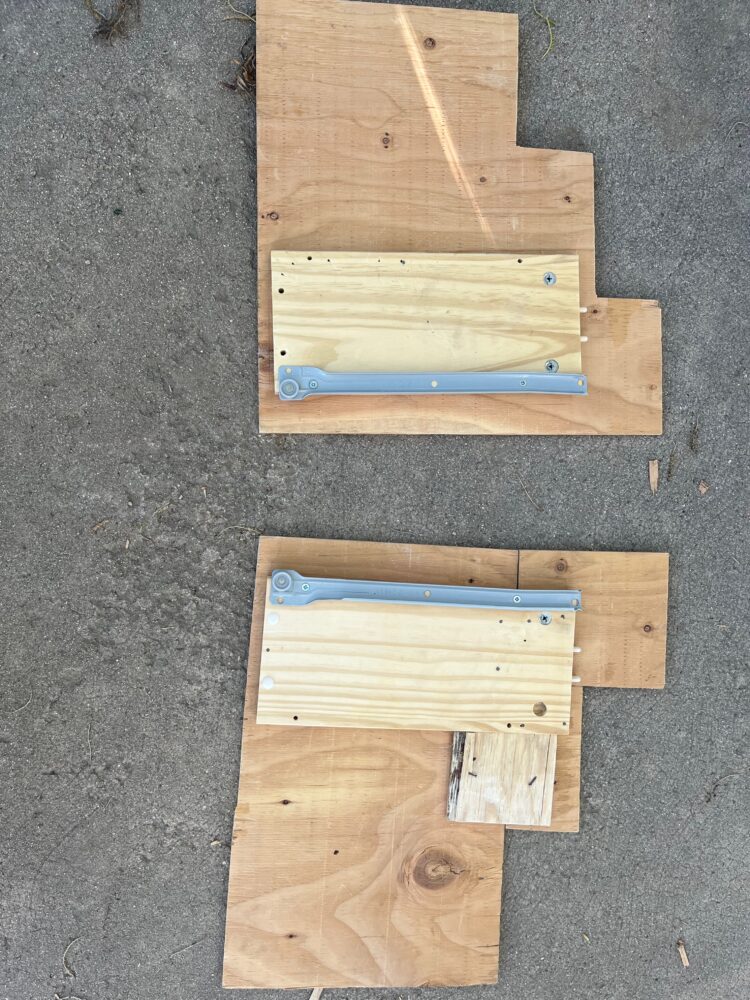
I started disassembling the drawers by taking them off their rails and unscrewing the rails from the table. With the drawers removed I realized that the rails had very specific mounting screws that bore into slots in the wood in the table. Since the wood I purchased didn’t have those slots, I knew that sinking the screws would be extremely difficult. So I decided to take the drawer without a knob and disassemble it even further by taking each board apart from each other. Once I had done that, I was then able to attach the rails that were originally on the sides of the table to the sides of the drawer using the same guiding holes. Then I took the drawer sides and attached them to the staircase shaped side pieces I had cut out using nails I had purchased from Home Depot. With that, the drawer could slide smoothly between the two side pieces, and a major piece of functionality had been taken care of. I was also able to glue the two pieces I had previously cut out to the drawer sides, making the side pieces one whole piece again.
After I had all my pieces cut out I wanted to see how they fit together and where I needed to line up my nails, so I set them all together in the way that I wanted to assemble them to ensure I had cut them correctly. I discovered I had made a small error when attaching the side pieces together, but it wasn’t anything some sanding couldn’t fix. For the pictures below I hadn’t cut out the last few staircase pieces, but I was able to get a good sense of how the project was coming along without them yet.


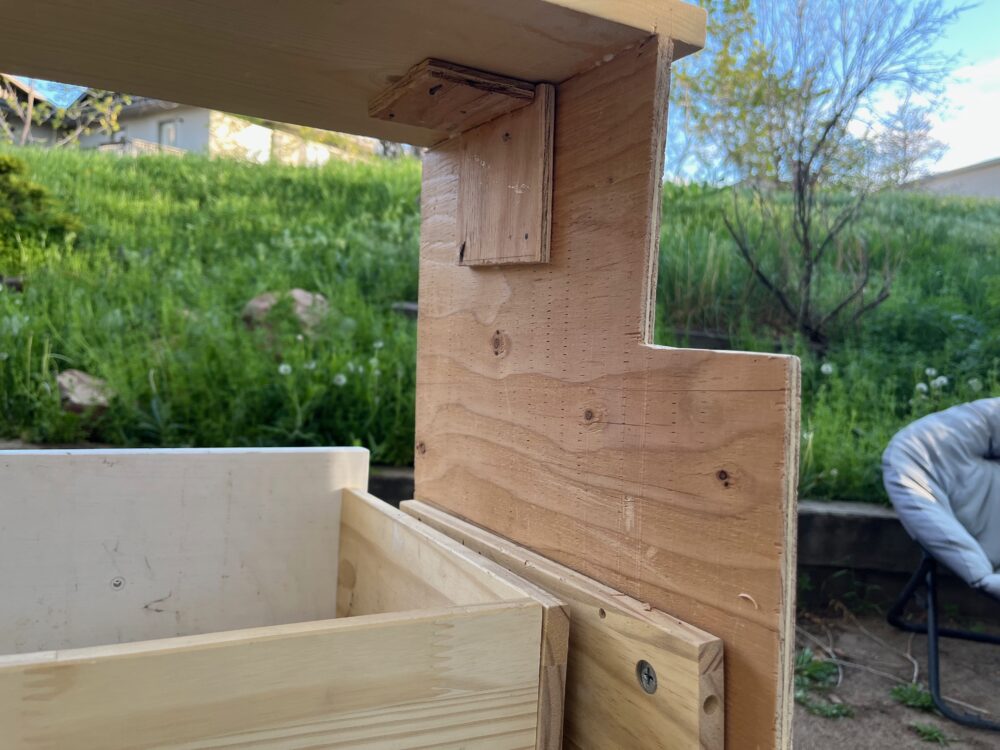
Finally, I had cut out each piece and sanded down the edges not only to make sure they were smooth enough, but also to shave down any dimensional errors I might have made when cutting with the hand saw. I had originally planned on gluing each piece together to create one solid and sturdy box, but since the pieces were relatively thin compared to their length, the glue wasn’t strong enough to prevent wobbling. Thats when I pivoted to simply using nails to join the different boards together, which was much more effective. However, the top butcher block was too thick for the thin nails I purchased to penetrate, so I designed a method of nailing to small pieces of scrap wood together at a 90 degree angle, and then nailing that assembly to the inside corner of the display stand. Below are two images that show a close up of the inside of the stand, focussed on the joining assemblies. While these assemblies look pretty rough, I didn’t mind too much since the inside will rarely be seen.

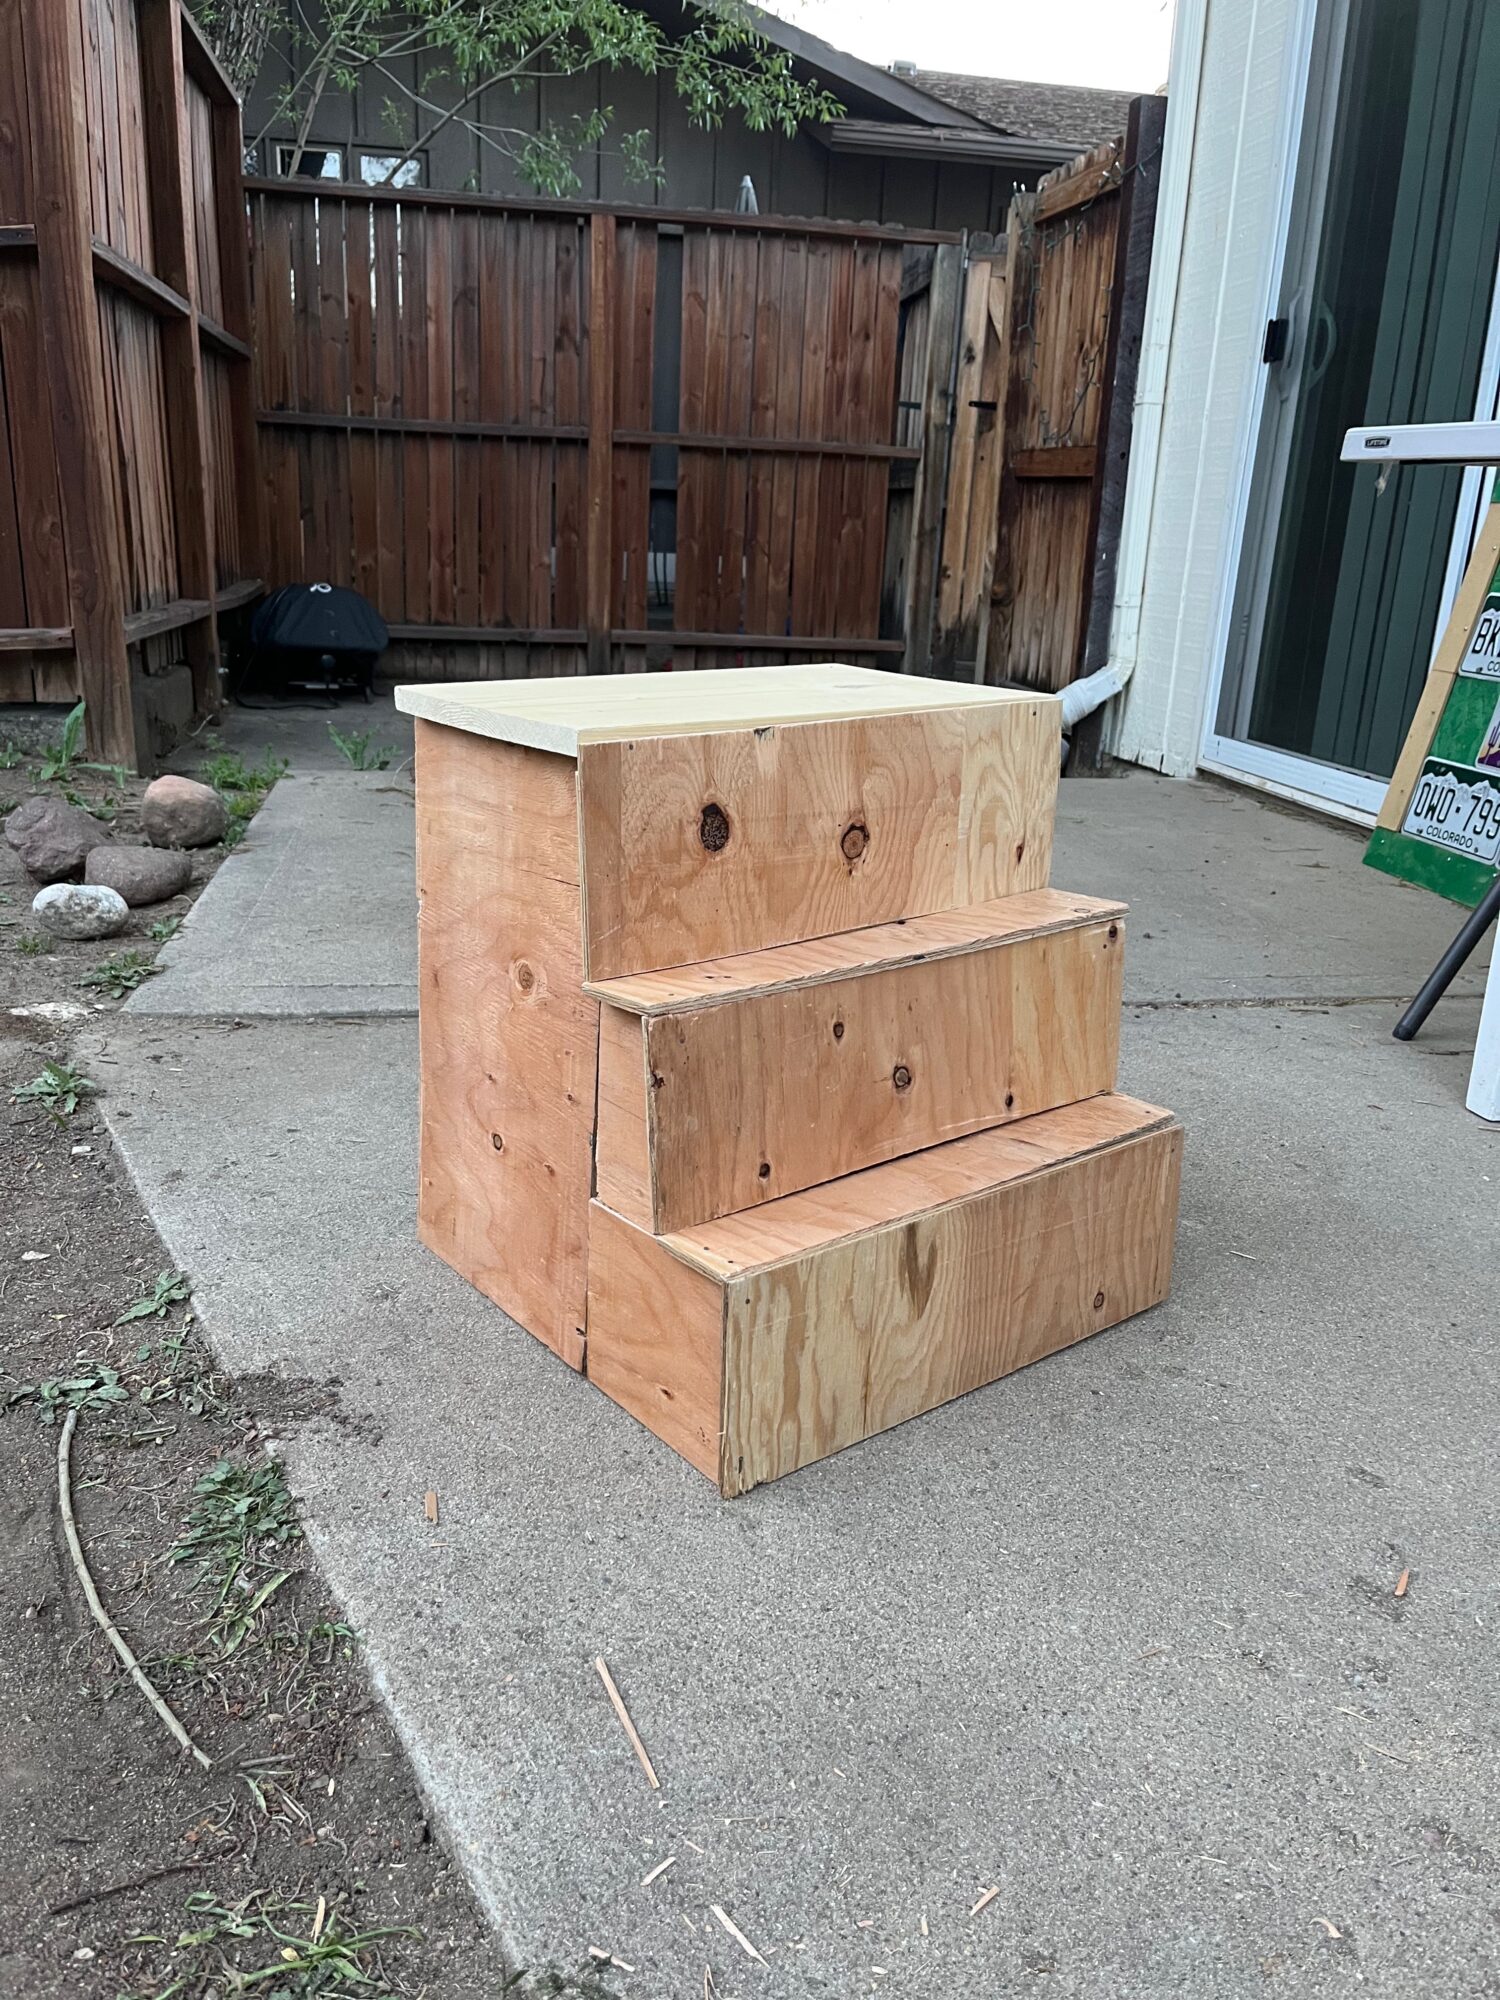
Joining all ten wooden panels together was certainly challenging, and of course I wasn’t perfect in my cutting so some of the pieces did have strange geometry that I tried to work around. Everything was dimensioned around the drawer in the back and the top butcher block, so I knew the drawer would fit and that the top of the project would be flush, but some errors on the side pieces led to the second and third tiers coming out slightly wonky, but these design quirks remind me of what the cabin core aesthetic is meant to evoke. Feelings of warmth, coziness, and homeliness are key aspects of the aesthetic, and I truly believe that a rougher, slightly less polished design helps further those aspects in my project. Below are front and back images of the design before I did any decorating. The wood grain looks great and the warm almost red color of the wood definitely helps remind someone of a warm fire in a log cabin.


My final step in this process was decoration. I really wanted to create a natural scene with flowers, trees, rocks, and maybe some animals to help bring home that cabin core notion. I had gotten some stencils from Michaels and planned on using spray paint for the larger strokes of the vision and some paint pens to fill in the details. The stencils were unfortunately not thick enough to prevent the spray paint from seeping beneath which was shame, but they still did an alright job at giving me some interesting shapes to work with. In the end, I just used a brown spray paint to create some tree trunks and log sections while going in with green to create the foliage that surrounds them. I was also able to use a red marker to create some cool looking flowers, and a brown to create a small volcano on the top board.
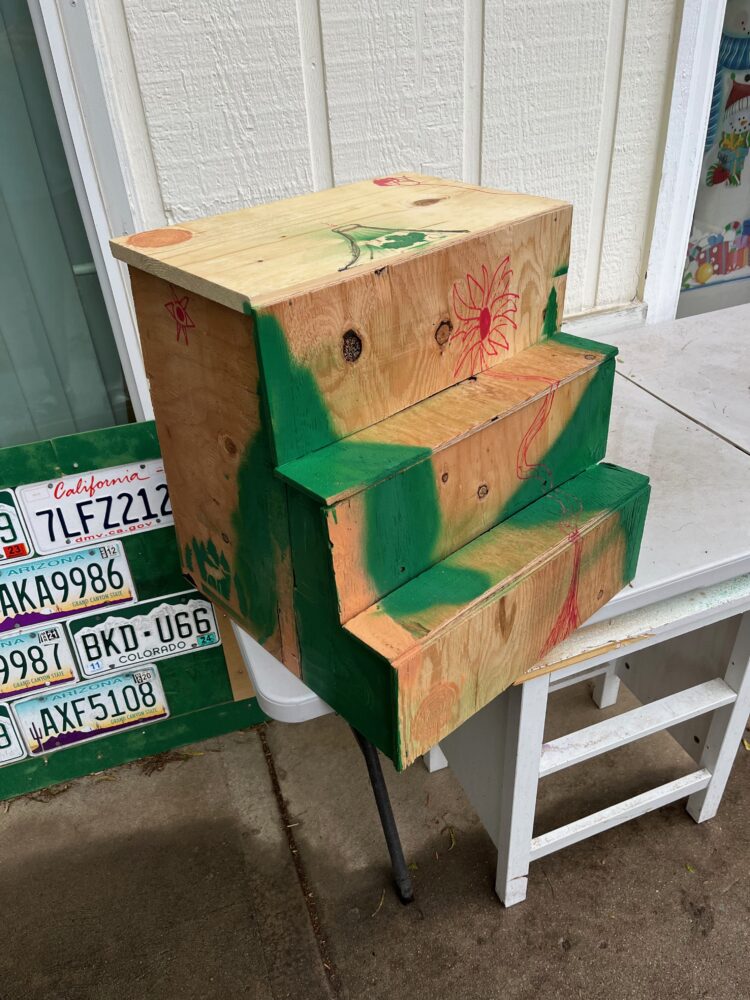
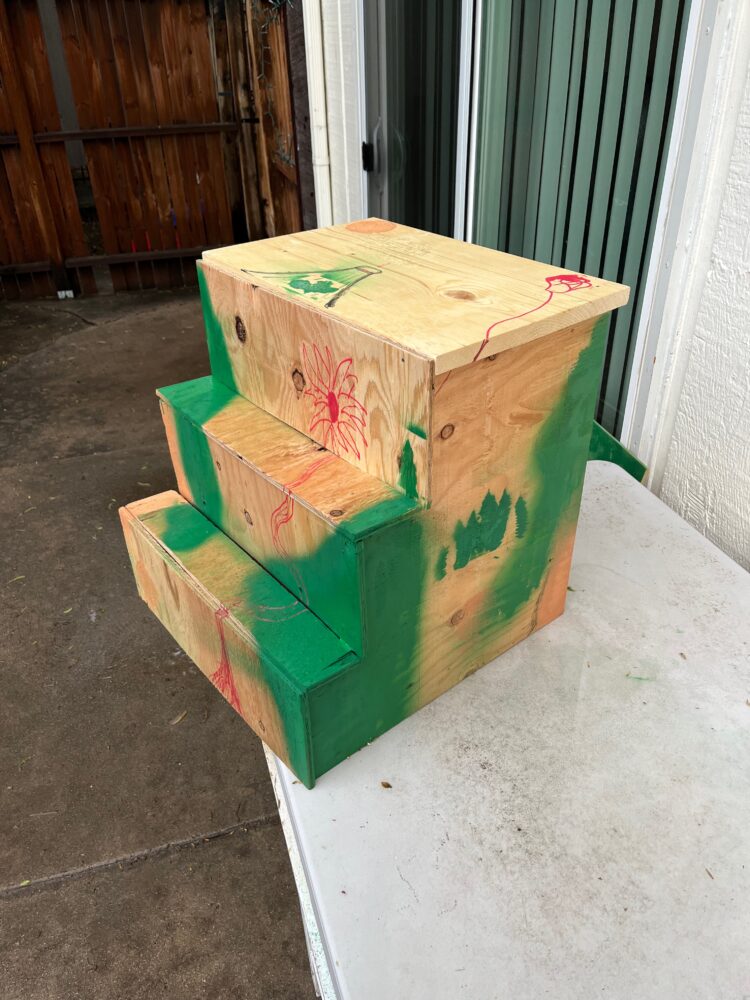
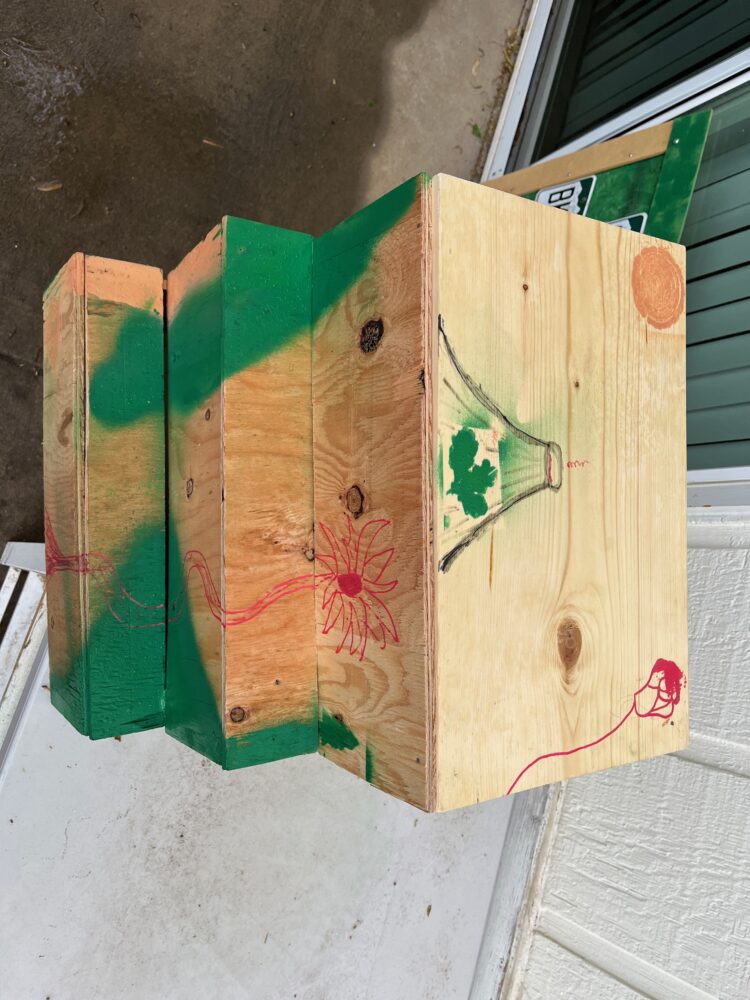
Overall, the decorations were messy, rough, and spray paint certainly won’t be my first choice to decorate something this small anytime soon, but I still like how they turned out and I’m glad I did it since it adds a lot of extra charm and character to the final design. If I had to go back and start this project all over I wouldn’t change too much. It turned out well and was cost efficient, and I’m excited to use it to display things in my room. The one thing that I wish I could go back and fix is the side panel that I had to cut through to create the stair case pattern. Using a different board for both sides would’ve worked a lot better and turned out slightly cleaner, but I’m still happy with how I did in the end. As for future plans for this project, I definitely want to revisit the decorations and maybe add some more detail with different shades of green and brown, and add more flowers with different colors since I was limited with only red. I think more complexity will add a lot of visual interest, so hopefully it turns out well.