

Shortly after making my inspiration post, I found an extremely similar process conducted by a craft-cycle.com user “McKenzie” posted to the site – https://www.craft-cycle.com/upcycled-receipt-notebook-2/ – on August 3rd of last year, with pretty promising results regarding notebook/sketchpad functionality. Reading through this post addressed a lot of my own concerns regarding how I would proceed with fabrication of the sketchpad. I will reference procedures I follow from McKenzie throughout this post.
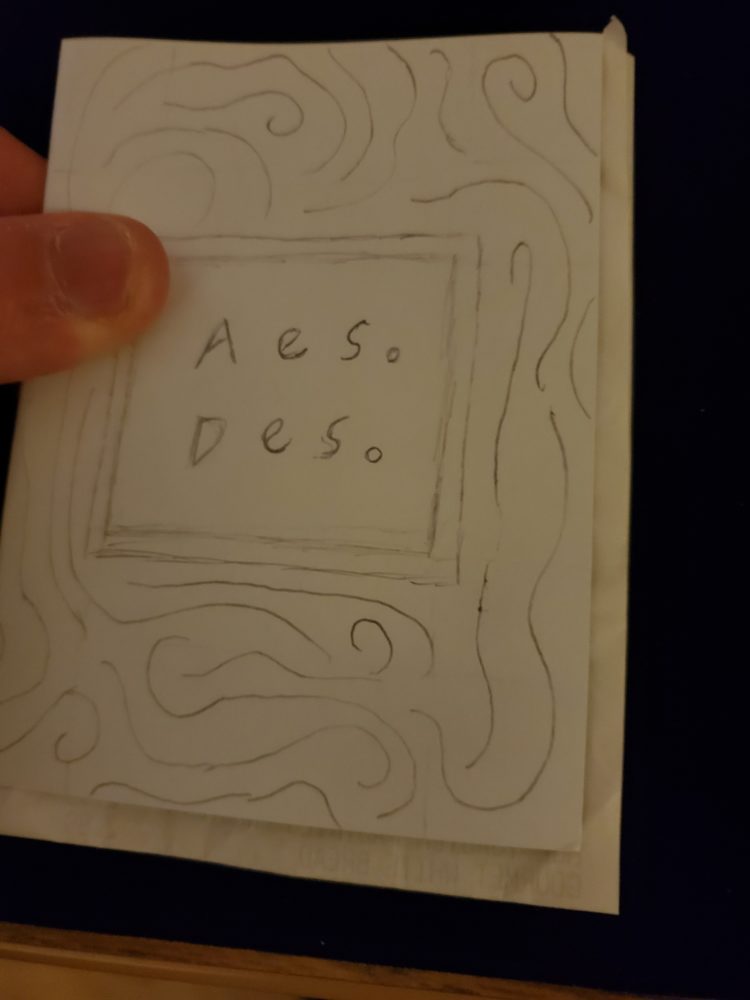
Within my inspiration post, Jackson Hootman made an excellent suggestion to create a digital stencil for my sketchpad cover design. Since I will only be making one sketchpad, I decided instead to lay down pencil work of the design on the cardboard cover first. I had initially planned to lay down the final design in Black Sharpie, but I am open to suggestions of another pen, marker, or any other marking instrument for my finalized cover design.
I folded all my accumulated receipts – 27 total – in half such that the blank back faced outwards as both sides of a sheet. After doing this, four of the receipts were significantly smaller than the cover, so I set those aside not to be used within the fabrication.
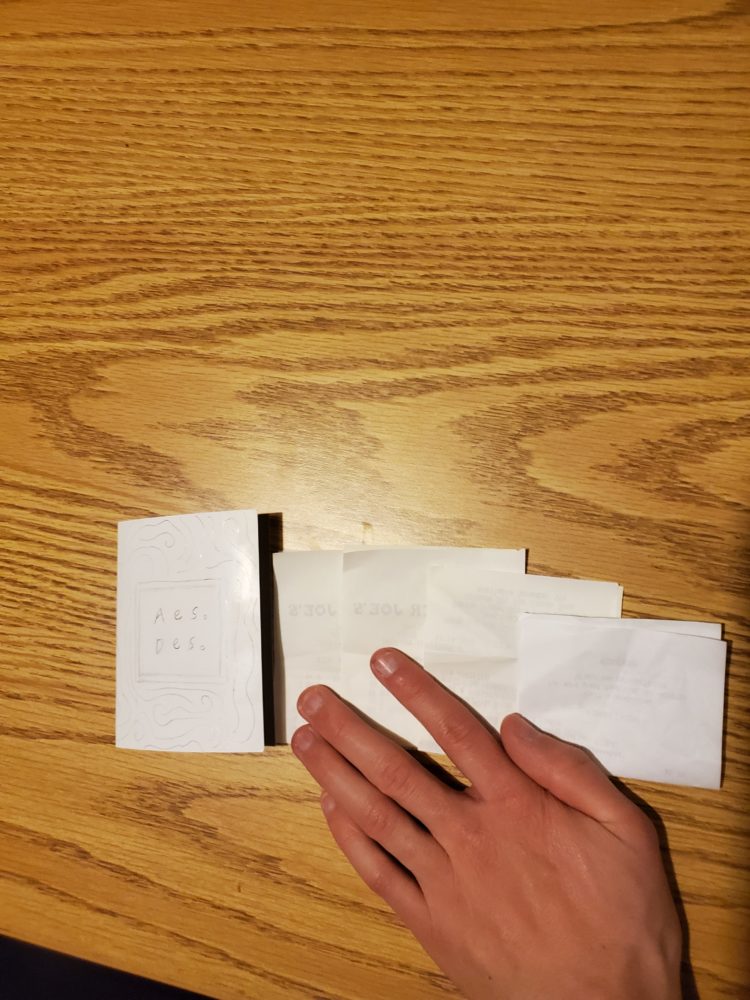
The remaining receipts all were similar enough in size to the cover to be functional, so following McKenzie’s procedure from the Craft-Cycle post I snipped them all to better fit the sketchpad cover, and compressed them below a stack of textbooks overnight so they would hold their folded shape better for subsequent fabrication steps.

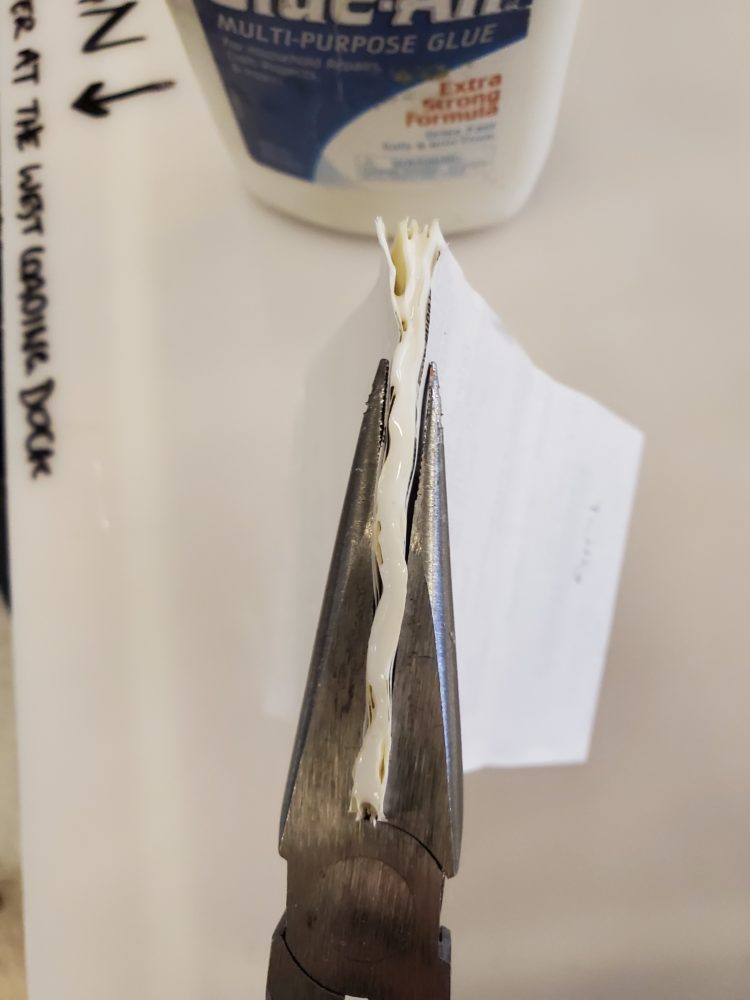
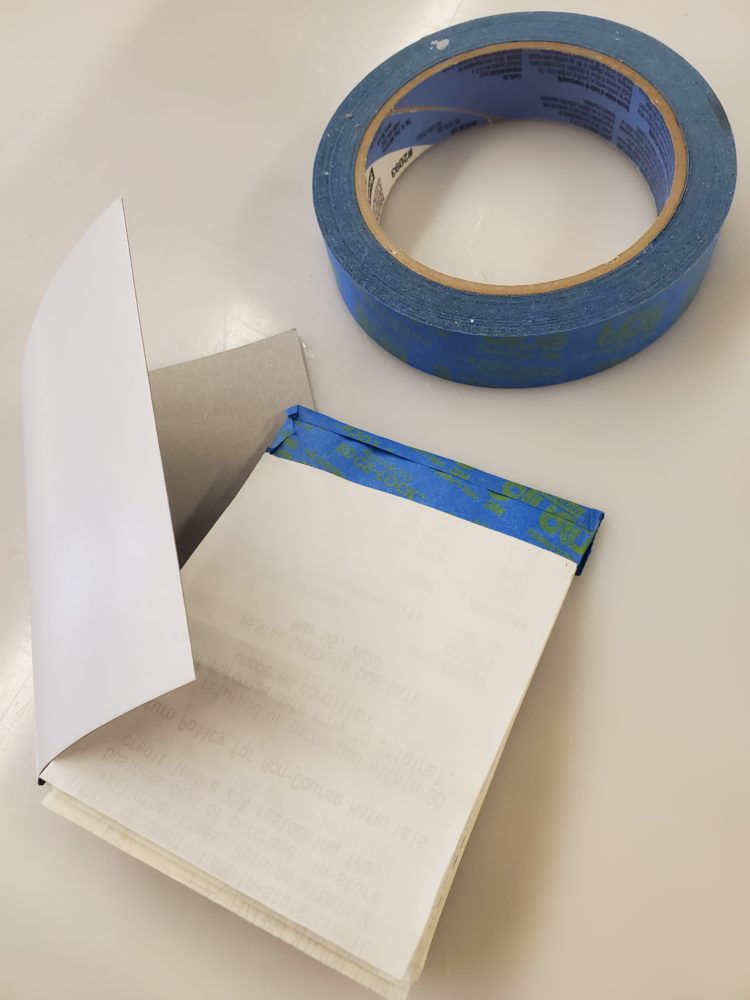
Again following McKenzie’s Craft-Cycle post procedure, I added glue to the top of my clamped stack of receipts, though for holding the stack together I used long needle nosed pliers in lieu of two clothespins. I then followed her step of adding a top binding of painter’s tape, fully completing my sketchpad pages.
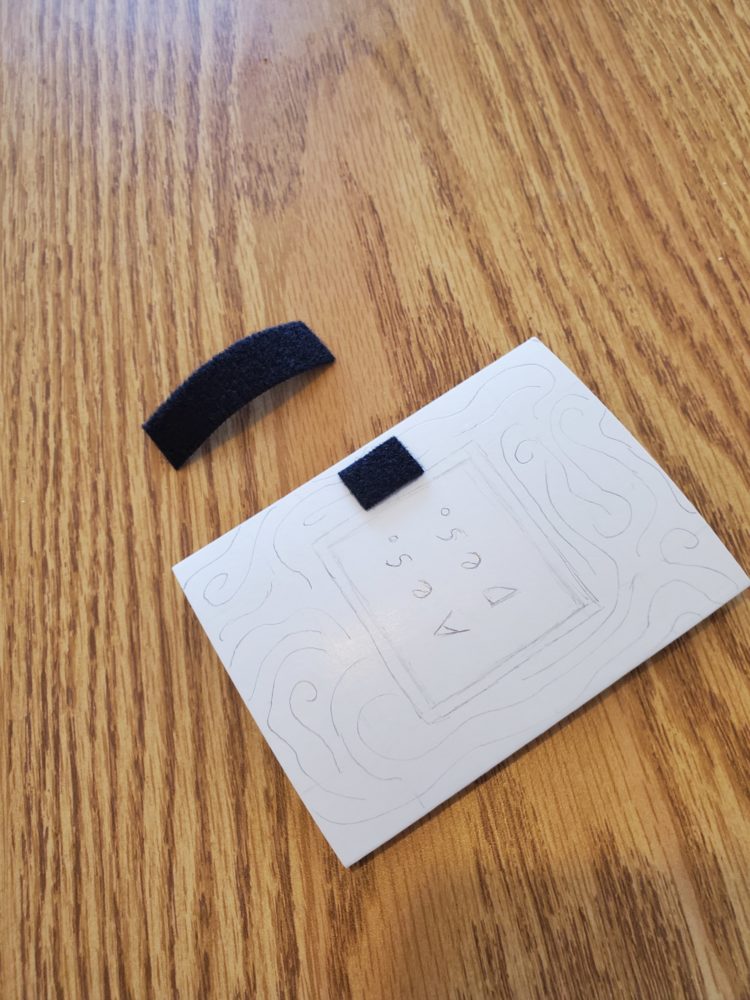
Following my initial plan to add a journal strap to hold the cover closed, I was able to find an abandoned strip of hook and loop (“Velcro”) in an Engineering lab over the weekend. I then cut the Within the Craft-Cycle post, McKenzie also creates a notebook strap with an old command strip.
The work that remains to be done to complete my pocket-sized sketchpad is as follows:
- Trace over cover pencil design with desired marking instrument
- Add an aesthetic to the back cardboard cover
- Fasten the Sketchpad pages to the inside of the cardboard cover with hot glue
- Potentially add layers of packing tape to cover for sturdiness
- Fasten the cut sections of hook and loop to the front and back covers