
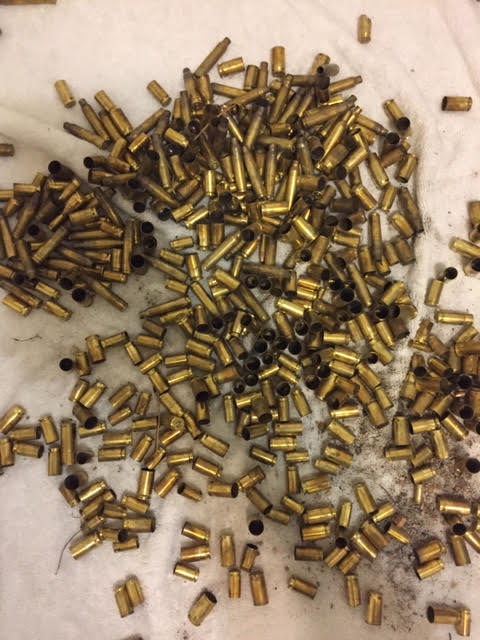
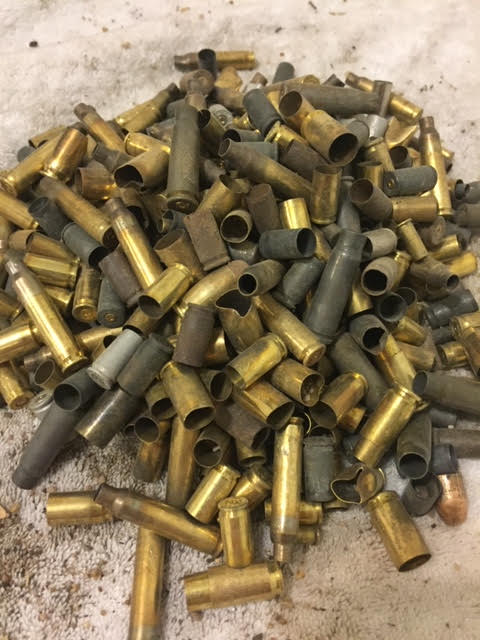
Great progress on the upcycle project has been made over the last week! After narrowing down the material I wanted to use (expended bullet casings) I was able to make a trip out to Lyons on Sunday to collect brass from one of the open-land shooting areas. As always, there was an abundance of brass there and finding enough was not a problem at all. With the help of my roommate and friend, we were able to gather more than enough brass for the project. The photos below show all of the mixed assortment of brass found spread out before sorting. As you can see some casings were tarnished which ended up actually being quite useful as you will see later in the post.
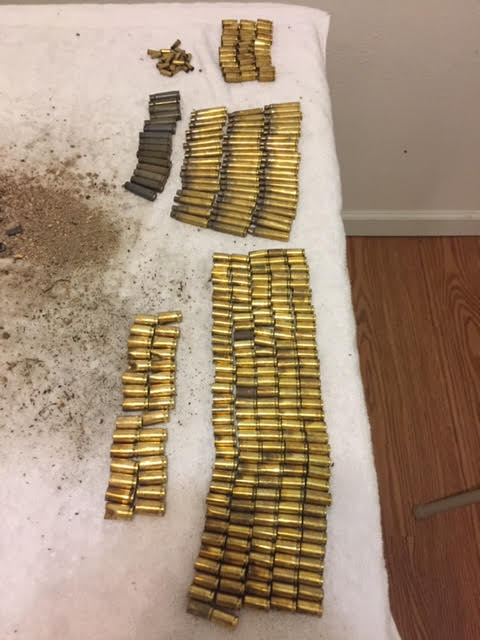
The majority of the caliber of brass found was 9mm, .40 S&W, .45 AUTO, .22 and 5.56. There were a few casings found from different calibers, however not enough to make a contribution to the project. Below pictured are the casings sorted into their respective caliber group. The largest amount as expected was 9mm, arguably the most common handgun round.
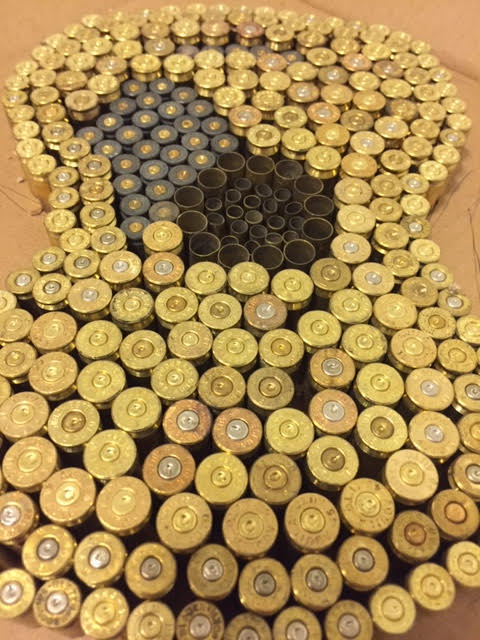
Looking around my room I found inspiration to try to make a model of my guitar from the brass collected. I started by free hand sketching the perimeter of the guitar shape and began placing casings around the edge to form a perimeter. I After each full “loop” I changed the caliber starting from 9mm, to .40 to .45. These calibers increased and added a nice contour to the body of the guitar sculpture.
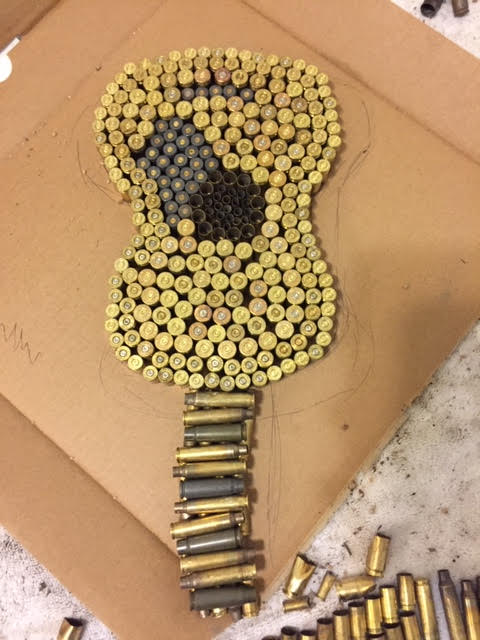
I used the .22 round and 9mm flipped upside down to resemble the center hole in the middle of the guitar. I then used the tarnished 9mm to make the pick guard and the string anchor at the bottom. I was very pleased with the aesthetic appearance as the guitar began to take shape.
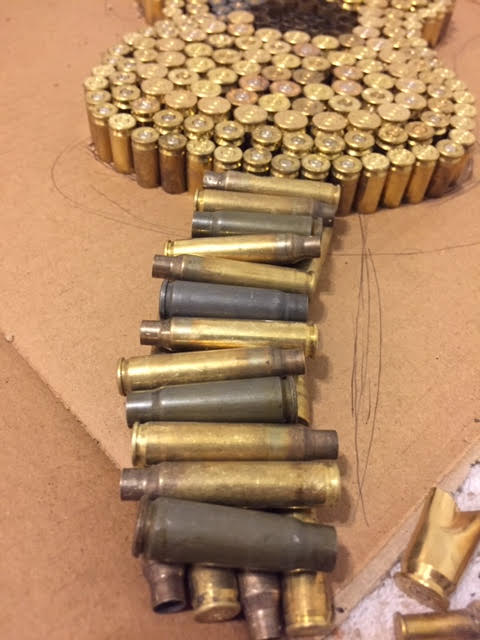
I decided to use the rifle rounds for the neck of the guitar and by placing rows of 4 and alternating the orientation of the casing. They had a hard time just being placed, however when I glue them down they will be much more uniform. Nothing is glued down as of now, and I am still debating on what kind of supporting material I want to use. I think it should be something relatively strong to bear the weight of all of the rounds as they are relatively heavy added all together. All in all I am very happy with the route this project is taking and it has been a very enjoyable process.
5 Comments. Leave new
Nate, this looks amazing! How to scale is this? Like I mentioned before, if you ever have time this would be great to encase in resin!
Nathaniel,
Great progress so far! Looks like the guitar is really coming along well! I really like the contour shape of the guitar, and the different casings you have used here. My question is with the minimal surface contact between shells, the precision for adhesives must be very precise. What techniques are you going to use to achieve a strong bond?
Zach,
I plan on using some sort of base for the shells to be glued on to. Thinking maybe laser cutting acrylic, or using some wood. Either way, a base will be used to glue down the casings and support the weight of the sculpture.
Hey Nate! I’m a huge fan of what you’ve done so far and I look forward to seeing the final product. As for the base, I think acrylic would be a great option. This way, you can laser cut the base to be the same shape as the guitar.
Jackson,
That’s an awesome idea, and I think that would help improve the symmetry and overall look of the sculpture. Thanks for the input!