
Design Review Presentation Recording
For my project, I will be making a multifunctional distressed wood resin fill table. This piece will be unique because it will incorporate LED’s, adjustable table legs, glow in the dark resin, and a rustic distressed wood base for the table top. I am creating this table to use as a centerpiece for my living room, as a main coffee table, and also to be used for entertainment for party games, which is why it will be adjustable to standing height and glow in the dark and have LED’s. I am hoping to come away with a piece that is both very functional and aesthetically pleasing.
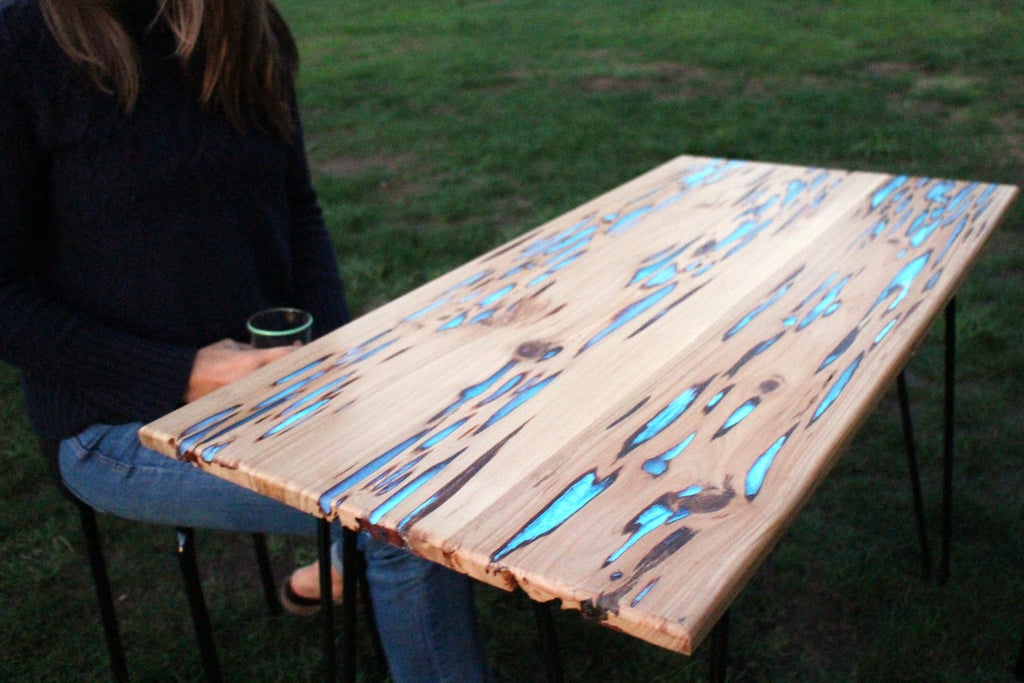
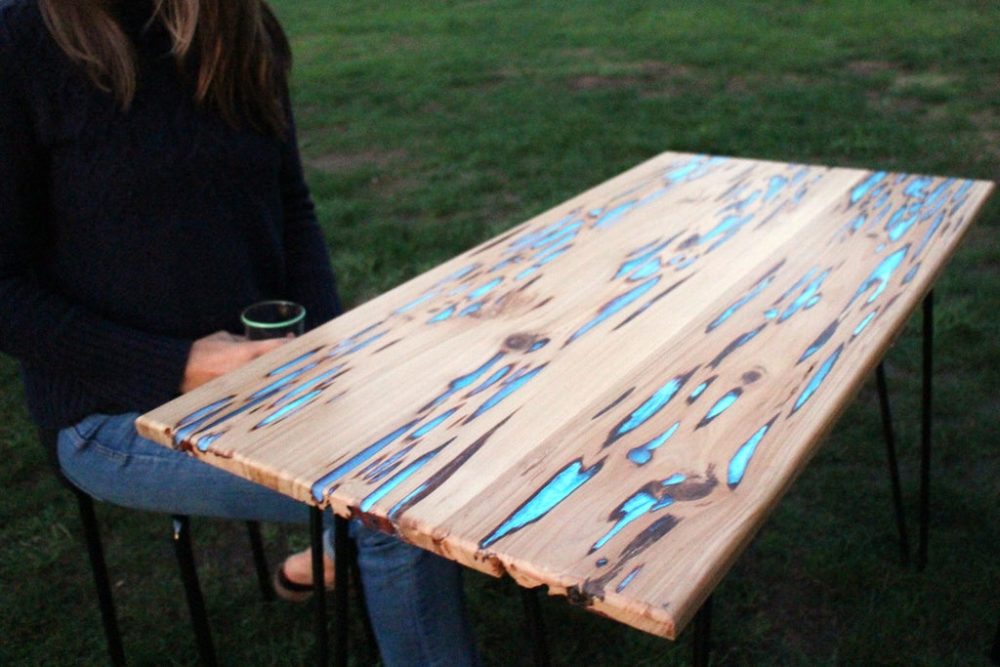
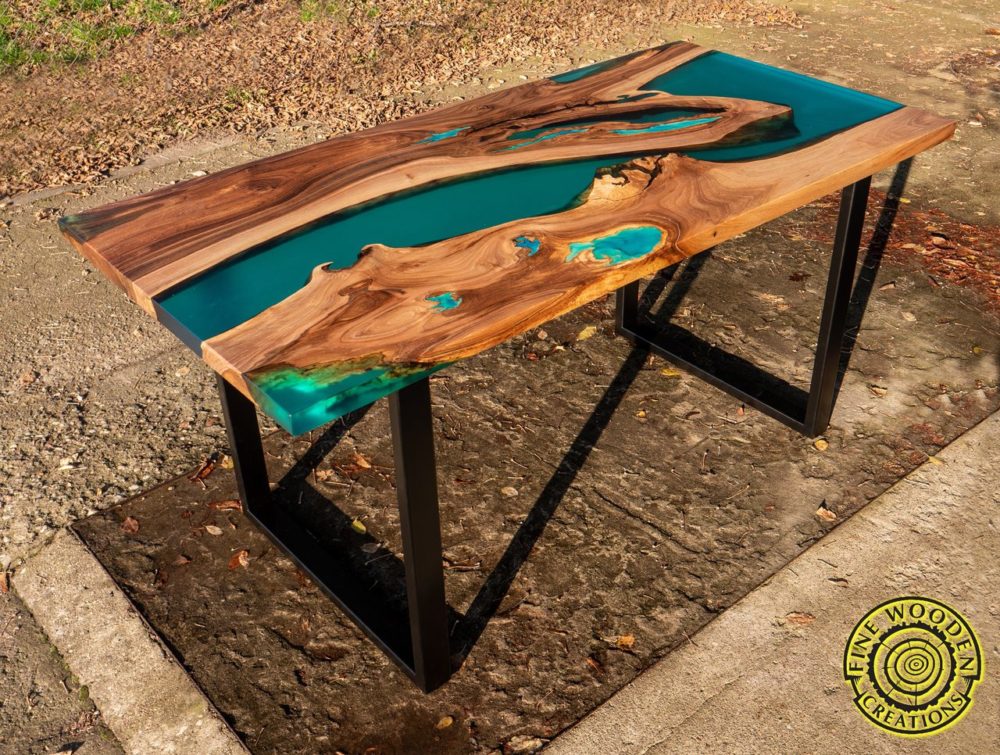
For inspirations, I did a lot of research on different types of acrylic and epoxy resin pour table tops. Since my last post, I decided to steer away from an acrylic pour because while it creates some really beautiful colors, I feel that the piece would turn out too busy. So, I was inspired by a lot of the resin finish reclaimed wood table tops that I saw and am decided to take that route. In particular, I really liked the look of distressed wood with colored epoxy in the damage pockets. Specifically, I feel most inspired by the look of this tabletop, which also incorporates glow powder in the epoxy. In terms of the other aspects of the table like the adjustable height from the coffee table to game table height and LED lining, those are original ideas that I didn’t seek inspiration for. However, I have seen people line the back of their TV’s with subtle LED’s which I really like, so that’s the sort of look I’m going for with those.
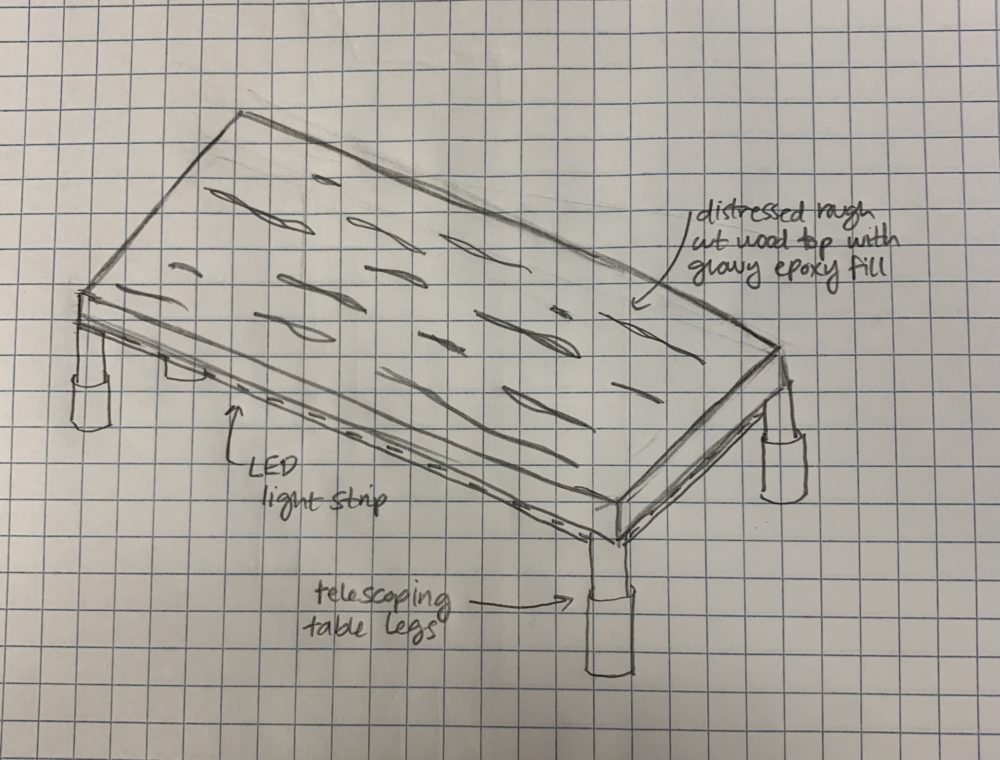
Below is a photo of my initial design, which hasn’t changed much, except for the addition of the LED’s and slight change to the adjustable table legs.
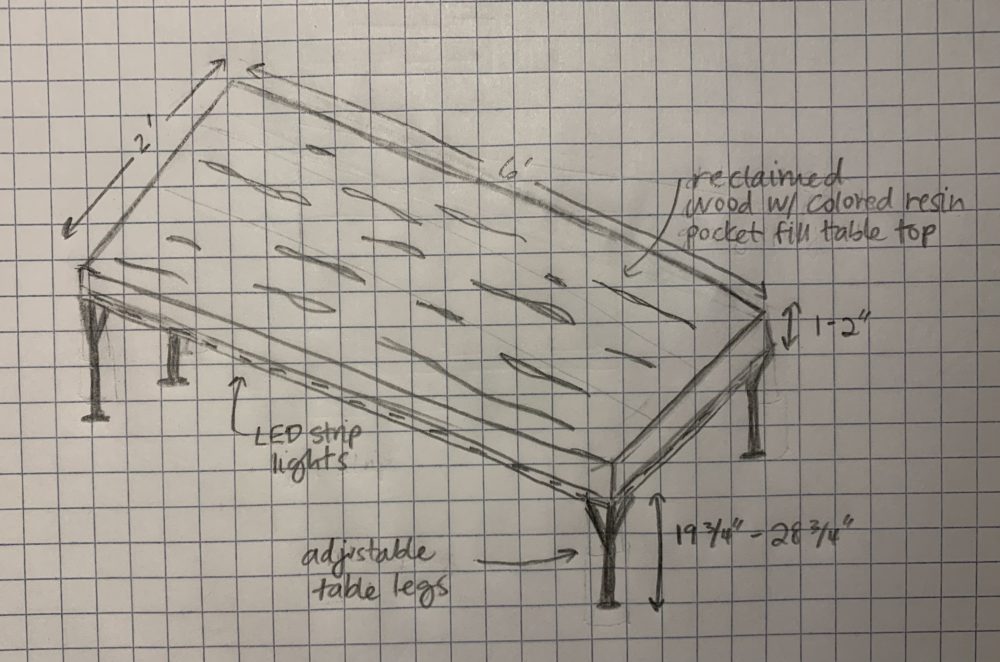
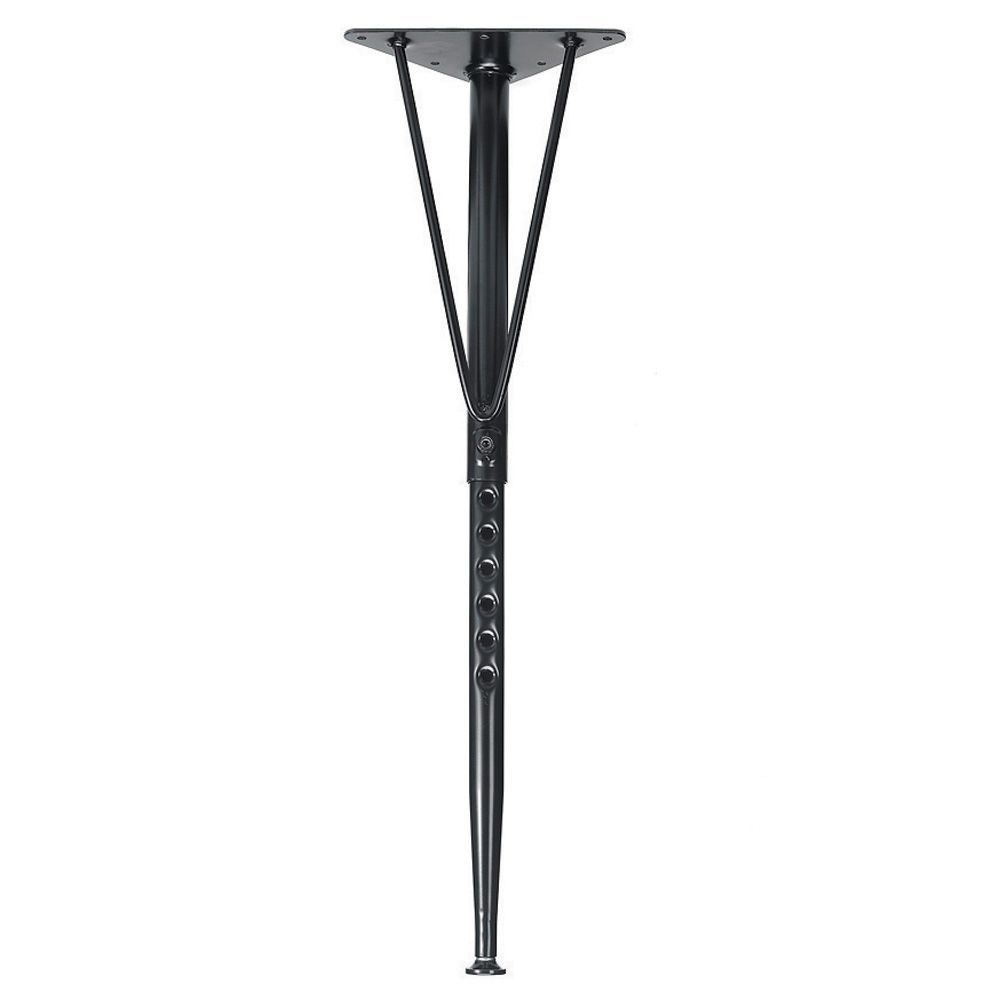
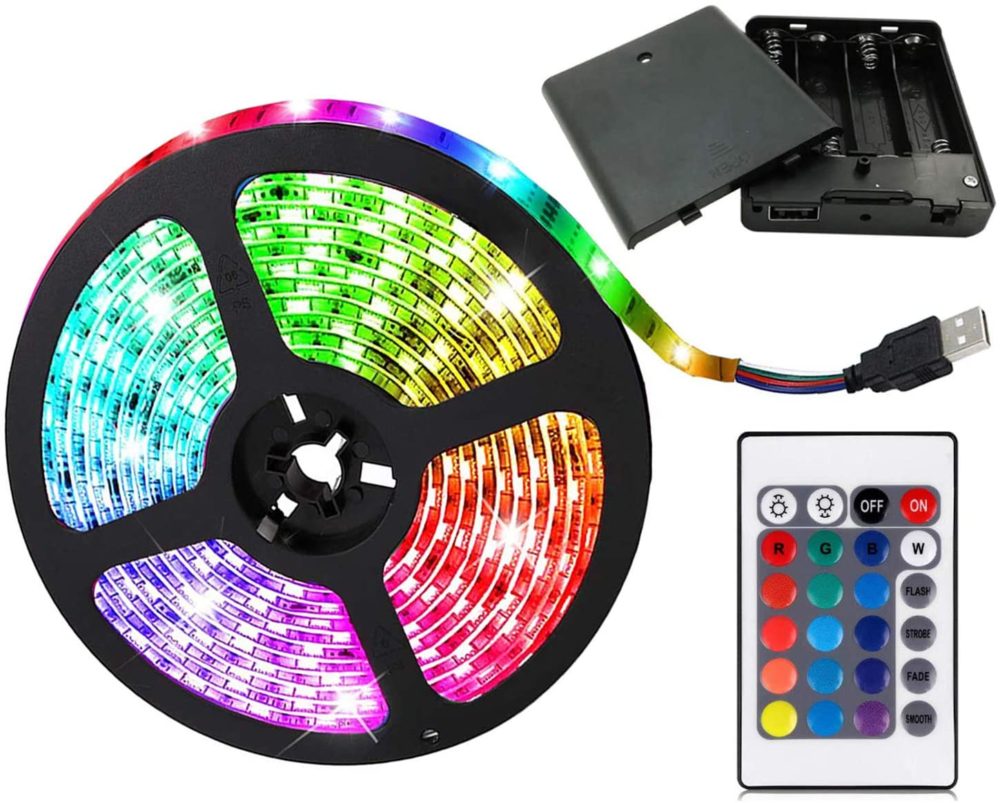
Also below is a photo of my final design. The final design will use adjustable table legs that I found online ($65 for a set of 4, which isn’t bad). The legs adjust from 19 ¾” to 28 ¾”, which after some research on average height for coffee tables and “beer pong” tables, seemed to fit pretty well. The final design will also use color changing LED strip lights, which I think I will try to find with a remote and battery pack power. And then the main part of the final design, the table top, will be composed of the reclaimed/distressed wood. I am still considering different wood types and how I’ll find wood for this, one option is purchasing pecky cypress wood planks (type of wood with natural pockets) or to find some sort of reclaimed wood to use (i.e. old fence posts or something similar). So far, I have some really promising and inexpensive leads for reclaimed wood on craigslist. I plan on the table top being approximately 6’ x 2’ and 1-2” thick (depending on the wood I’m able to find). I will be using colored resin to fill the pockets, one thing that I’m still considering is if I am going to use blue/turquoise or purple. And then I will likely add a finish to the whole thing, probably polyurethane.
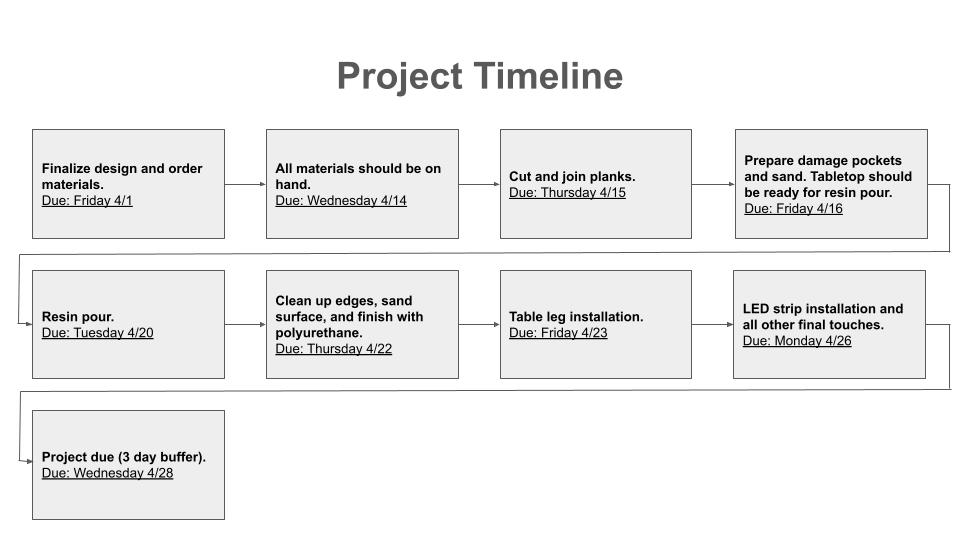
For the fabrication process, I plan on spending most of my time with the wood tabletop. Prepping the wood and setting the resin will likely end up being a fairly tricky process. I plan on generally following this guide for the tabletop, which describes the process for making the distressed wood into the finished glossy glow fill table. In general, the process is to prep the wood by joining the planks, finish the edges, clean the damage pockets, sand, mix/prep the resin, pour the resin, sand again, and then give it a gloss finish. From there, once I have the tabletop complete, I will install the table legs, which since I’m buying a 4-pack kit, should be pretty straight forward. Finally, I will install the strip LED’s to the bottom, which I plan to simply adhere to the bottom of the table. Overall, the process seems fairly simple right now, which I think is good because there will definitely be a lot of things that will come up and take more time than expected. See below for a plan on the timeline that I plan on following for the fabrication process. I am not too concerned about not being able to fabricate this piece, as I am lucky to have access to the Idea Forge (I am staff), so I plan on doing the prep for the wood and table leg installation in the woodshop and utilizing our finishing room for the resin pour. I definitely have access to the proper tools/space needed to accomplish what I am aiming for with this project.
Sources:
Photo 1 and Main Project Inspiration/Process Steps
Photo 2 – Original
Photo 5 – Original
4 Comments. Leave new
Hi Maya,
This is such a great idea I am almost jealous I didn’t think of it first. I think it’s really neat how you’re planning on using the natural indents, cracks, fissures, and pockets of the wood to fill in with light. It will bring out a mix of natural organic aesthetic with the overall LED aesthetic. I can’t wait to see the final product in use!
Hey Sidd,
Thanks for the comment! I’m really hoping that the tabletop turns out to be a unique aesthetic art piece when combined with the light sources.
Hey Maya,
What a great project! I really like how the legs you picked out are adjustable. That will allow the table to be functional in many different circumstances. I think something that is really important when using LEDs is to not have them ever directly visible. In your project this might be hard with some transparent areas in the wood due to the resin fill. However, if you are able to lay out the lights well I think they will be very effective and add to the final project. I cant wait to see how it turns out!
Hey Michael,
This is a great point, I definitely agree and that’s why I’m going to line the bottom of the table with the LED’s; to create that glow effect but avoid overdoing it. I’ll remember to keep this in mind when implementing those.