
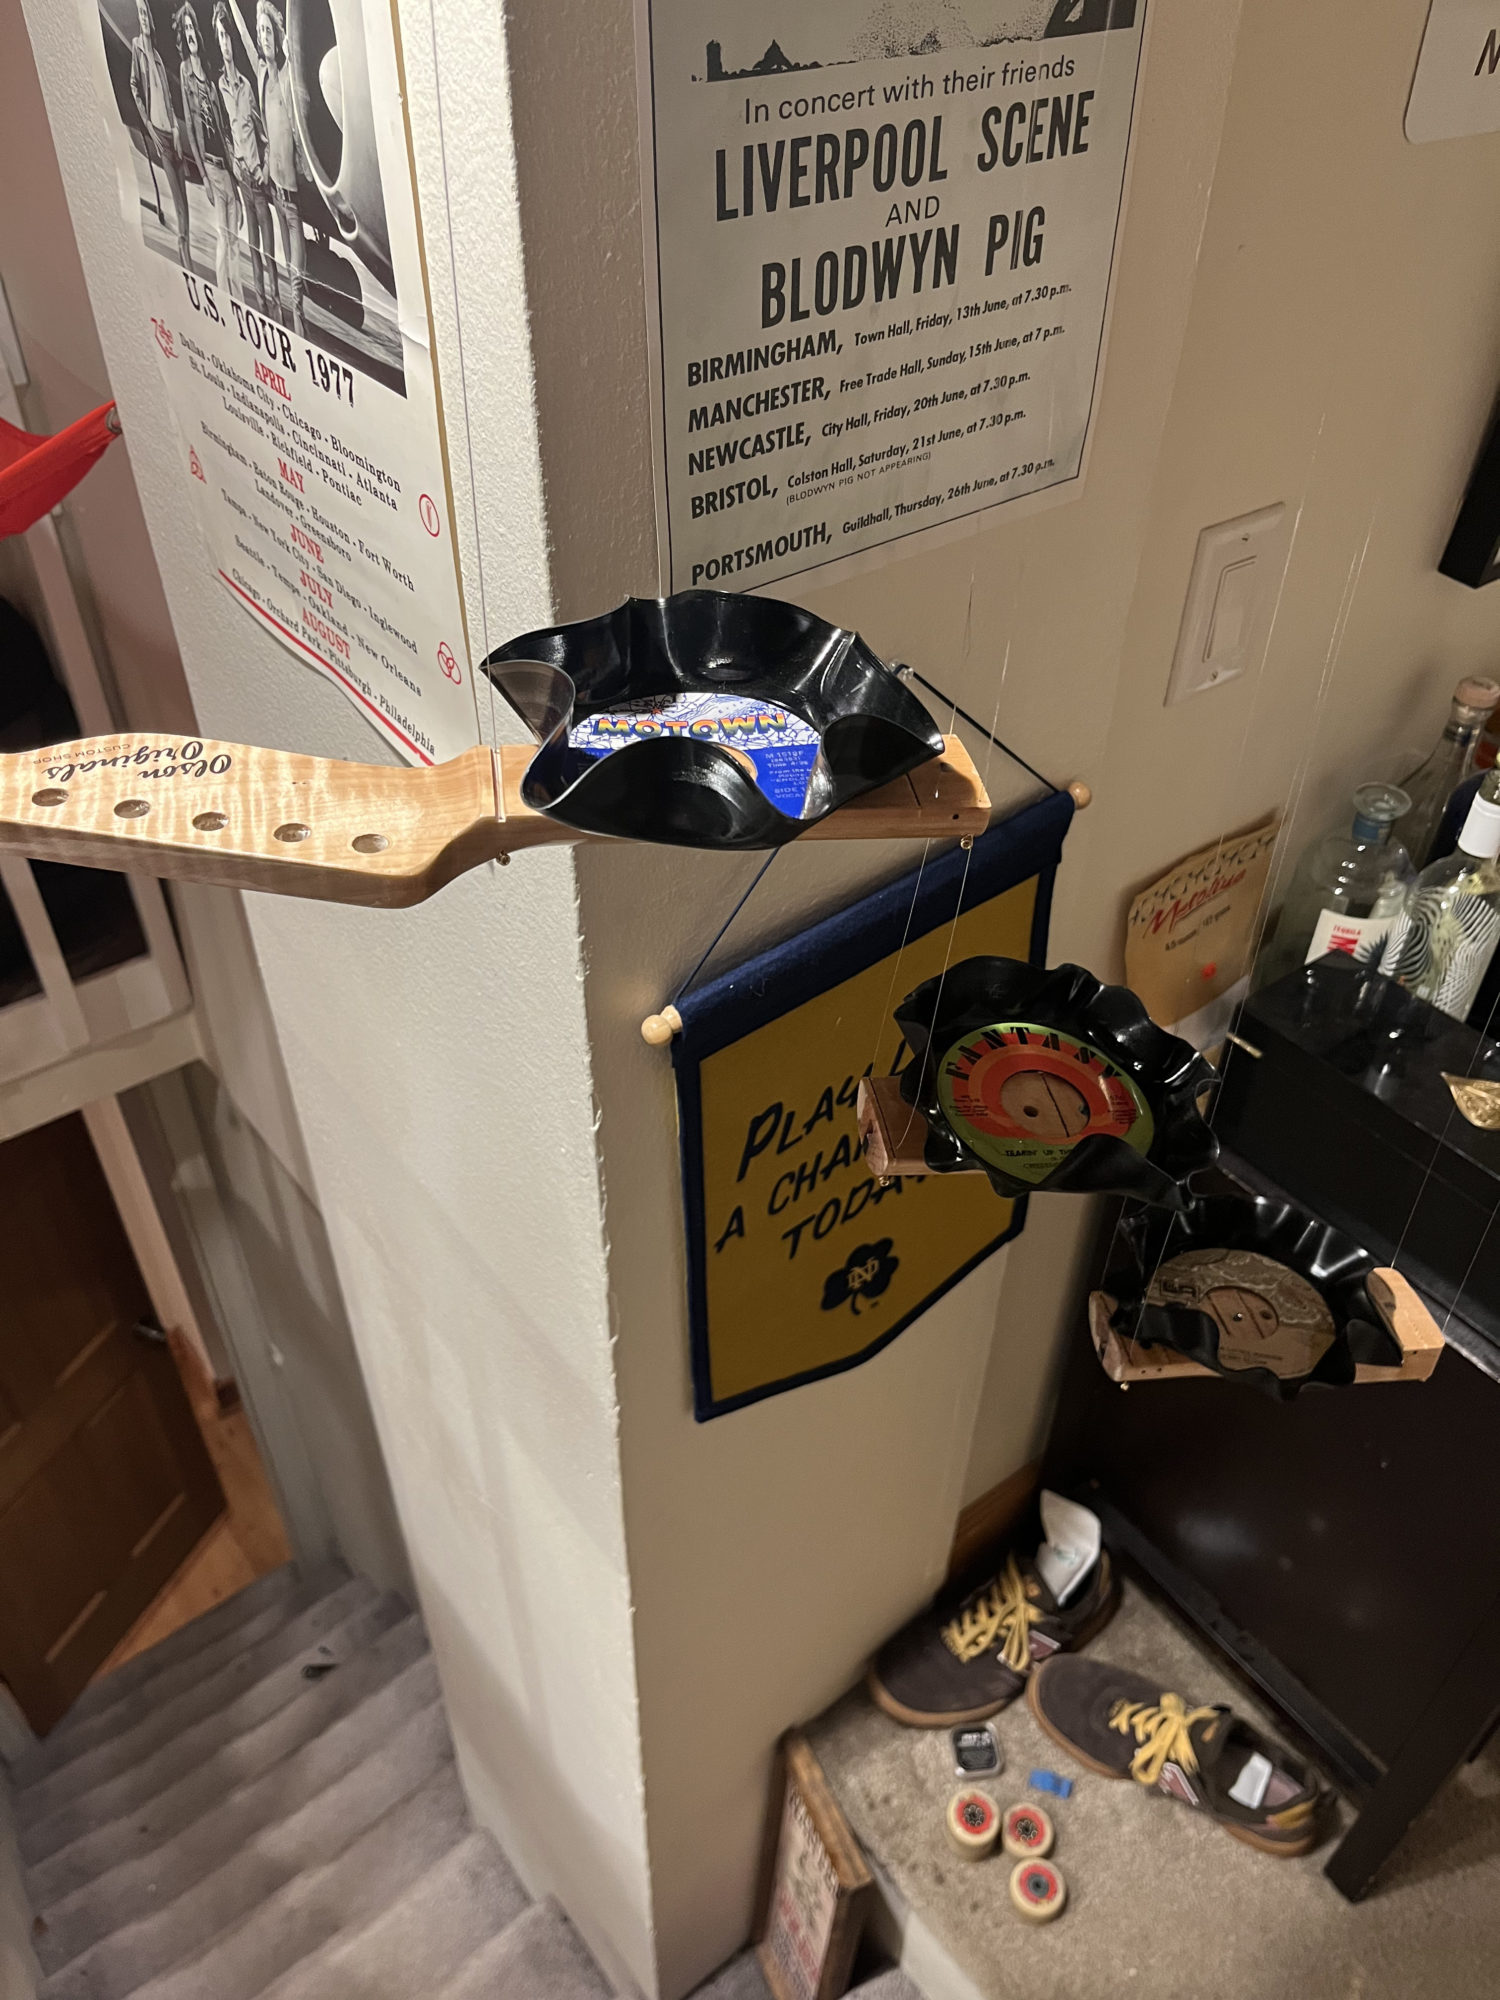
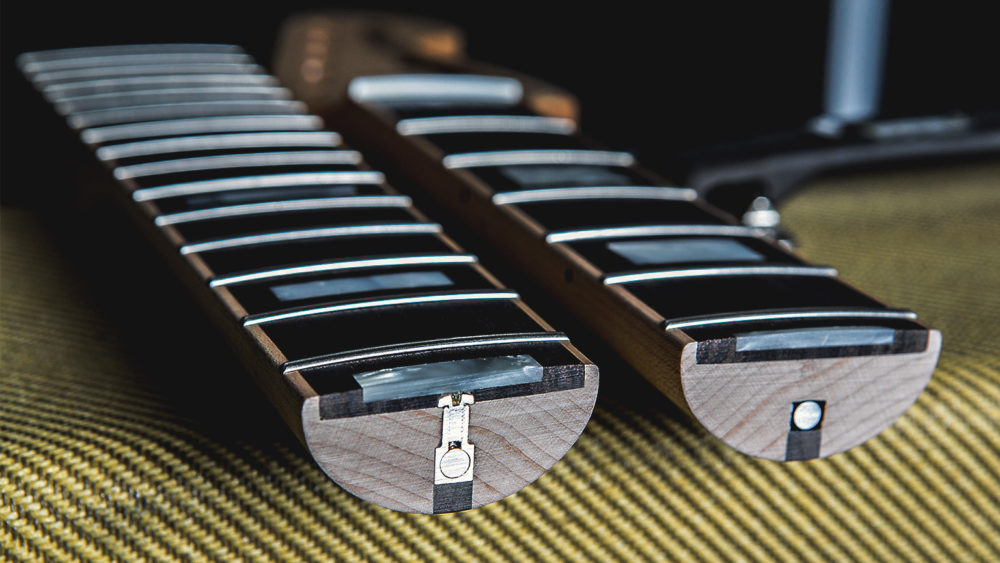
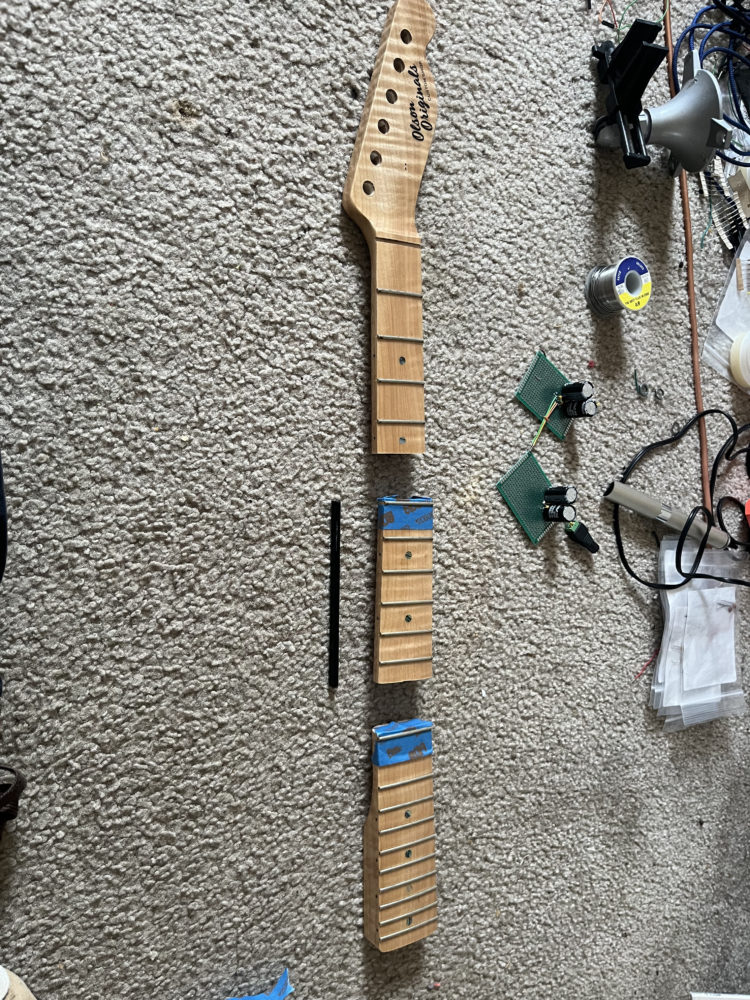
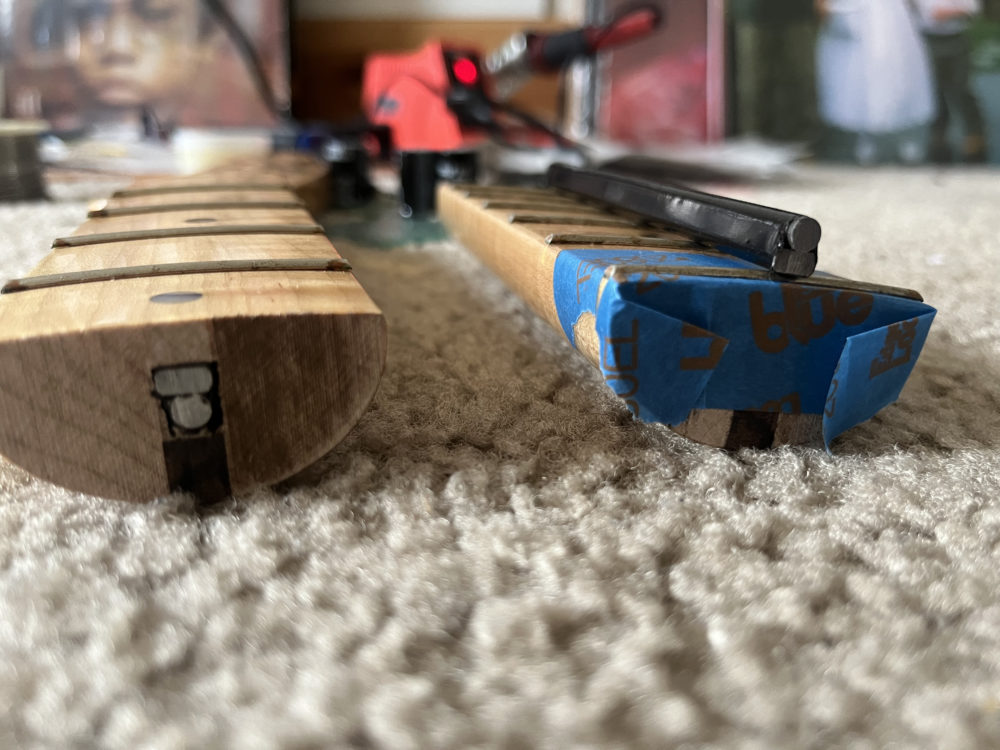
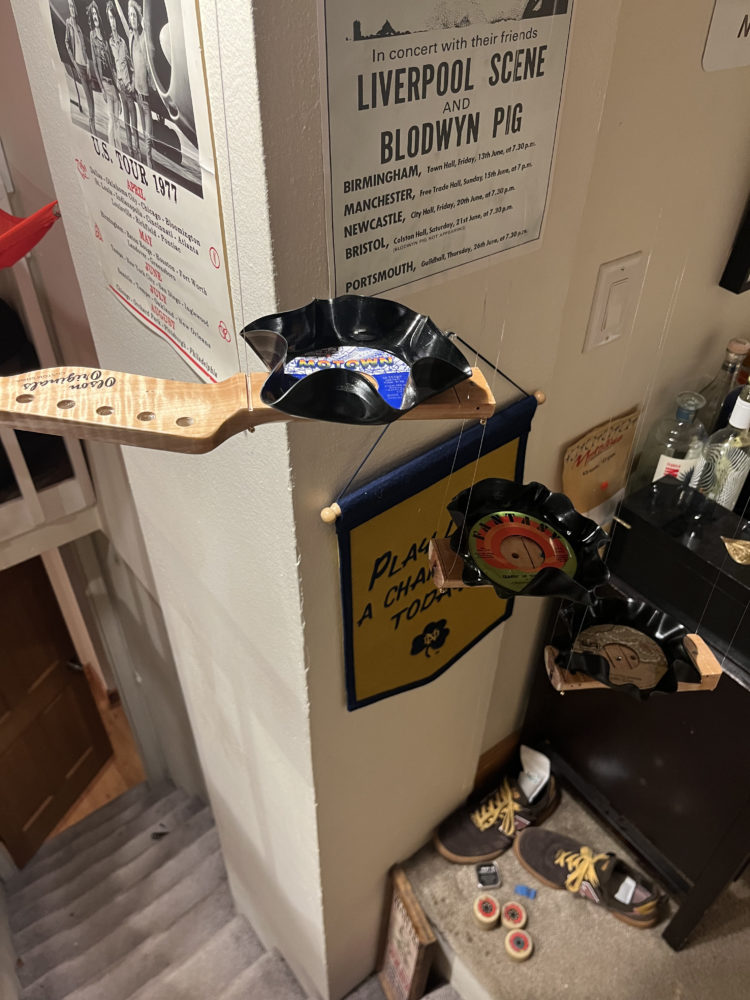
My inspiration for this project came from my love of music and retro styles, as well as my desire to implement nature and greenery into everyday objects and environments. I began creating my artifact by sketching concepts of what I wanted to produce and speaking with staff at the manufacturing resources around campus to determine the feasibility and timeline of this project. I then measured and divided the guitar neck into three sections and used an assortment of bandsaw blades to separate the neck into these separate parts. After that, I drilled small holes for the guitar string used to suspend them, making sure that these holes were large enough for the 9 gauge guitar string (.009″ diameter) and end wrapping to pass through, while also retaining the ball end, which I used to bear the weight of each segment. My next step was removing the truss rod, which was a bit difficult, but using rods, hammers, drills, and other methods, I finally removed the truss rod from two of the sections, machining all the way through the portion nearest the headstock, as this is where it was secured most permanently. With the support cable holes drilled and my water channel open, I drilled drainage holes where I would eventually place the vinyl record succulent pots. Throughout this process, I was also experimenting with different methods of softening and shaping the records. I landed on a baking tray with an aluminum cup supporting the record, which I placed in the oven at 200F for 3-5 minutes. After this, it was soft enough to shape, and with damp cloths and a spindle, I was able to produce creative and unique shapes which also held enough soil to sustain small plants. Before securing these to the fretboard, I first removed the frets using a soldering iron to release the fish/hide glue, then used a utility knife and tang nippers to remove the frets with minimal damage to the fretboard finish, even with the barbs. From there, I transferred the support holes I had drilled into the neck to a long section of MDF, which allowed me to string my support cables through the neck and over the MDF board. I secured these with tape while I managed balancing tension and angle to allow proper drainage, then clamped an identical MDF board on top to secure the strings and secured the two together with button head cap wood screws. The last step I took was to use a curative waterproof putty to seal any gaps between the record bowls and fretboard. I have not yet purchased soil and plants, but did test the function of the drainage and made sure that each stream landed correctly at the next tier.
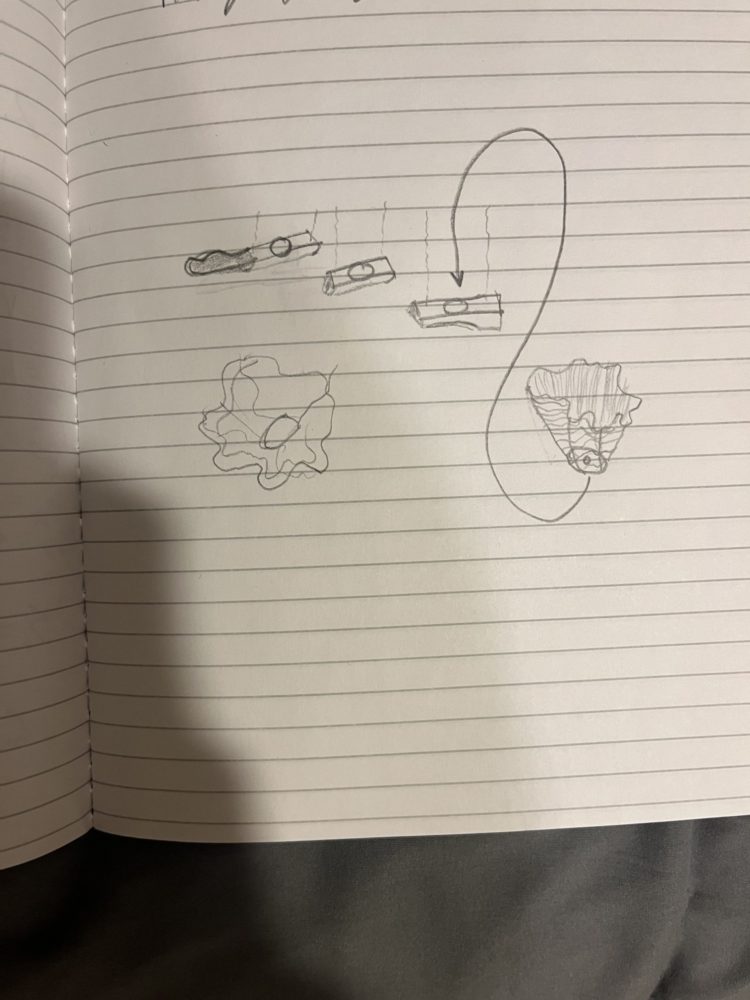
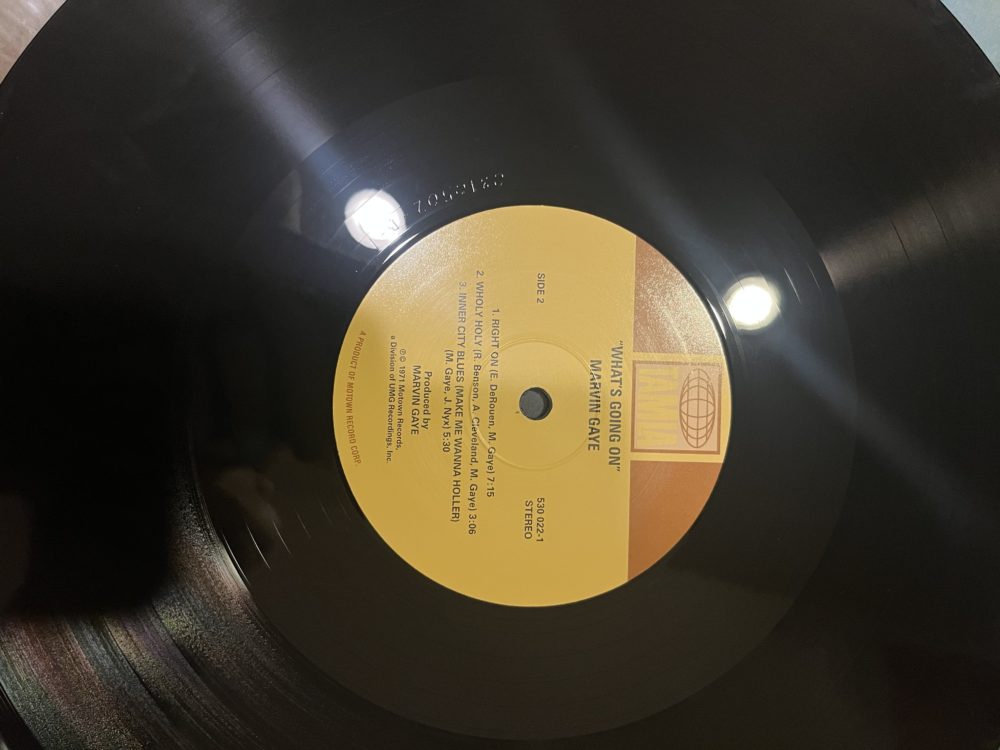
I ran into a few roadblocks along the way – some unexpected barriers that I encountered were the removal of the truss rod and the sizing of the record bowls. The most challenging part of this project was, however, the final assembly and string tensioning. With a limited amount of ways to suspend the neck sections while I strung them through the MDF board, I found myself struggling to maintain equal amounts of tension in four or more supporting cables (made of guitar strings) while pinning all four cables down at once, holding the neck, adjusting the supporting cable lengths, and permanently securing them. In hindsight, thicker guitar strings like the D or A string (which are wound) may have been better than the .009″ high e strings that I chose to use, as the flex and stretch became irritating when trying to suspend them and balance tension between the cables. Thinner strings are also much easier to accidentally kink or bend throughout the process, which negatively altered the aesthetic appearance of the string supports. The record bowls proved to be a challenge as well, since the thickness of the guitar neck was too small to allow me to slip them into a bored hole. Instead, I had to place them on top of the neck sections and secure them with waterproof curing putty. Another change I had to made was switching from full-size LP records to smaller 7″ 45rpm single records. These fit perfectly with my size constraints and were easier to warm and shape without melting or ending up with strange irregular warping.
Some parts of the project worked very well, however. I had anticipated that it might be difficult to cut the neck into three pieces, but making bandsaw cuts on each side of the truss rod to sever the maple wood before switching to a wavy metal bandsaw blade and completing the cut through the truss rod worked very well and took very little time. This rod is what induces the curvature of the guitar neck, and it was interesting to feel and hear the tension in this set of rods release as I compromised its integrity – it was valuable to have a tactile experience which related to a concept I already understood about the mechanism. I also made some changes to my design as I was creating my artifact. With the aforementioned knowledge that I could not fit the records within the neck, I had to place them on top and find another solution for drainage. I originally considered routing a channel, but realized that I could repurpose the existing channel within the neck by drilling drainage holes partially through the wood. This presented additional challenges related to drilling through a rounded metal rod which became freely able to spin within the neck as I deconstructed it. These problems were remedied with the aid of the helpful ITLL staff, who guided me towards the proper centering bits, securement techniques, and machines to achieve my goal of removing the truss rod without causing damage to the wood or finish.
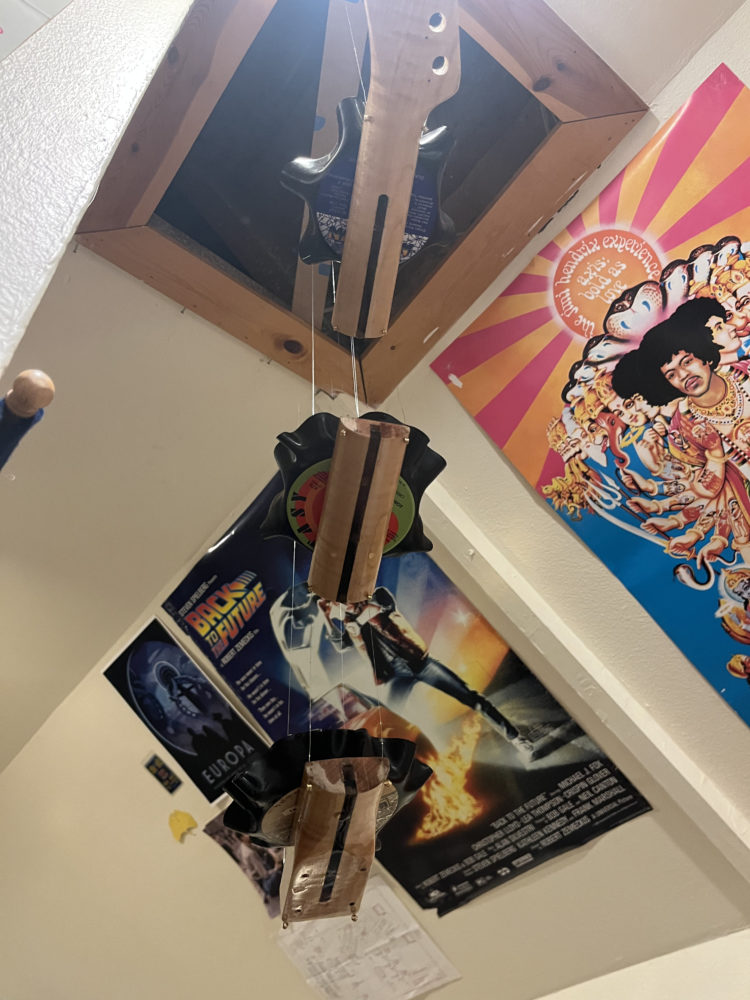
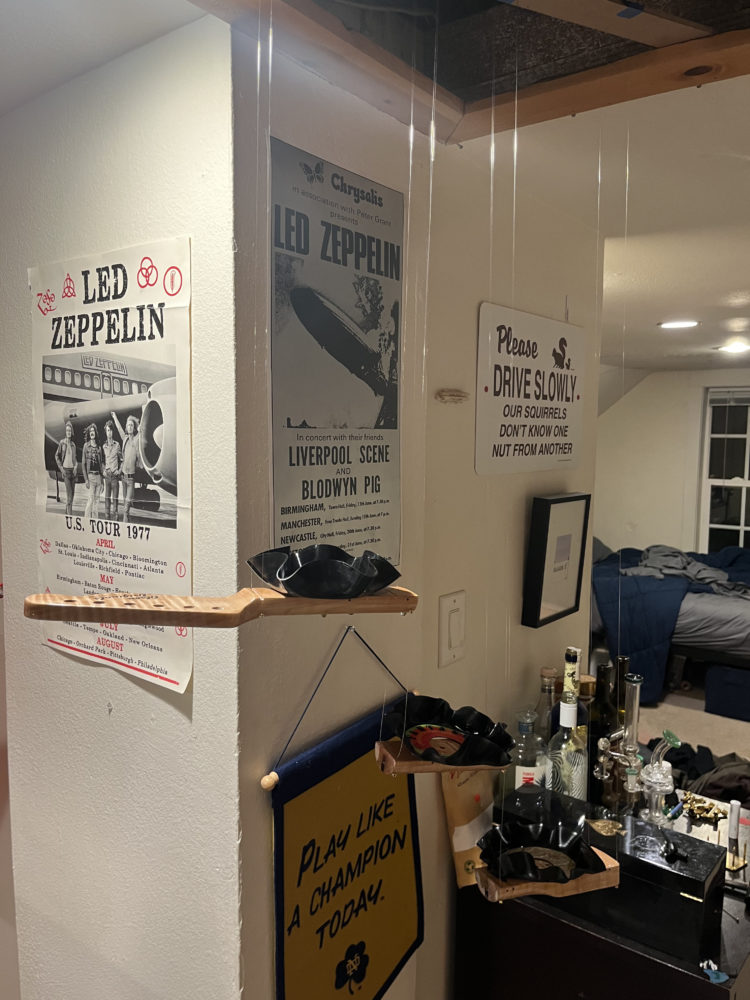
Overall, this project gave me a better sense of what issues I may face in the future when attempting to combine and marry form and function. I now know much more about manufacturing techniques that can be used in unique situations like those I encountered through the creation of my artifact. I also have a sense of pride in my ability to create, especially when professional materials are not available to me – I instilled confidence within myself that I can create something that is both useful and aesthetic in a highly constrained environment and I have a practical but beautiful hanging garden to remind me of that as well.
2 Comments. Leave new
Hi Nate!
What a fun project. Great job on explaining the entire creation process fro start to finish as well as the ideation with your drawing. I felt that this project was pretty for you as I can tell youre pretty passionate about the materials. Where did a acquire these records/do you own a bunch of them?
Hi Nate,
Great project! I also feel passionate about greenery into everyday objects and life. I particularly liked your use of vinyl records to create the bowls. Did you try making the bowls with any other materials as well? I think this design choice though really ads to the aesthetic you chose. Awesome stuff!