
Show and tell progress since the Design Preview.
I decided to change my project idea, so this blog post includes my progress update as well as an updated version of the previous blog posts I submitted.
Rationale for Change: I decided that I want to create something more functional that I would use more often, but honor the intended aesthetic and use elements from my previous project design in this one. My new idea also takes inspiration from my up-cycle project, which was a model of an earthship home. My up-cycle project used similar materials and has a similar aesthetic to my final project.
Post 6: Main Project Plans and Inspiration
For this project, the aesthetic I am taking inspiration from is colorful maximalism. This aesthetic is a huge part of my everyday life in both the clothes I wear and how I have decorated by personal spaces.

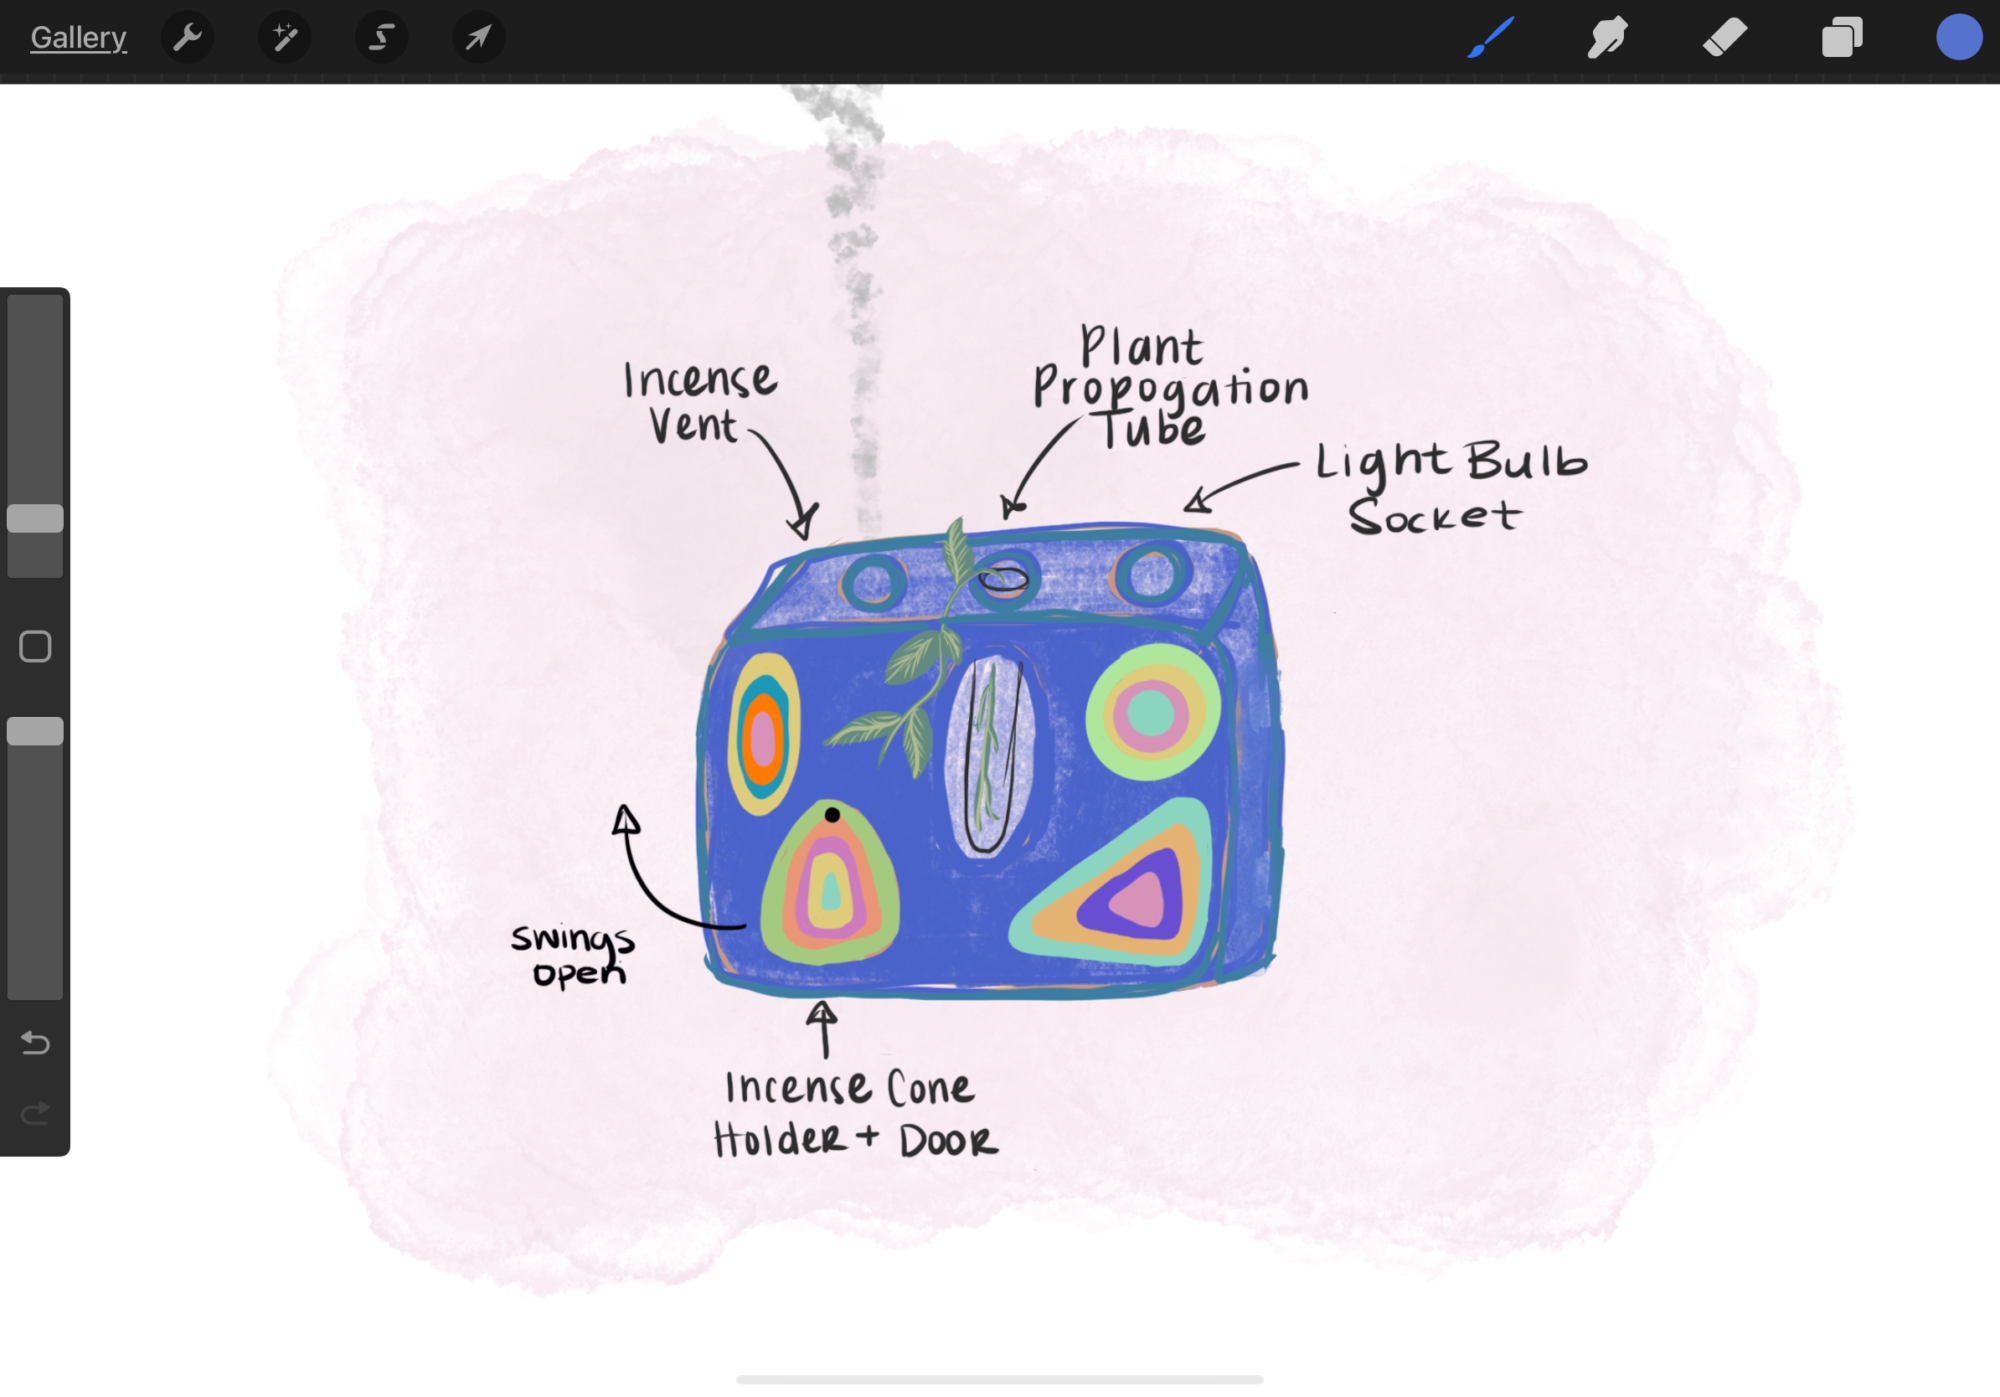
I will be creating a multifunctional decorative accent piece, made out of clay. It will include an incense holder and vent, a plant propagation tube, and a light fixture. This honors the aesthetic with an excess of varying functionality in a singular item. Additionally, it will be painted and decorated with colorful paint and beads, similar to my previous design.
Post 7: Main Project Aesthetics: Plans and Alternatives
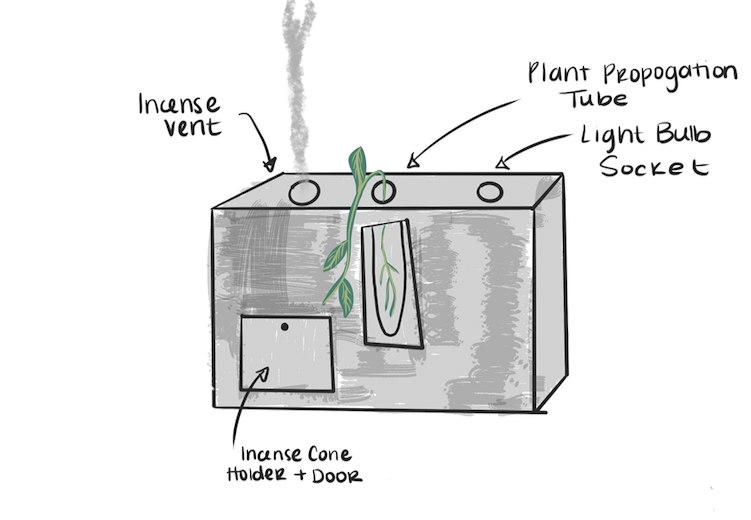
The first alternative aesthetic I sketched is a minimalist and industrial design. I imagine this would be all black and would be made out of sheet metal. The design would be rugged and sharp. This variation of the design focuses on function rather than aesthetic. This is a strong contrast to the colorful clay I will be making my design out of.
The second alternative aesthetic I sketched is a futuristic design. I imagine this looking like an appliance the Jetson’s would have in their home. The overall shape is very elliptical, with other rounded and elongated design features. While this differs from my first alternative aesthetic, they are both simple in their shapes and design features.

Post 8: Top 5 Specs and Constraints
Top 5 Specifications:
- Has more than one intended function or purpose
- Uses existing or up-cycled materials for construction
- Incorporates course concepts and feedback provided on my previous blog posts
- Incense properly ventilates
- Materials and coatings used are safe when heat from burning incense and powered light bulb are contained inside
Top 5 Constraints:
- Lack of time for iteration
- Integration challenges after the clay dries
- Inability to modify the design after the clay dries
- Achieving precise dimensions using clay
- Method of fastening door could inhibit movement
Post 9: Design Preview
The image below is my final design.

Materials Needed & where they come from:
- Air dry clay – rehydrated from past projects I was not happy with
- Small, glass test tube – left over from my biodesign class
- Metal hooks – from a previous project that I have disassembled
- Light fixture and light bulb – will most likely have to buy new
- String & beads – from a previous project I have disassembled
- Small metal fasteners for incense door – from a previous project I have disassembled
Planned Fabrication Process:
- Create clay brick and allow it to partially dry
- Hollow out incense holder
- Hollow out plant propagation tube holder
- Hollow out top vents and sockets
- Add bead hooks
- Smooth all surfaces
- Allow to fully dry
- Create incense holder door separately
- Paint
- Paint door
- Fasten door
- test door hinge
Post 10: Progress
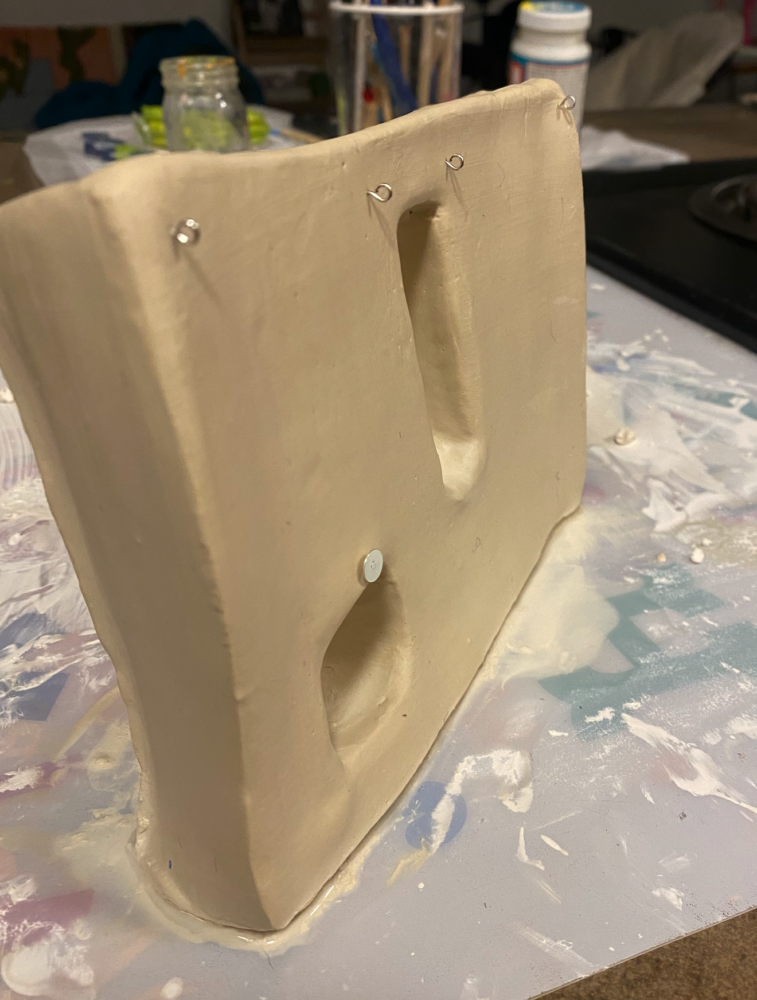
Included below are pictures of the progress I have made so far.
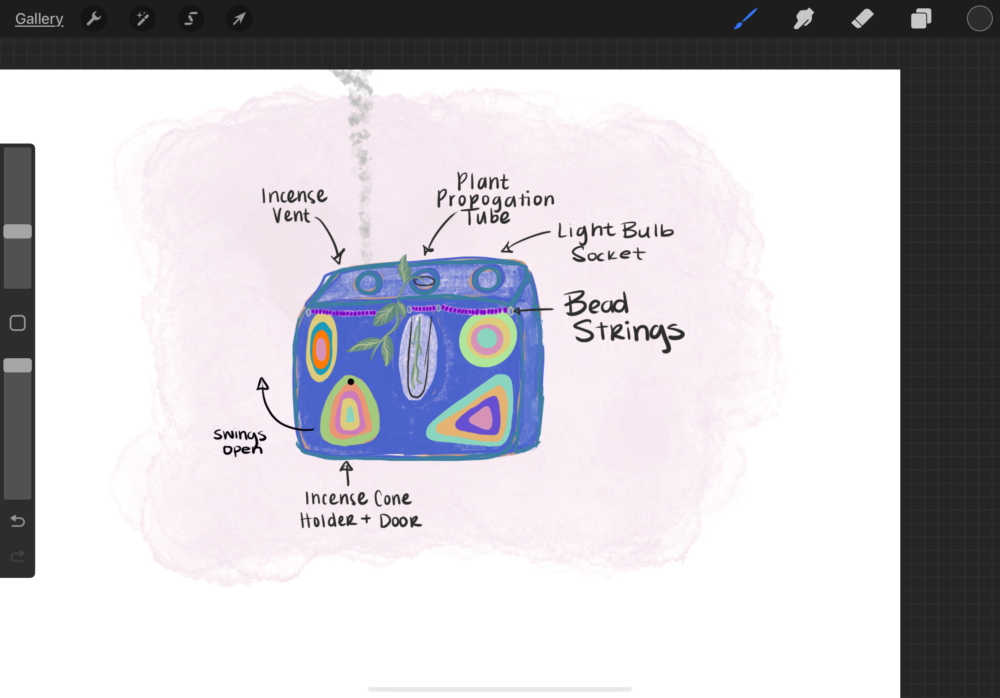
Small Design Change: Added bead strand across the top
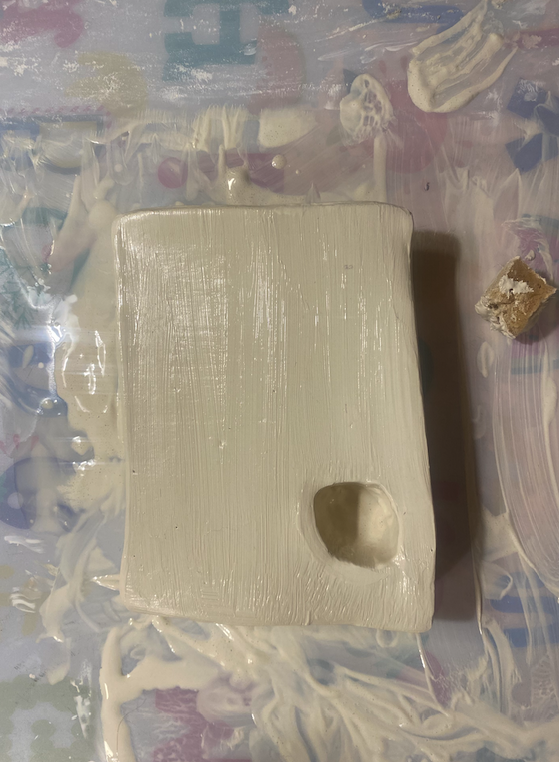
Created clay brick as a starting point & carved out incense holder
Carved out plant propagation tube holder, carved out top ventilation holes and sockets, & fit checked test tube

Added fasteners
Next Steps:
- Let clay finish drying
- Create incense holder door
- Procure and integrate light bulb
- Test light bulb
- Paint all surfaces
- Apply sealant
- Add beads
- Test incense vent
- Finish documentation
3 Comments. Leave new
I am quite fond of how much functionality you’ve packed into such a small space! The diagrams you’ve made are very clear and it looks like you’ve already made good progress with the clay shaping. I’m wondering on how you plan to supply power to the lightbulb. Will you drill a hole for a cable, or incorporate a battery pack into the backside?
Hi Abigail
It’s great to see you making progress after deciding to change your project. The rationale for changing your project shows that you have put in a lot of thought in the project and I agree of making something more useful.
It’s exciting to see what the final product will look like, and I wish you all the best in your continued progress.
Hi Abigail, this is a great post! Sorry to hear you had to switch your project, but it is a very cool idea and seems very functional! I like the use of clay to show the earthy design. Were you planning on painting the clay or keeping it natural as is? It is cool either way just curious based off the futuristic aesthetic that you mentioned a bit.