
For my final project, I wanted to combine functionality and form, and I wanted my dynamic element to be purposeful and not solely aesthetic. I chose to create a puzzle box, which is a storage container that is often difficult to open and requires a hidden series of slides, twists, pushes, and other manipulations to access the storage area. My design contains several dynamic elements, including two rotating portions of the puzzle and a ball which must slide between slots in order to enact the following step. Below are renderings of the steps required to open the box and access the three radially symmetrical circular storage sections present in the bottom section. My inspiration on functionality came in part from craftmanspace.com, where basic high-level plans for a puzzle box were published (pictured below)
.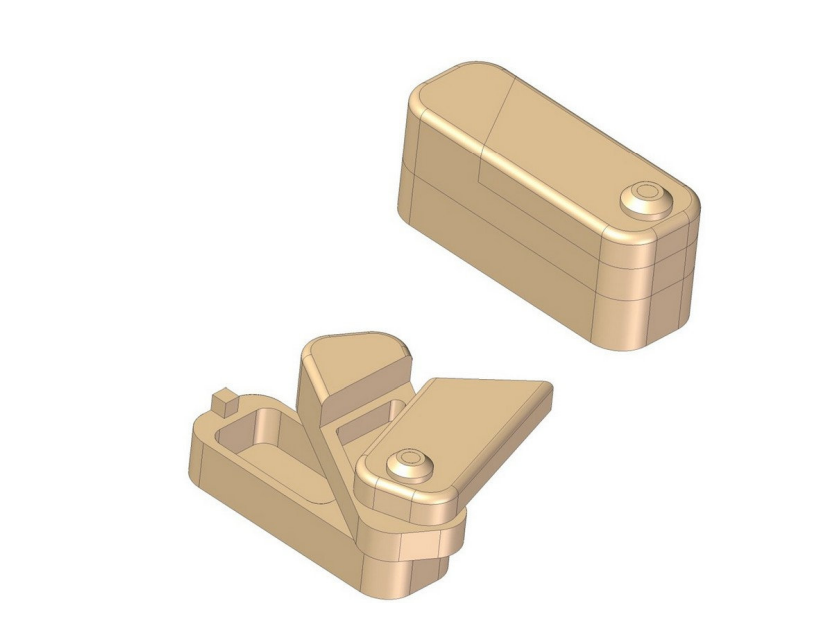 Inspirational puzzle box functionality.
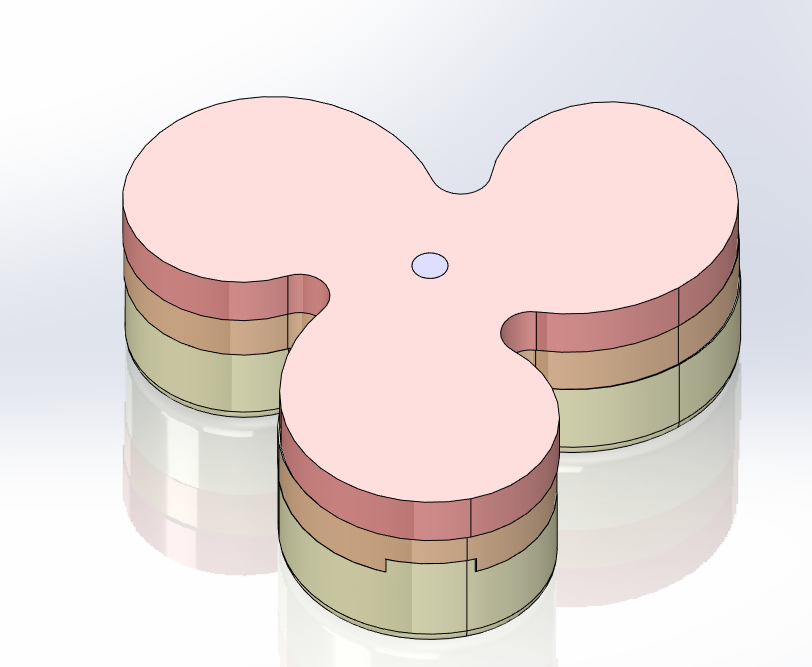
- Rotate the top section to reveal a small storage area (I chose to remove this feature due to time constraints and also because this is not a hidden storage area. Additionally, tipping the puzzle upside down would cause items in this tray to fall out). Rotate until the slot in the top section aligns with the slot in the bottom, then tip upside down to allow a small ball to fall into the top section.
- This removes the ball from its previous position preventing translation of the middle section, and now the middle section is capable of sliding back and away from the tab, allowing it to rotate.
- The last step is to rotate the middle section and reveal the main storage cavities.
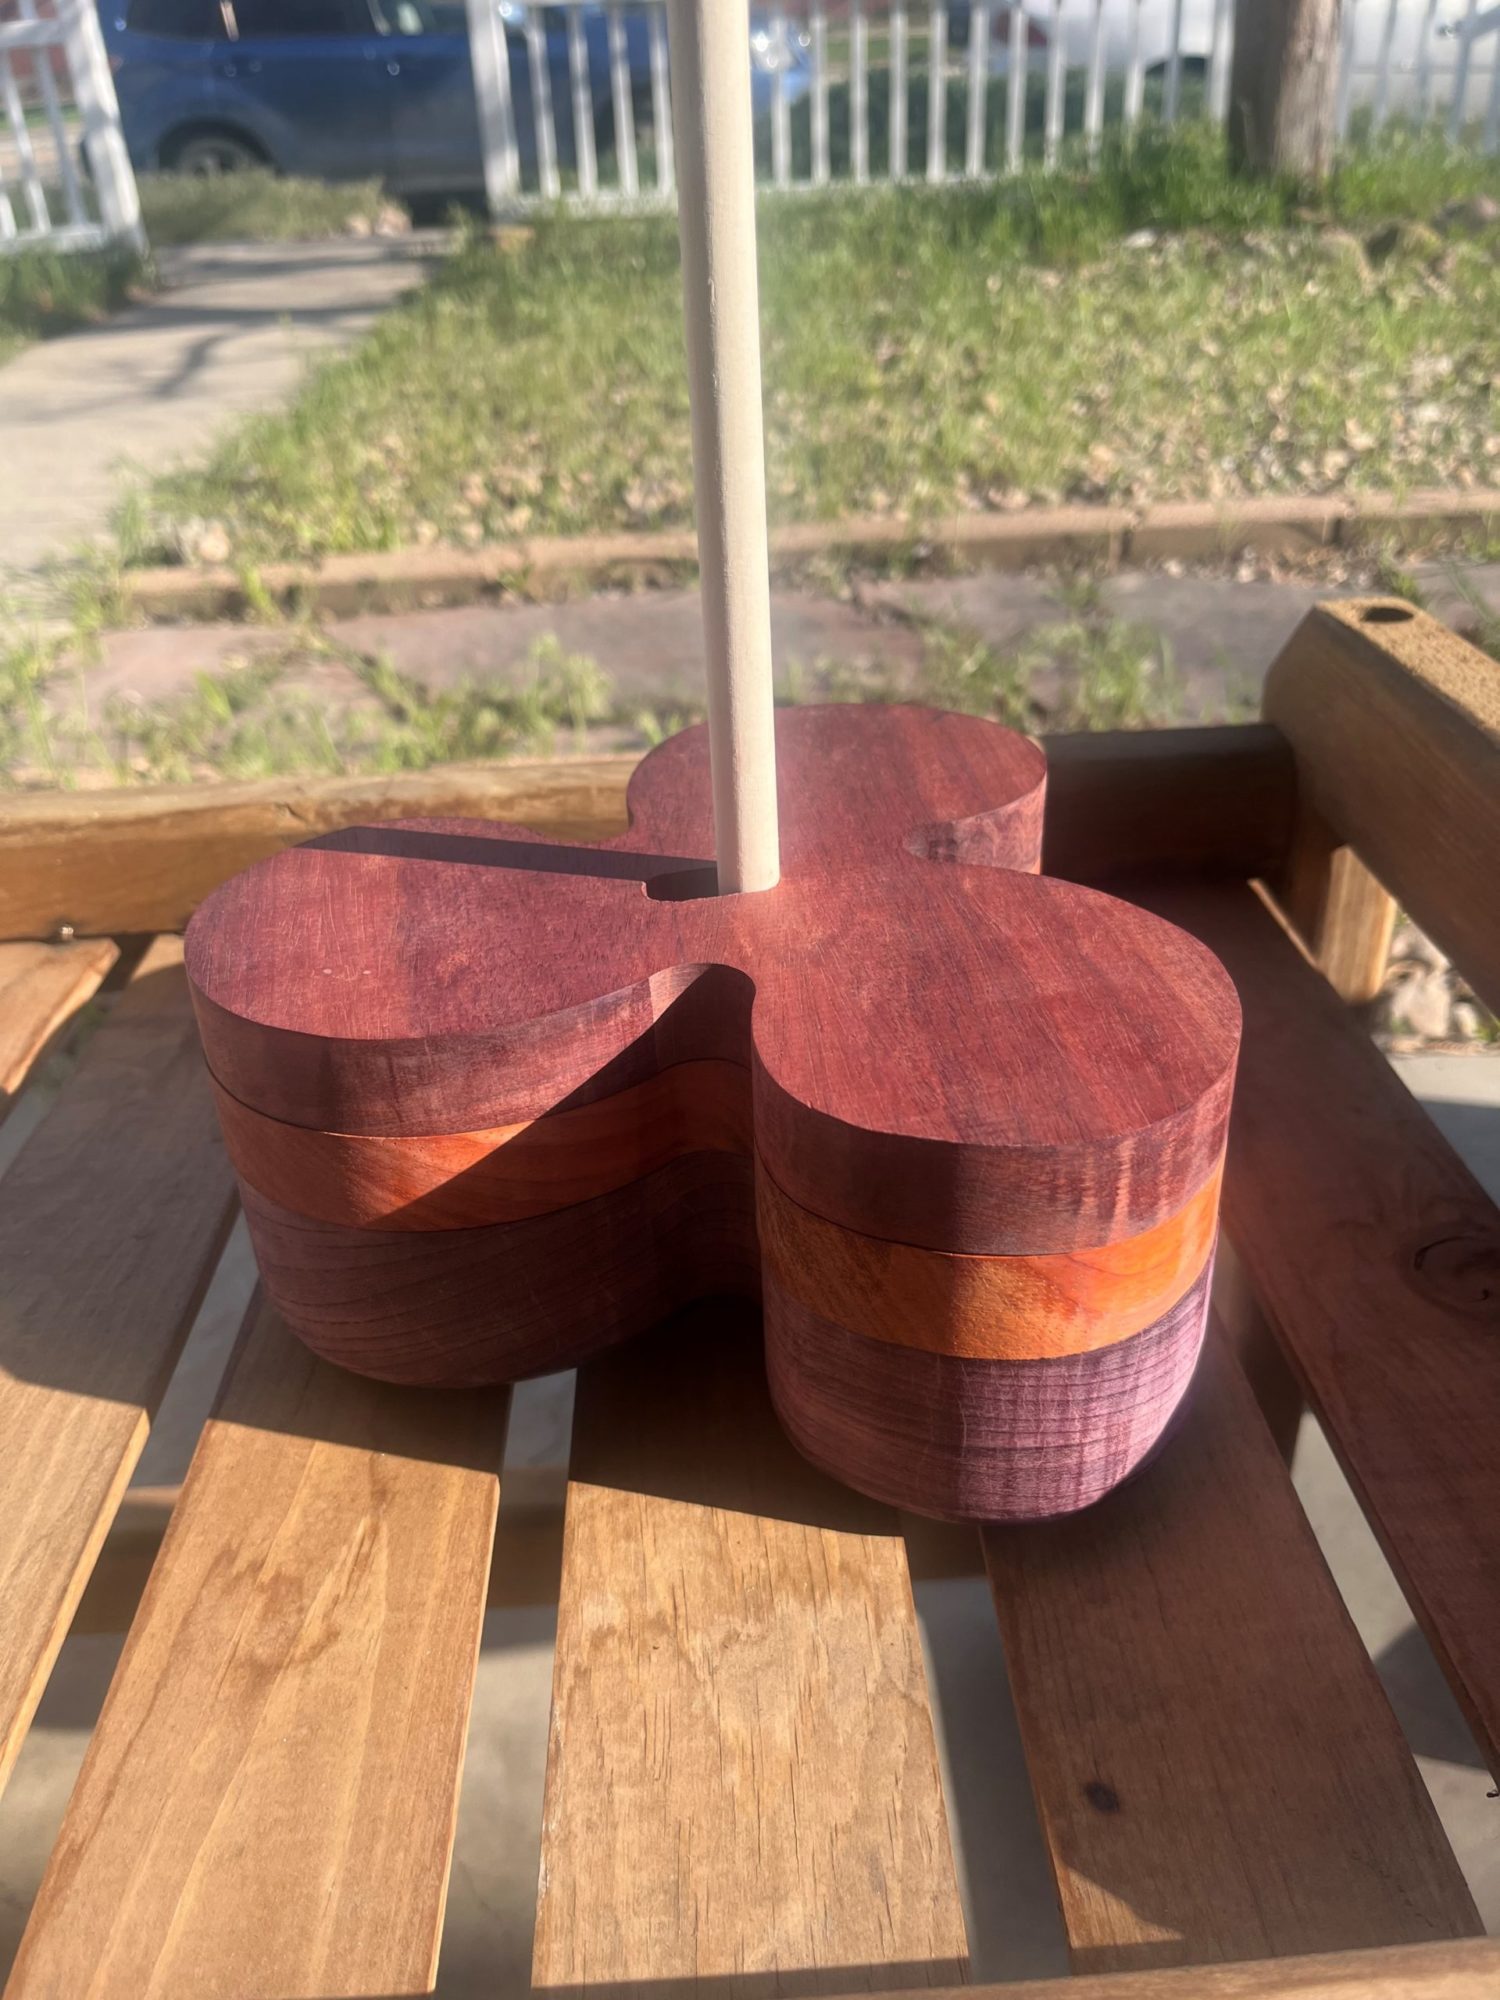
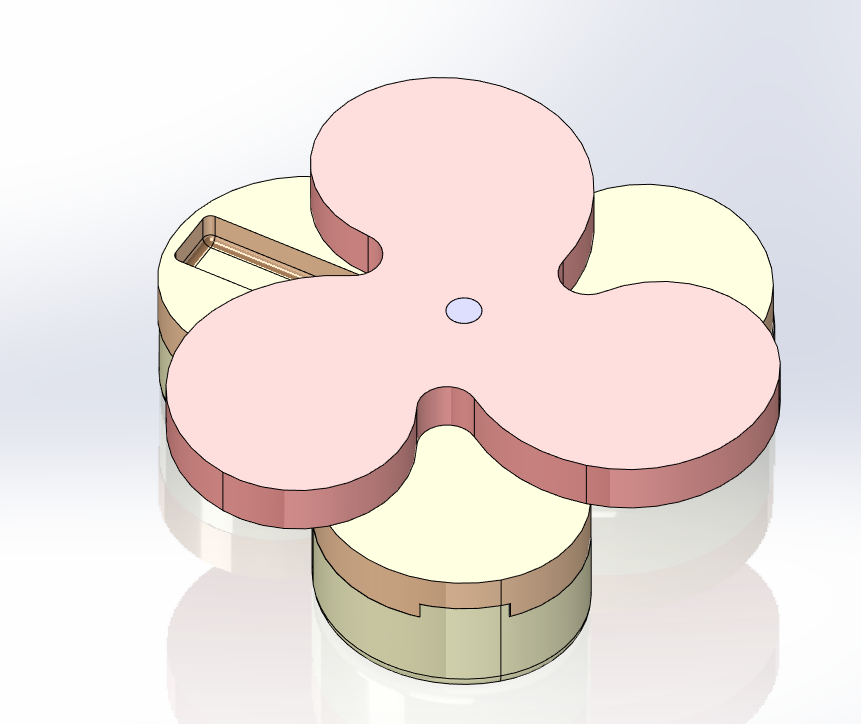
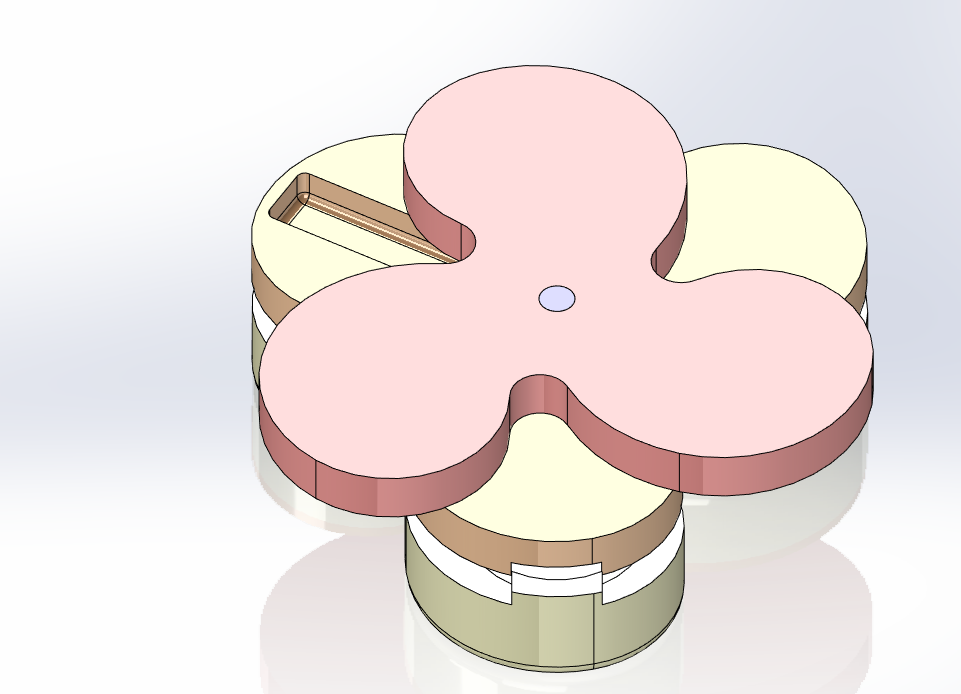
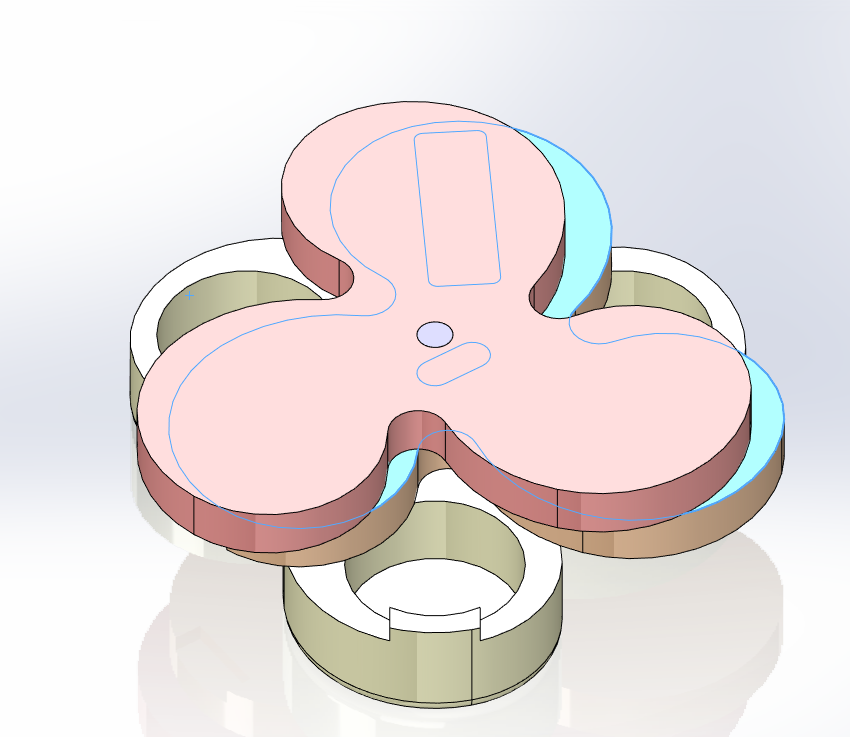
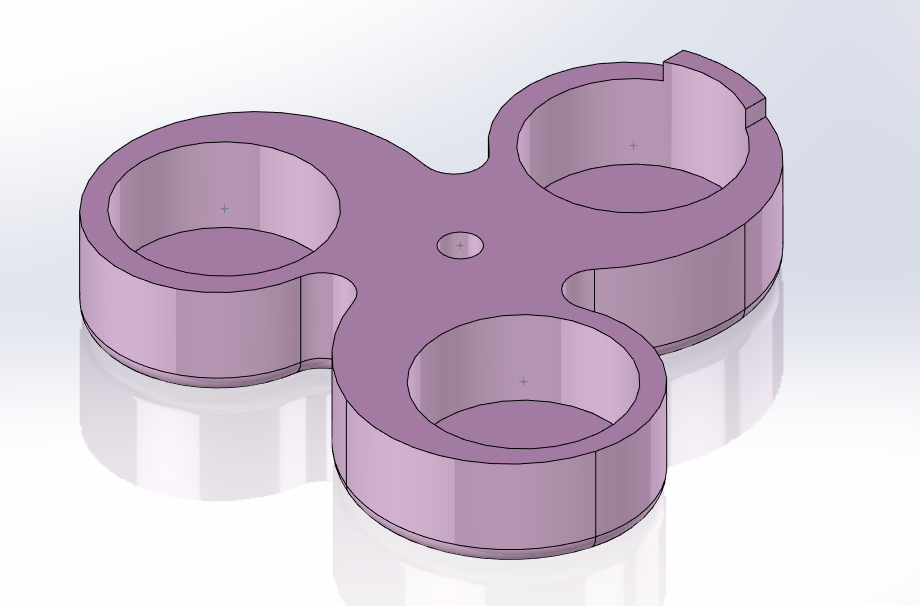
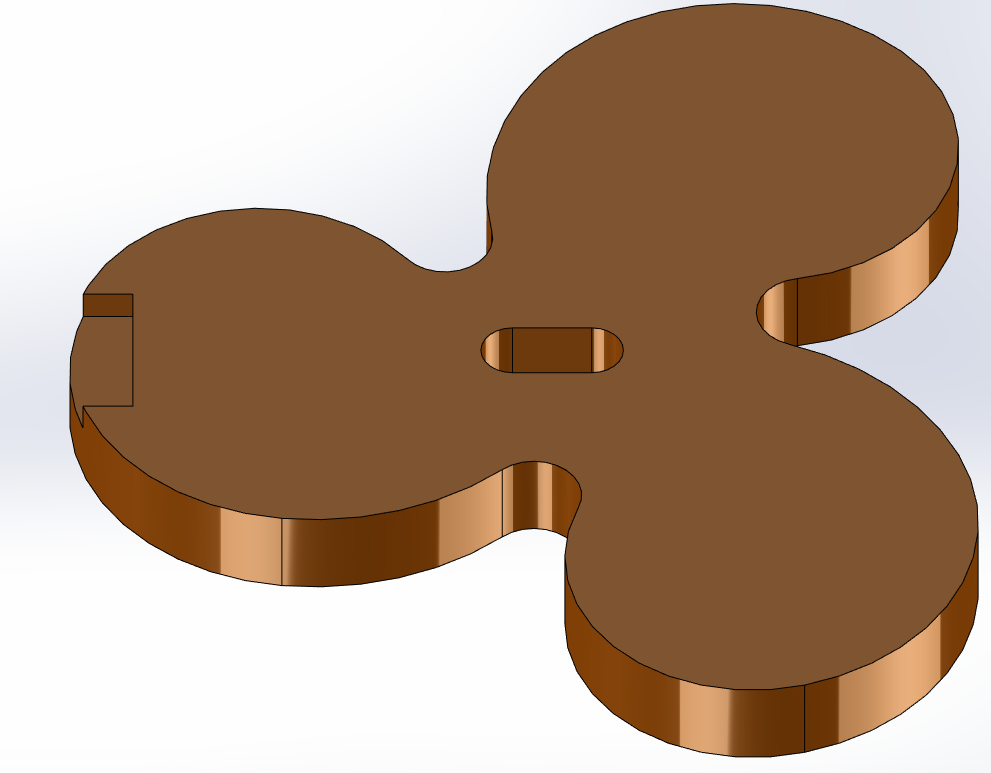
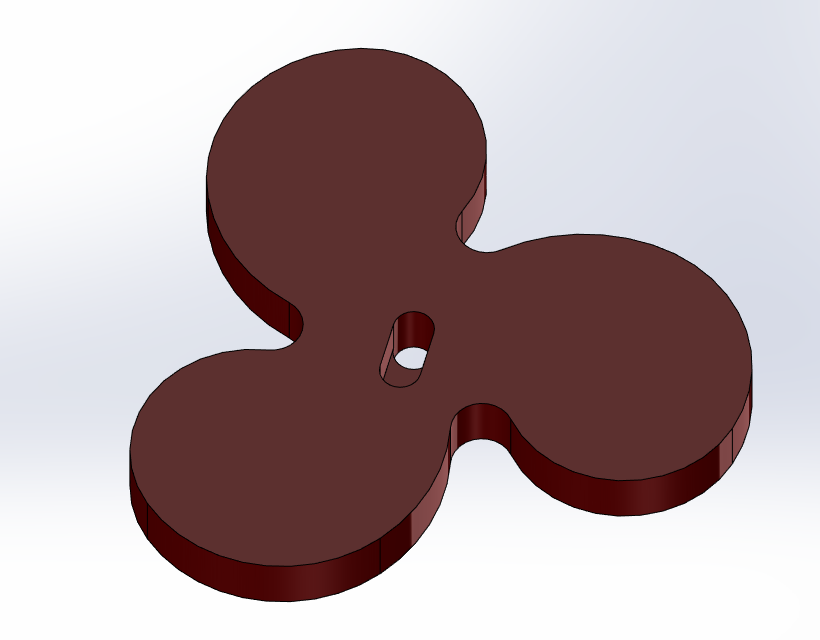
The box is composed of three main pieces pictured below (plus a dowel, cap, and ball). The bottom portion includes the storage areas for trinkets and a tab which prevents rotation of the middle piece, which has a single slot in the middle allowing it to slide linearly such that it is no longer restricted by the tab. This slot has a ball preventing this translation when the puzzle is unsolved. The top piece, which has a partial slot, houses the ball when it is rotated to align with the middle section and tipped upside down. The bottom portion is made of purpleheart wood, which is a purple colored wood from the rainforests of Central and South America that is very oily and dense, much like padauk, the tropical west African orange wood used for the middle section (which also produces natural oils but is significantly less dense). This is in contrast to the top section, which is made of an incredibly dense jungle wood called bloodwood – this tree grows in tropical South America and grows very similarly to padauk. I chose bloodwood for the top section because its density would prevent it from denting, chipping, or scratching as easily, which is important because the top piece will bear a large design that should remain crisp and easily identifiable. The figuring on the bloodwood will also look great once I add contour and depth with my carvings. I also chose grain alignment very carefully not only to ensure structural stability, but also to accentuate the contours of the features, cavities, and dynamic movement of my box assembly. Smoothness, shaping, grain patterns/orientation, and overall finish and appearance are also very important aesthetically. For finishing, I will be using Tru-Oil, a boiled linseed oil blend which cures by exposure to oxygen (a drying finish). It is durable, soaks into the wood, and is a more natural finish that won’t crack/check with temperature changes or misuse, and won’t suffer from the effects of wood expansion/contraction. It also goes on very thin, which is desirable in a context involving moving parts where thick layers of finish can impact freedom of motion. The finishing process will also be fairly quick, as linseed oil can be applied with rags and does not require spraying as with nitrocellulose. This choice also allows me to avoid the use of plasticizers and urethanes, which can be problematic to apply and dry slowly, creating more opportunity for contamination and scratching more easily and noticeably. Tru-oil gives a great sheen that isn’t a mirror finish, but produces a professional, durable, and smooth appearance.
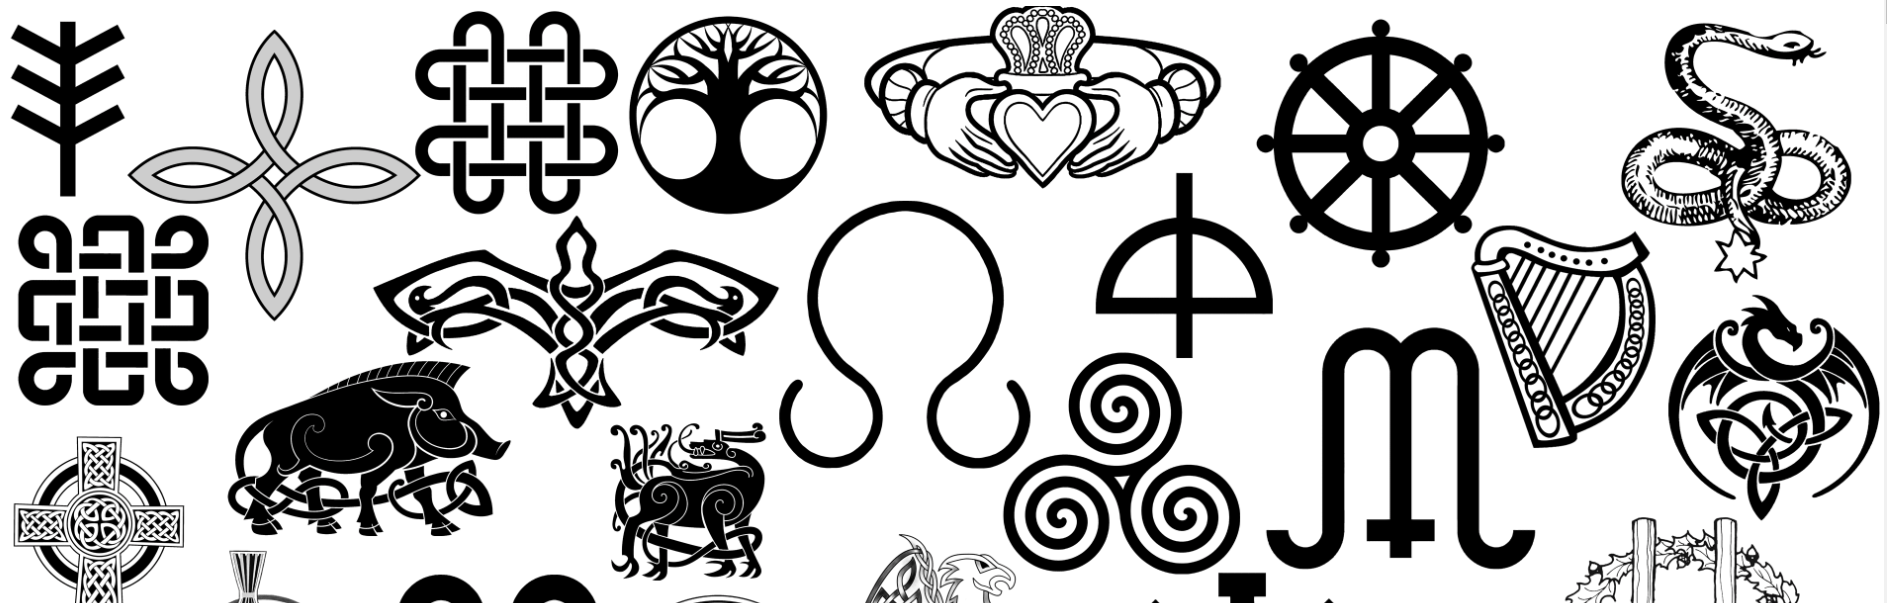
The puzzle is meant to follow a Celtic aesthetic, which is why it bears the shape of a triskelion (pictured below at left). The design of all the slots, tabs, cavities, and storage areas are made with circles, arcs, and very few straight lines, but still bear a notable amount of symmetry, especially radially (which parallels the rotation required to open the box in this case). This symmetry and the preference of arcs and circles over linear patterns is typical of traditional Celtic designs, some of which are displayed below. I chose this aesthetic because I am very used to seeing these meaningful and time-honored symbols in my family’s house and when visiting relatives as well, as we are very connected to Irish heritage. I would like to have a physical manifestation of this pride in family and culture, and modeled my design aesthetic on these principles and common symbols.


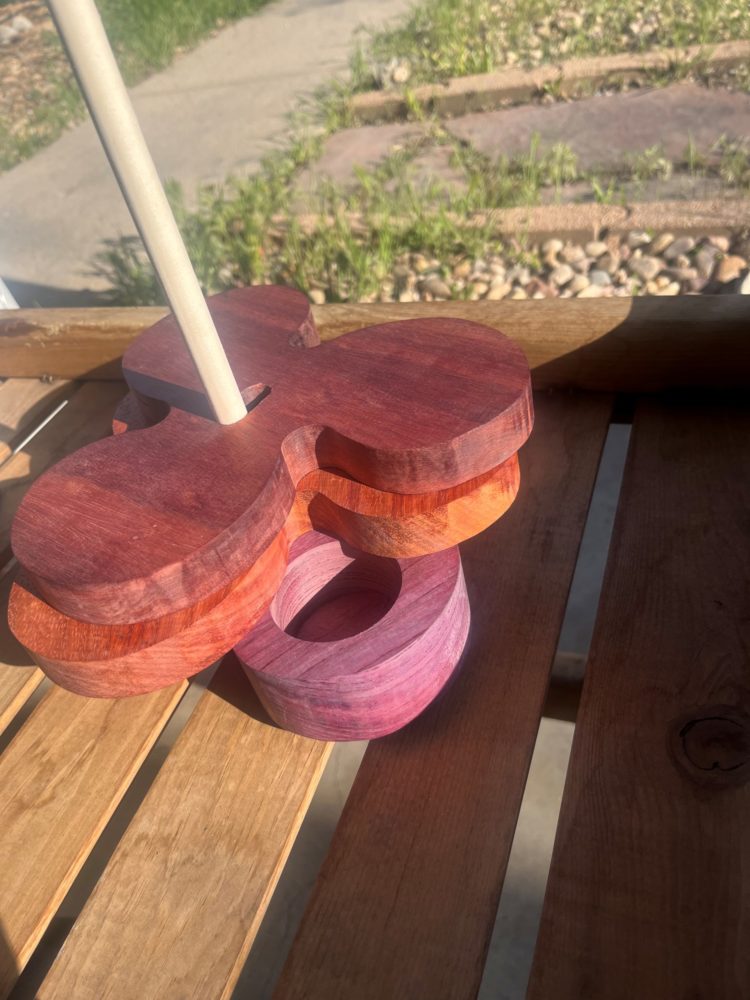
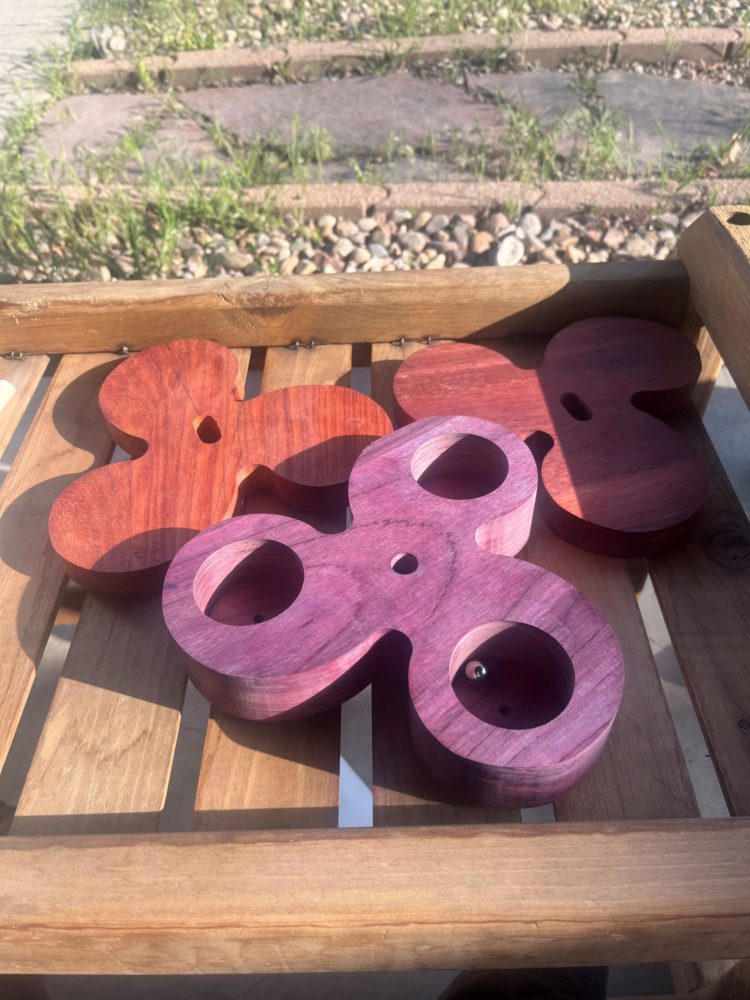
There is still some work to be done to bring this piece to a state of functionality and aesthetic appeal that I am satisfied with. I will finish my final round of sanding on Monday and carve the triskelion into my top piece. I will also quickly create a cap to top the central dowel and prevent the ball from escaping. I have already tested functionality and the project works as intended! After that is done, I only have to complete the finishing process. I will return and post an update concerning my progress since this post, including images of my final product. Considering the density of the woods and precision of my construction, I believe I have met my specifications regarding durability, invisibility of the solution path, proper functionality, and professional appearance. Below are images of my current assembly and individual parts.

![]()
![]()
2 Comments. Leave new
Hi Nate, I really like seeing your progress on this project, it looks really good! I appreciate your attention to detail on the grain patterning and the colors of the wood you used. I am very excited to see updates with more finishing and the final design carved on the lid. In terms of the wood choice, what drew you to the purple heartwood as a material? In my mind at least, it contrasts a bit with your chosen aesthetic. I think that it creates an interesting contrast with the other tones, however, and works with how you have used it.
I remember your design preview during critique and I loved it. I’m a big fan of the triskele. I also really like the finish you used and the final color. Is there a reason you chose to make it out of wood instead of by 3D printing? Great work!