
Summary:
- Overall, I am very happy with my final design. I think that I stayed close to my target aesthetics, and in addition also made a functional project that I’ll be able to use in the future.
 I aimed to create a desk lamp in the mid-century modern and contemporary aesthetic, with focus on minimalism and quality materials choice. Using quality wood and drafting a design before hand to approximate angles and dimensions helped greatly with this, and as a result my final project fell within my goals and specifications.
 - In terms of manufacturing, I focused on a simple design with an emphasis on ease of production. I measured out all angles and dimensions beforehand to minimize waste and time spent on manufacturing, along with purchasing pre-made electronics. I was able to create the lamp through several visits to the woodshop, utilizing tools like the band saw and CNC router. I joined all the pieces using glue, nails, and pegs instead of using complicated joinery. For the lighting aspect, an LED strip was chosen as it is easy to cut to the correct size, and already has integrated functionality for changing color and brightness.
- Presentation Recording: https://www.aesdes.org/wp-content/uploads/2023/05/video1118284809.mp4
What?
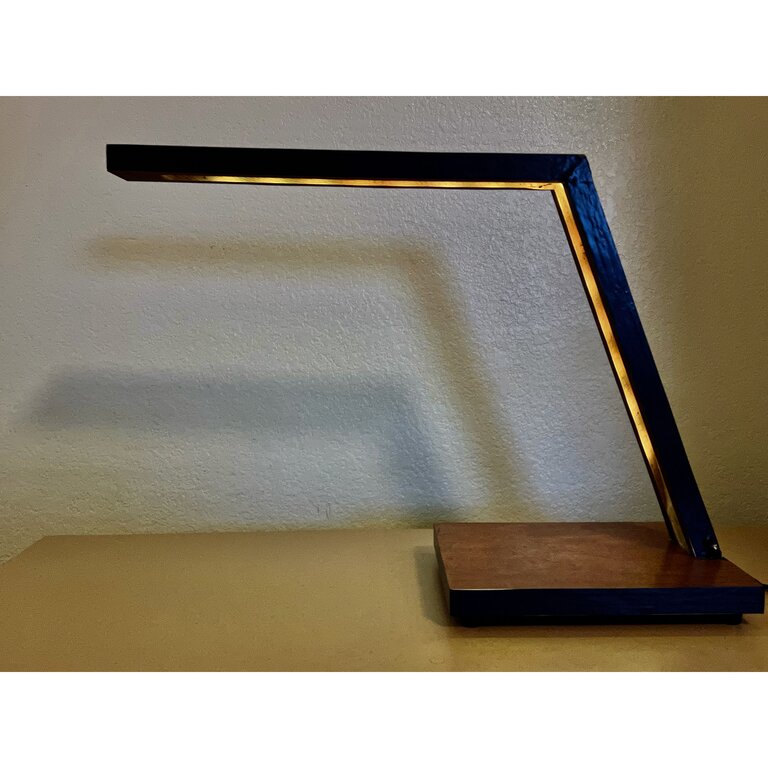
My final project is a contemporary desk lamp. I wanted to create a small lamp that would would blend in well with my furniture, which is mostly contemporary and constructed of wood.
How?
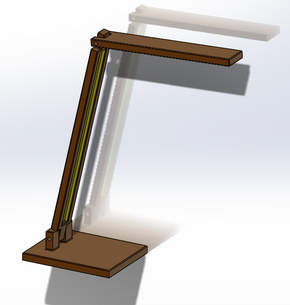
First, I designed a CAD model so I could accurately spec out dimensions and angles. The image below is the result of my work in CAD:
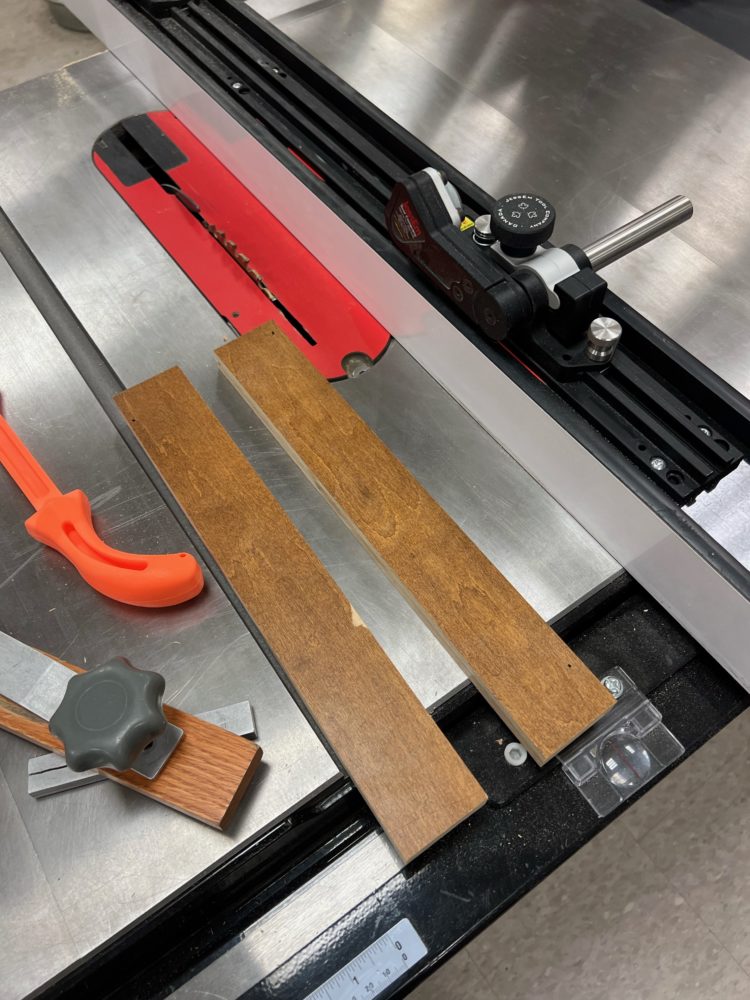
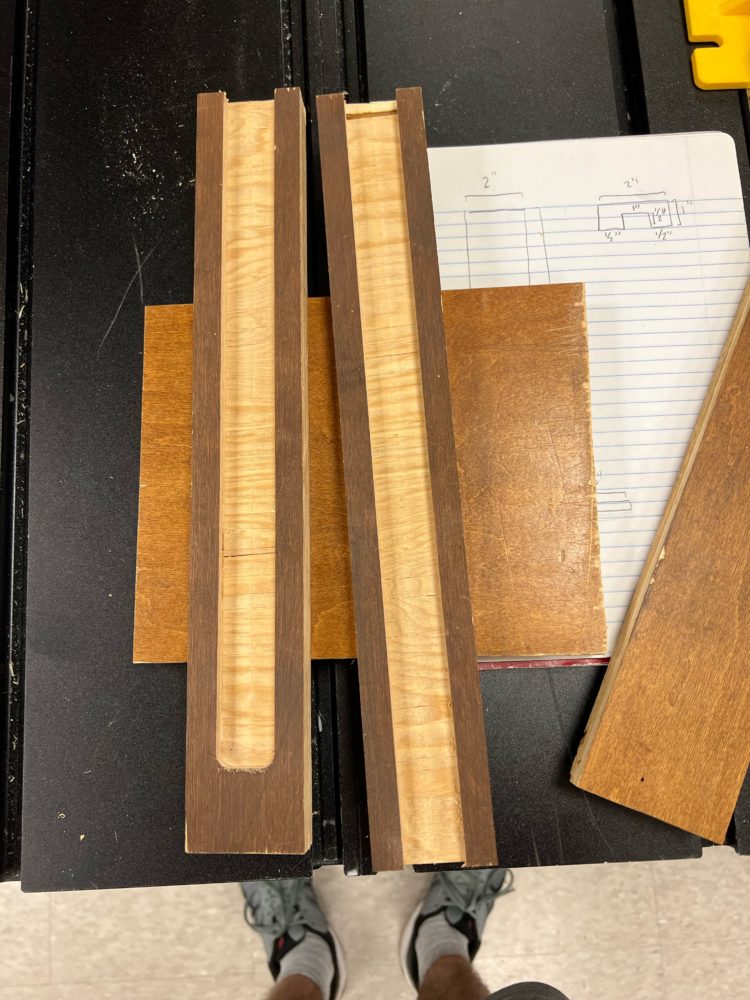
After creating my CAD model, I made a set of engineering drawings and purchased wood stock that would fit my specifications. I ended up buying composite wood and applying a veneer on top:
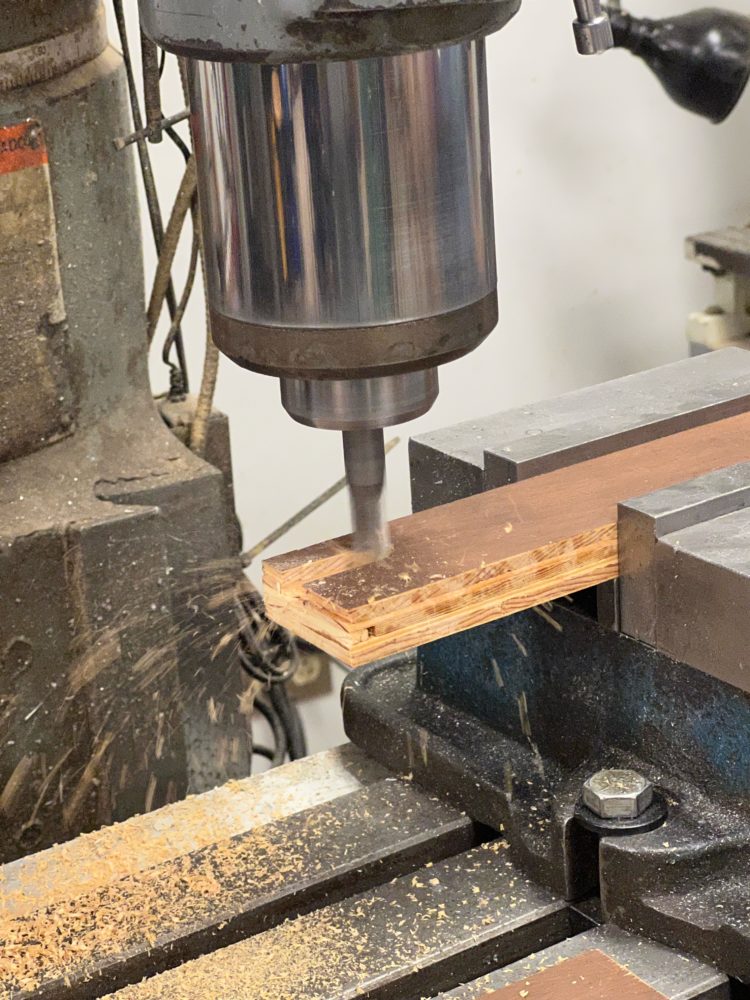
I measured out a slot the width I would to insert my LED lights into, and cut that slot into the middle and top portions of the lamp via CNC:
Here is an image of all my materials compiled prior to assembly:
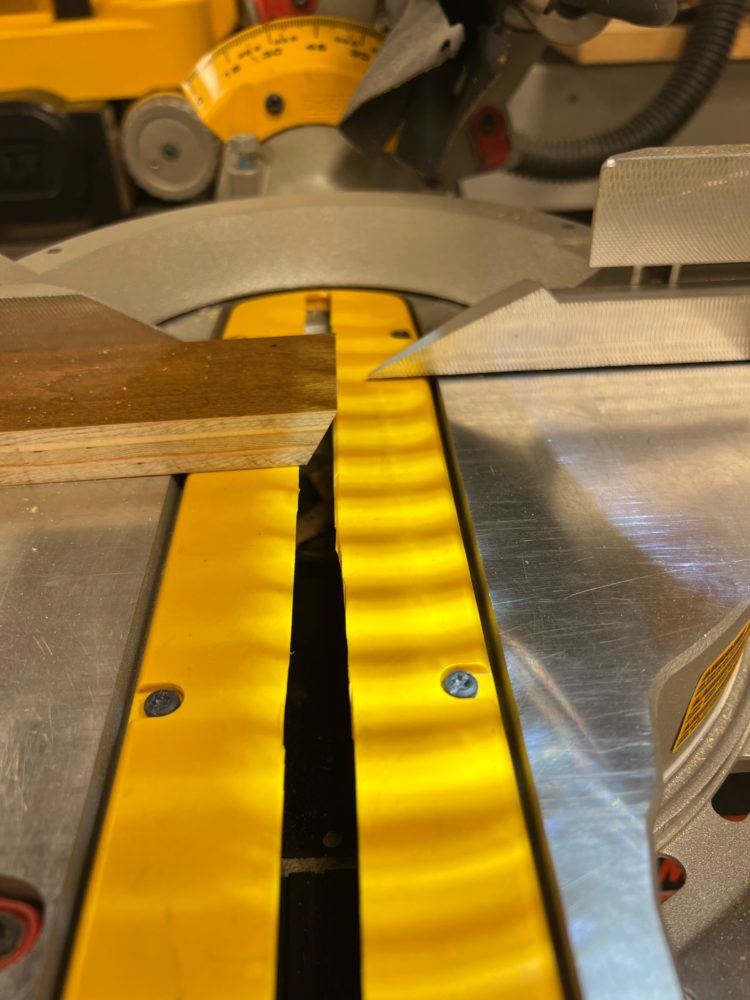
I then took reference from my CAD model to determine the angles I would need to make my lamp parallel to horizontal and still extend far enough to be stable (these ended up being 20 degrees from horizontal and a 25 degree compound angle for the connection point between the top and middle sections).
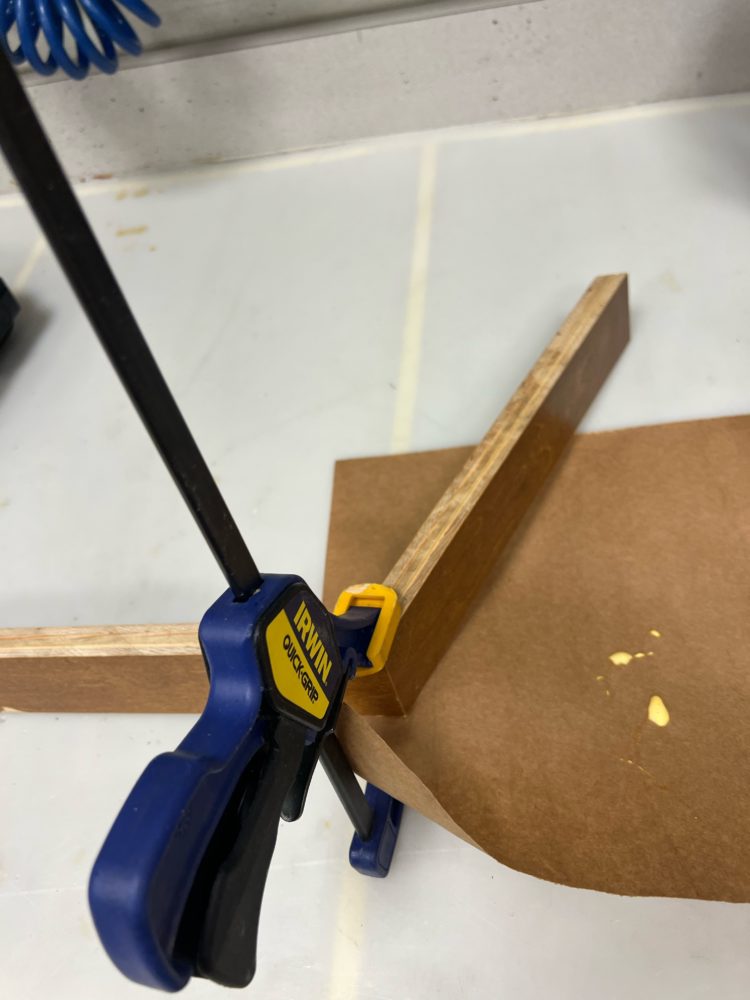
Finally, I glued and nailed the upper portions of my project:
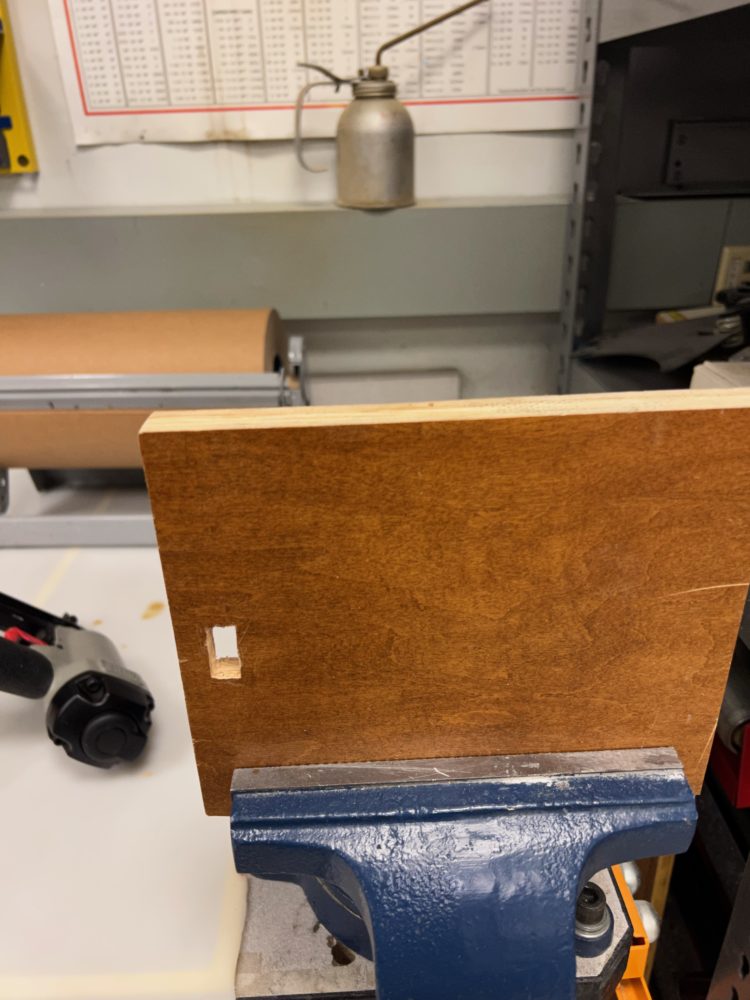
Then, I drilled and chiseled a cutout for wiring into the base of the lamp:
![]()
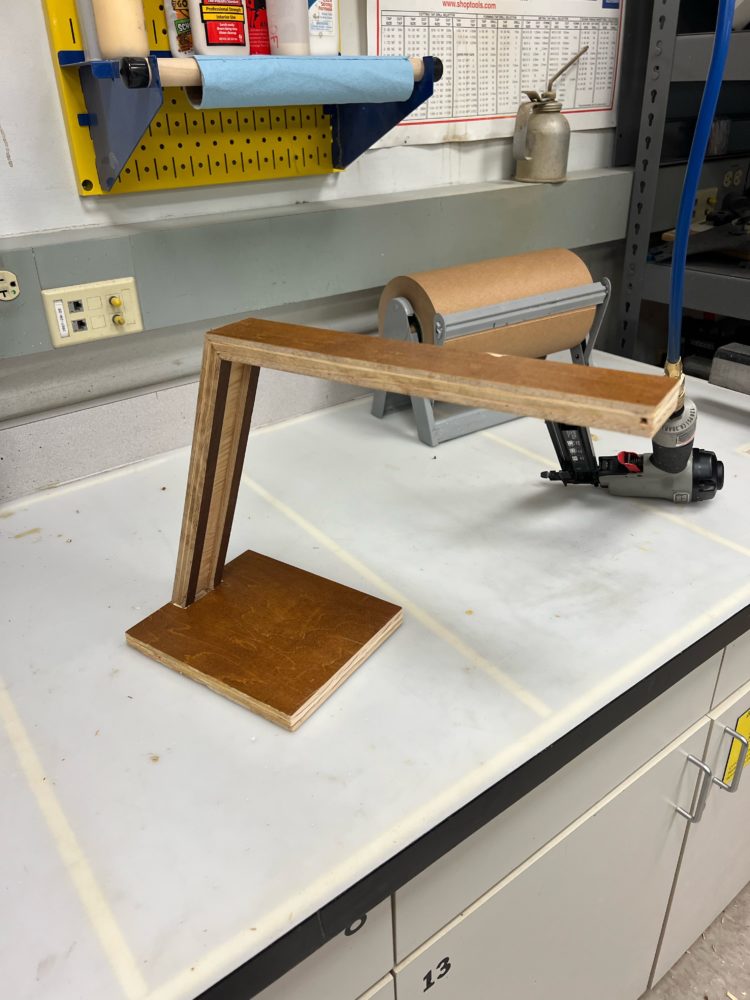
![]() Here are all of the structural components of the lamp assembled:
Here are all of the structural components of the lamp assembled:
![]()
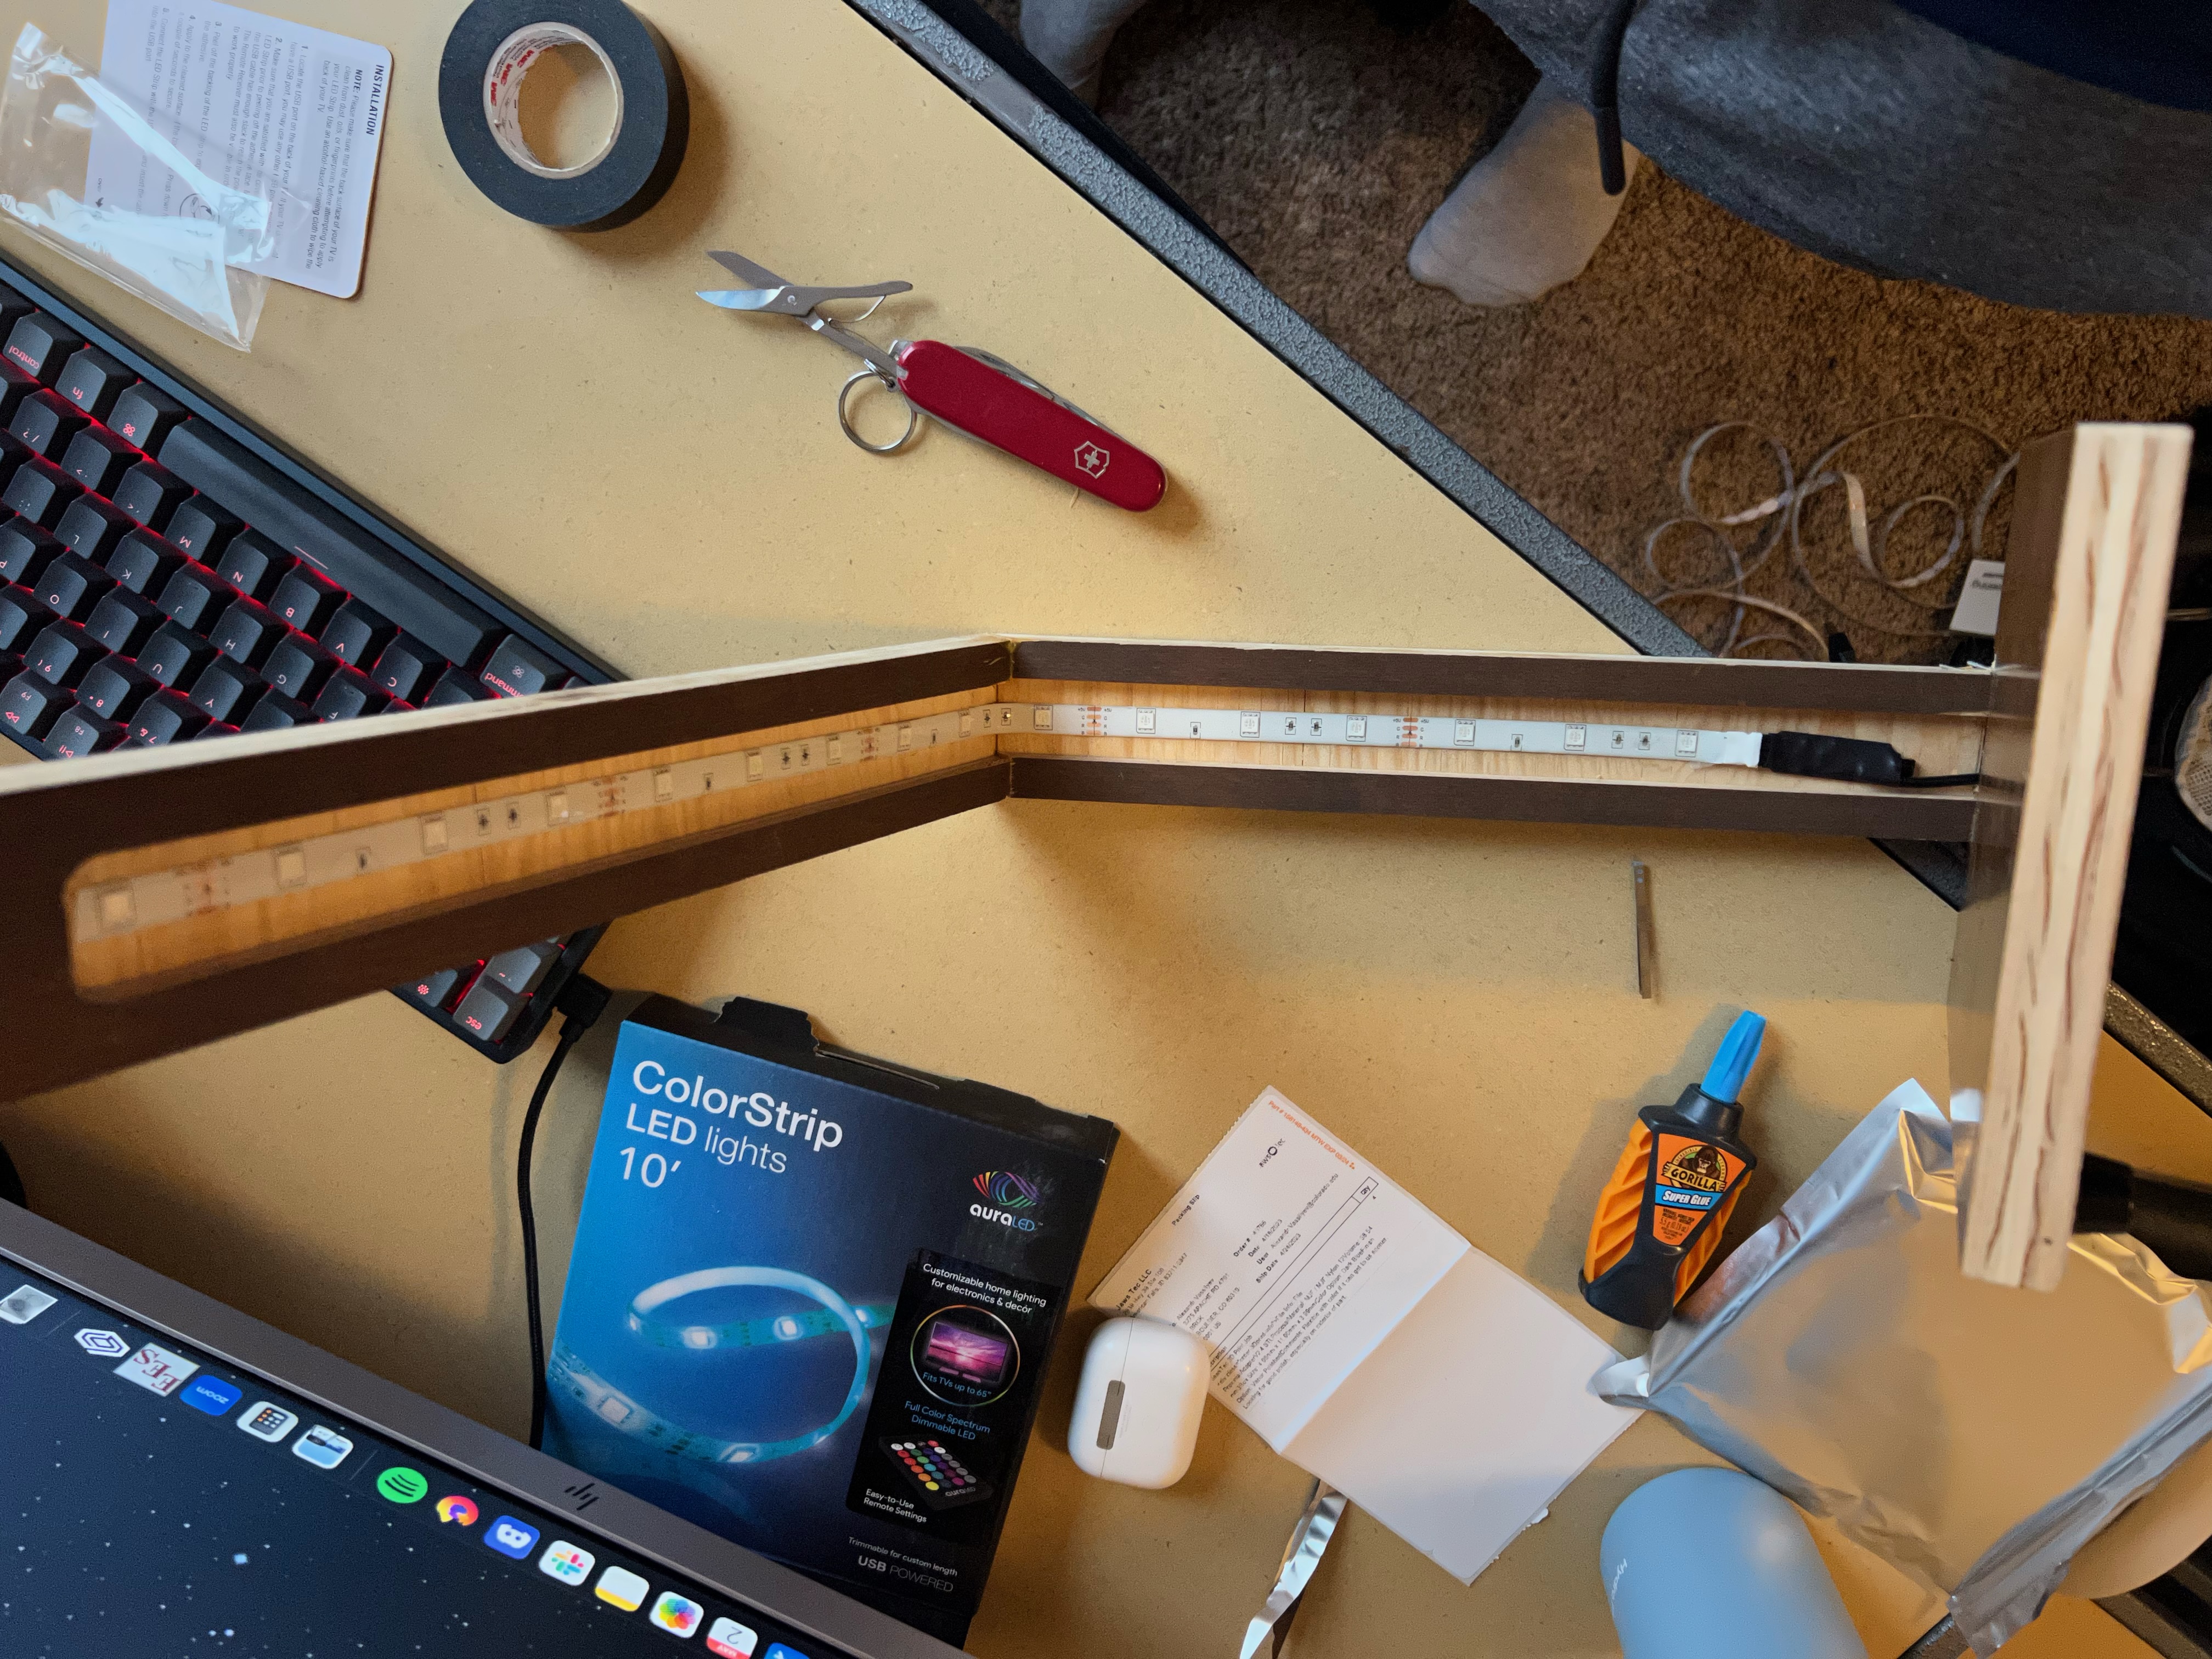
![]() This was the result after adding wiring and LED’s:
This was the result after adding wiring and LED’s: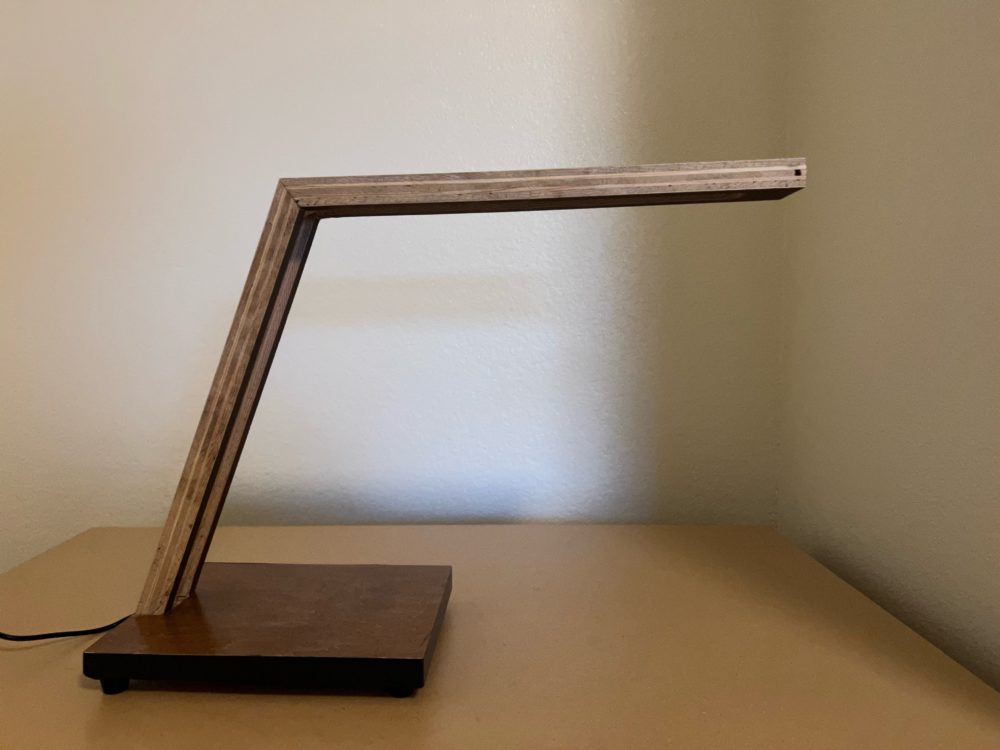
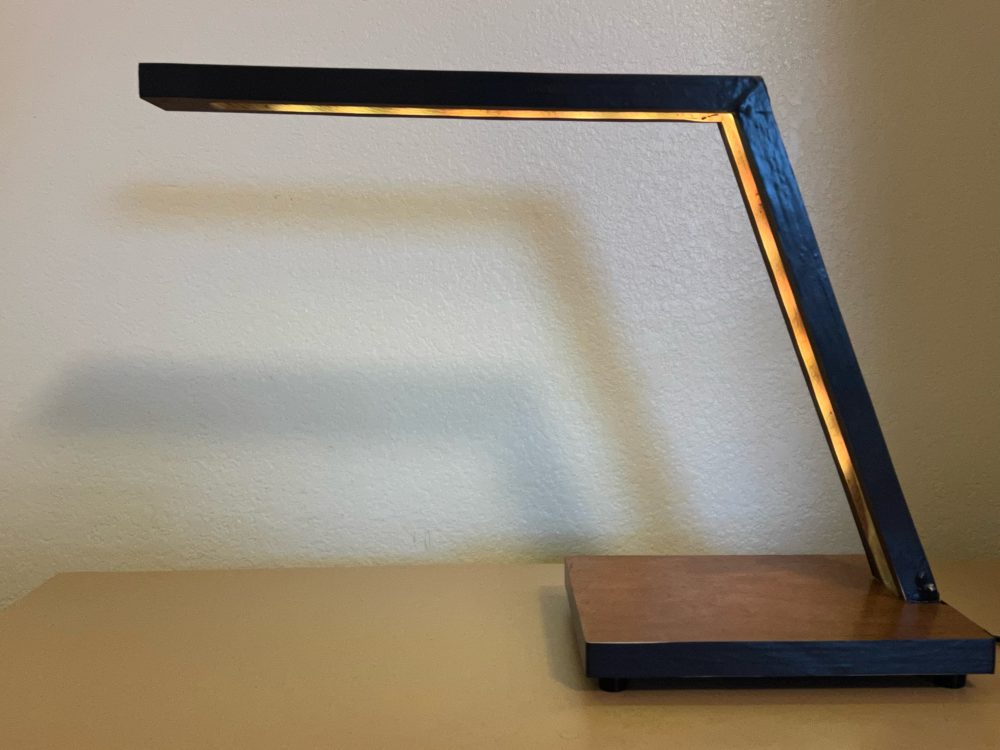
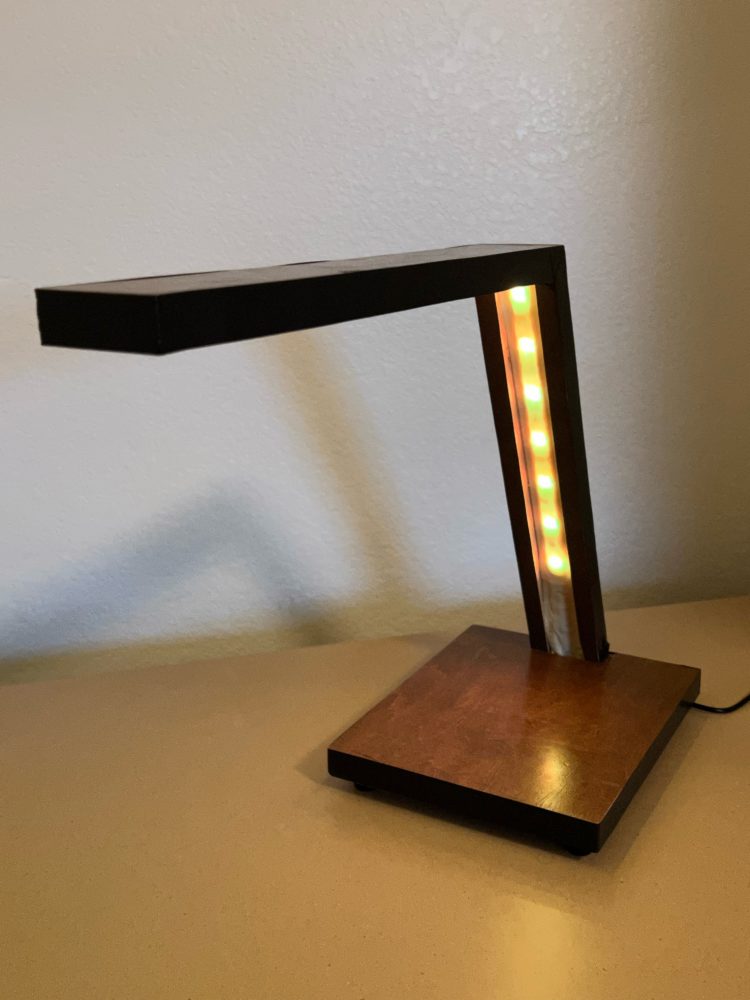
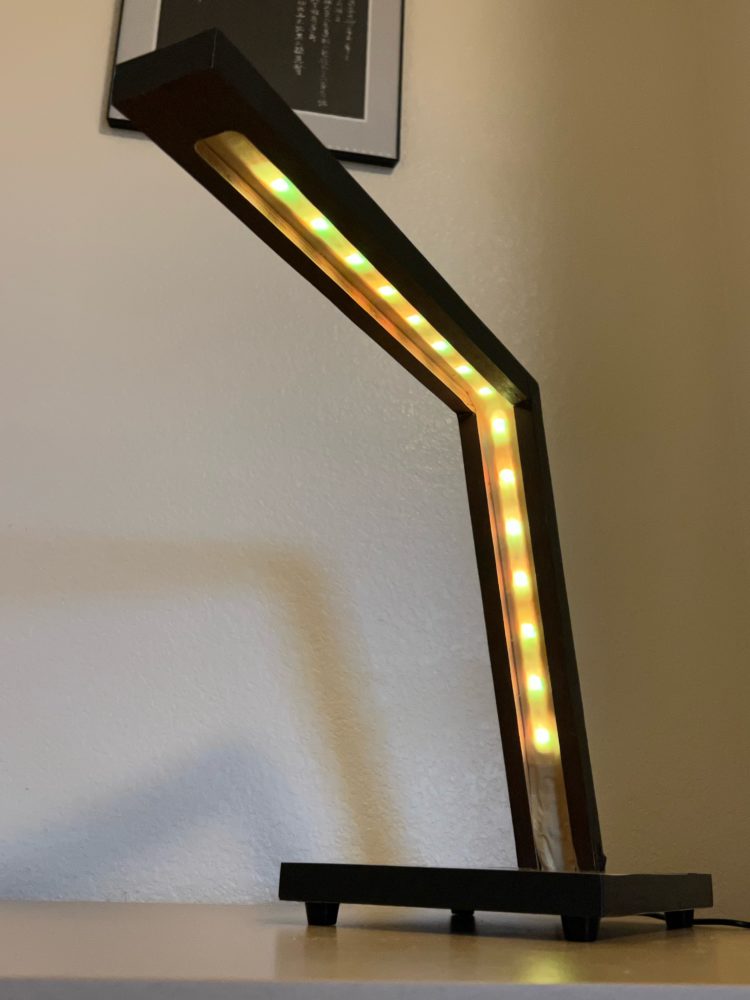
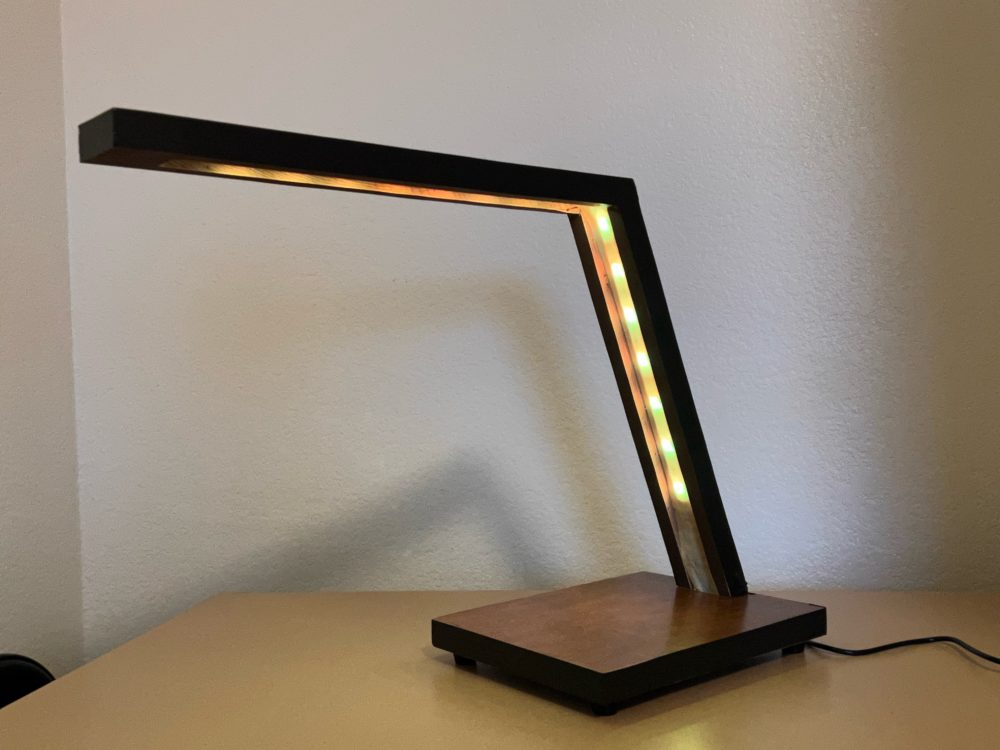
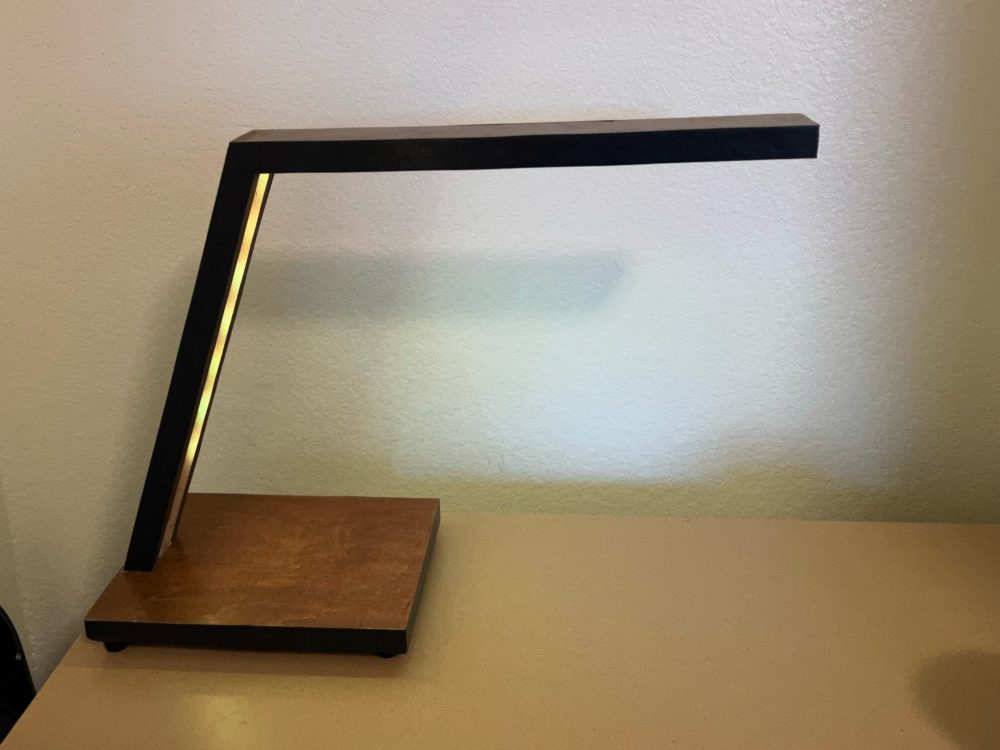
I wasn’t quite happy with the exposed edges of the lamp as I felt they detracted from the veneer and overall design. I chose to cover the edges with black paint and plastic so as to make the lamp look more subtle, in line with my mid-century modern and contemporary inspirations. Below is my final product:
![]()
![]()
![]()
1 Comment. Leave new
Hi Alexandr, the fabrication process for this project was interesting to read about. It certainly matches the contemporary aesthetic. I understand your concern about the exposed edges and I agree with the choice to cover them up, but I did like the look of the original wood color before it was painted. Is the lamp sturdy? I would be afraid it would crack at the base. Overall this is a very sleek, modern design and I think it looks great.