
Aesdes.org is your platform to share and explore captivating aesthetics in design content. This guide will walk you through the process of creating a post on the website. Follow these instructions to share your designs during the course.
-
- Check Your Email: Keep an eye on your CU email inbox for an invitation to join as an author on Aesdes.org. If you can’t find it, remember to check your spam folder too.
-
- Accept the Invite: Follow the invitation link in the email to set your password. Make sure to remember this password for future logins.
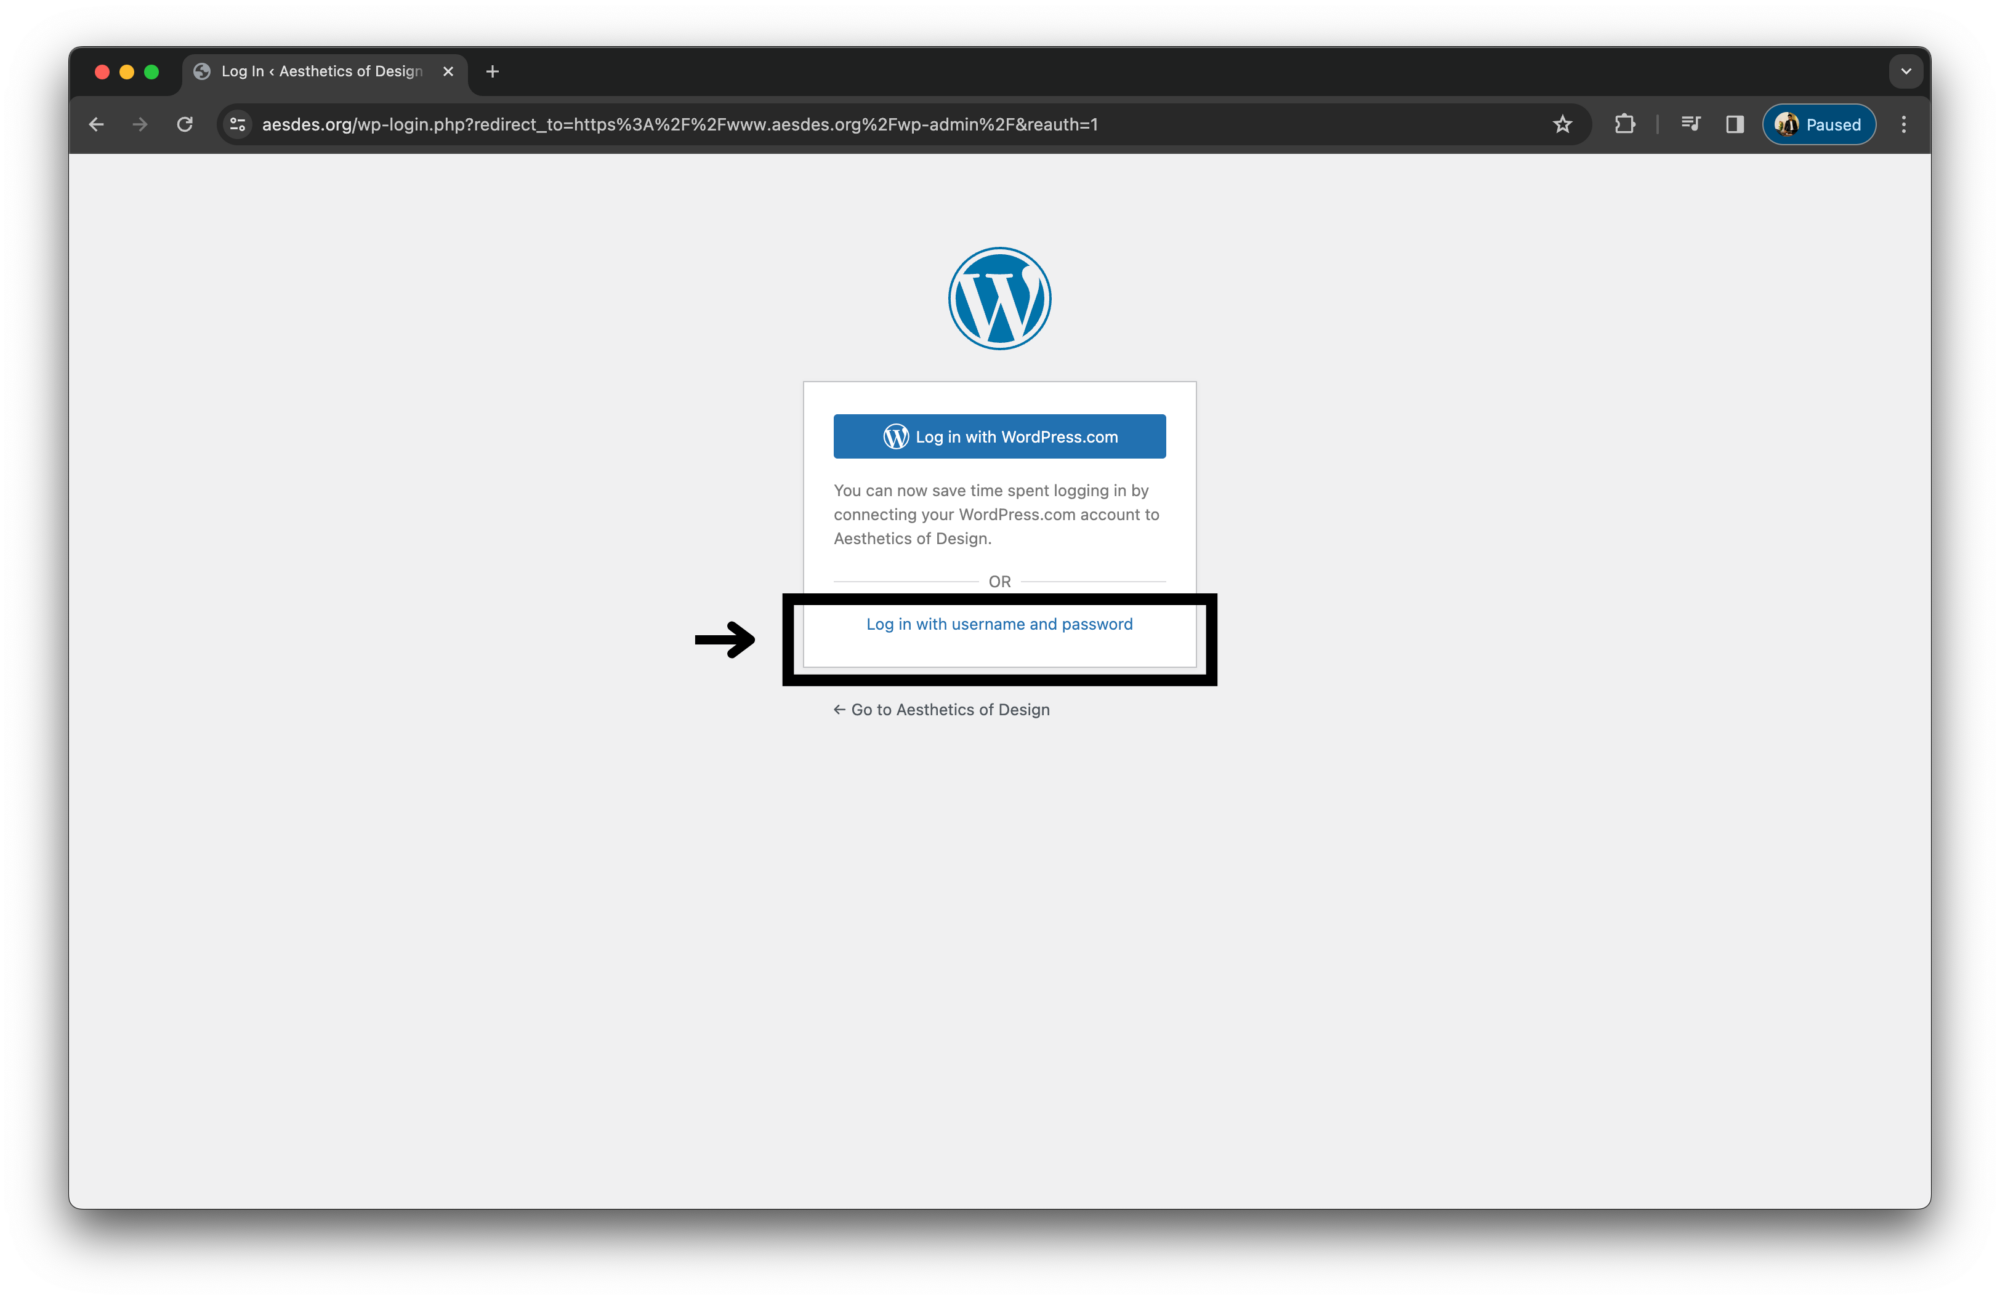
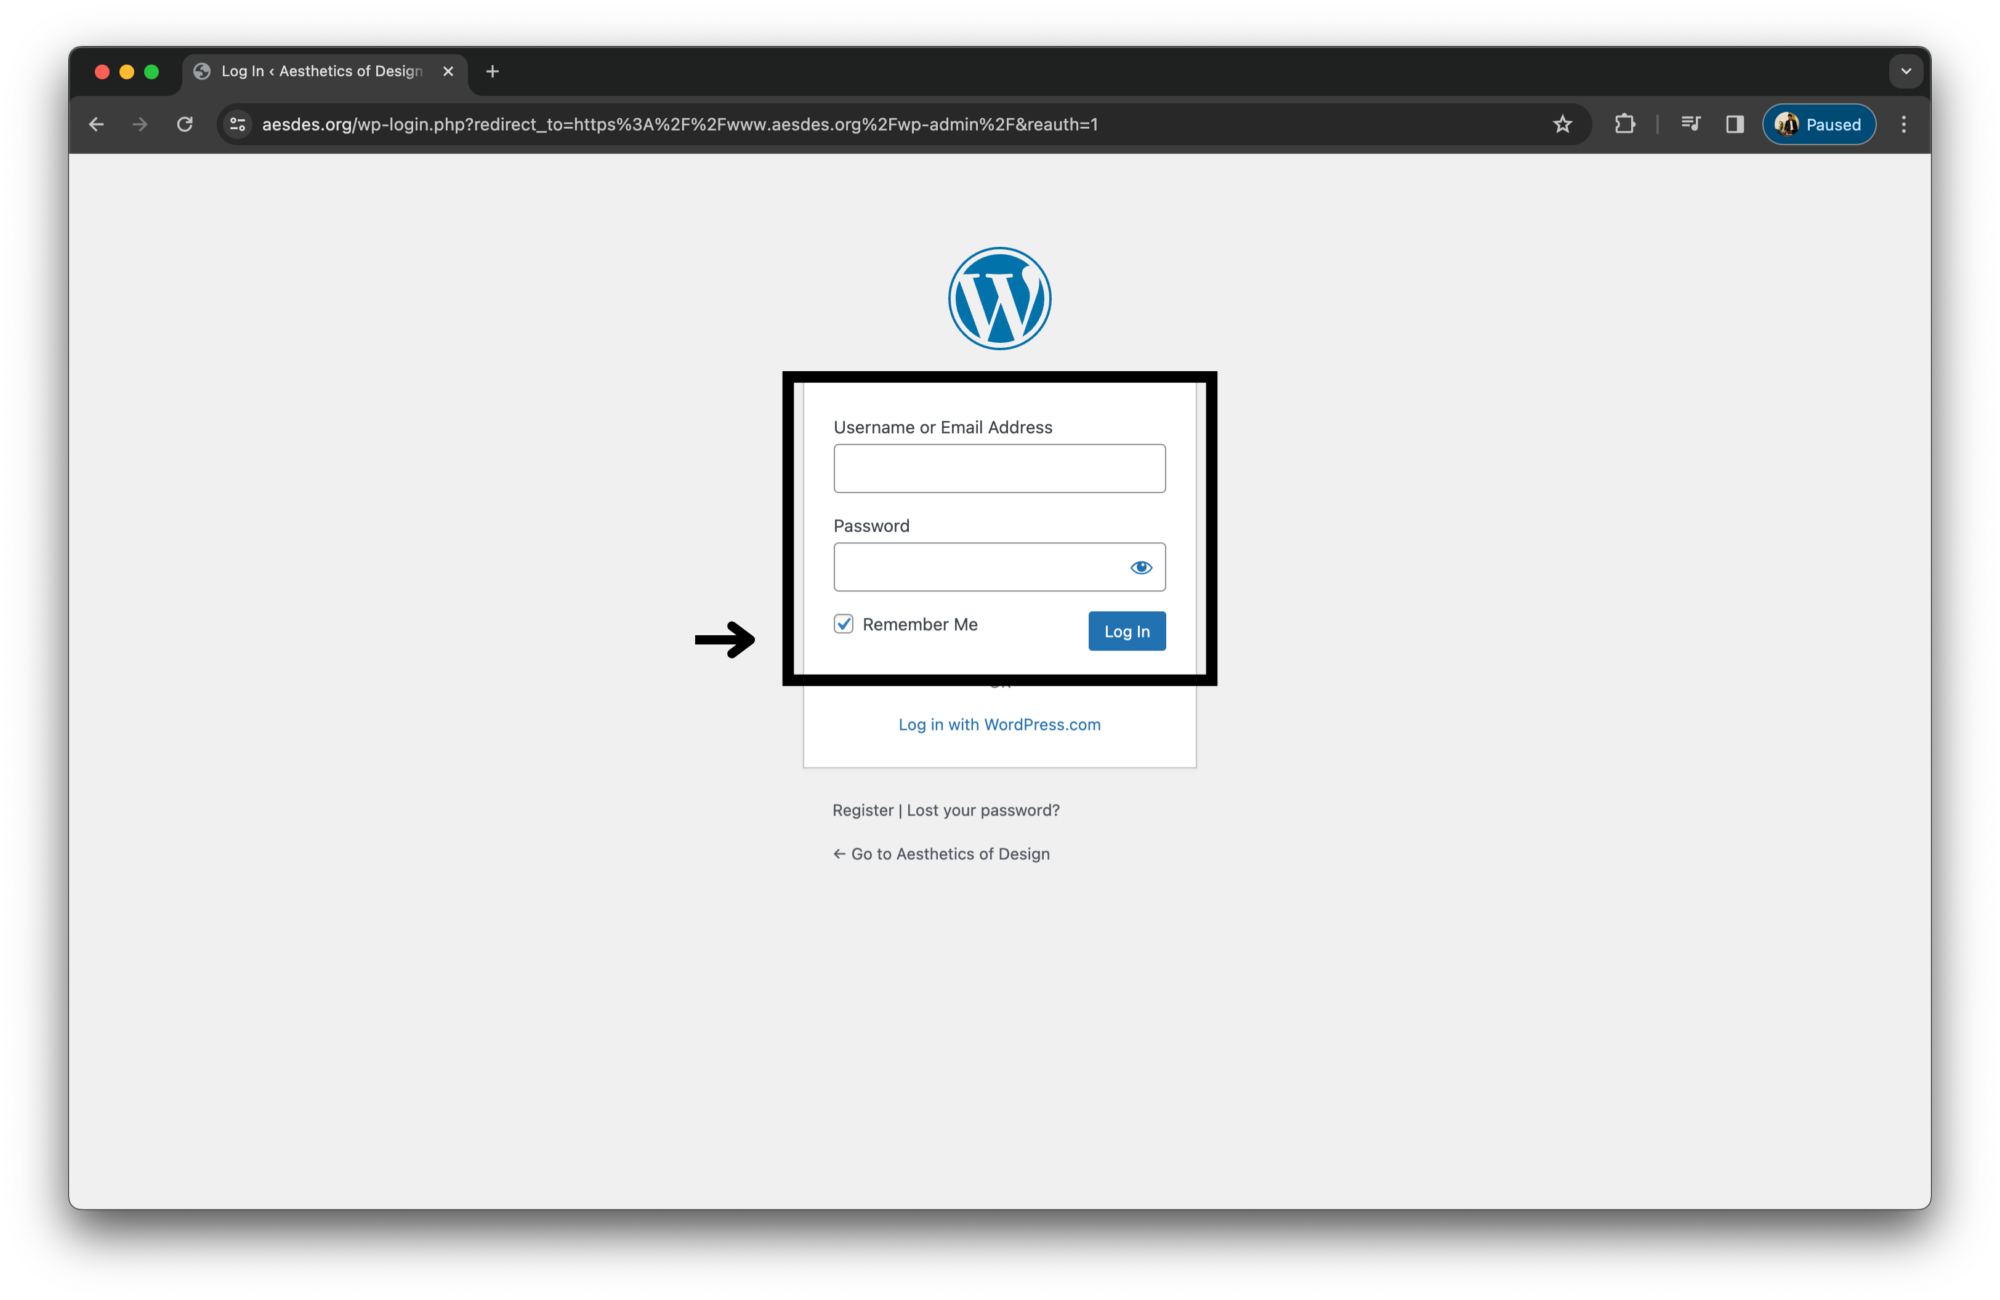
Login to Aesdes.org: Once you have your password set, visit https://www.aesdes.org/wp-admin/ to log in. Choose ‘login with username and password’. It’s crucial to use this specific link for login, NOT the general WordPress login page.
Contact for Assistance:
If you encounter any issues during the login process, reach out to Shrey Solanki (shso2409@colorado.edu) for help.
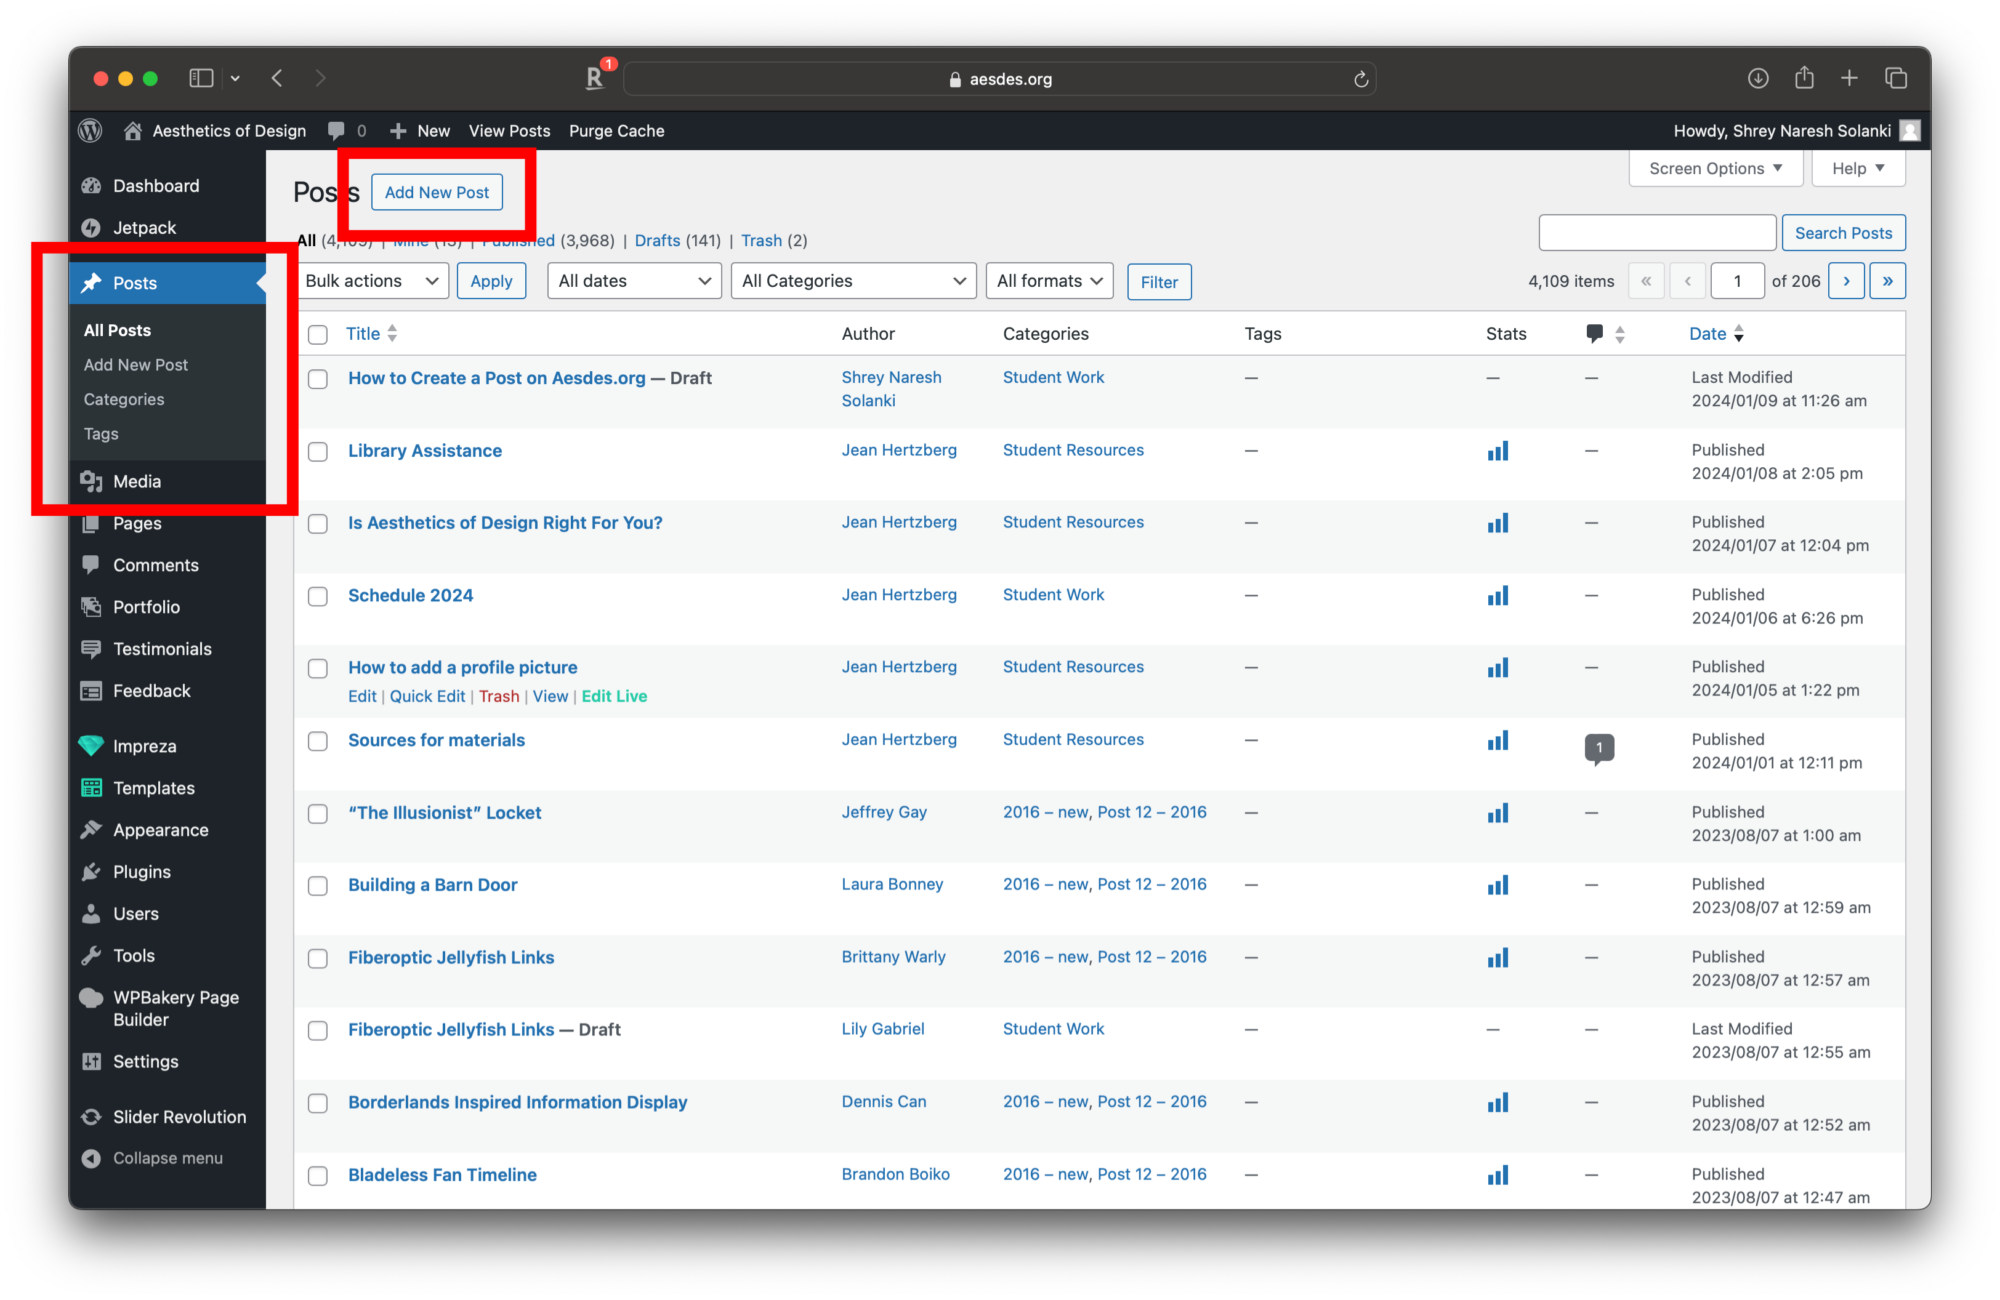
After logging in, you’ll find yourself on the WordPress dashboard. To start a new post, navigate to “Posts” in the left-hand menu and click “Add New.” The screenshot above will guide you through. The WPBakery Page Builder is an available editor but the website also offers a way to edit using a backend editor or edit live while viewing the preview.
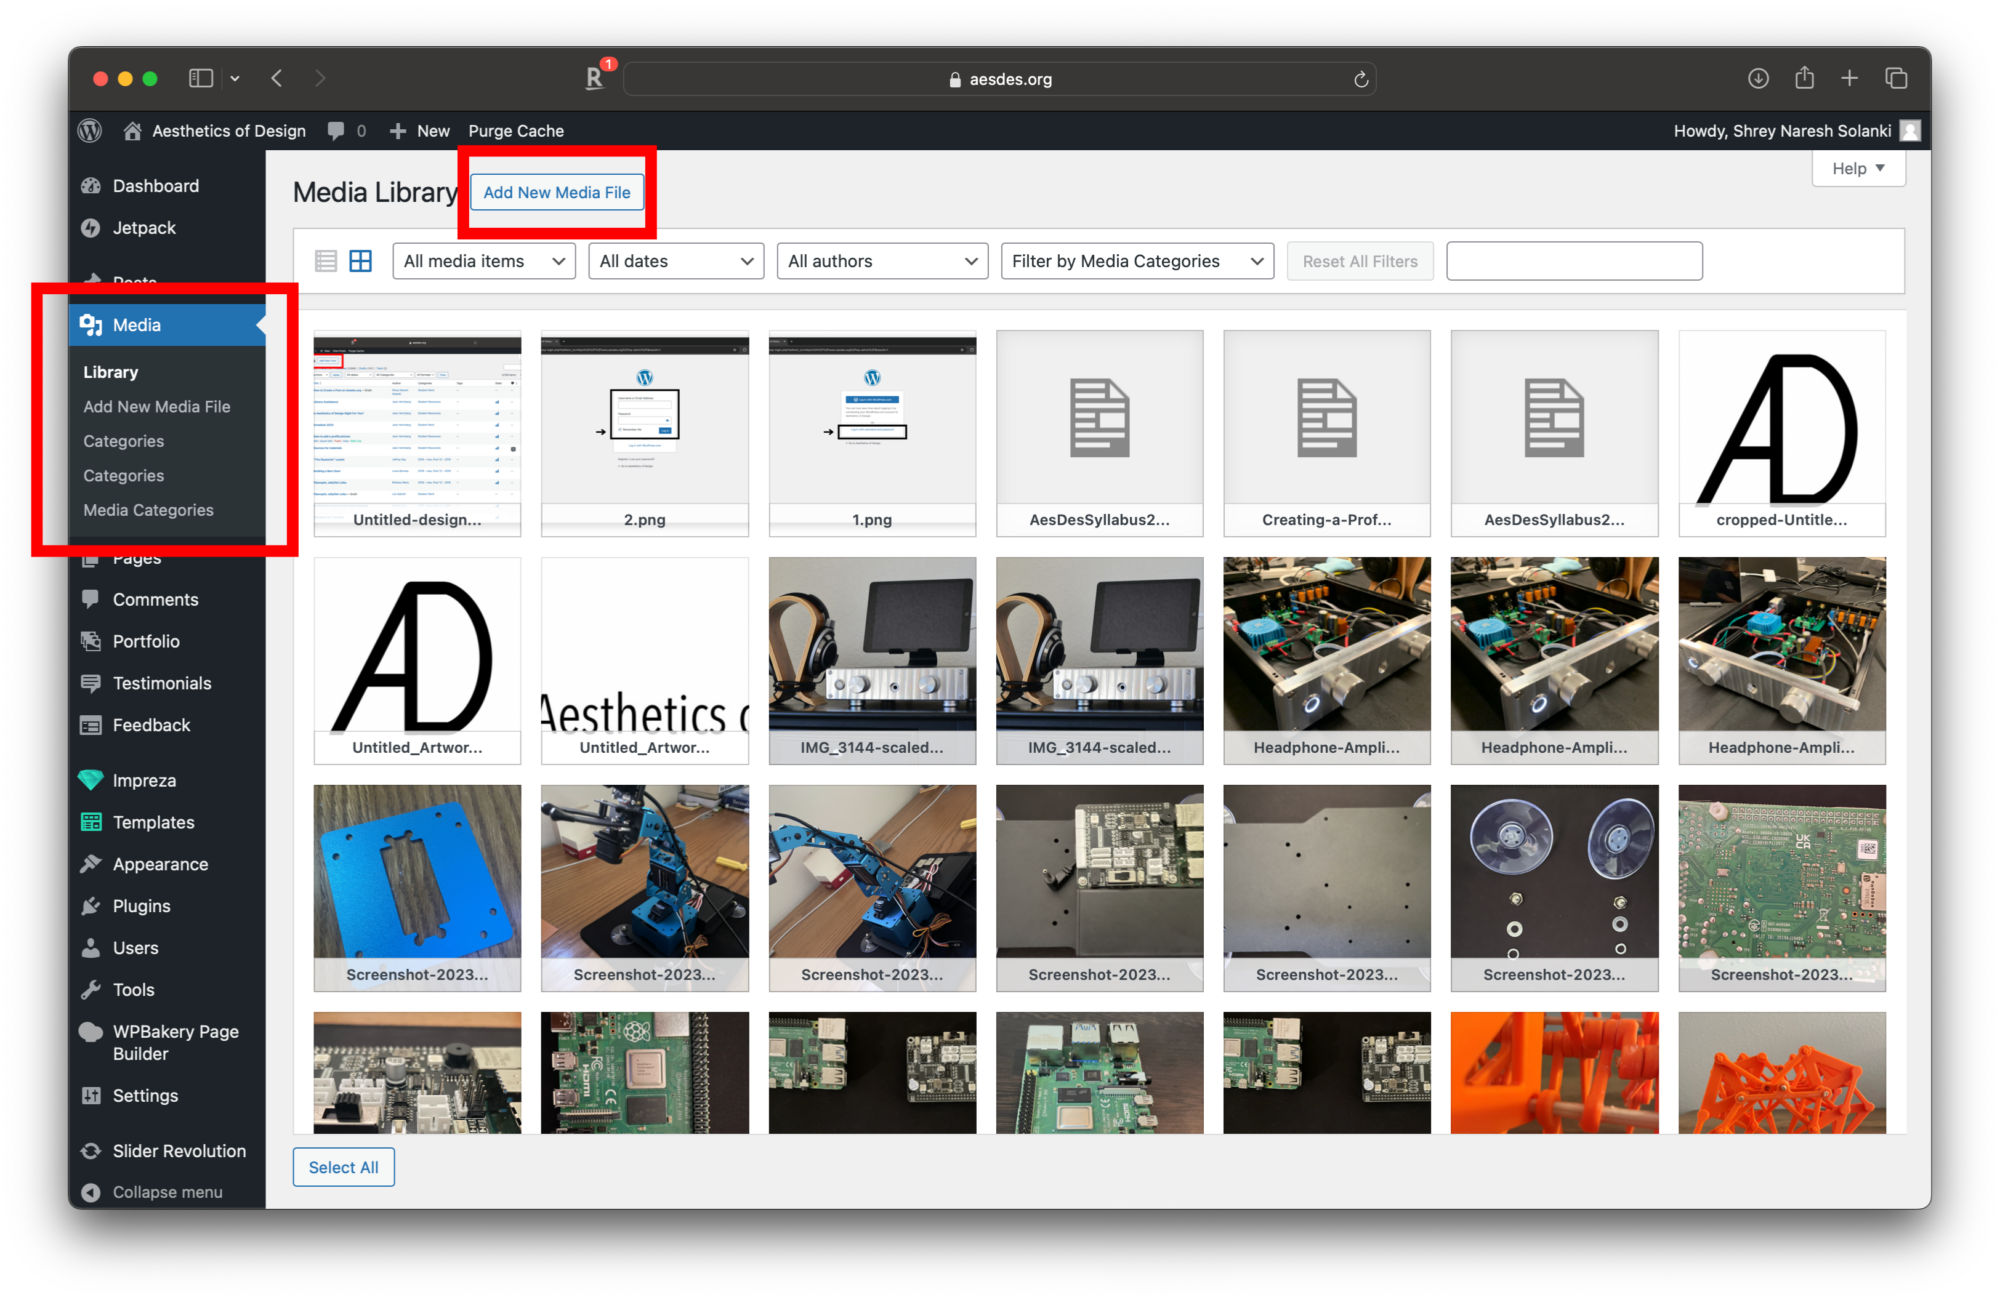
Insert the images into your post by clicking on the (Add Media) toggle. Upload an image using Media Library. Upon logging in to the dashboard, the left side would have a Media option where you must click on Library. You’ll have an option to upload media here. Once you have selected the image, select the appropriate media category on the right side of the page.
While videos should not be directly uploaded to Aesdes.org, you can showcase your video content by sharing links from your Vimeo or YouTube account. To do this, go to your video on Vimeo/YouTube, copy the link to the video and put it up in the post.
Both of these steps are required for you to get credit for your post.
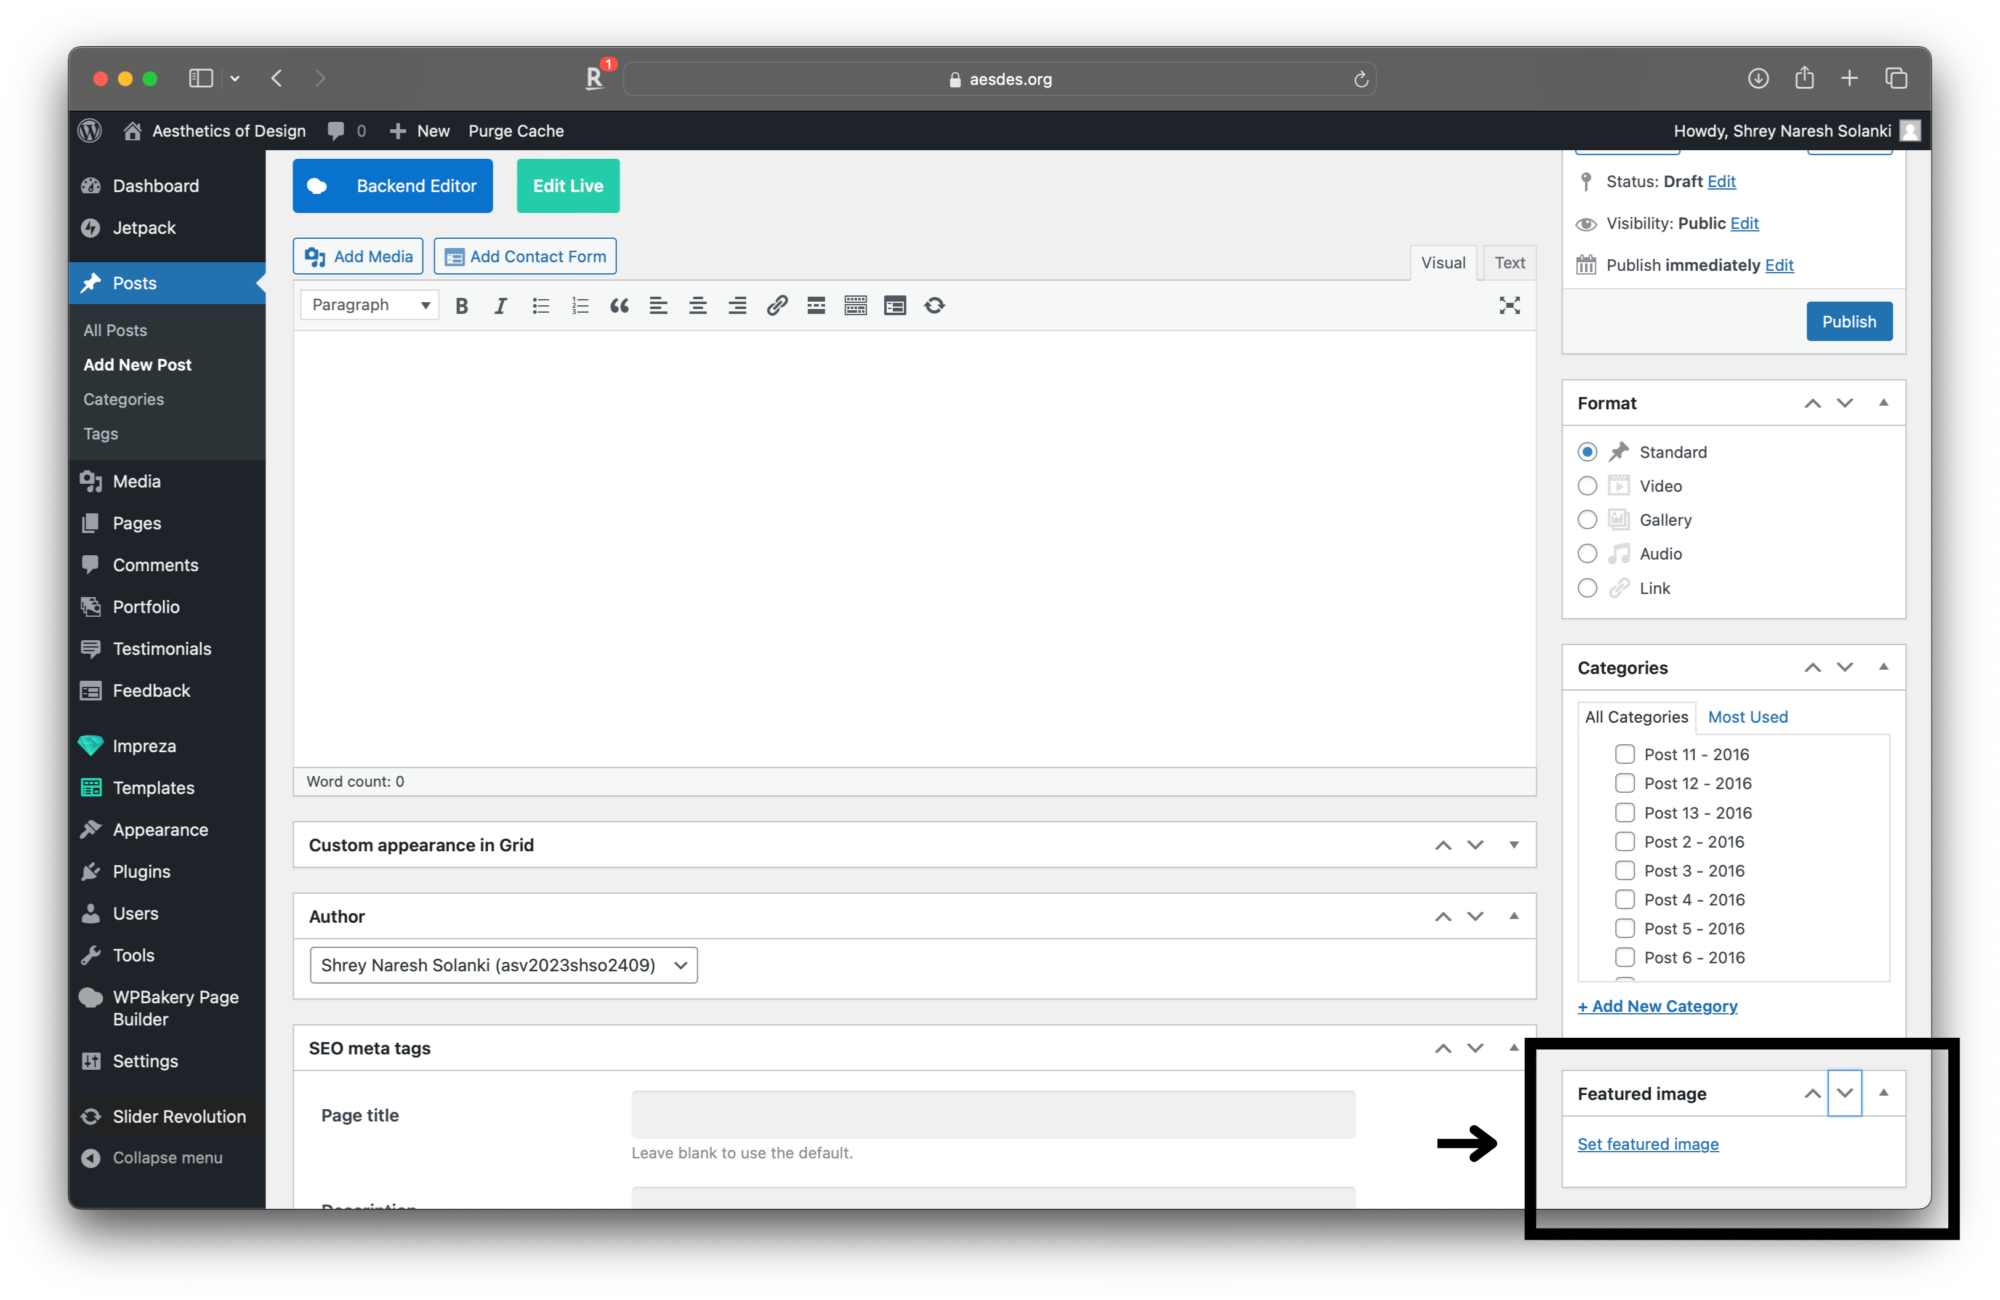
A featured image is presented full size at the top of your post and appears as a thumbnail in lists of posts. Scroll down on the post editing section of the page to find the “Featured Image” option. Click on “Set featured image” to upload an image that represents your post.
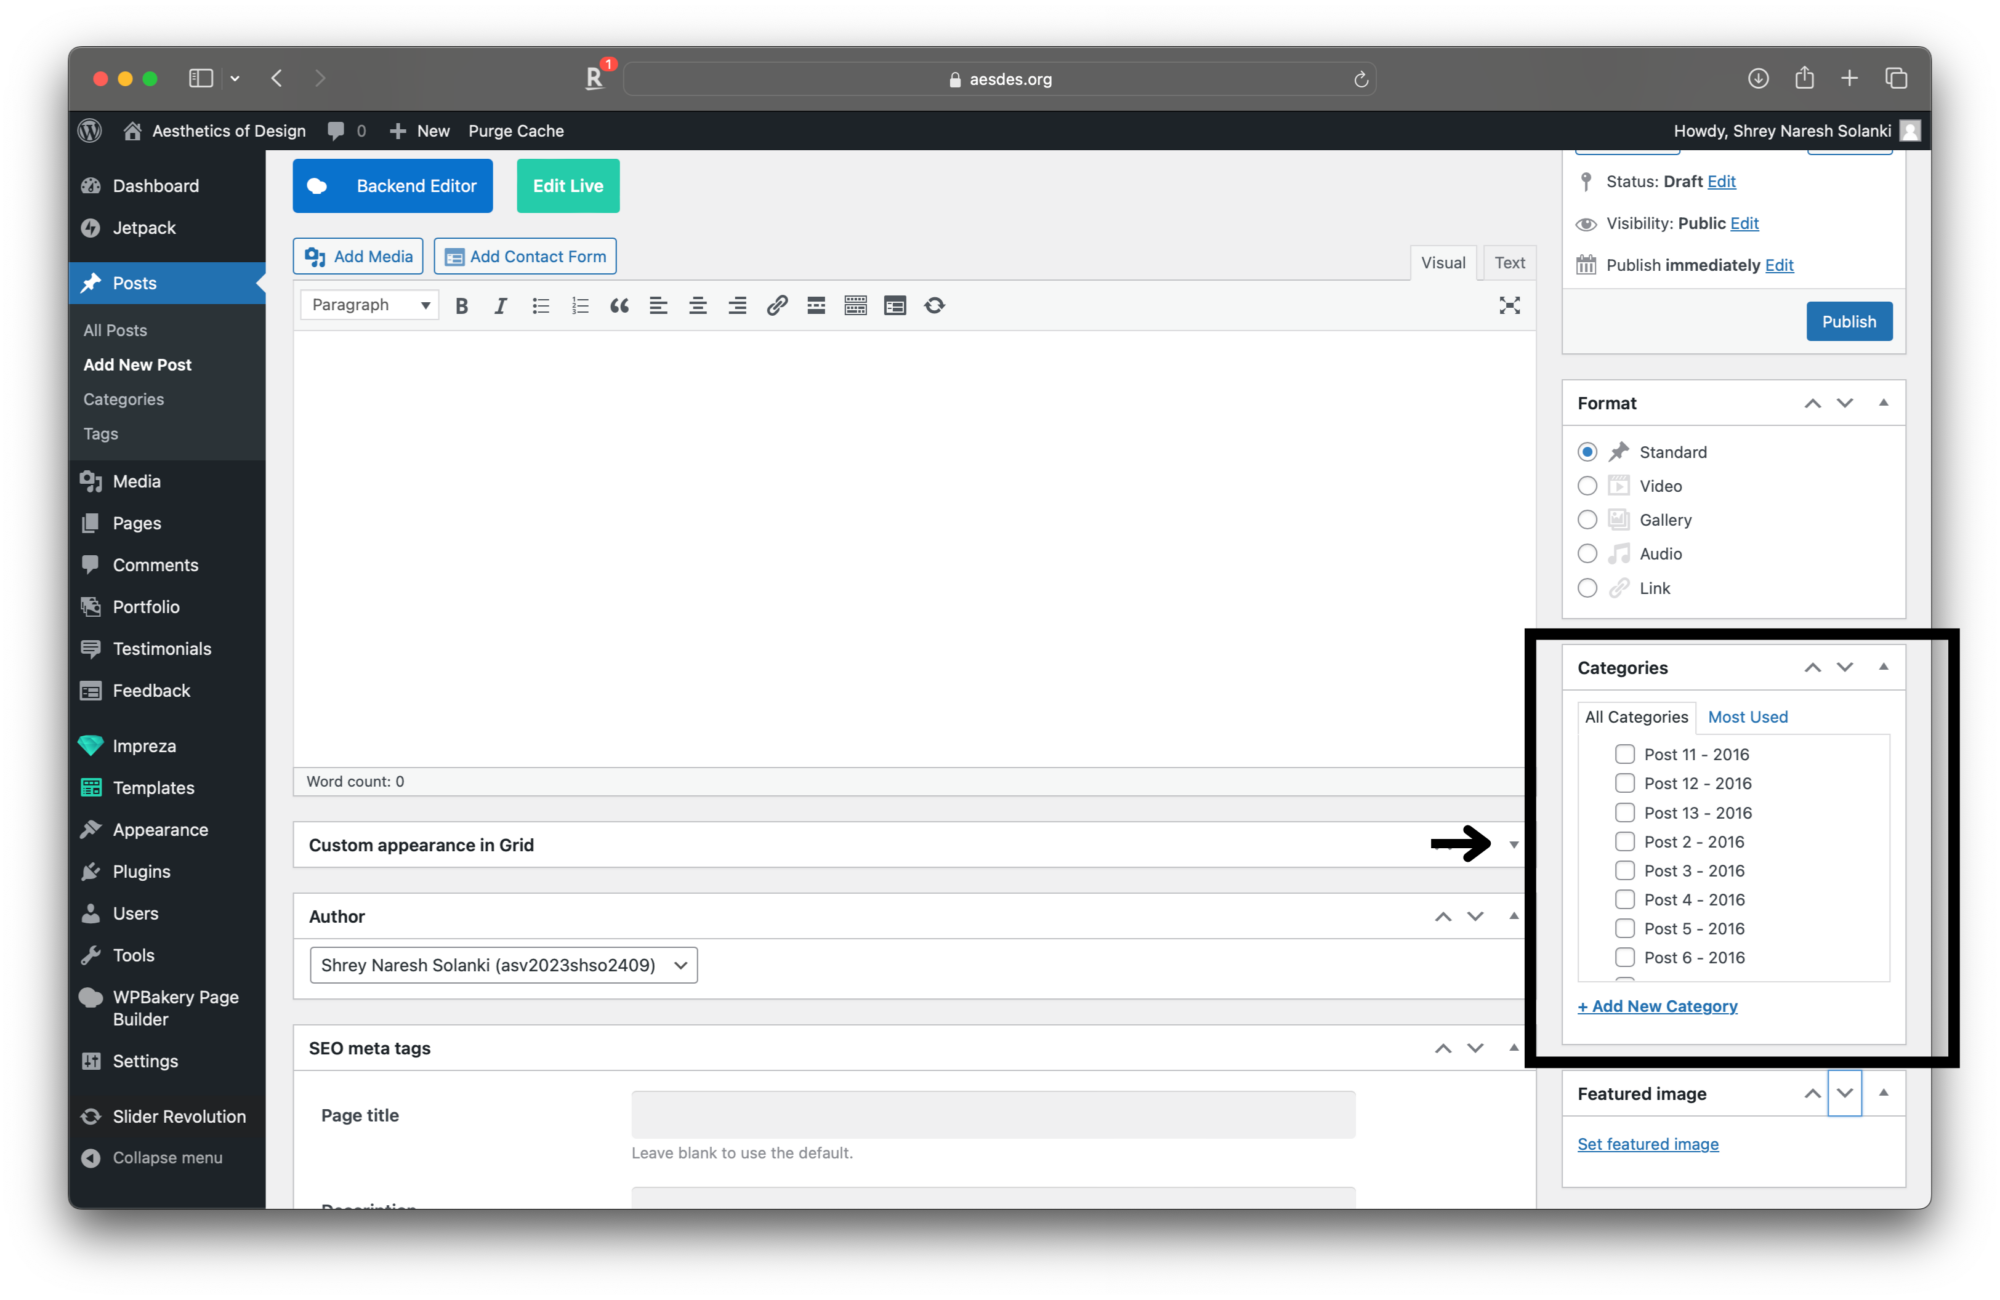
Categories help organize posts and makes it easier to find. Select the category appropriate for the assignment. Only use existing categories. Do not create new ones. Locate the “Categories” section on the right side of the post editing page & check the relevant categories.
-
- Preview Your Post: Before hitting that “Publish” button, it’s a good idea to preview your post using the “Preview” button located in the upper-right corner of the page. This allows you to see how your post will appear to others.
-
- Publish Your Post: Aesdes.org allows you to save posts as drafts before publishing. Once you’re satisfied with your post, click the “Publish” button. Your post will be live on Asides.org for others to see and engage with.
- Edit as needed: After publishing you can go back and edit your post any time, and then click the “Update” button.