
Project: I am planning to make a pinhole camera with a shutter mechanism that allows for different exposure times. This will be in the aesthetic of the iSpy books.
Specifications:
My specifications are guided by the ability to make an image–I want this camera to be functional. Making a shutter mechanism follows, as this is something that I can continue to tune after making sure my camera body is successful at capturing an image. The specifications are also guided by the aesthetic I chose, which I will achieve through my material choice and making a whimsical toy-like camera.
1. Light-proofing
No light should enter the camera body except by way of the pinhole. Light leaks would affect the final image produced, overexposing random streaks on the photo paper. The inside of the camera body should be as matte black as possible, so extraneous light doesn’t bounce around and additionally affect the final image. Making a light-proof box will require me to do some combination of ensuring that the body is assembled tightly, spraying the inside with matte black paint, covering it with black felt, lining the corners with electrical tape, and sealing the paper slide and lid.
2. Accurate dimensions for image making
I’ve chosen to make a camera that captures images on 5×7 photo paper. This dimension and the diameter of the laser-cut pinhole I purchased drive the size of the camera body. This is to ensure that all the photo paper will be projected on to, and placing the image plane at the correct distance from the pinhole for focus. Through my research I was able to find equations to relate these dimensions and drive my CAD.
3. Ability to attach to a tripod
Pinhole cameras have longer exposure times than normal cameras (seconds, hours, minutes vs. thousandths of seconds). I want the option of my images being as focused as possible, so this required the ability to attach to a tripod. This means I will be adding threaded inserts to the bottom and side of the camera body, so I have the ability to take in-focus landscape and portrait images.
4. Mechanical shutter
Many pinhole cameras have a shutter that covers the pinhole and can be manually moved back and forth to expose the photo. This is an option for me, but my goal for this project it to develop a mechanism that serves as an automatic shutter: the user moves the shutter out of place, then it slowly moves back into place to finish the image-capturing process. I’ve intensely researched this and learned a lot about clock and wind-up toy mechanisms that have inspired my design. I’ve 3D printed one prototype but haven’t tuned the gear ratio to get my designed exposure time.
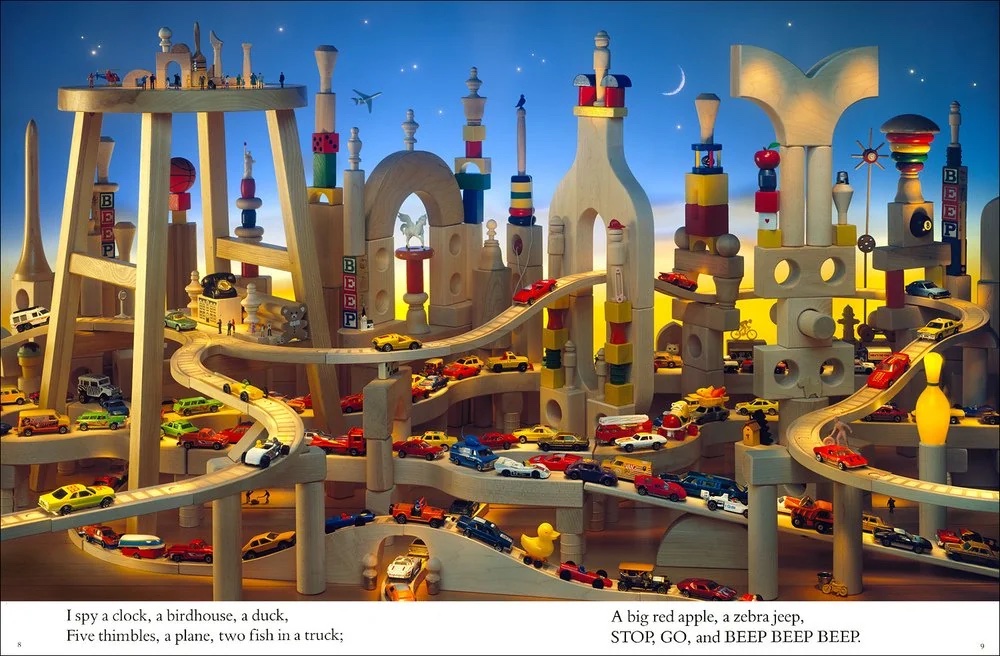
5. iSpy aesthetic
My aesthetic for this project is inspired by the nostalgic iSpy books of my childhood. These books set up scenes with many wooden blocks with accents of colorful toys. My materials were guided by ease of manufacturing which then informed my aesthetic choice, but I am very excited to pursue this aesthetic because of the nostalgic ties and relevant application to a toy-like camera. The camera body will be laser cut out of wood, which ties in the wooden blocks of the iSpy scenes. The shutter mechanism will e 3D printed or later cut acrylic depending on the component. This will be out of bright primary colors that invoke the toys in the iSpy scenes. The whole mechanism will be like a wind-up toy, so I would like to include it to add to the aesthetic.
Constraints:
These are factors that are adding some stress to the completion of my project.
1. Time
I am worried about balancing the completion of this project with my other end-of-semester projects in my DFM and DFI electives. Time will be the hardest constraint to deal with but I’ve tried to alleviate this by starting prototypes early and really researching every step of the process to minimize error in assembly and image-making.
2. Dark room skills
I am not super experienced with analog photography. I have made some cyanotypes before but I haven’t gone through the whole darkroom process that will be required of the light-sensitve paper. I am excited to get this experience though and am stopping at Mike’s Camera to pick up supplies this week so I can get started on experimenting with the photo-taking process.
3. Money
I am buying a lot of different materials for this project, ranging from basic darkroom materials for the photo paper to the wood and hardware for the camera body, to the plastic for the shutter mechanism. However, with the BOM I’ve started I don’t think it will be over the recommended spending budget for this project. I can also utilize free filament at the ITLL. This is also a project I want to invest in for my portfolio.
4. Troubleshooting
I don’t expect each of these assemblies to come together perfectly each time. Fixing issues and tuning different factors to achieve my specifications will probably add to the time stressor.
5. Aesthetic achievement
I don’t fully know how this camera will look when all of the materials together. It is totally possible that it comes together looking pretty ugly. By using a lot of rapid manufacturing methods I should be able to quickly pivot if some colors aren’t looking great together, though.
2 Comments. Leave new
Hi Katie. I agree with your call on laser cutting the wood and 3D printing plastic components to help reduce the time constraint. I also think that this will produce a pretty clean cuts and finishes, so I highly doubt that it would come out ‘ugly’ as you fear. Even if the piece is not fully functional, I hope you set aside time to bring to life your aethetic. The iSpy look is such a great and unique idea and it would be awesome to see it fleshed out.
Hi Katie,
Form what I could tell form when you presented in the design preview it seemed like you have a good start and understanding of what you are wanting out of the project with the gears, models features. How did the laser cutting go? If you still needed to laser cut I might be able to help answer and additional question we didn’t get to in the review.
I hope the rest of the construction of the project goes well!