
Background and Purpose
Growing up in a family with German roots, I developed a fondness for sparkling water, finding its refreshing taste irresistible. However, this preference led to accumulating numerous aluminum cans, all destined for the recycling bin. The sheer volume of cans occupied significant space, necessitating frequent emptying of the recycling bin. In contrast to Michigan, where I previously lived and benefited from store credits for bottle returns, such incentives are not available in my current location. To address this issue and streamline recycling efforts, I embarked on creating an aluminum can crusher, showcased in Figure 1. This endeavor not only served a practical purpose but also provided an opportunity to delve into woodworking, exploring diverse tools and techniques essential for achieving intricate design elements in wood.

Figure 1
Purchasing
All of the parts for this project have been ordered and arrived. A list of items that were ordered are listed below:
- 12 feet of maple
- 12 feet of walnut
- Wood Screws
- Chicago screws for linkages to reduce erosion
Manufacturing
Up to this point I am ahead of schedule by about 1 week. I have spent a total of 4 hours in the wood shop learning how to use special equipment such as router tables and table saws and various sanding machines. I have learned a lot about wood working through this project and I really enjoy making the various parts come to life. Before this project, I knew very little about woodworking techniques and all the tools that can be used to safely, effectively, and efficiently make various designs. I now feel very comfortable using most of the machines that are in the woodshop.
My project has two main components, the first being the mechanical and dynamic component which is designed to crush aluminum cans. I have completed manufacturing and sanding all of these individual pieces over the last two weeks. I am currently in the process of gluing all of the individual components of the mechanical module as seen in Figure 2. Gluing all of these components took approximately 4 days with curing time. The various parts were not glued together all at once. A strategic assembly plan was used because some high stress joints had to be carefully glued together in order to increase the structural strength. Gluing each piece together made it easier to clamp to ensure proper alignment and placement which was often the most difficult part because glue acts as a lubricant when first applied.
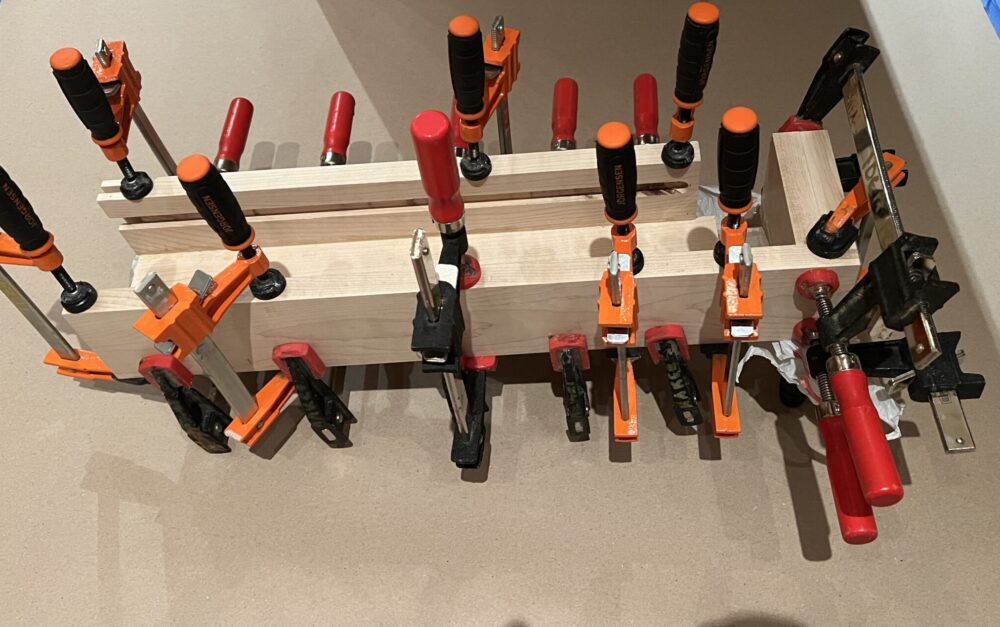
Figure 2
I have also fabricated the crushing plate which is the piece that moves and crushes the can. It is made out of 3 layers of 3/4 inch maple which allows the crushing plate to smoothly glide along the channels as its longer profile prevents it from getting stuck. This piece can be seen in Figure 3.
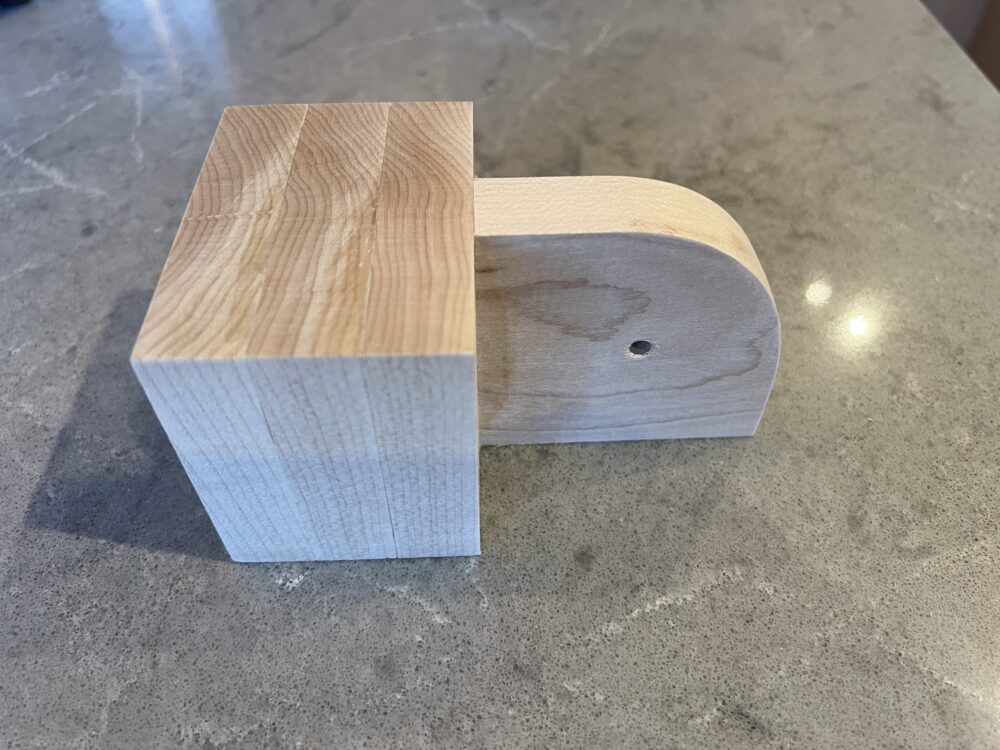
Figure 3
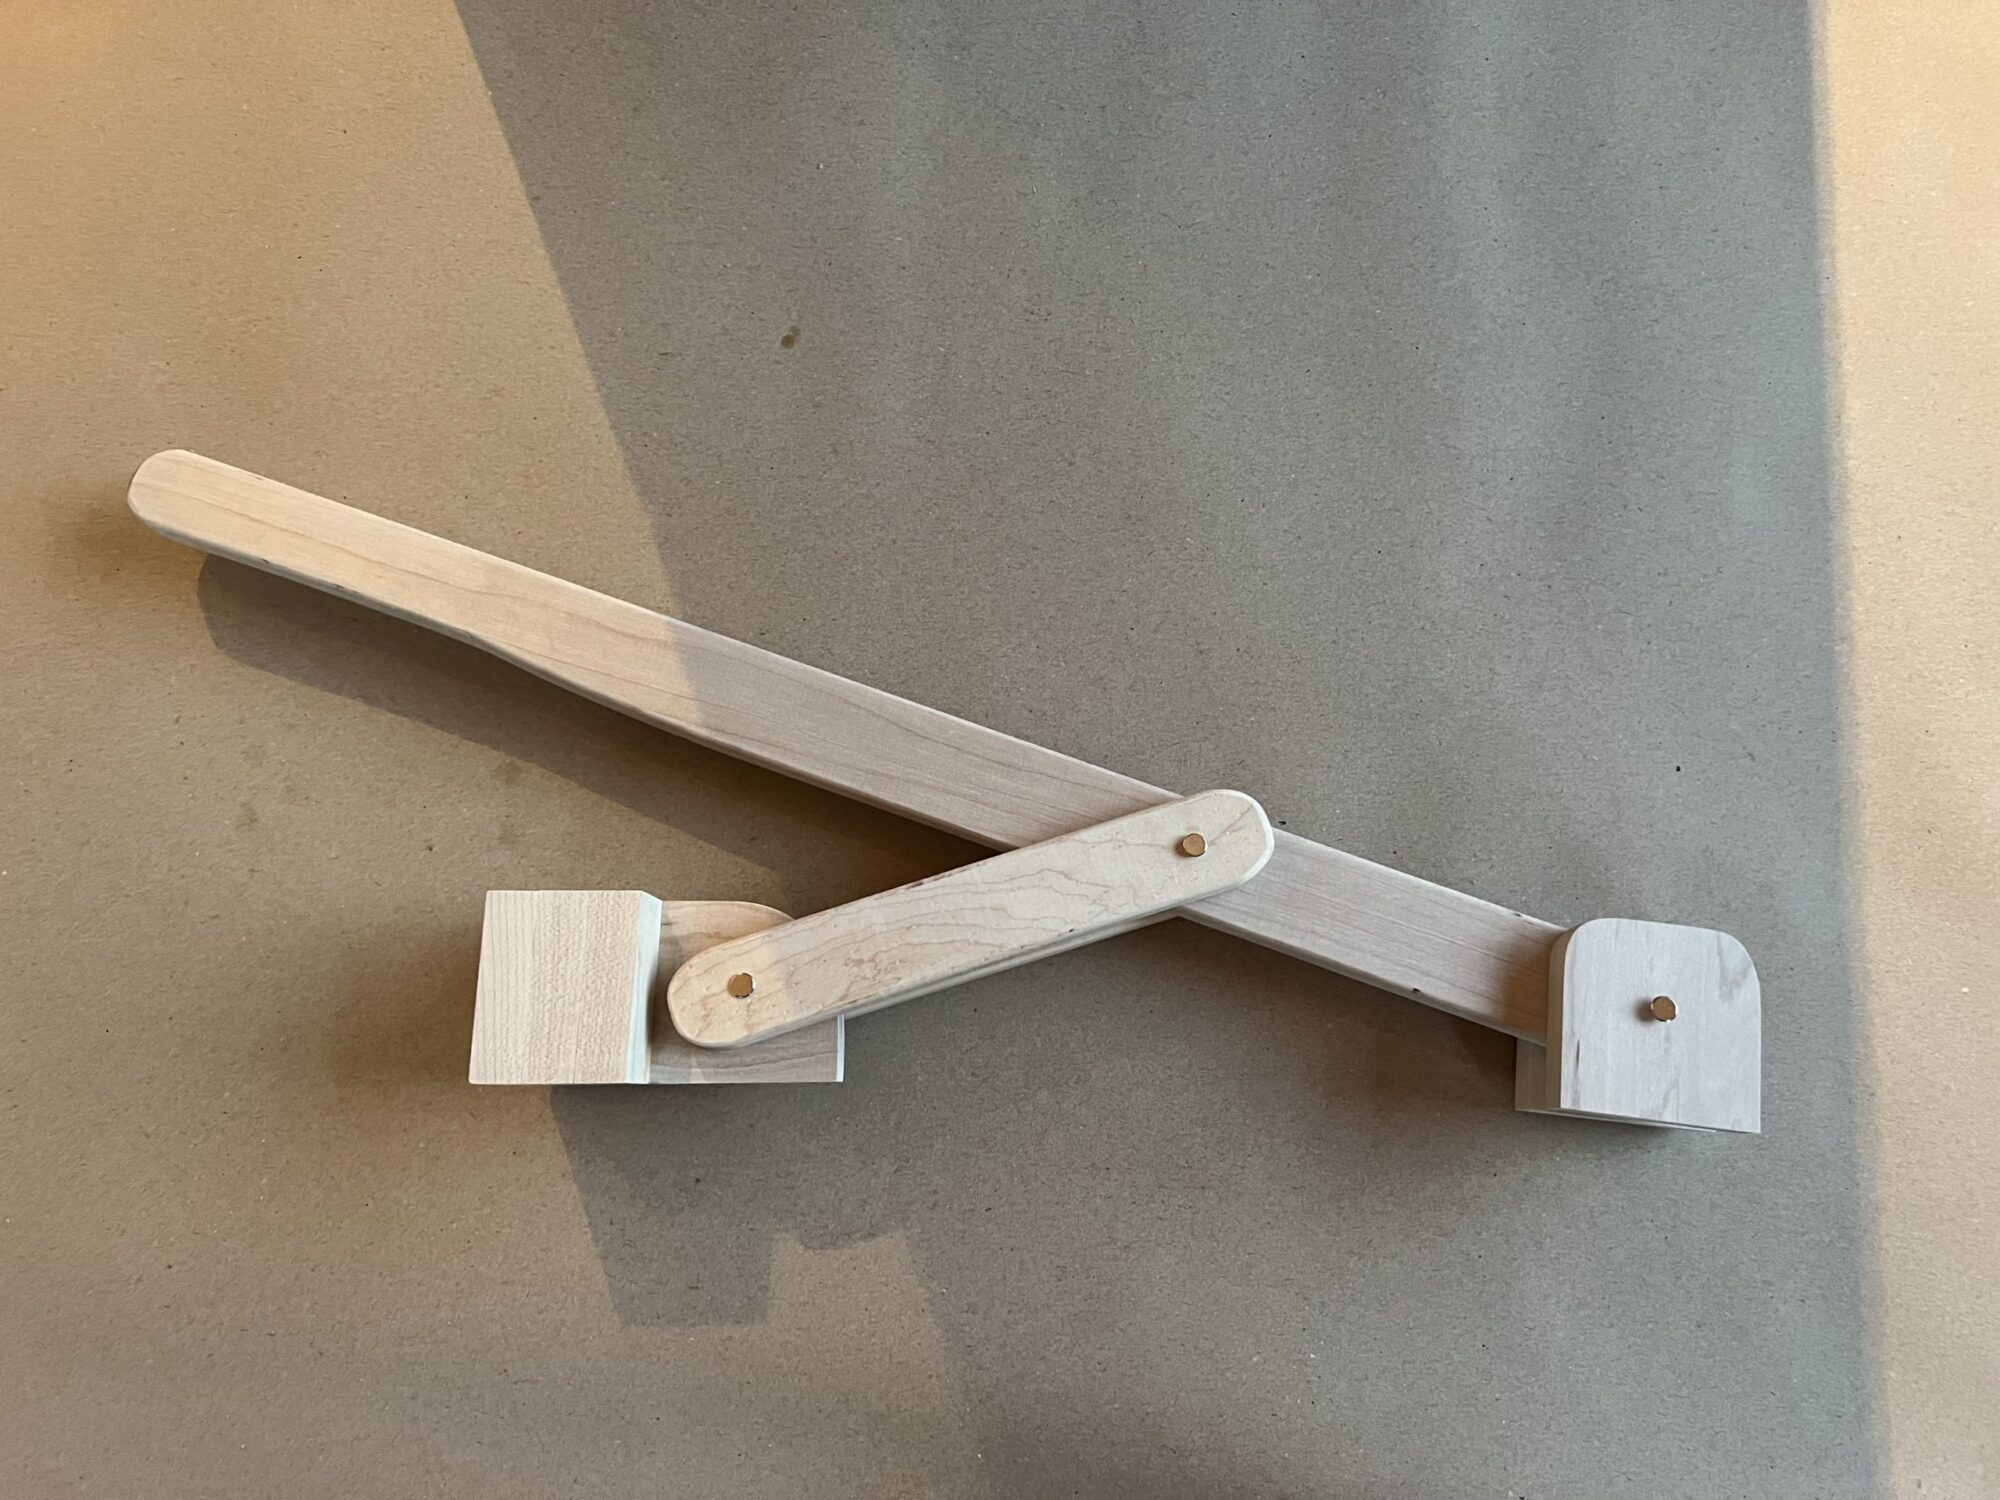
The linkage and lever system has also been completed and assembled. I ended up making the linkages and blocks larger than I had originally planned because it allows for more surface area and increase stability and support. This can be seen in Figure 4.

Figure 4
Next Steps
Once the mechanical component of the device is assembled and the glue has cured, I will begin testing the design make sure the moving components slide smoothly. This process will also include hand sanding various components to achieve a smooth and polished finish. Next, I will fabricating the airfoil component of the design. This component will be made out of Oak. This will add contrast between the two species of wood and also create the aerodynamic aesthetic I would like to achieve. It will also compliment the lighter colored countertop that it would be used on. The airfoil design can be seen in Figure 5.

Figure 5
4 Comments. Leave new
Hi Tim,
I think you have done a great job on this project so far, I really do like the idea of utilizing an airfoil as a can crusher. I also think its cool how you used different types of wood and utilized new types of manufacturing in the wood shop. My question is if you will apply any sort of stain on the finished product?
Hi Alex,
Thank you for taking the time to comment on my post. I appreciate your positive feedback! I am currently not planning on using any stain because I like the natural look of the wood. I am not a big fan of the chemicals and fumes that come with staining wood. However, I am still considering staining it which would bring out some more of the natural lines in the wood.
Hello Tim,
I really like that your are making your project out of wood. I also think it is cool that you are learning new techniques through manufacturing this can crusher. Do you think the cutting and gluing time will change with the different wood type? Also if you are currently living in Boulder, make sure that you should be crushing your cans because some recycling facilities aren’t built for that. Really cool project, I think it will turn out much cooler than the store-bought options.
Hello Sierra,
Thank you for your positive feedback and commenting on my post. The curing time for the glue should not change between the types of wood. For high-stress joints, 24-hour clamp times are recommended. For each joint in the component, I allowed the glue to fully cure for 48 hours before applying any force to the joints. This 48 hours includes the 24-hour clamp time. I added the 24 hours out of extra precaution because I don’t want to prematurely compromise any joints. You are correct in that some recycling facilities do not want you crushing your cans and Boulder is indeed one of those locations. This is because some of the sorting machines do not recognize flattened cans and they can get caught in some machinery. There are some locations that accept and also prefer crushed cans.