

After a lot of work and frustration, this project is REALLY close to being finished!
***
Ralphie III
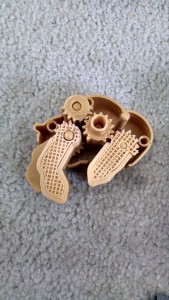
In order to get the four-legged, hooved animal gait mentioned in my last update, I decided to use a gear train on Ralphie III.
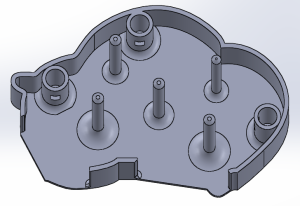
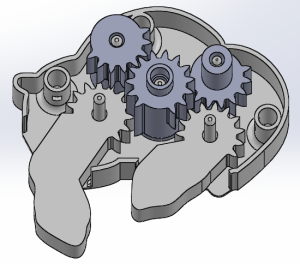

After selection locations for the three gears, I placed circles at each gear and leg location and made them all equal and tangent. The value of these diameters was the pitch circle diameter of each gear (the points where gears interface with one another). By doing this, it ensured that each of the legs would move at the same speed as the central crank. I wrote a MATLAB script to determine tooth parameters. I arbitrarily chose 15 teeth and the script gave me values for the addendum, dedendum, and tooth thickness. Then, I removed select teeth, or certain lengths of teeth, from each gear if they were causing interference or were unnecessary. Below is an example of an exceptionally weird one.

Then, I printed it in black plastic ABS on a MakerBot.
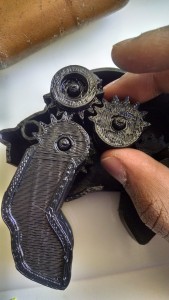
The gears worked!!!!!! I was very excited. However, due to tolerance stack up, surface defects, and a stress concentration, a bending moment was placed on the gear alignment sticks on the base/chassis. In order to mitigate this, I increased the diameter of the sticks. The issue has been mitigated. Additionally, I reduced the part count by incorporating all spacers/standoffs into the gear parts. This requires the use of support material, but reduces the amount of required print time.
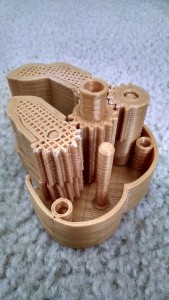
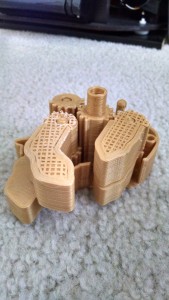
Ralphie IV
The print is mostly done, but there are a few parts that I will finish when I have full access to my printer. I will make an assembled version, and a disassembled version for people to tinker with at the Design Expo. Here is how it is looking so far:
***
I am feeling extremely confident that this will work! I fully expect to have a functioning mechanical buffalo by the next blog post. As it is my aesthetic, I will also do more research about karakuri/automata. It is a really awesome and old japanese tradition: https://www.youtube.com/watch?v=i5zYK9FxORI
4 Comments. Leave new
[…] Update 3 – https://www.aesdes.org/2016/04/04/mechanical-buffalo-4616-update/ […]
Dude, I’m super impressed with how far this project has come along! It looks really great and you’ve made a lot of progress since the first few prototypes. For the final one, are you planning on double extruding so you can get the Black and Yellow? I’m also impressed with how you laid out all the gearing, you gotta show me how to do that kind of thing sometime! It would be really cool to market this as some kind of CU toy, and try to sell it.
Wow this is really getting to be amazing! When you first described your project idea I didn’t think you would go this deep into the design but wow! I think a great plan for the expo would be to line up all the Ralphies and show each design iteration you made and just your whole process up to the final design! What are your plans for the final design as far as the printing colors? I think the black looks amazing but add in the gold CU logo in the middle with maybe the cool textured look you got from Ralphie 2 I think where you had the black and yellow but maybe do gold and black this time? Still great job so far and I am so excited to see the final product!
Great work, the idea to include all the spacers and standoffs into the gears making printing time faster was great, are you planning to go back to the yellow and black exterior design? Will the buffalo be driven by a crank or motor? If doing a crank the CU logo along the shaft would add a great touch.