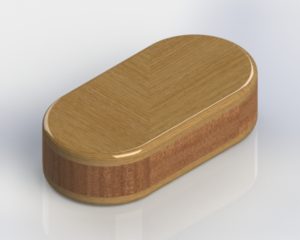
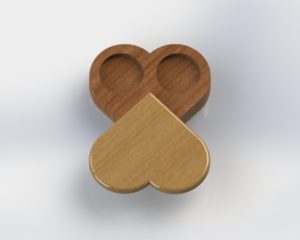
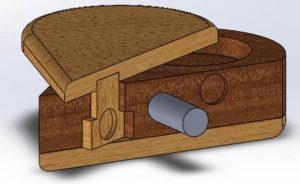
For my final project, I wanted to do a very intricate wooded locket. The inspiration for this locket came from the movie The Illusionist. In this movie, the locket twists from an oval or “pill” shape to a heart shape. While in the heart shape, there are doors that swing open to reveal an opening for a picture. However, in the movie, they used two separate lockets; one that twists and one that swings open. Looking up this locket online, there are quite a few tutorials showing how to make it and even a company that sells this locket. However, in almost all of these designs, the axes of rotation are different, twisting in the same place but swinging opening at the top of one of the hearts. I wanted to make a version that is high quality but hinges in the same places as the movie. The first step towards making this was making a model using Computer Aided Design (CAD). Below are some pictures of the CAD model that I created.

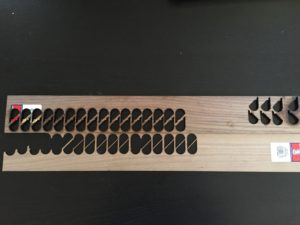
From here, I created drawings detailing each step that I took throughout the process. Each step is put on one page of each drawing. The point of having only one step per page was to enable myself to take notes as I went along in the manufacturing process. After this, the next step was to cut the profile out of the stock that I had purchased. As you can see in the pictures below, I cut out a few more pieces than were necessary. This was because I fully intended to screw some of them up, and it was probably one of the wisest decisions that I made in this project.
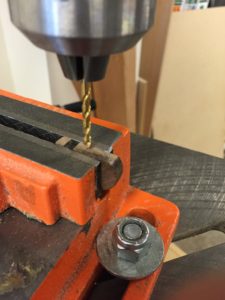
After this process, I started to sand the outside of each piece. I knew this would take me a while, but I had no idea how long this would really take. It took me almost a full week to sand down the outside of all the pieces that I had cut out. Next, I had to drill the center hole. I first thought that it would be possible to clamp and drill the hole by hand, but I was unable to create consistent holes. The main reason for this was that I was trying to drill with the grain in which the grains of the wood will try to push the drill bit around. My solution to this was to use a drill press and a clamp.
After this step, I wanted to know that what I was doing would indeed work so I made a prototype, using the pen cartridge and shortened nail combination for the first hinge (for the twisting motion). I was very happy to see that it did in fact work!
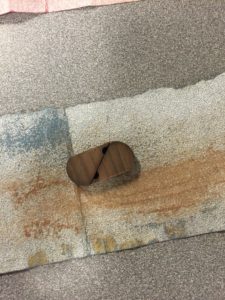

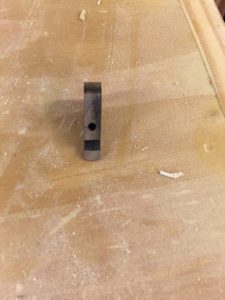
I then used a 1/2” forstner bit (makes a flat bottomed hole) to make the picture indentation. This worked really well, creating a hole for the glue and picture to sit in. In order to made the rest of the holes and steps, I used exacto-knives and Dremels. This was due to the intricate nature and size of the features that I was trying to make (the biggest of which was less than 1/8 inch in diameter and 0.020” deep). These holes are for the tiny magnets that hold the locket together and give it a “snap” feeling. These took a long time because of how quickly the tips of the exacto-knives dulled and eventually broke off. Eventually I was done with the middle piece.
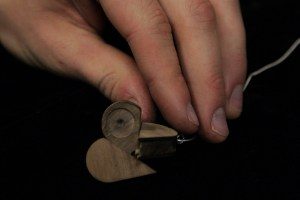
The next challenge of this project was to make the second, half-pin hinges. To make these, I used my personal lathe (a hand drill) and lathe tools (file and sandpaper) to turn down a section of 1/8” wooden dowel and make a step in it. I then took my exacto-knife and whittle the dowel in half. This meant that I had to make this piece twice in the exact same way. I then took and cut a hole and set a small magnet in both halves of the pin and waited for them to dry (I superglued all of the magnets in place). I then started the process of sanding each of the two pins down to the correct length. Once they both fit properly in the core piece, I was able to glue them onto the “door” pieces.
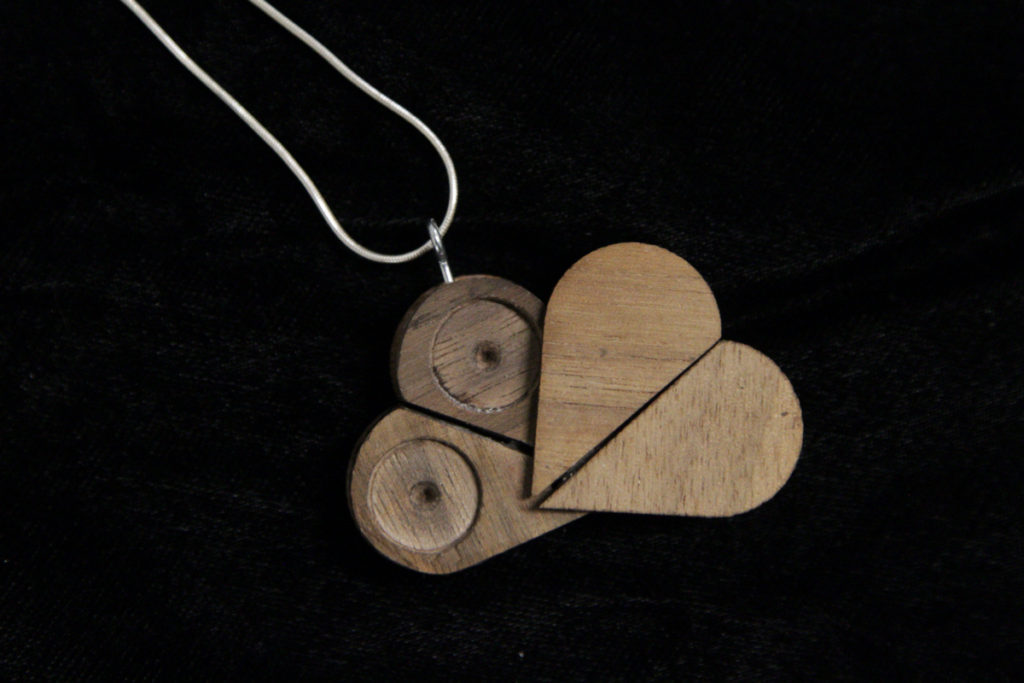
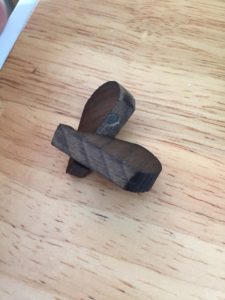
The rest of the process included putting on the back panel and assembling the locket together. You can see the final product in the picture below.