
How the Idea Came About
Things I wanted my design to revolve around:
- Furniture
- Laser cut and etched design
- Something resembling a circuit board design
- Wood
Things I needed to refine:
- What type of furniture
- What style of furniture
- The exact etching design
Initial Prototype
To help narrow down my design I created a quick prototype.
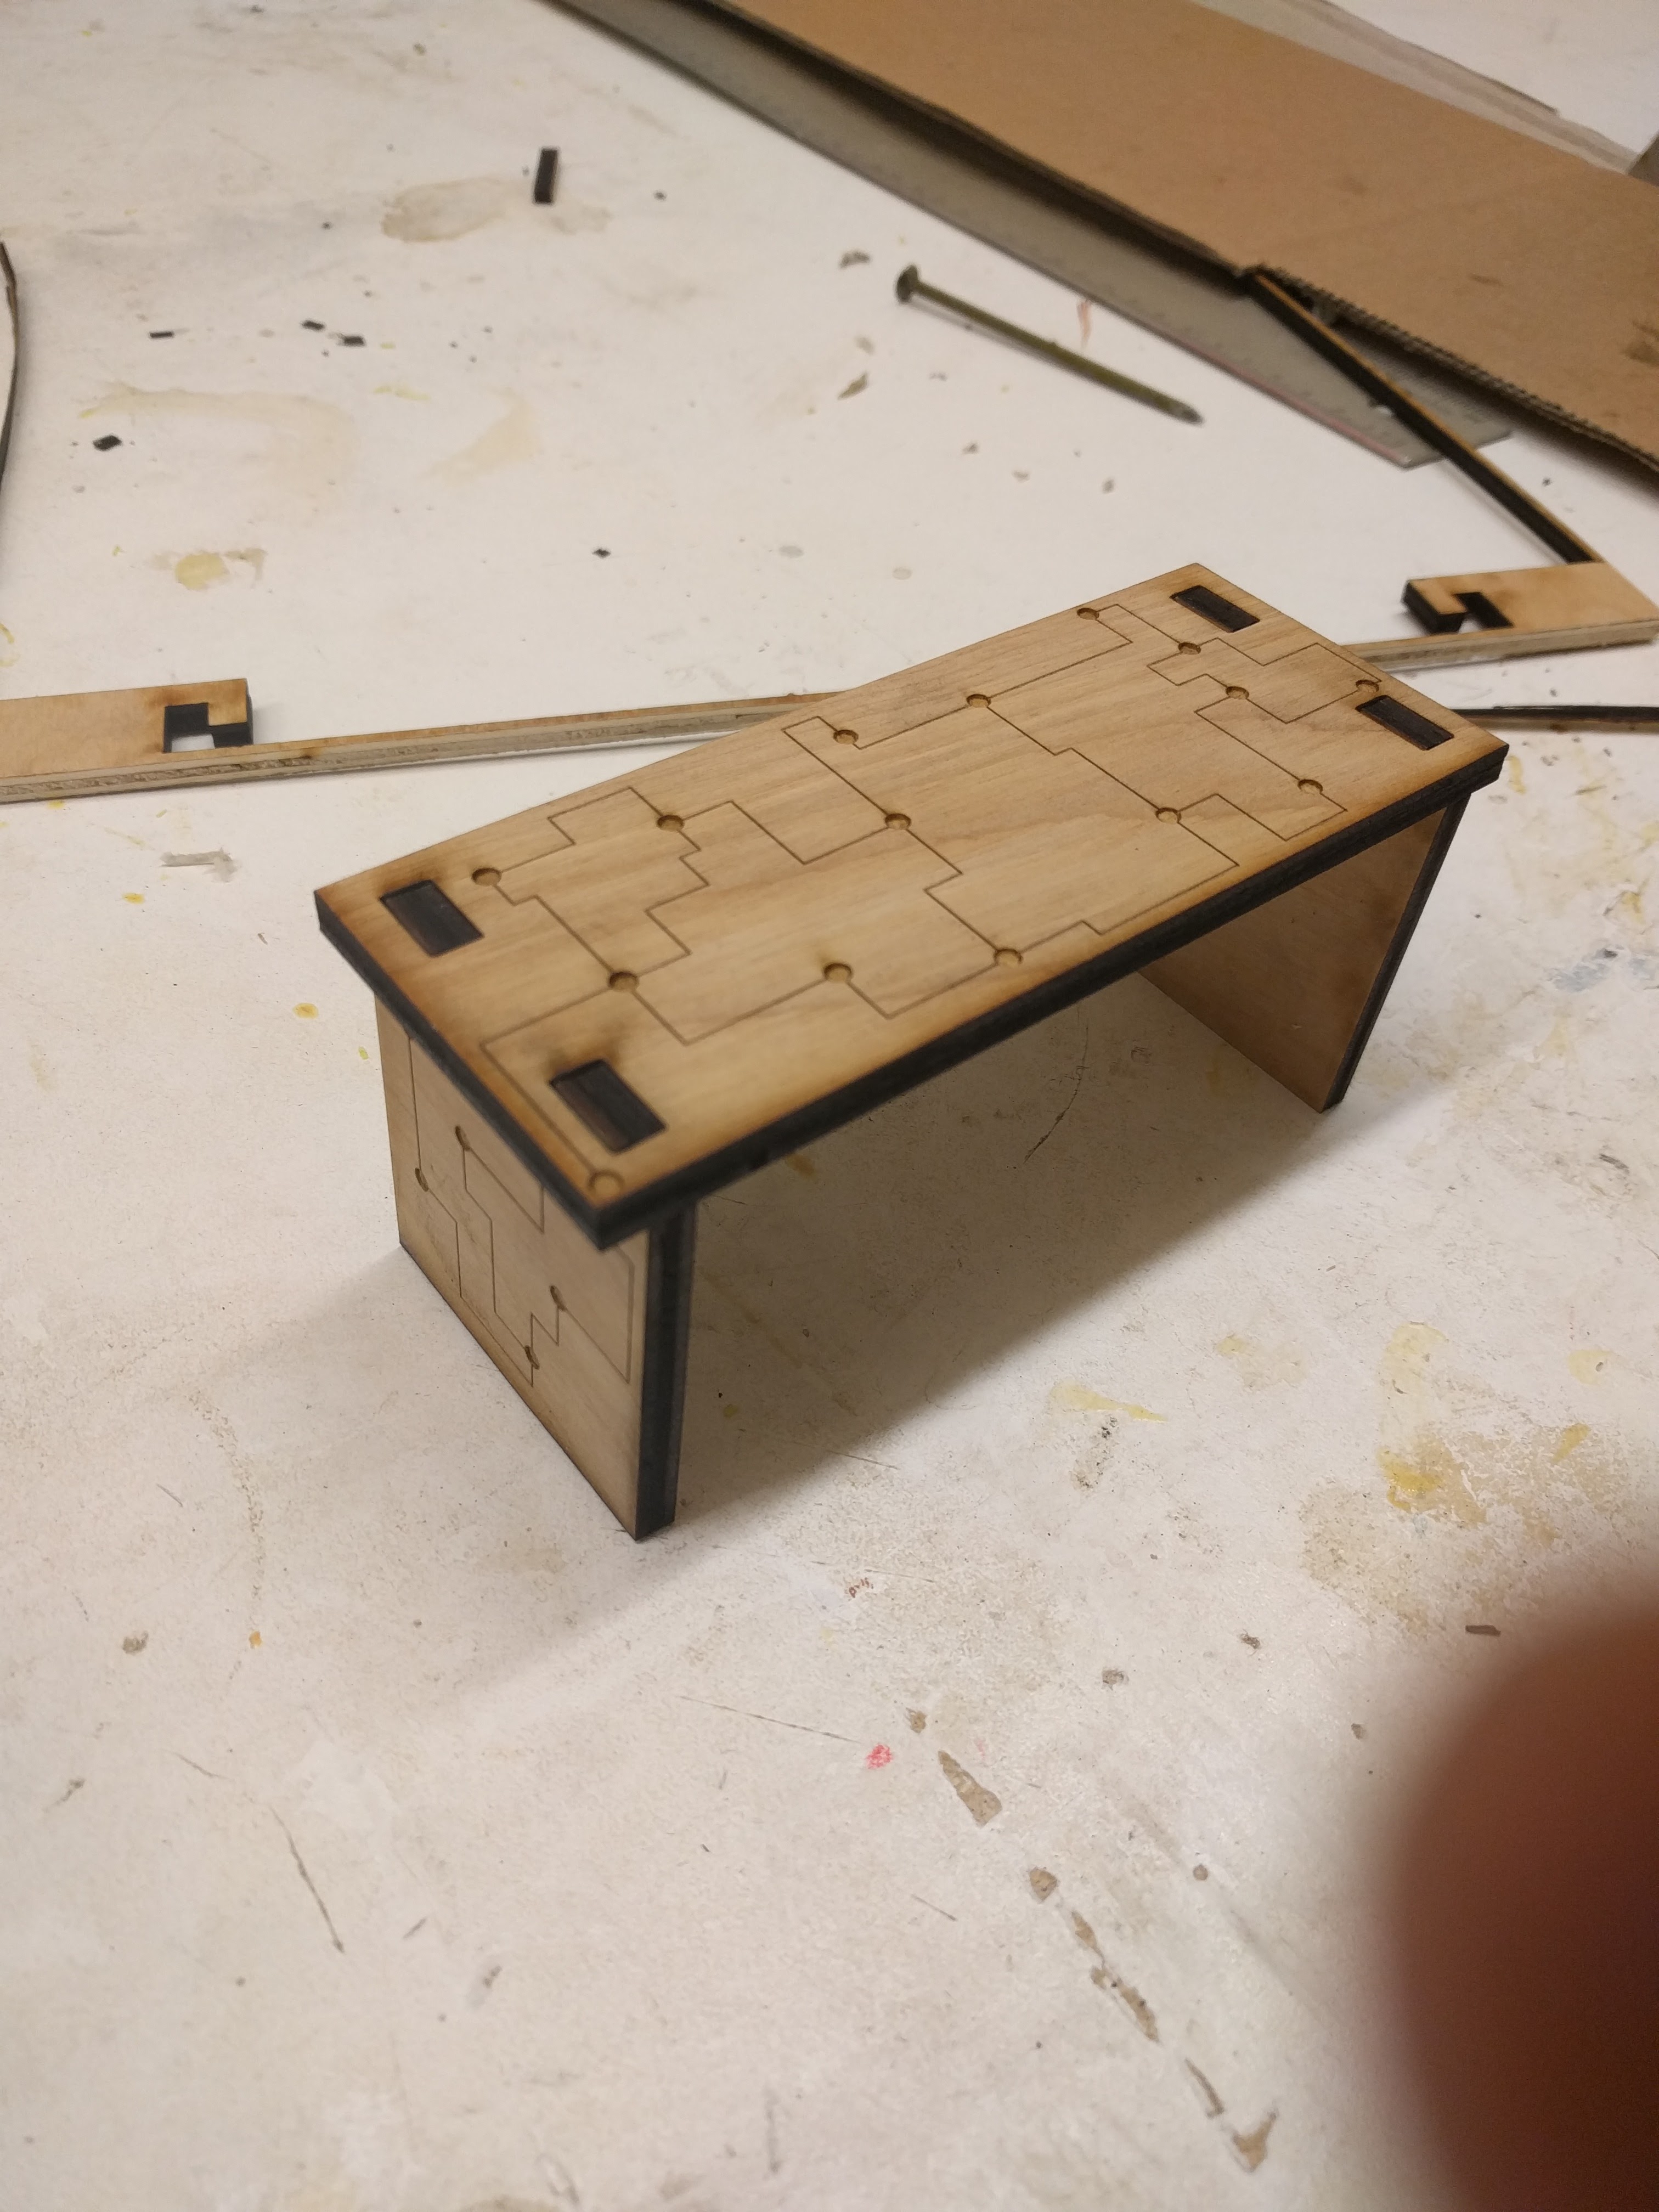
Things I Learned
- Raster etching would take far too long for a full project
- A desk was out of reach due to the laser cutter bed size
- I liked the random design look but would prefer a bit more uniformity
Deciding on Materials
The majority of my material decisions came from the laser cutter restrictions. I wanted to stay under 100$. After cost and usability research I chose the following:
- ¼” Birch Plywood – 50$
- Standard 2×4’s – 8$
- Construction Screws – 10$
- 14” Drawer Slides – 15$
- A Drawer Handle – 10$
Total – 93$
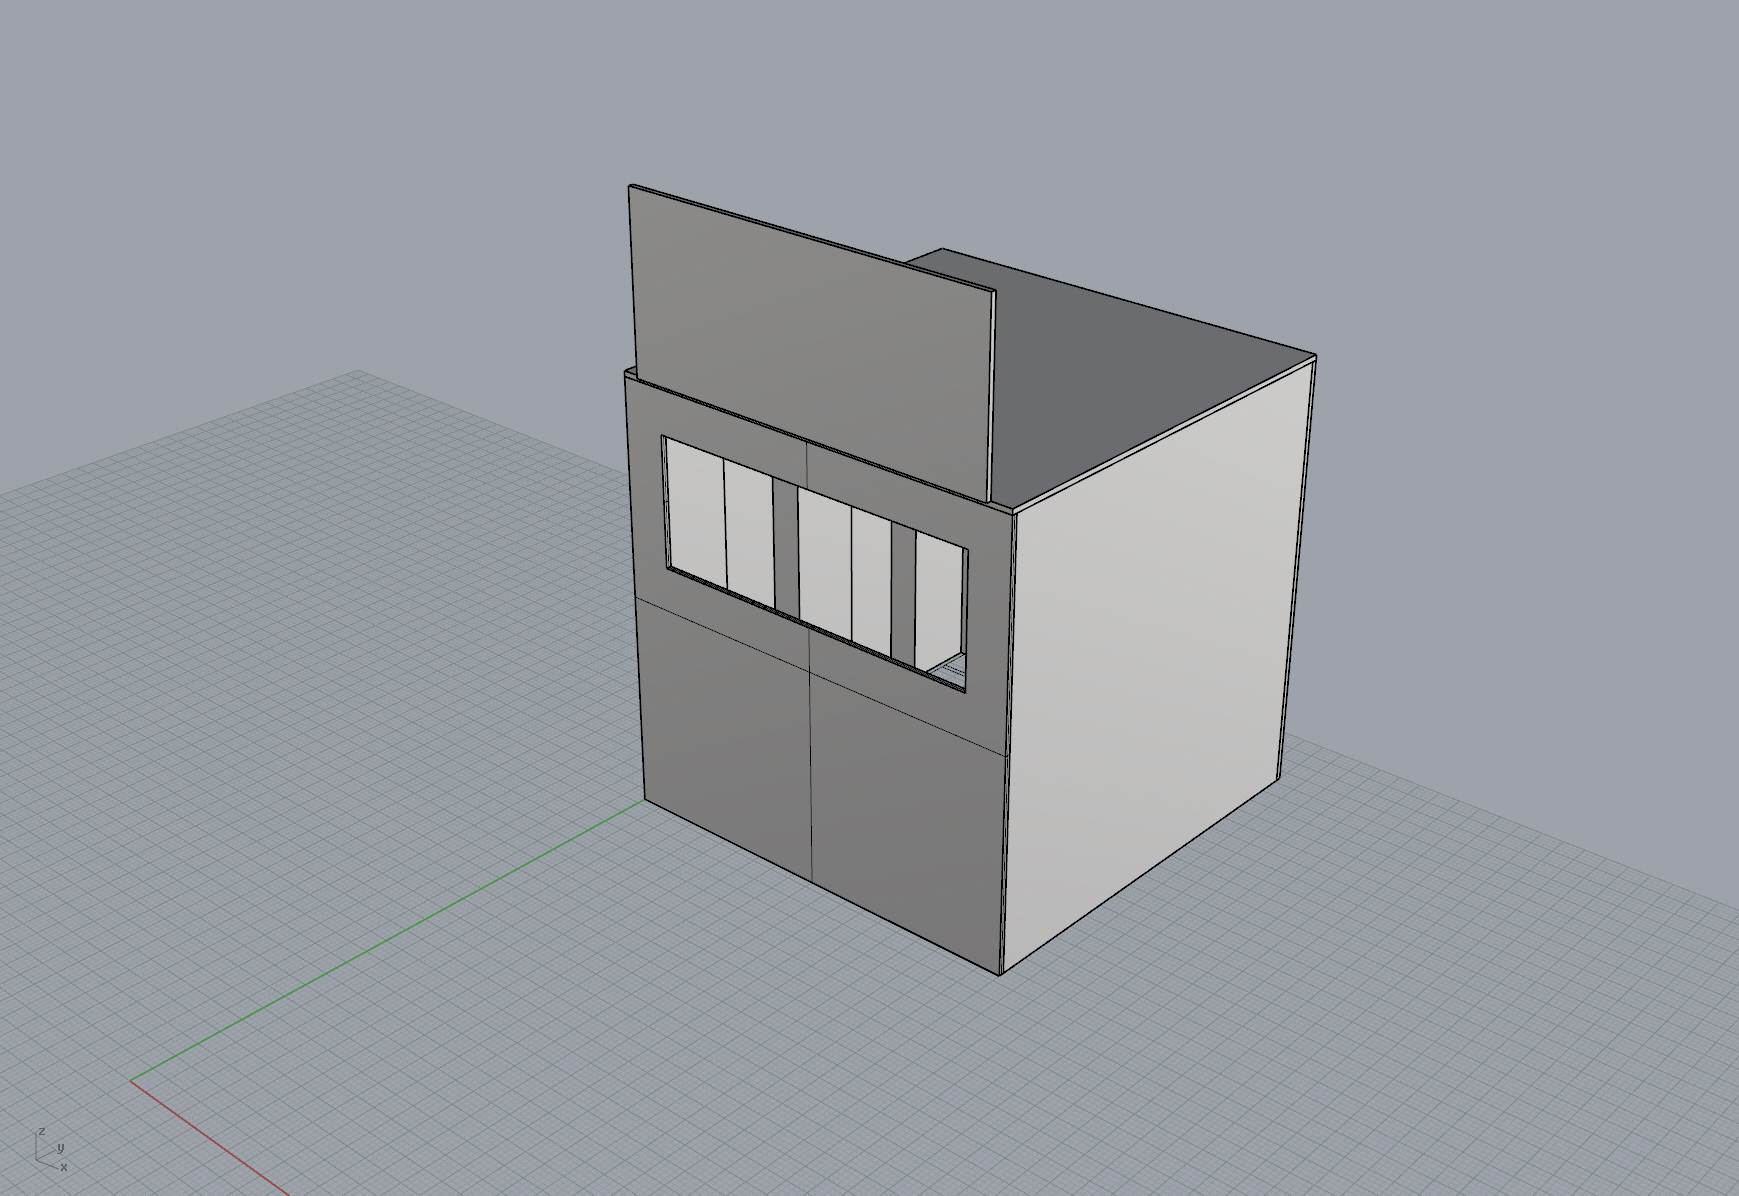
CAD Mockup
Now that I knew my material dimensions, I created a mockup on Rhino 3D.
- The original design was made to be 20”x20”x20” but due to the cutting bed size I changed it to 17”x17”x20”
- I decided on a post-modern design that would go well with the laser cut design
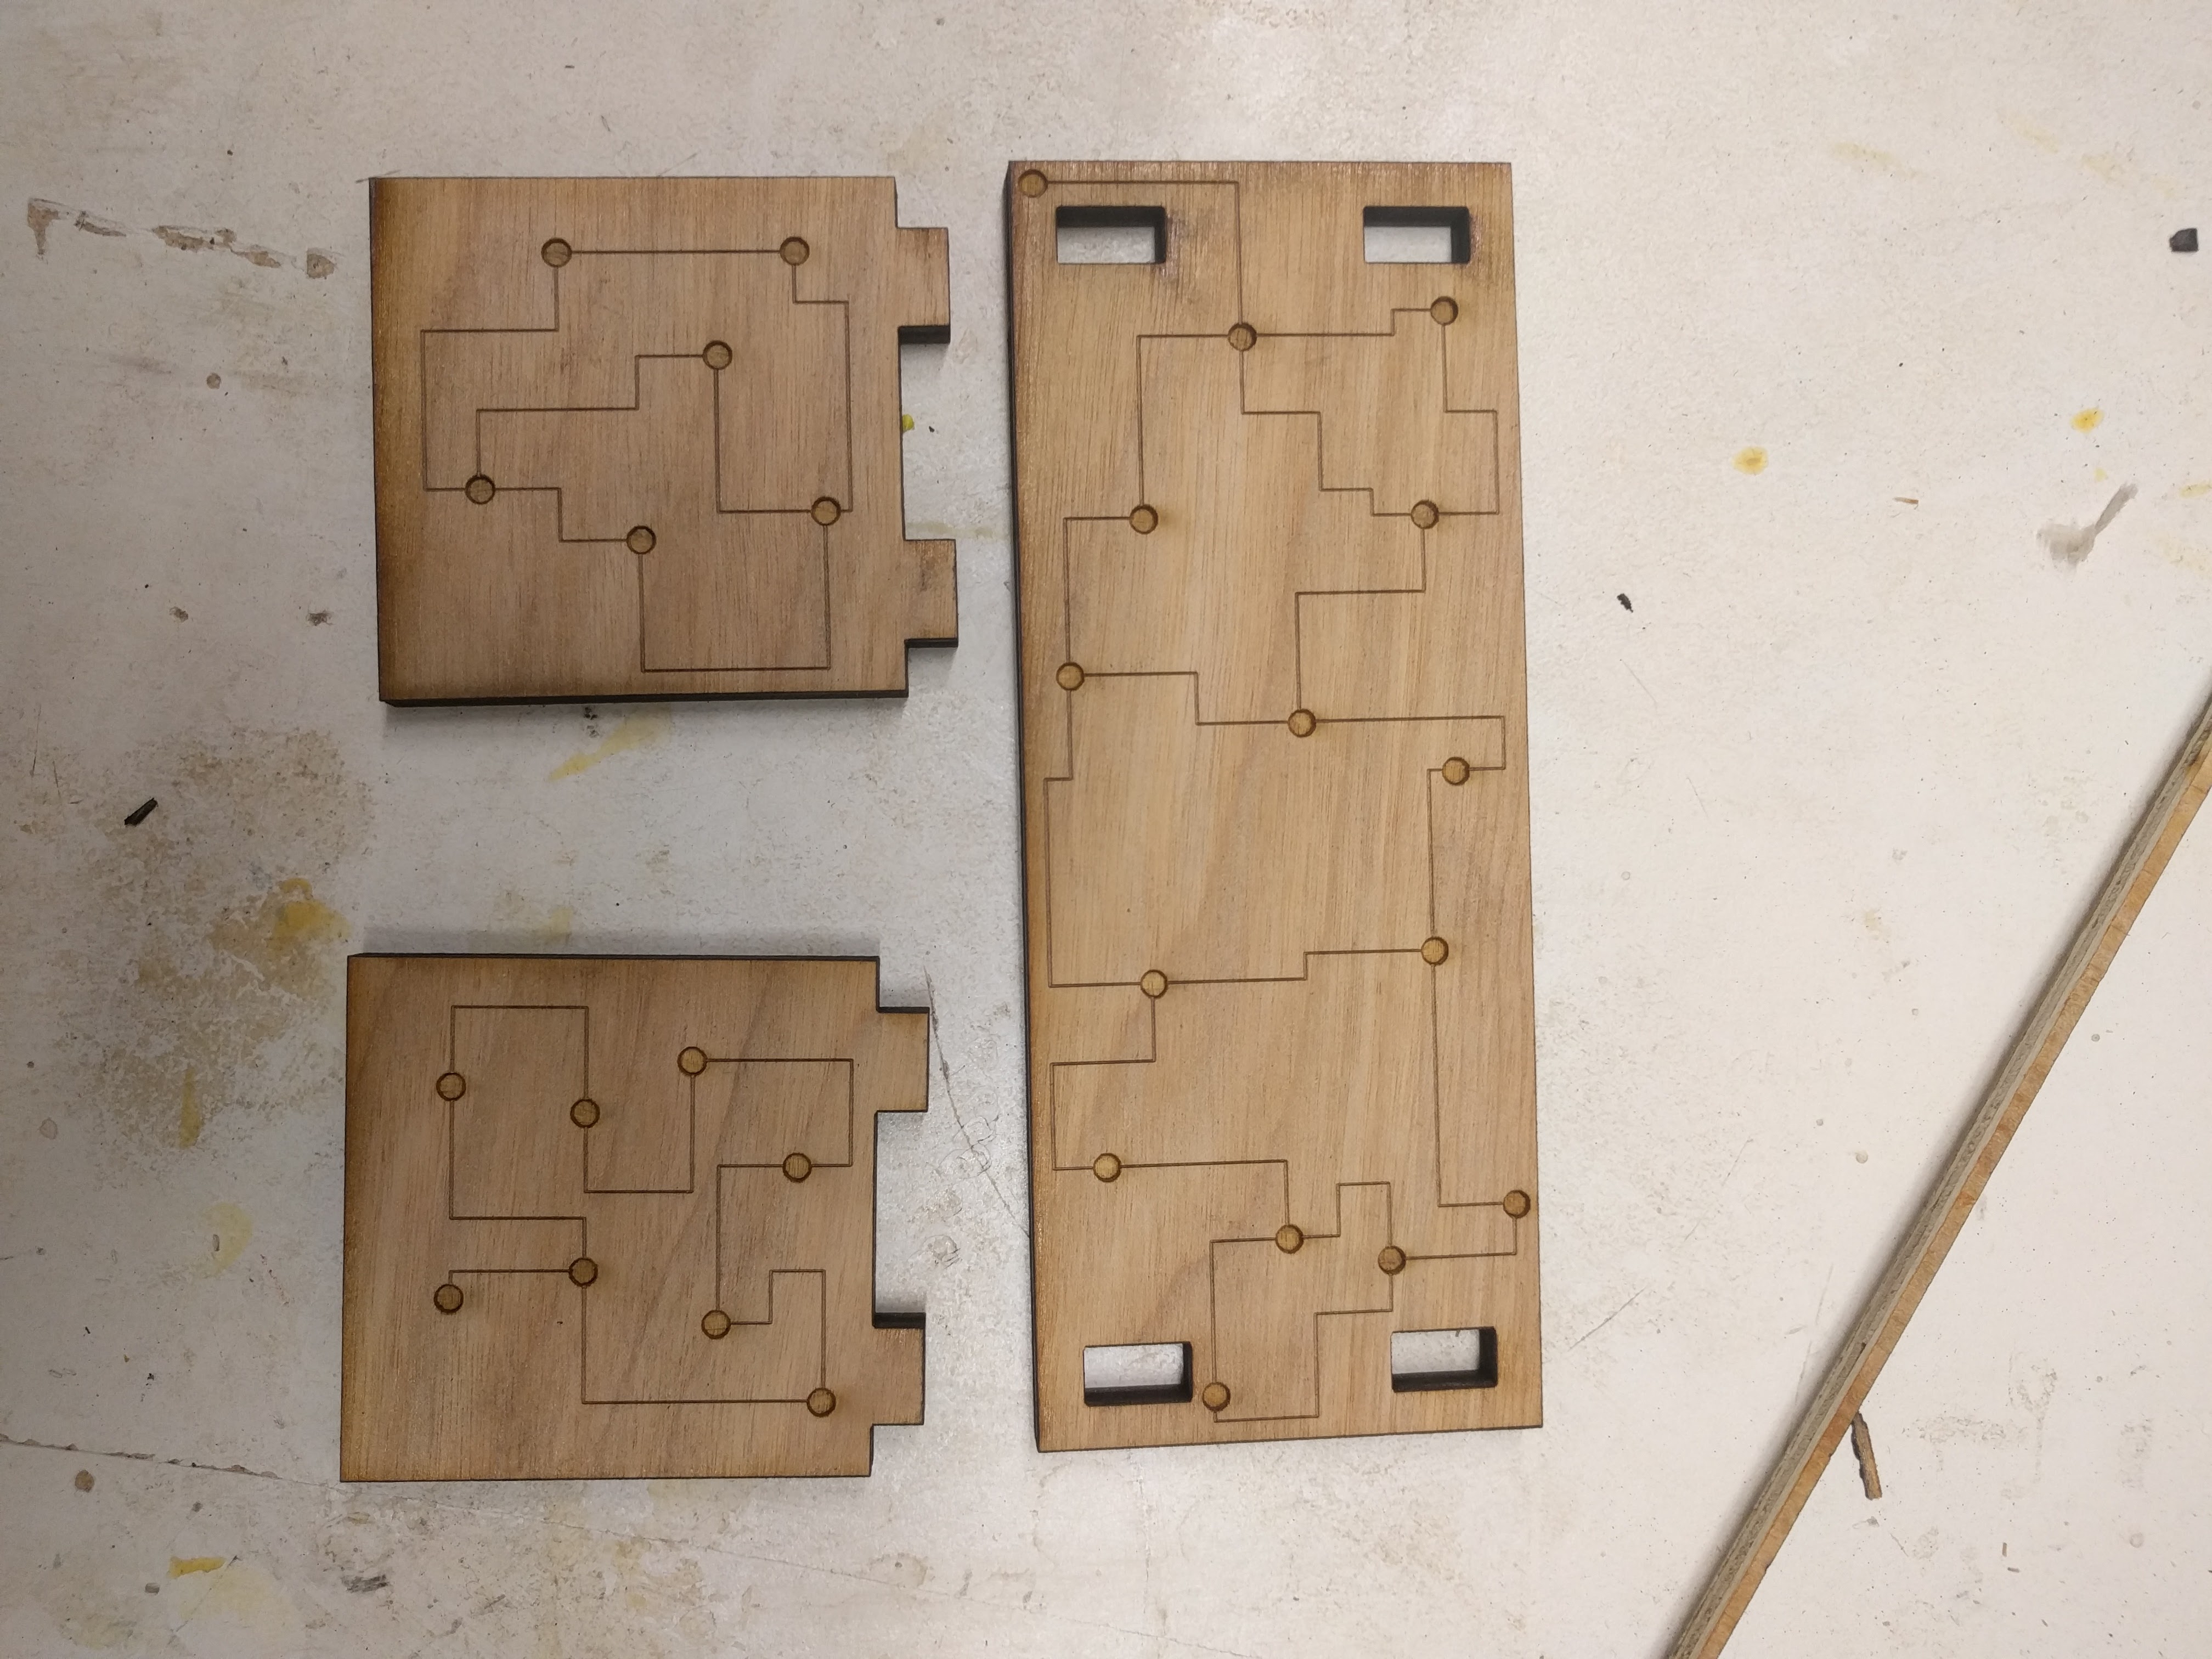
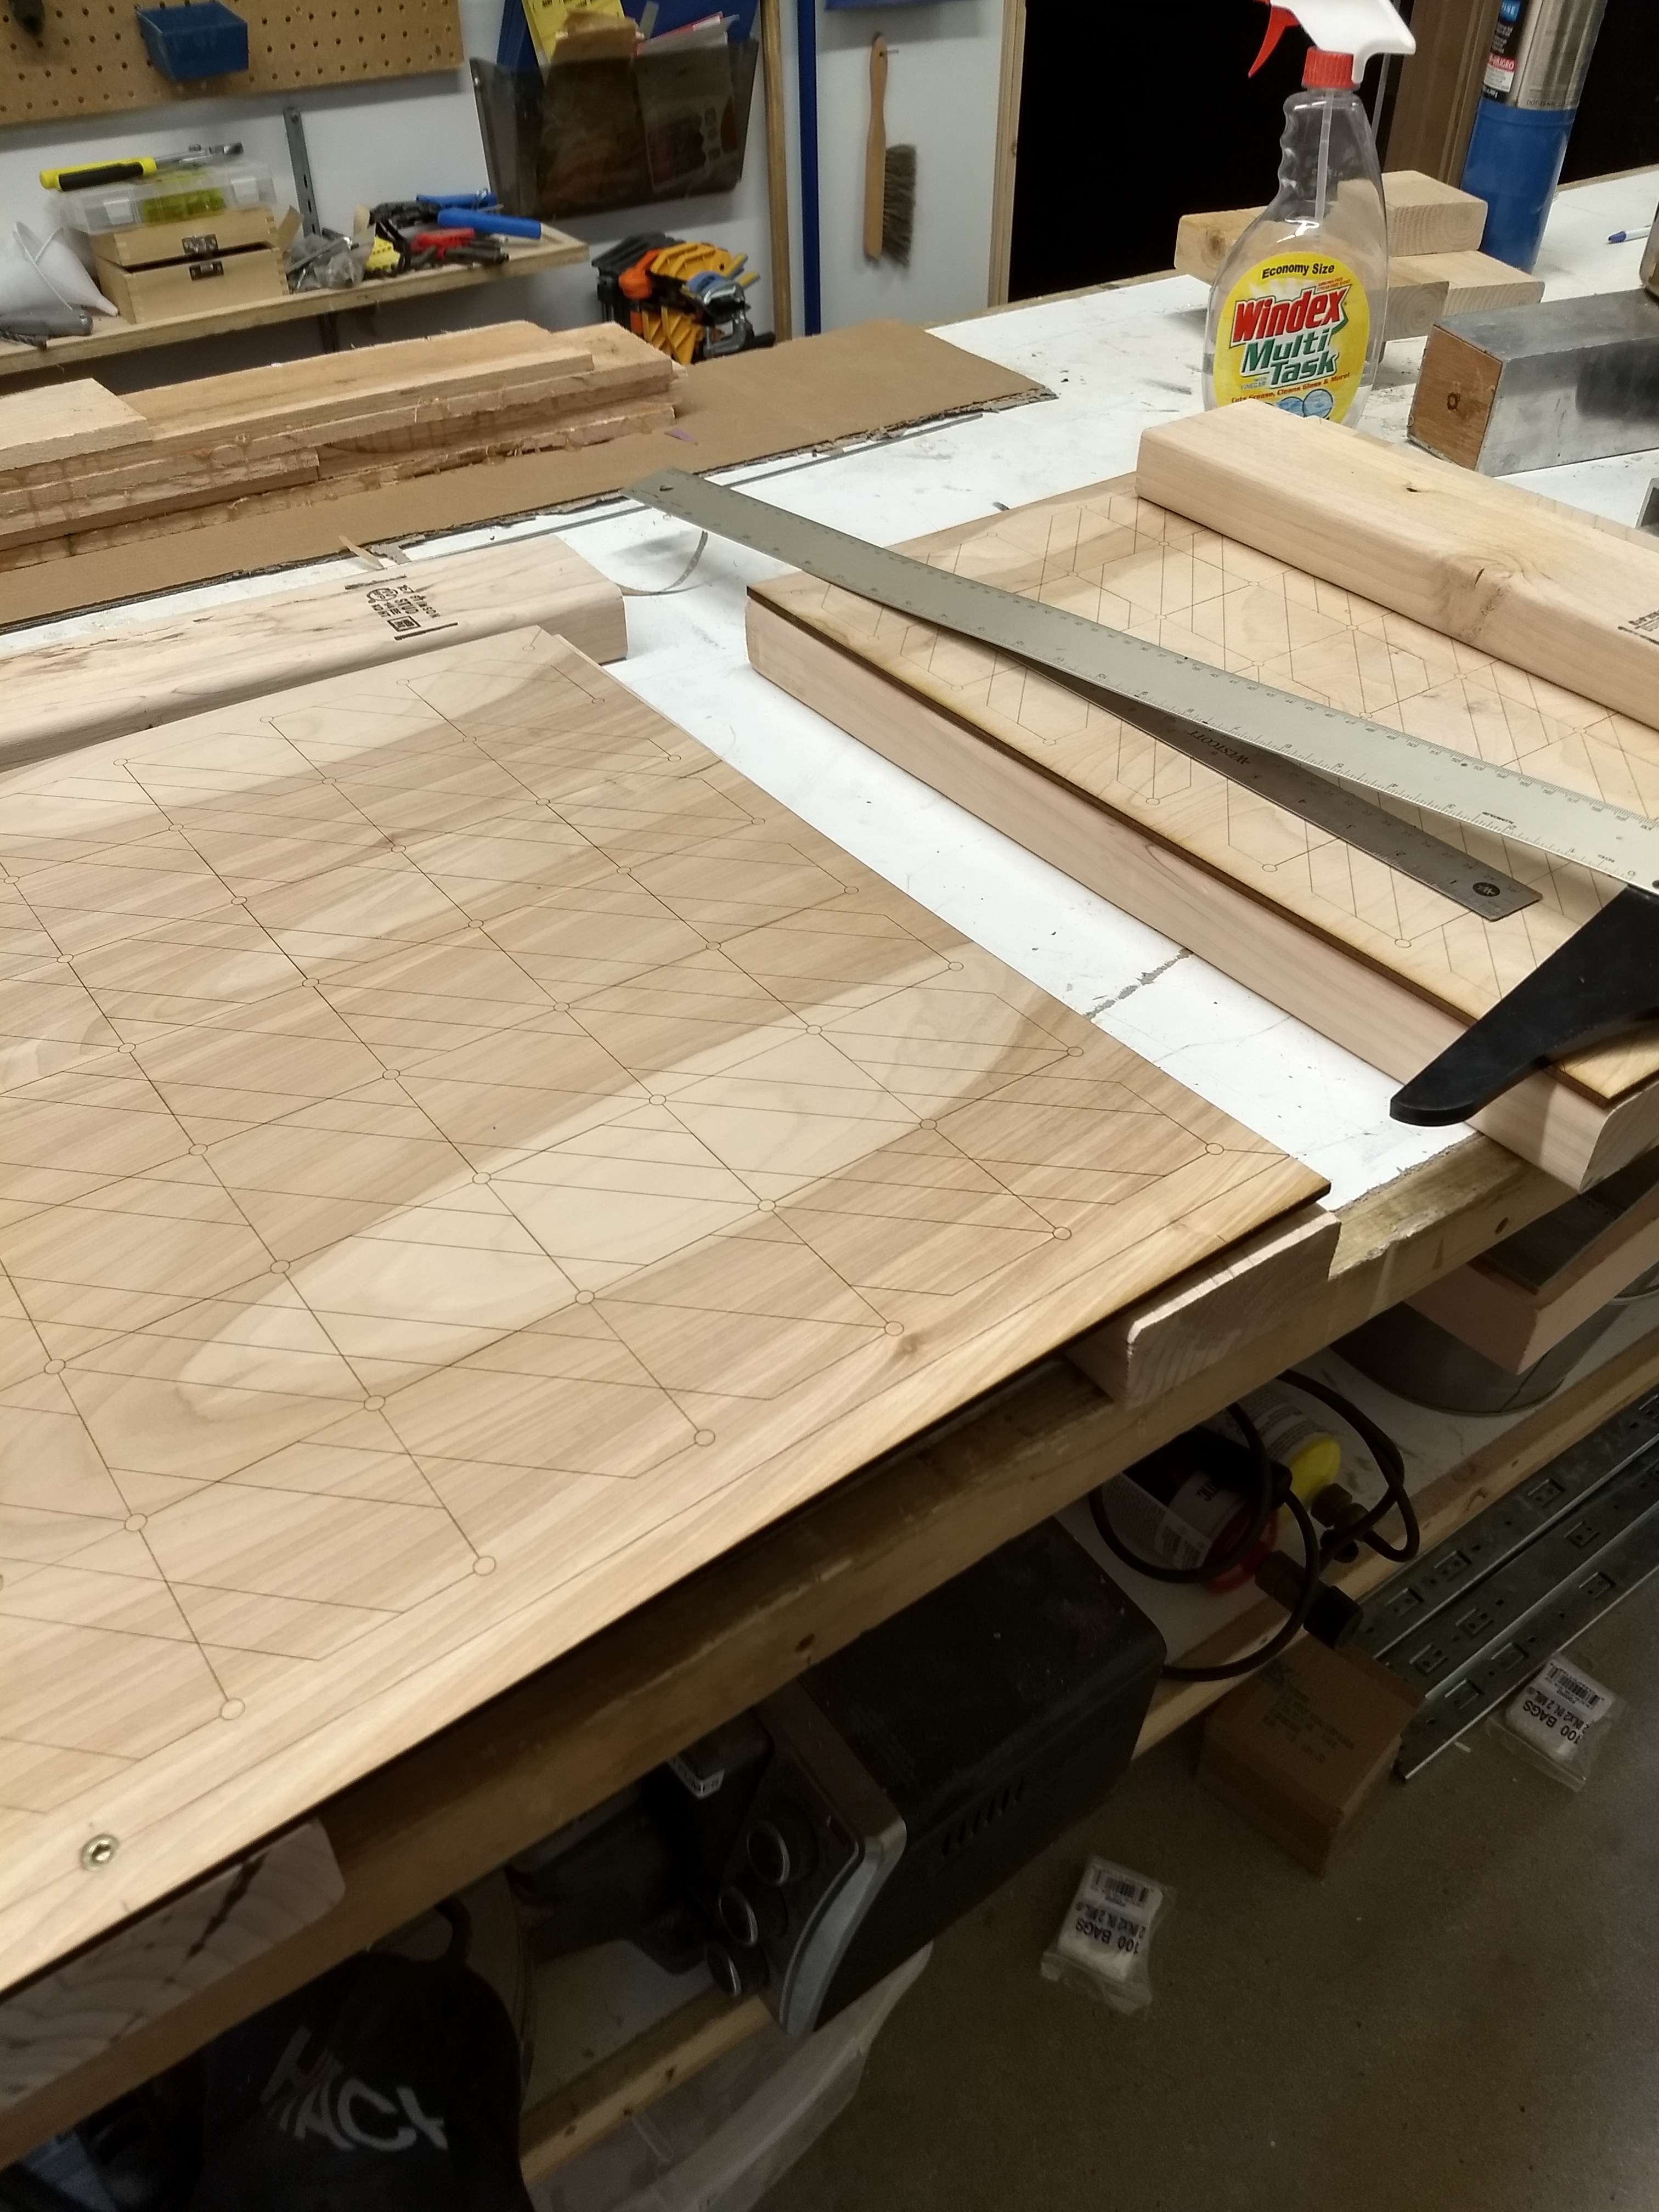
Cut Designs
From the 3D mockup, I now knew the plywood dimensions
- I started off with a design resembling my prototype
- I then created an array with each of the nodes
- The nodes were then connected to each other with 5 different lines
- I went through and randomly deleted a few lines for each block
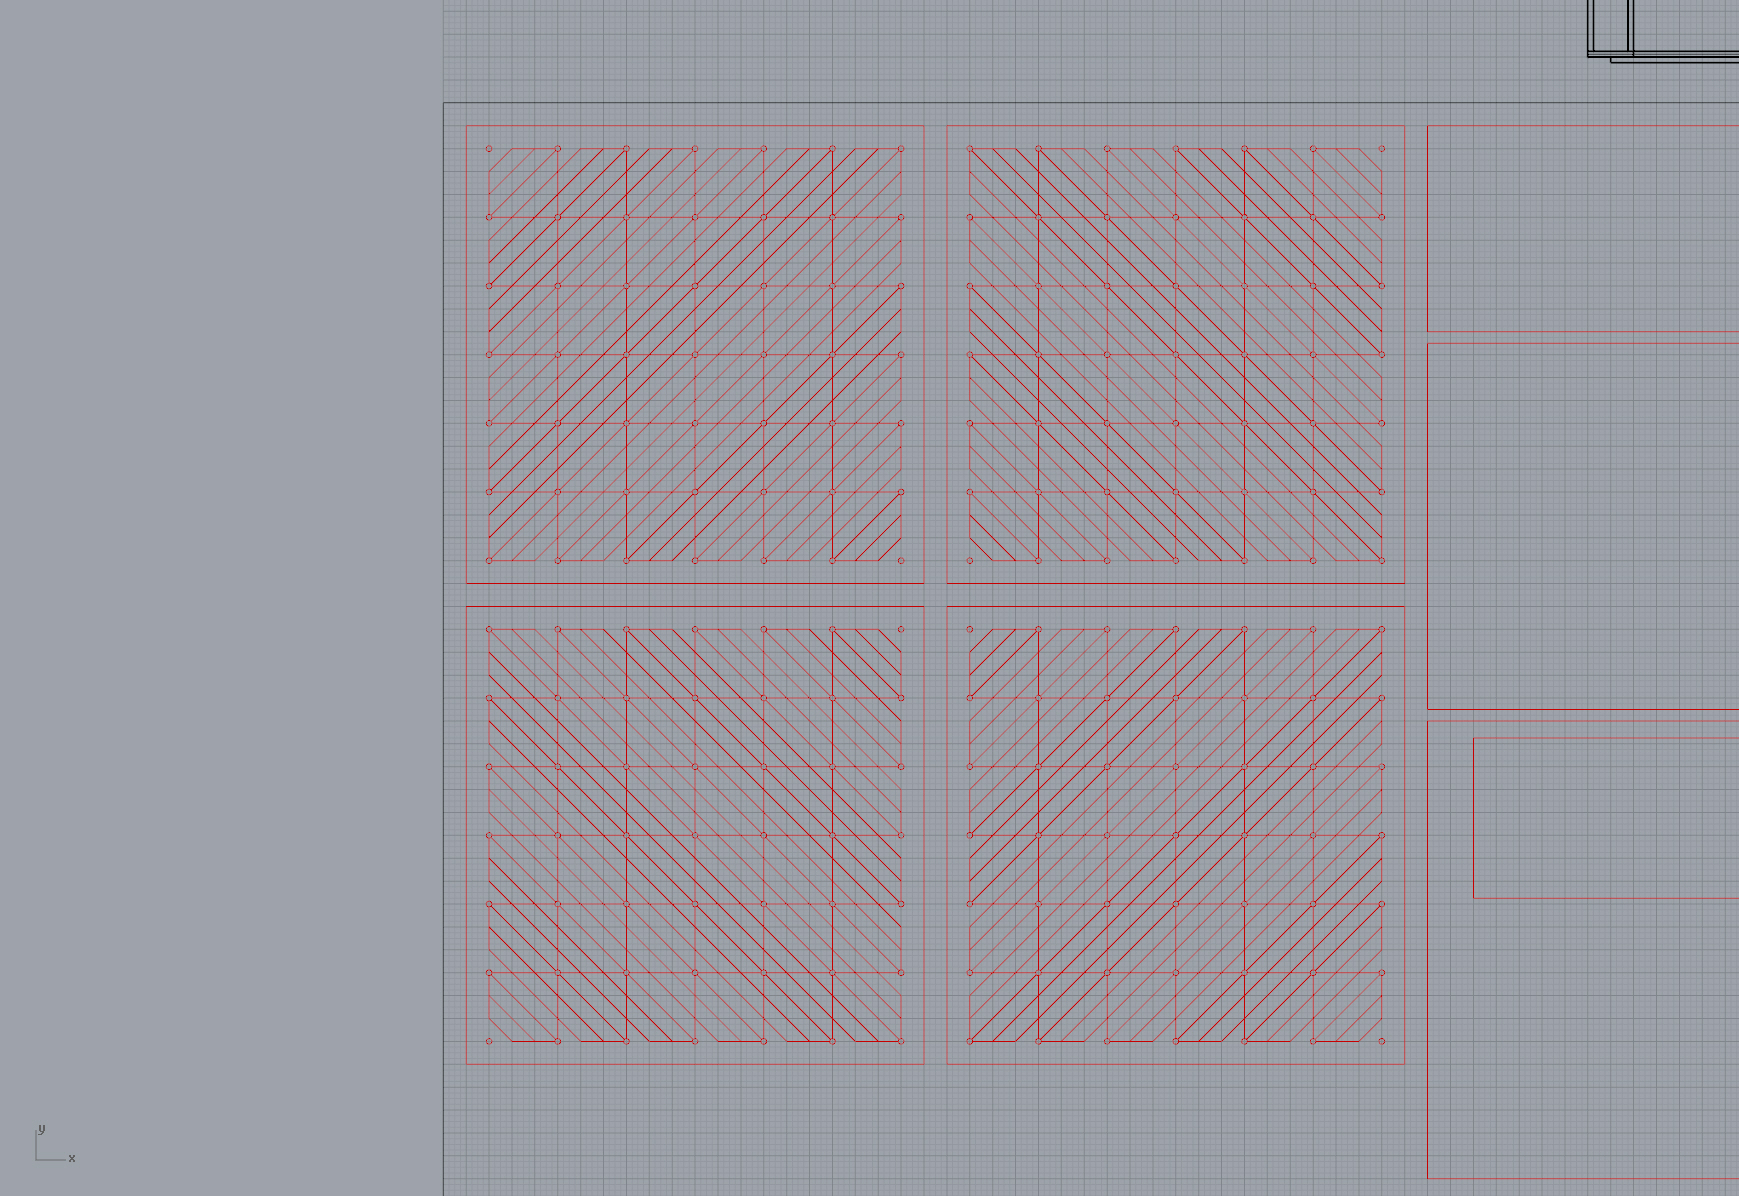
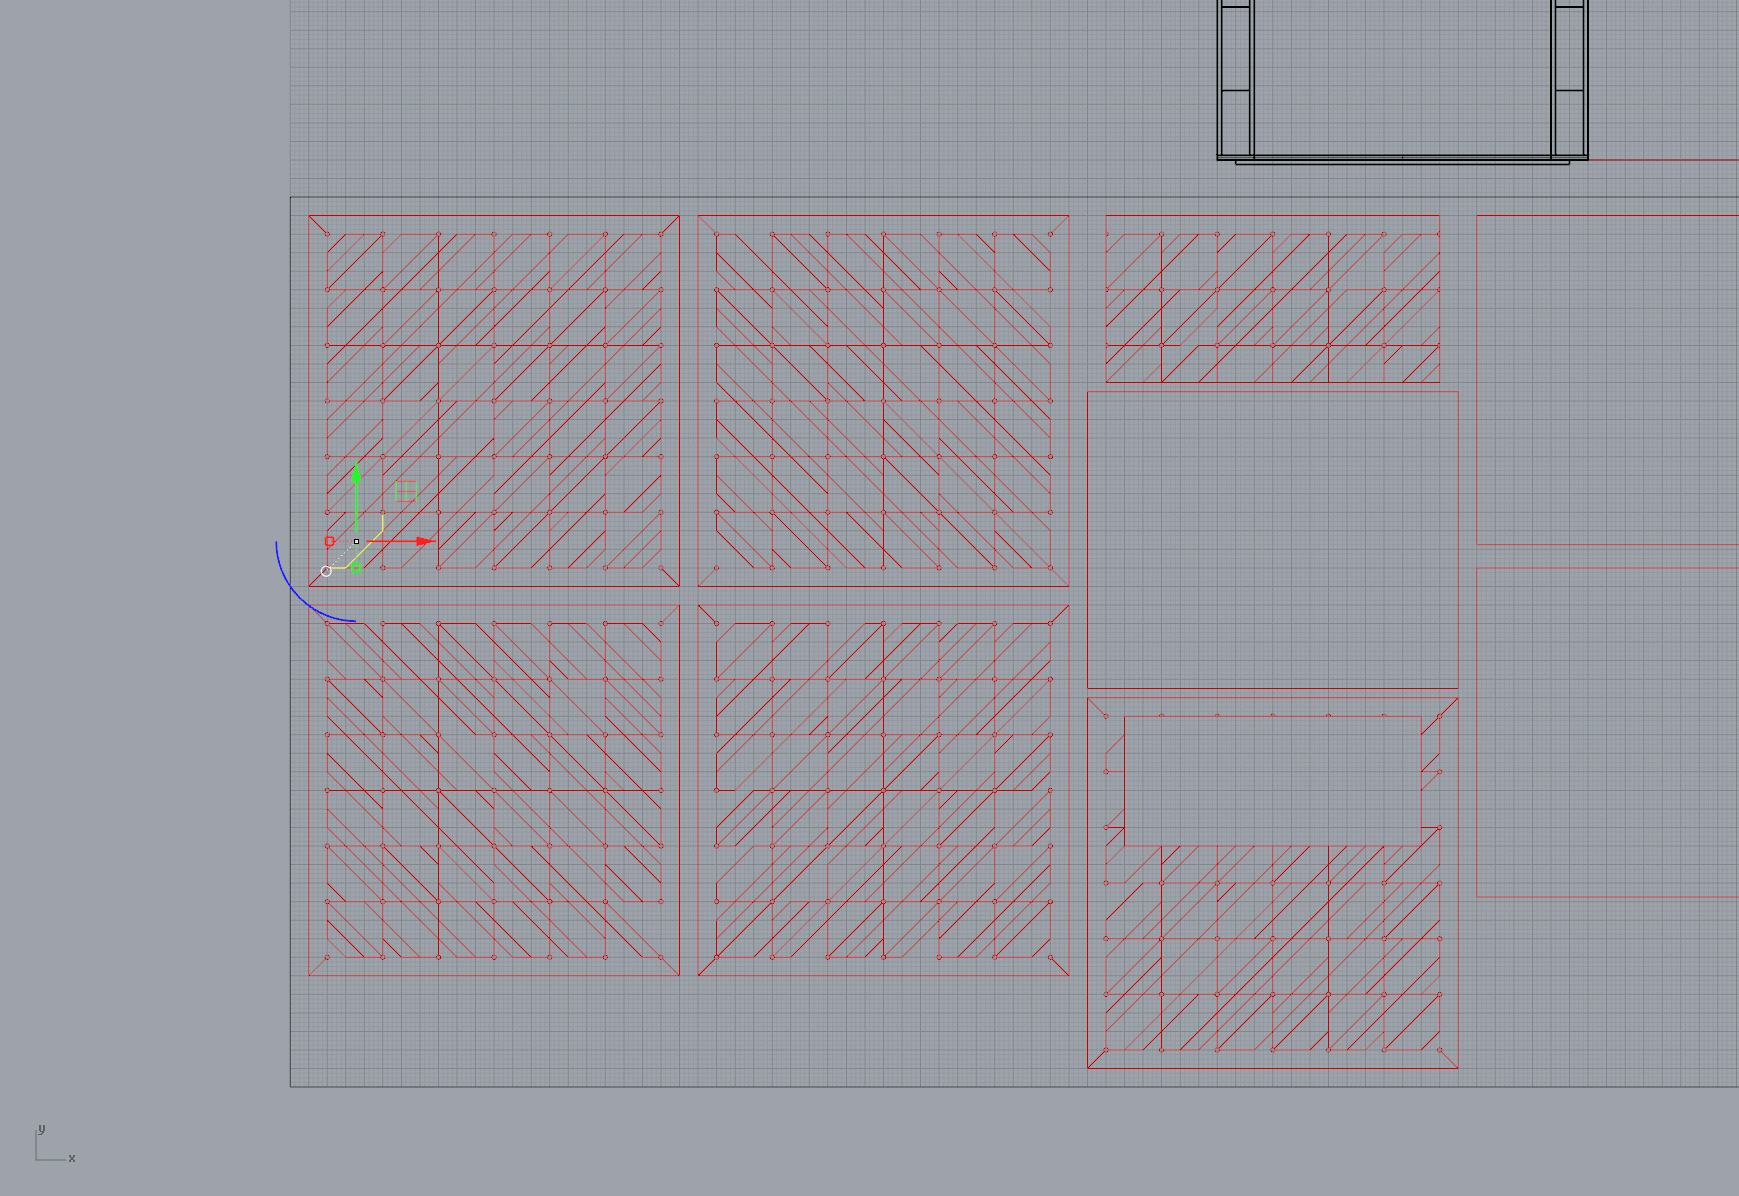
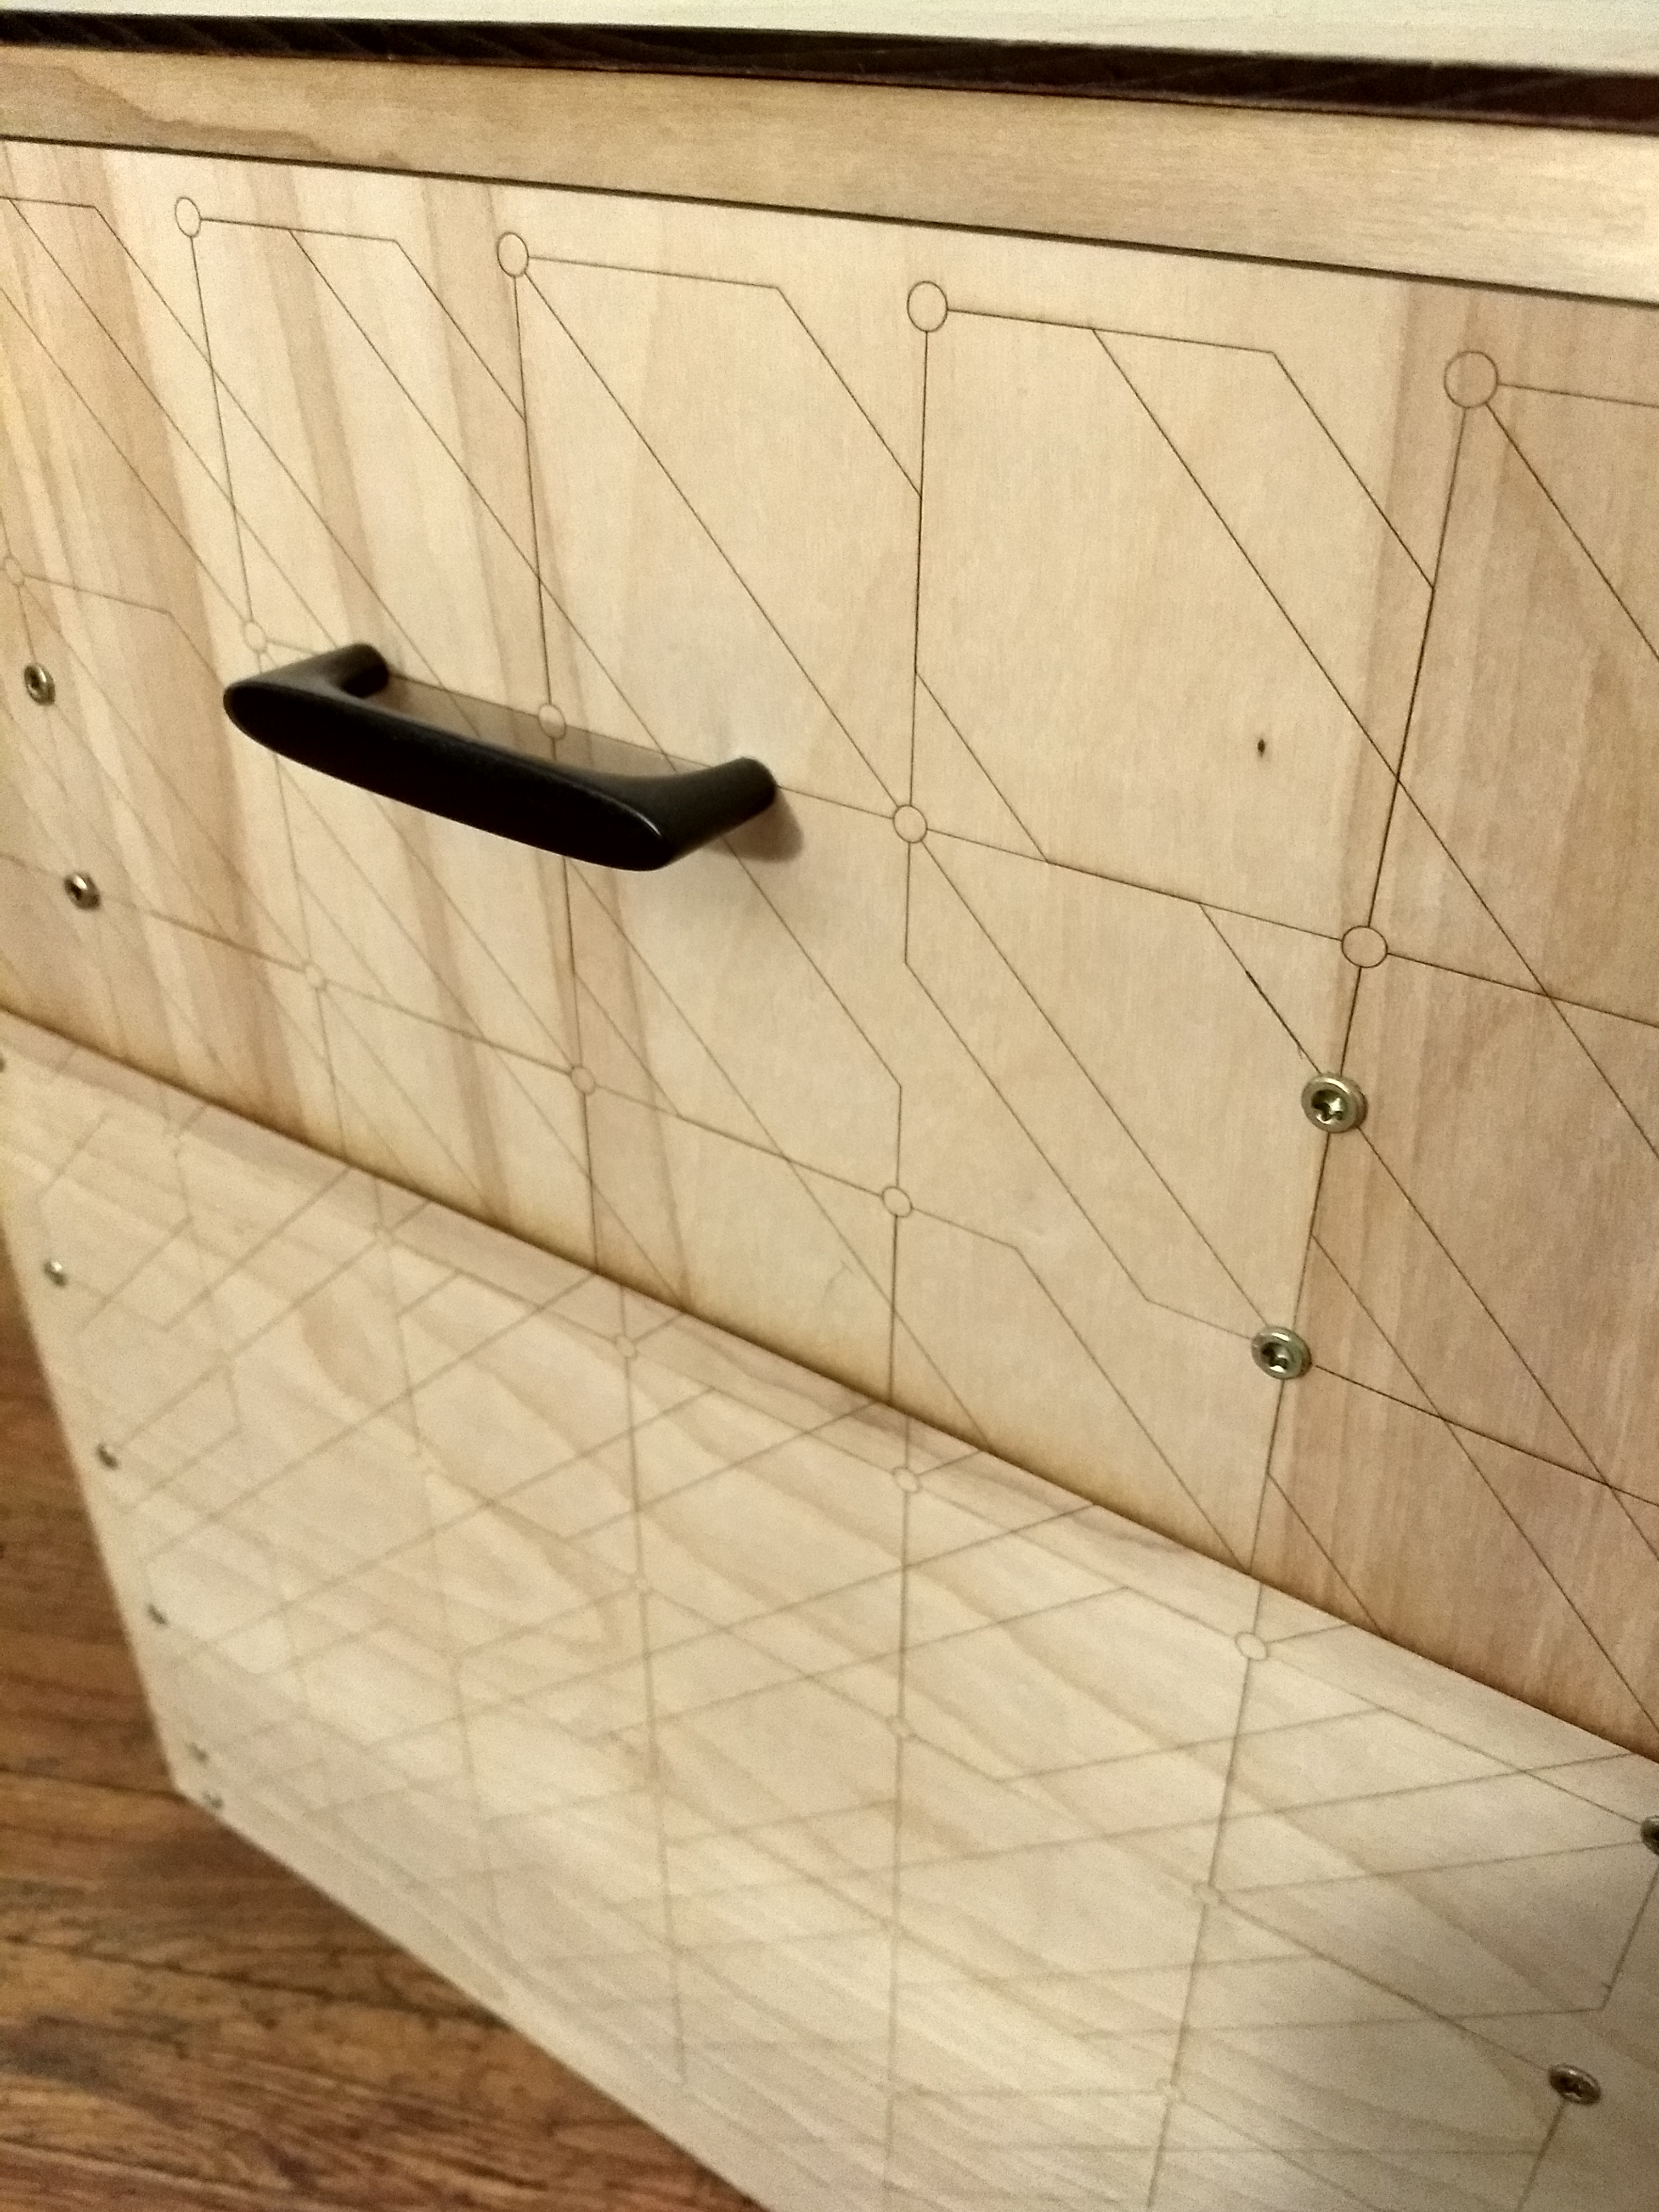
Final Cut Design

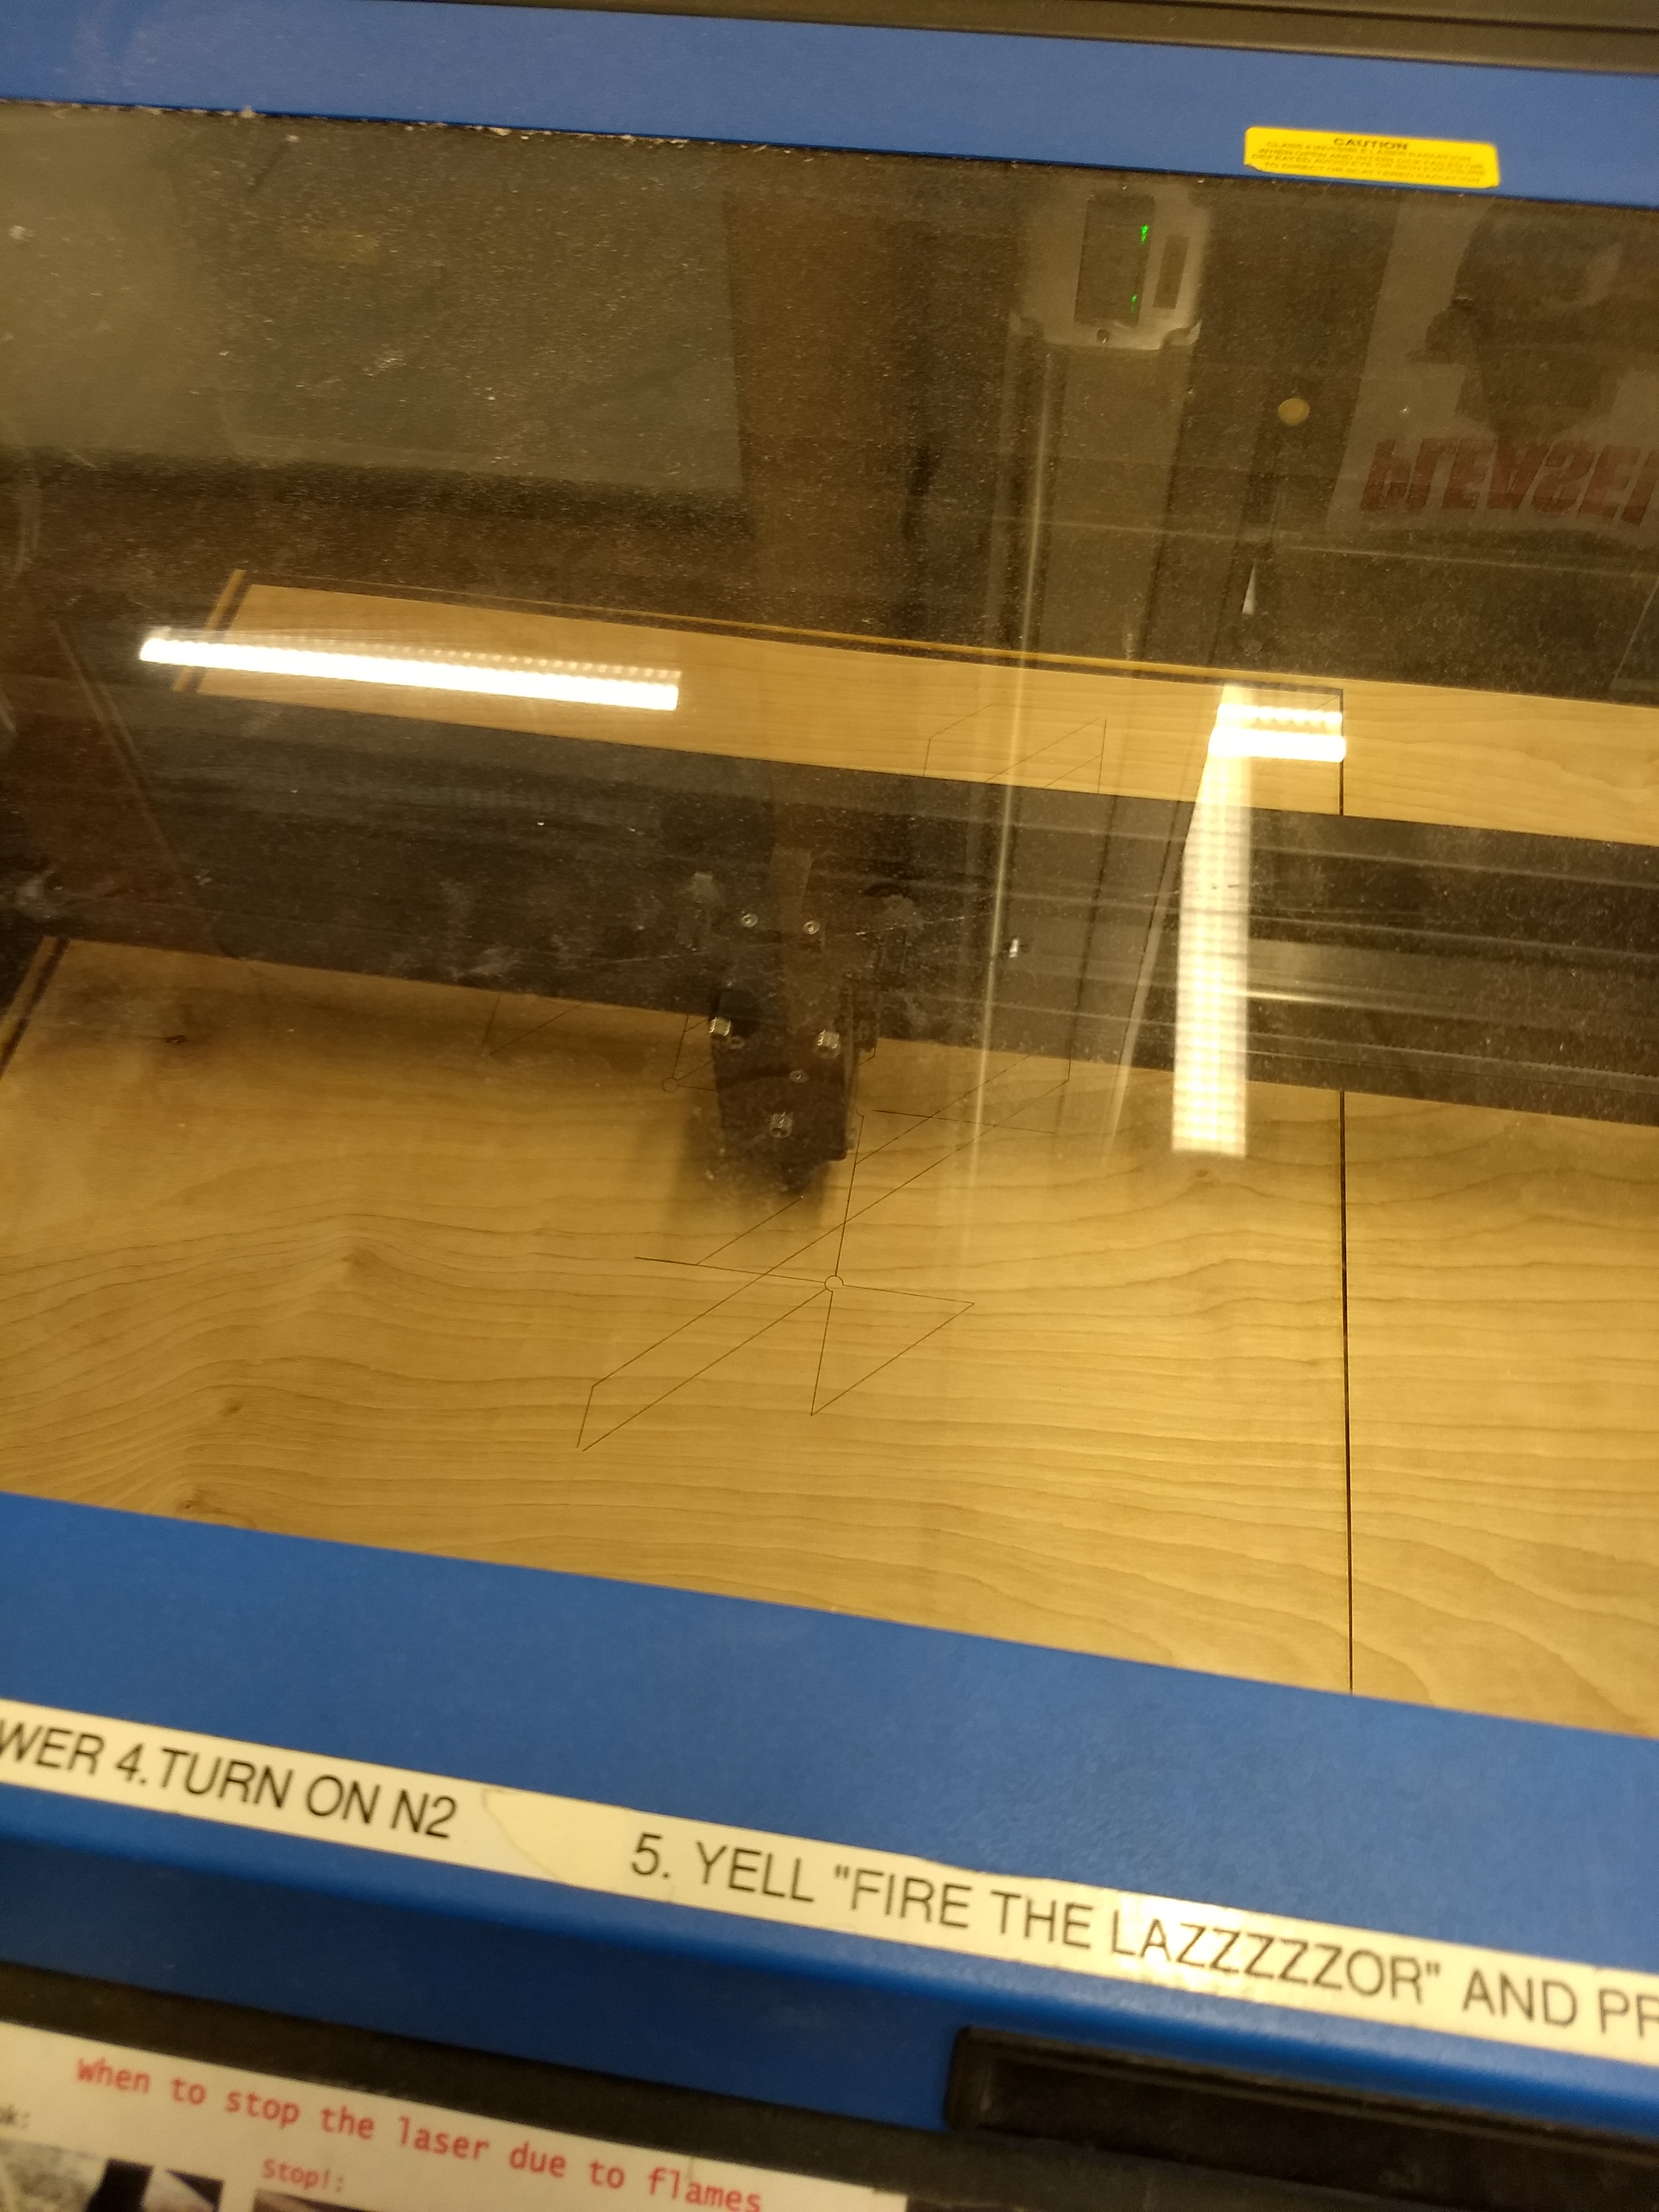
The Cutting Process
- The raw materials were too big for the laser cutter so I did a lot of cutting with a table saw
- Once the plywood was to size, the laser cutter was used to etch and cut the pieces
- I vector etched everything instead of raster etching (lines instead of areas)
- The laser cutting took about an hour total
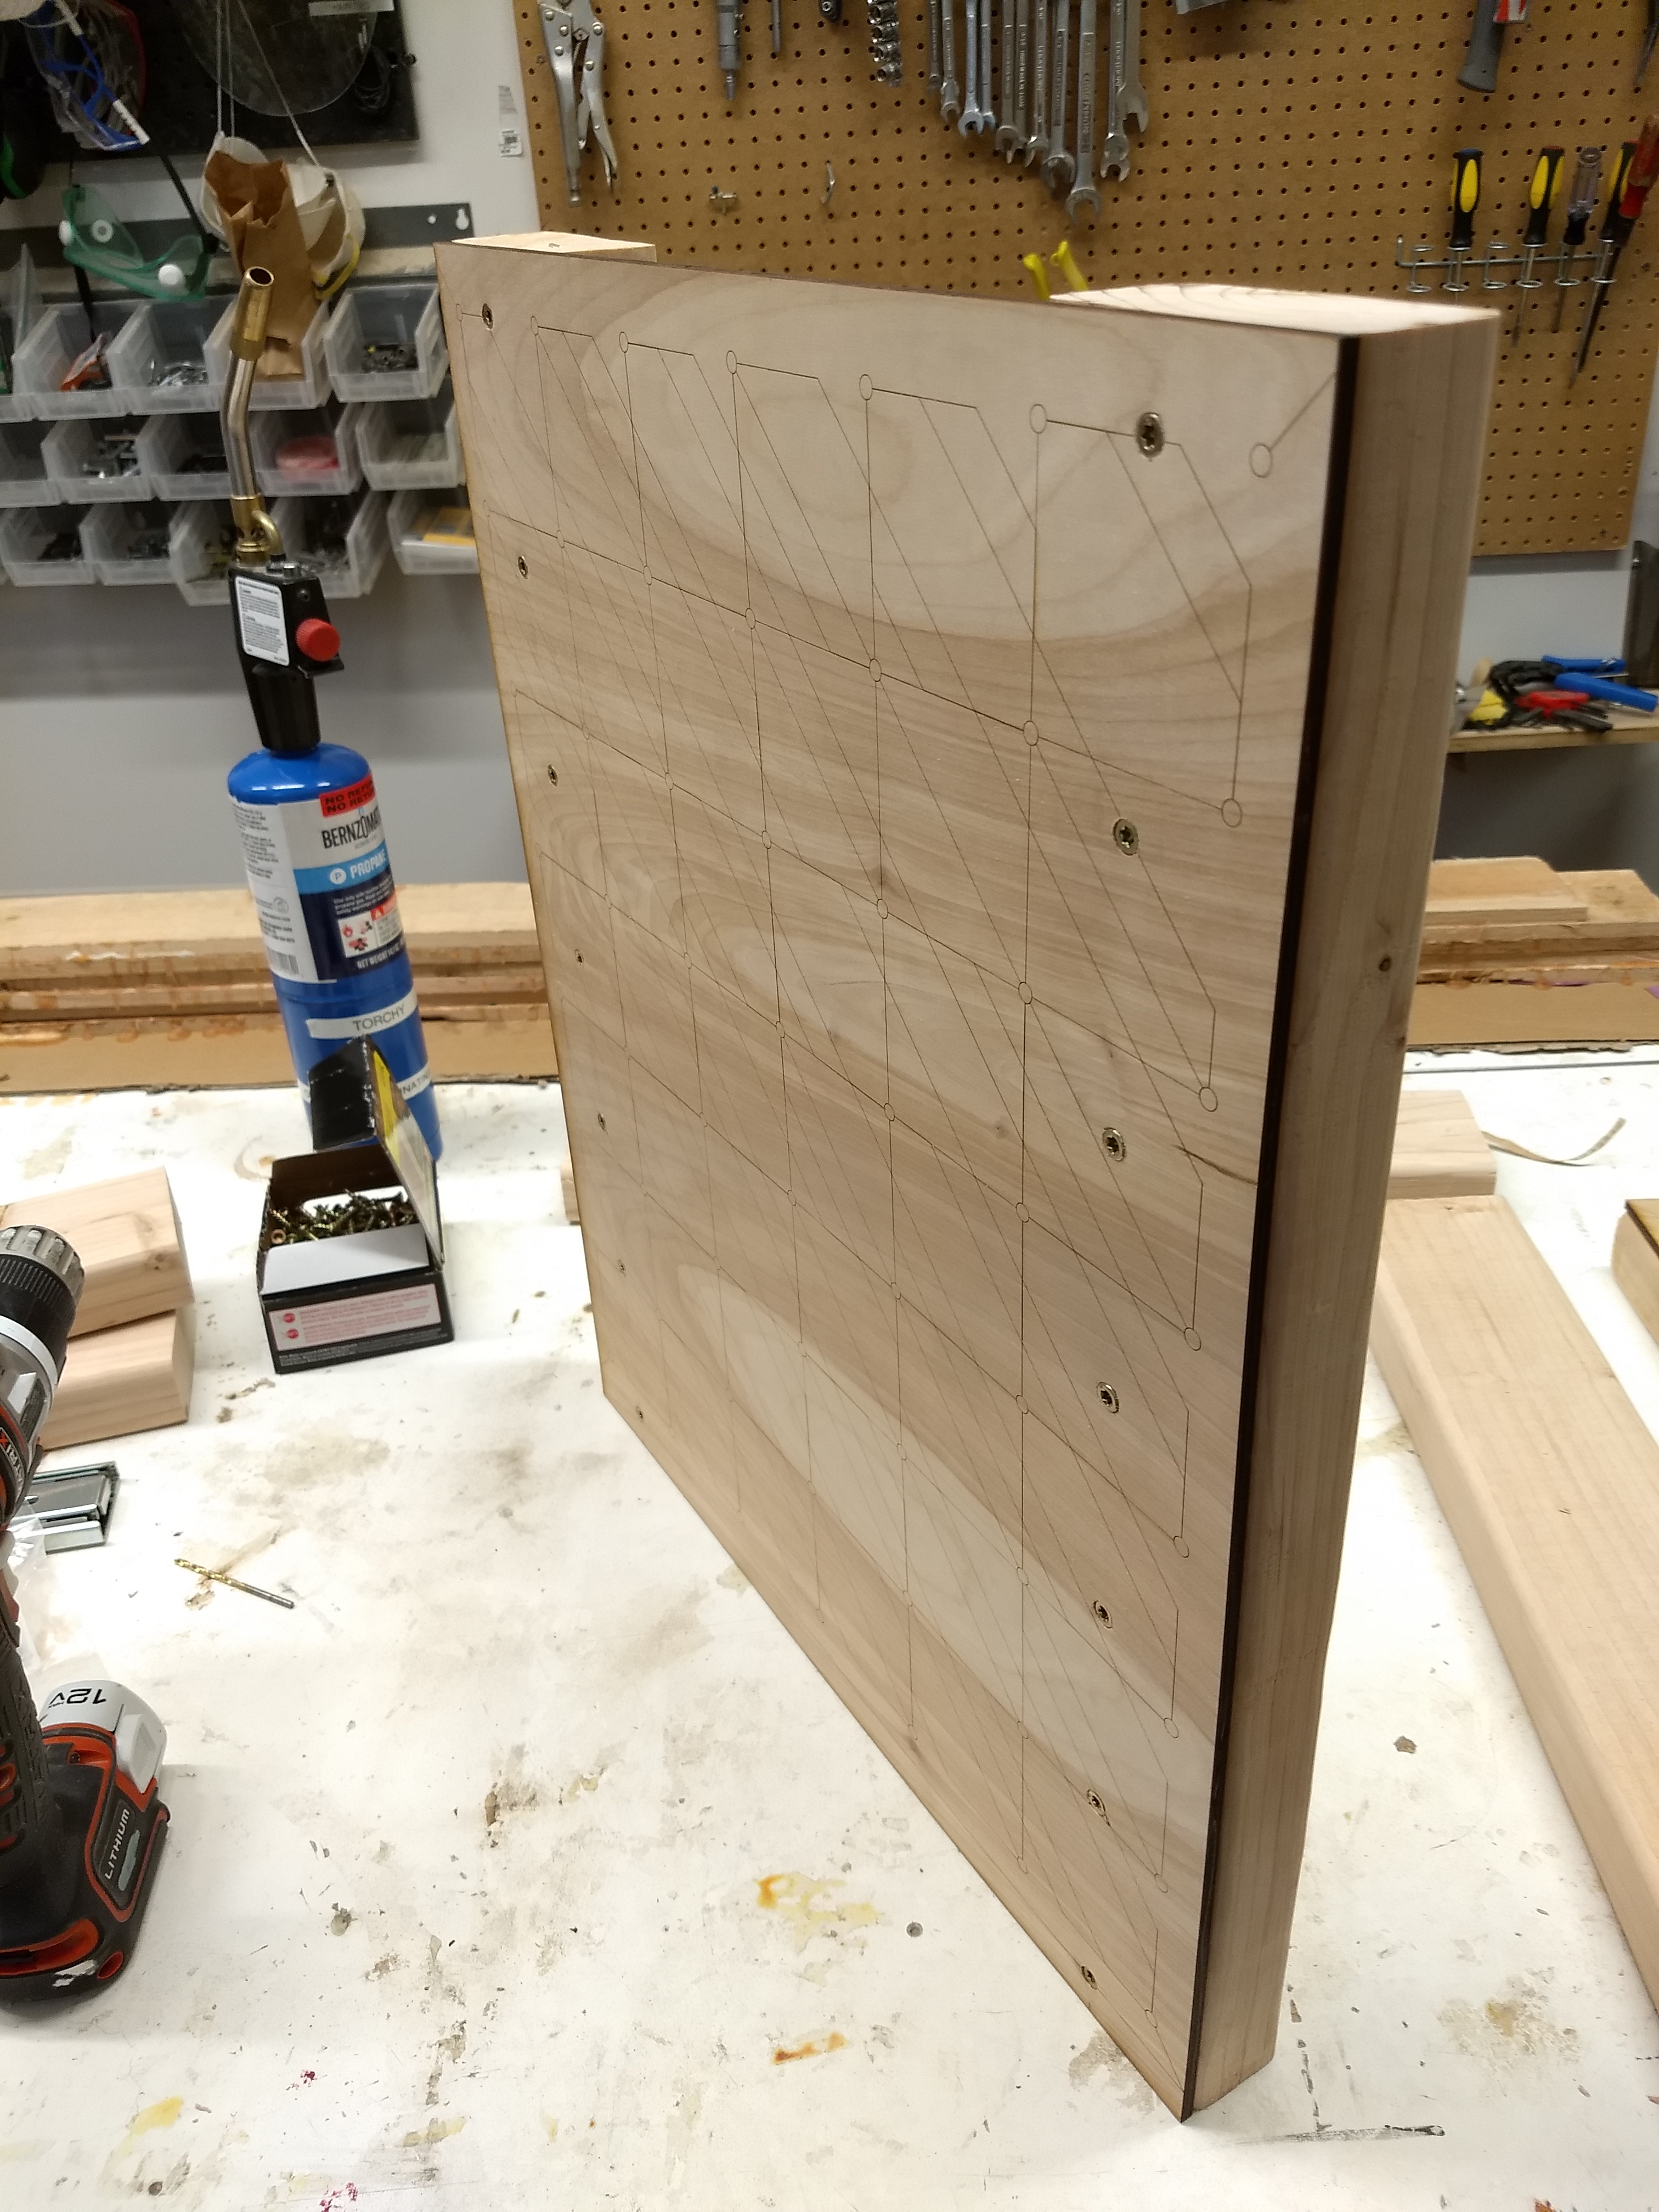
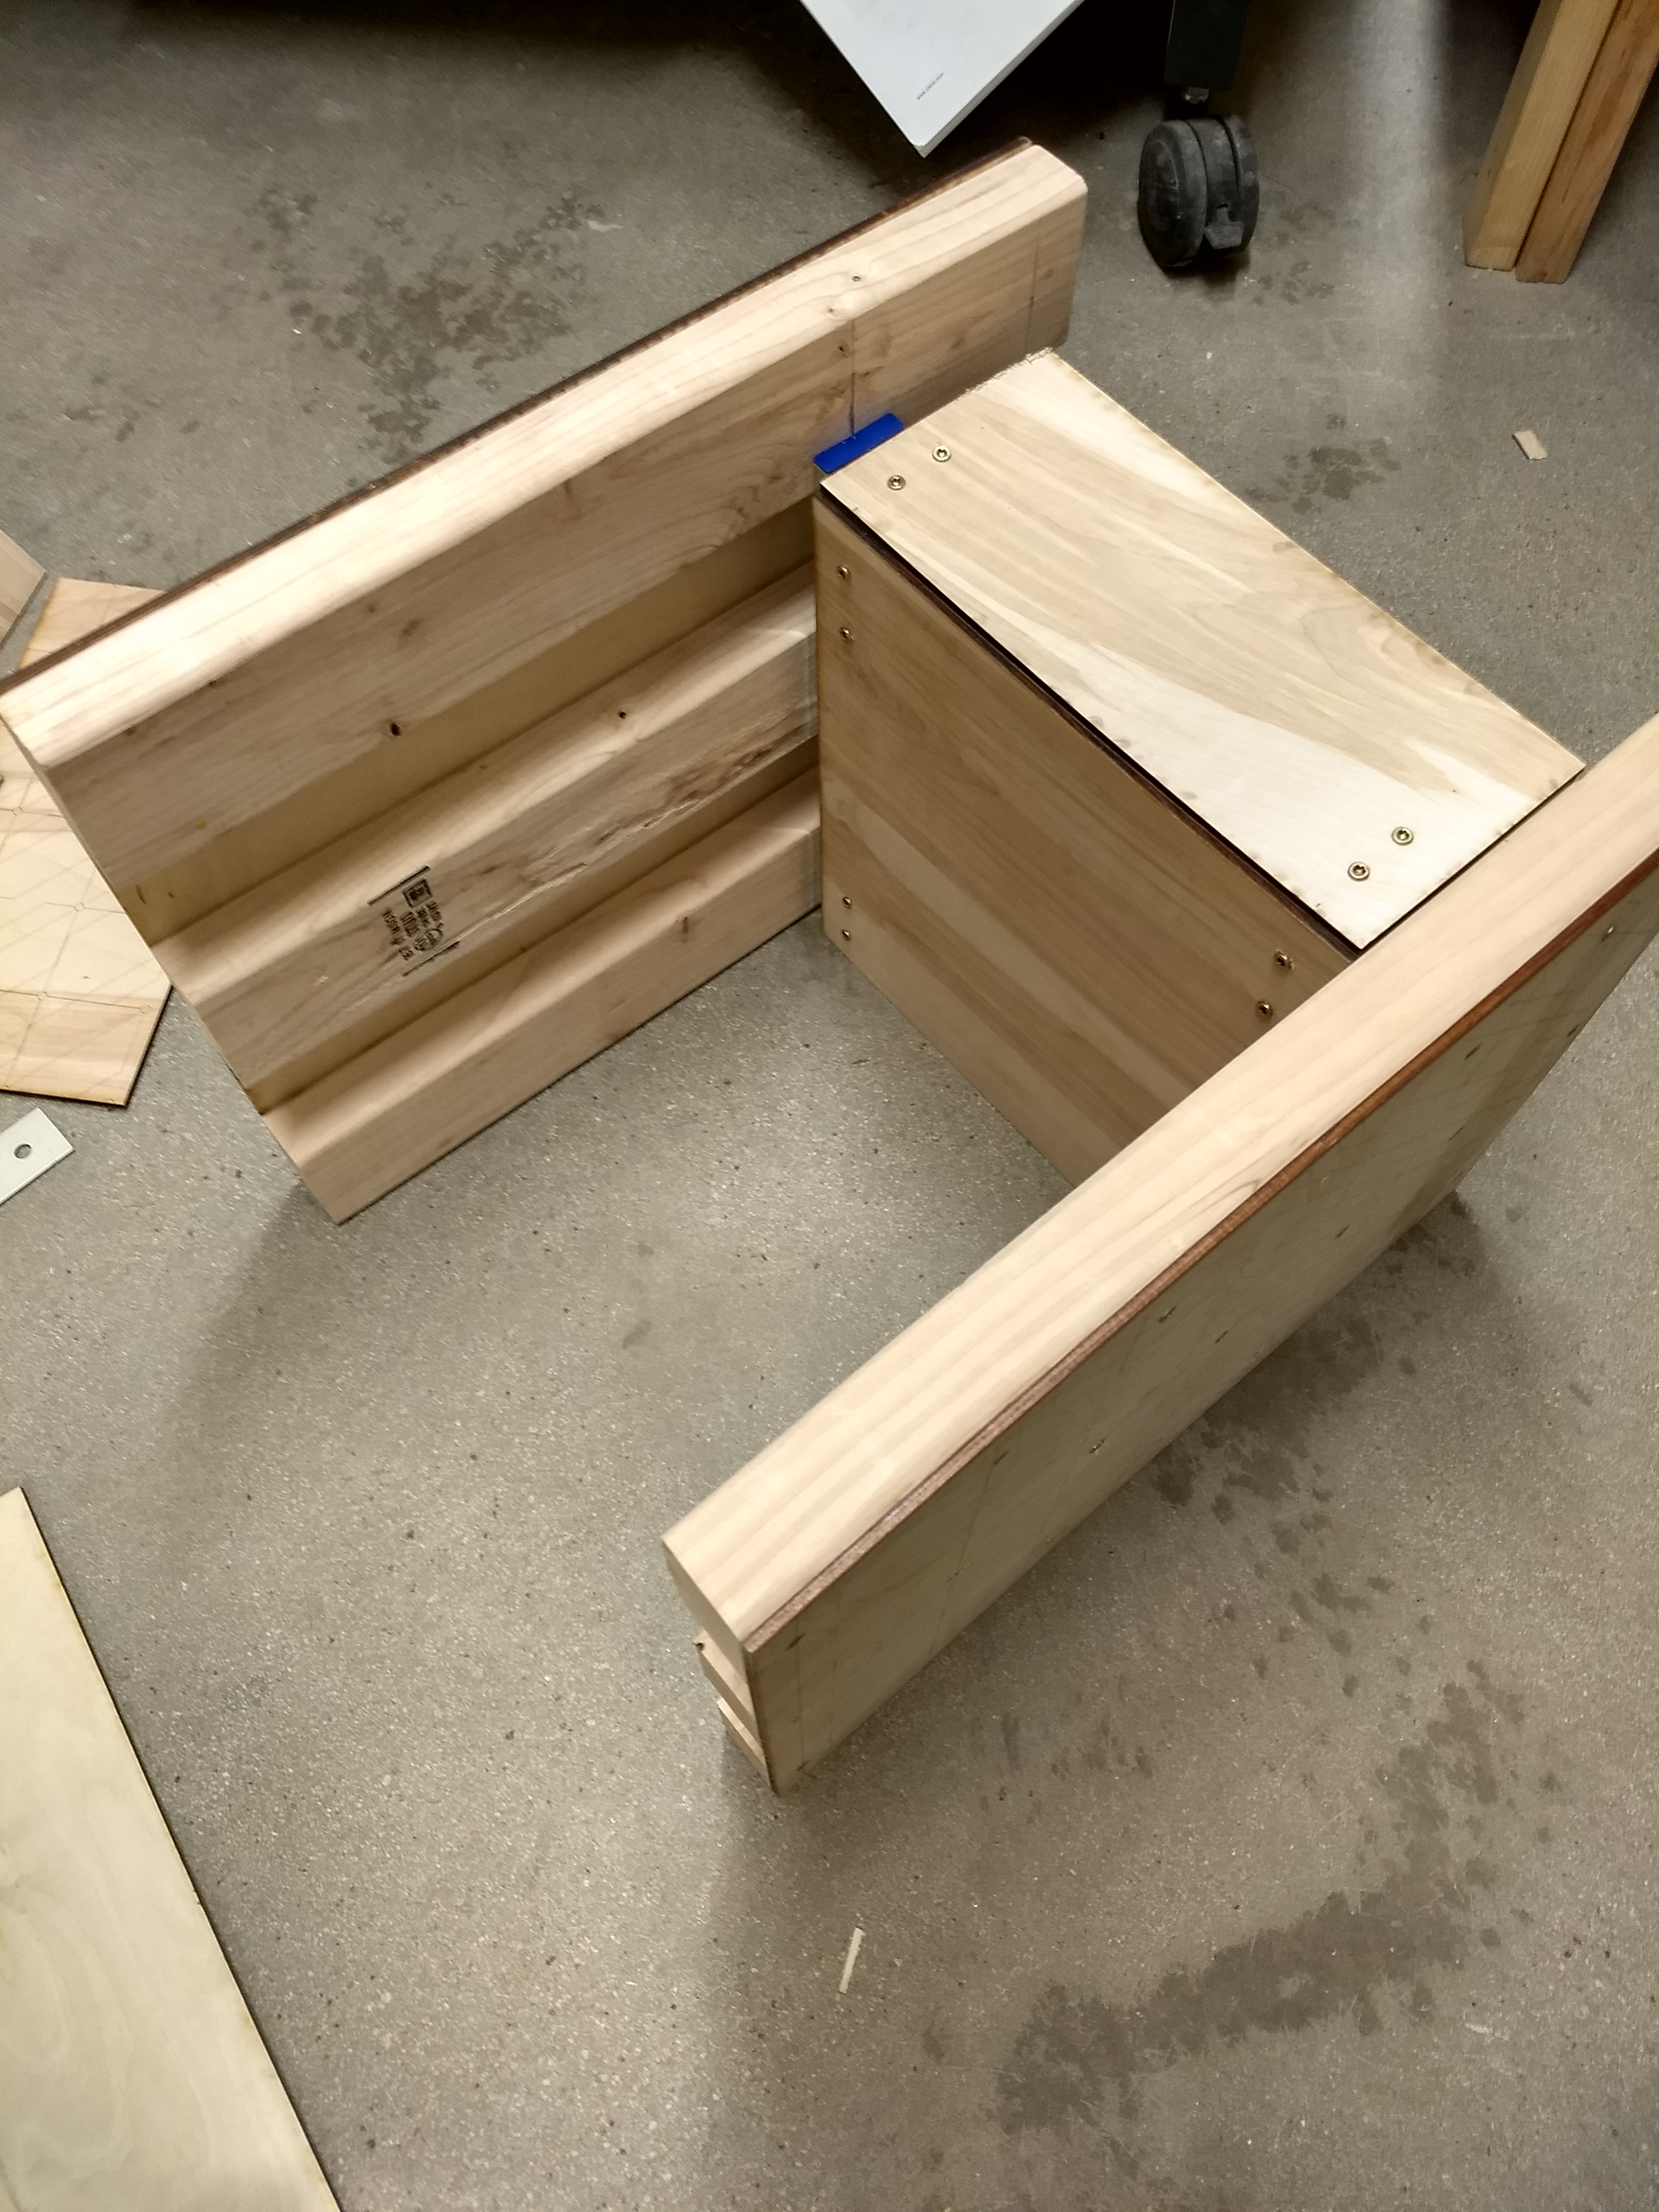
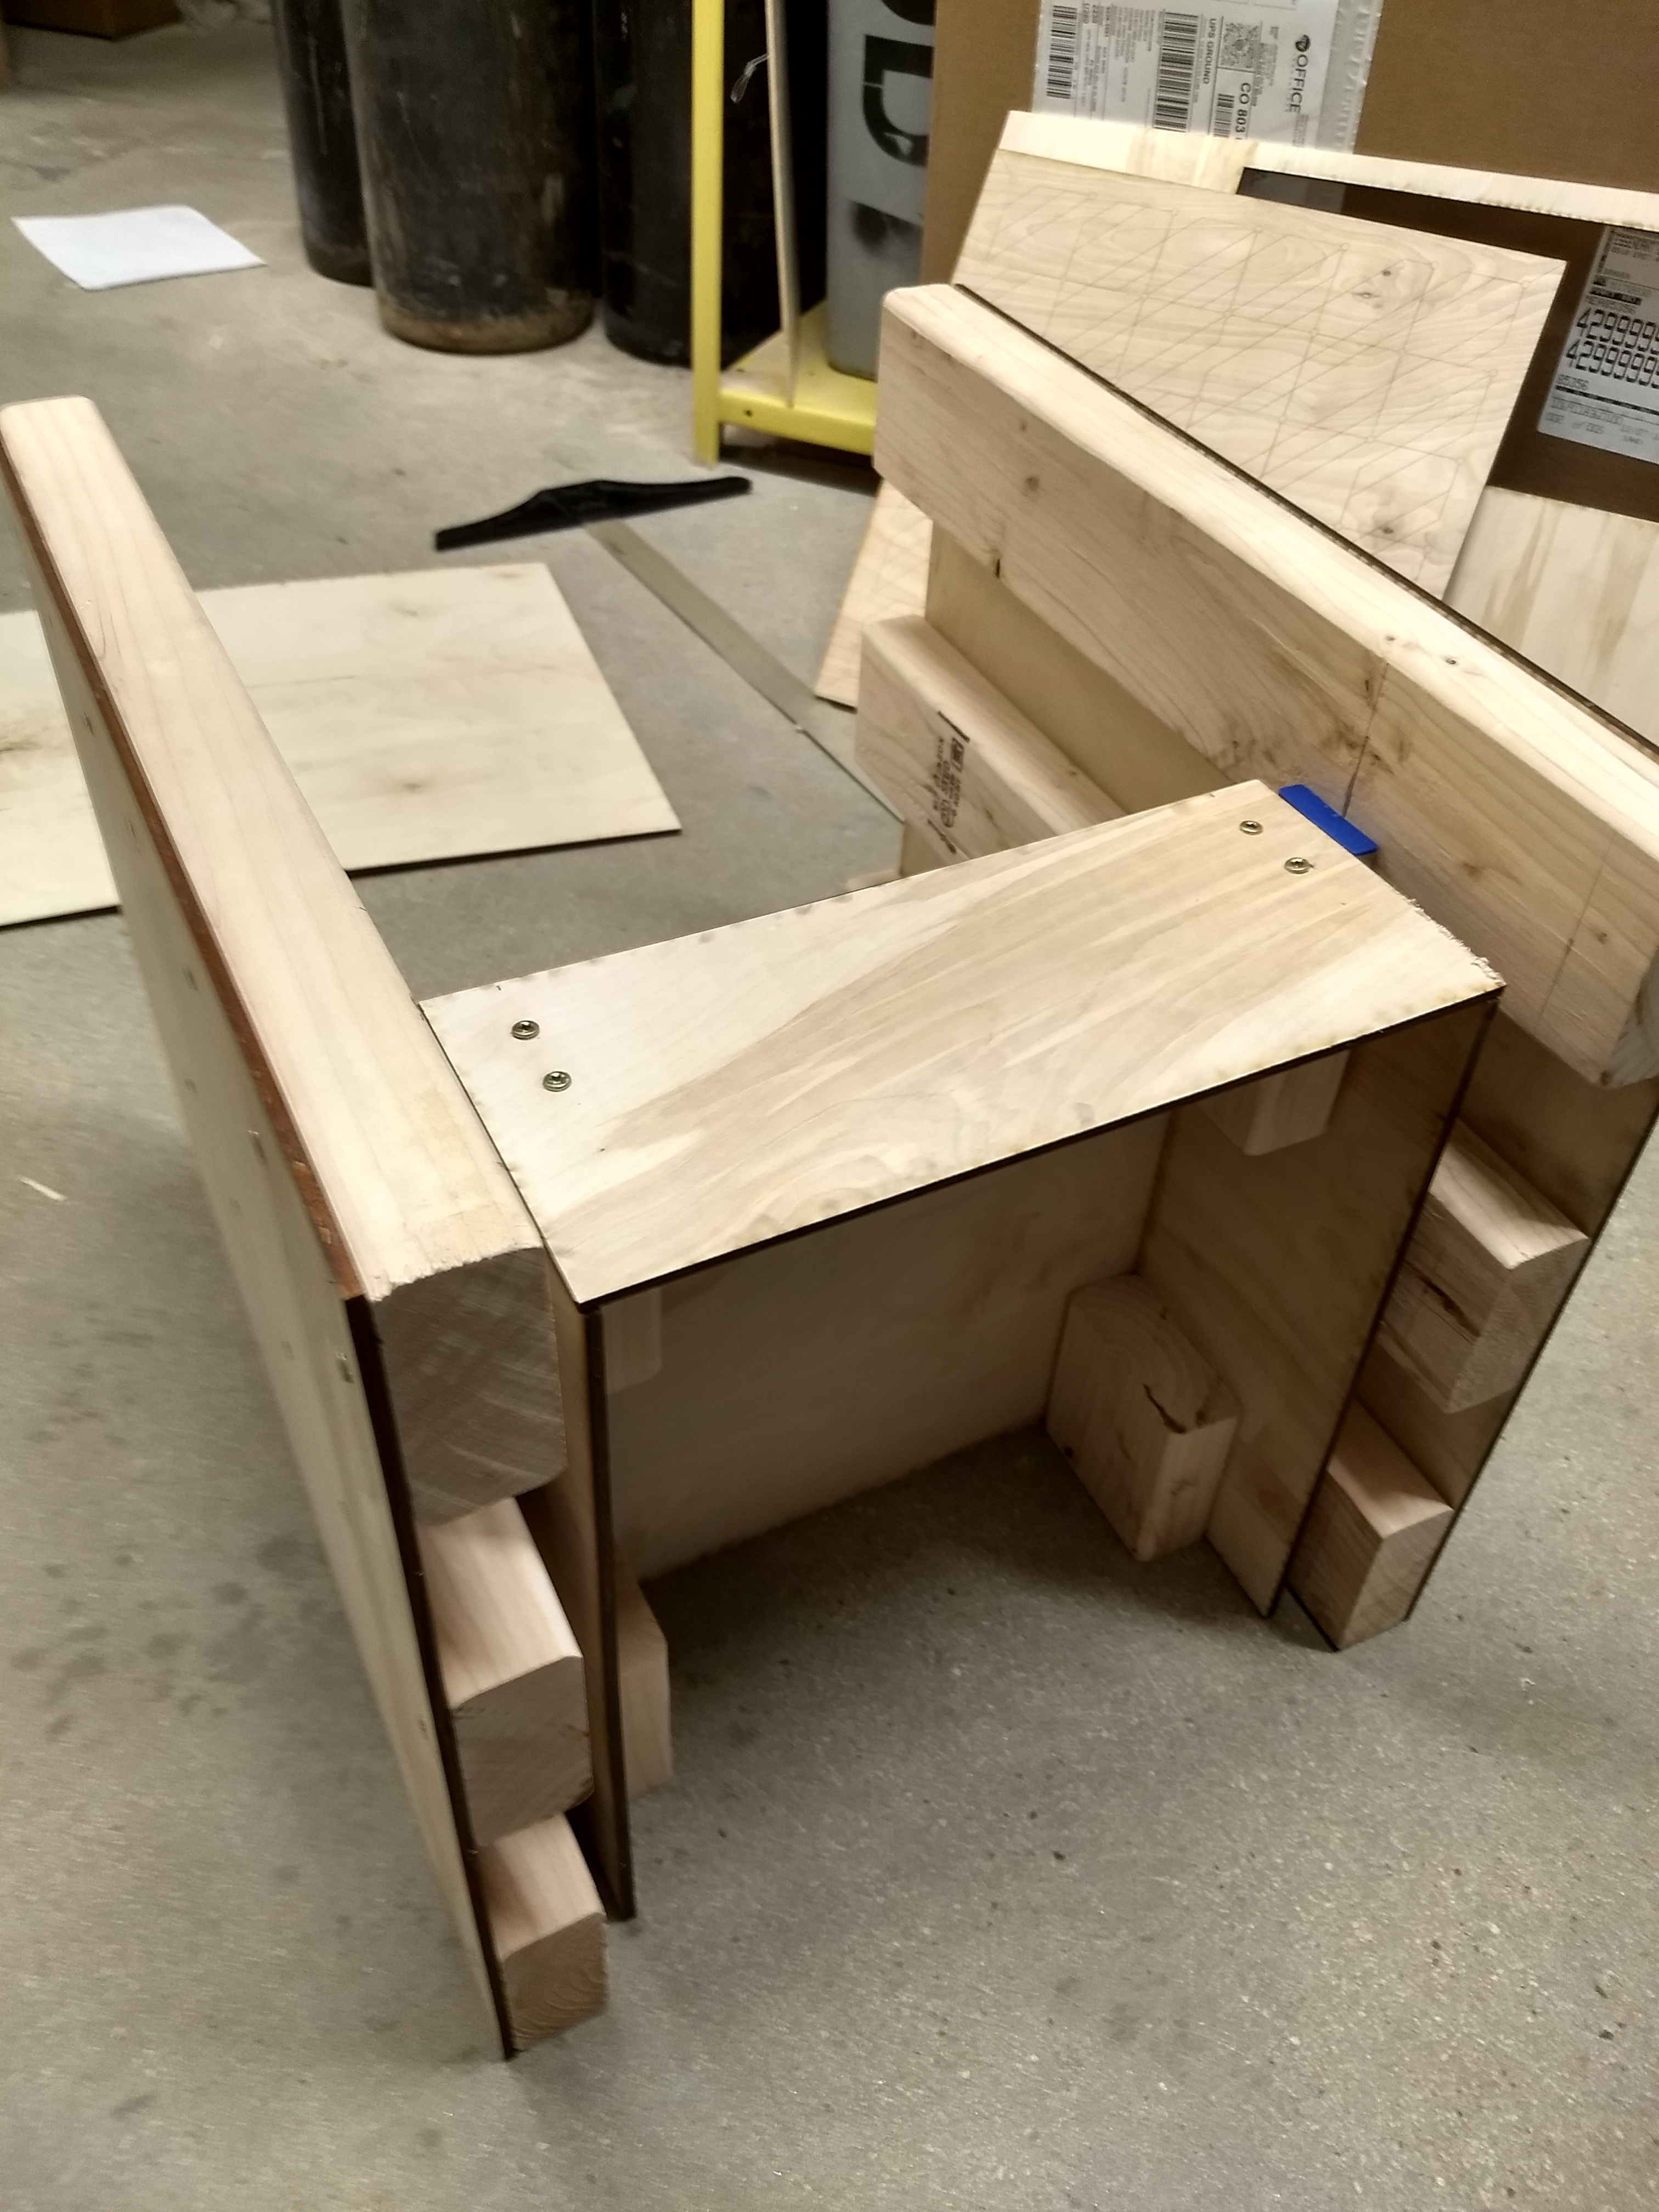
The Assembly Process
- Everything was connected with 1 ¼” inch construction screws
- The process went fairly smooth except for some warping in the wood and a screw breaking inside a 2×4
- The most time intensive part of the project was attaching the drawer
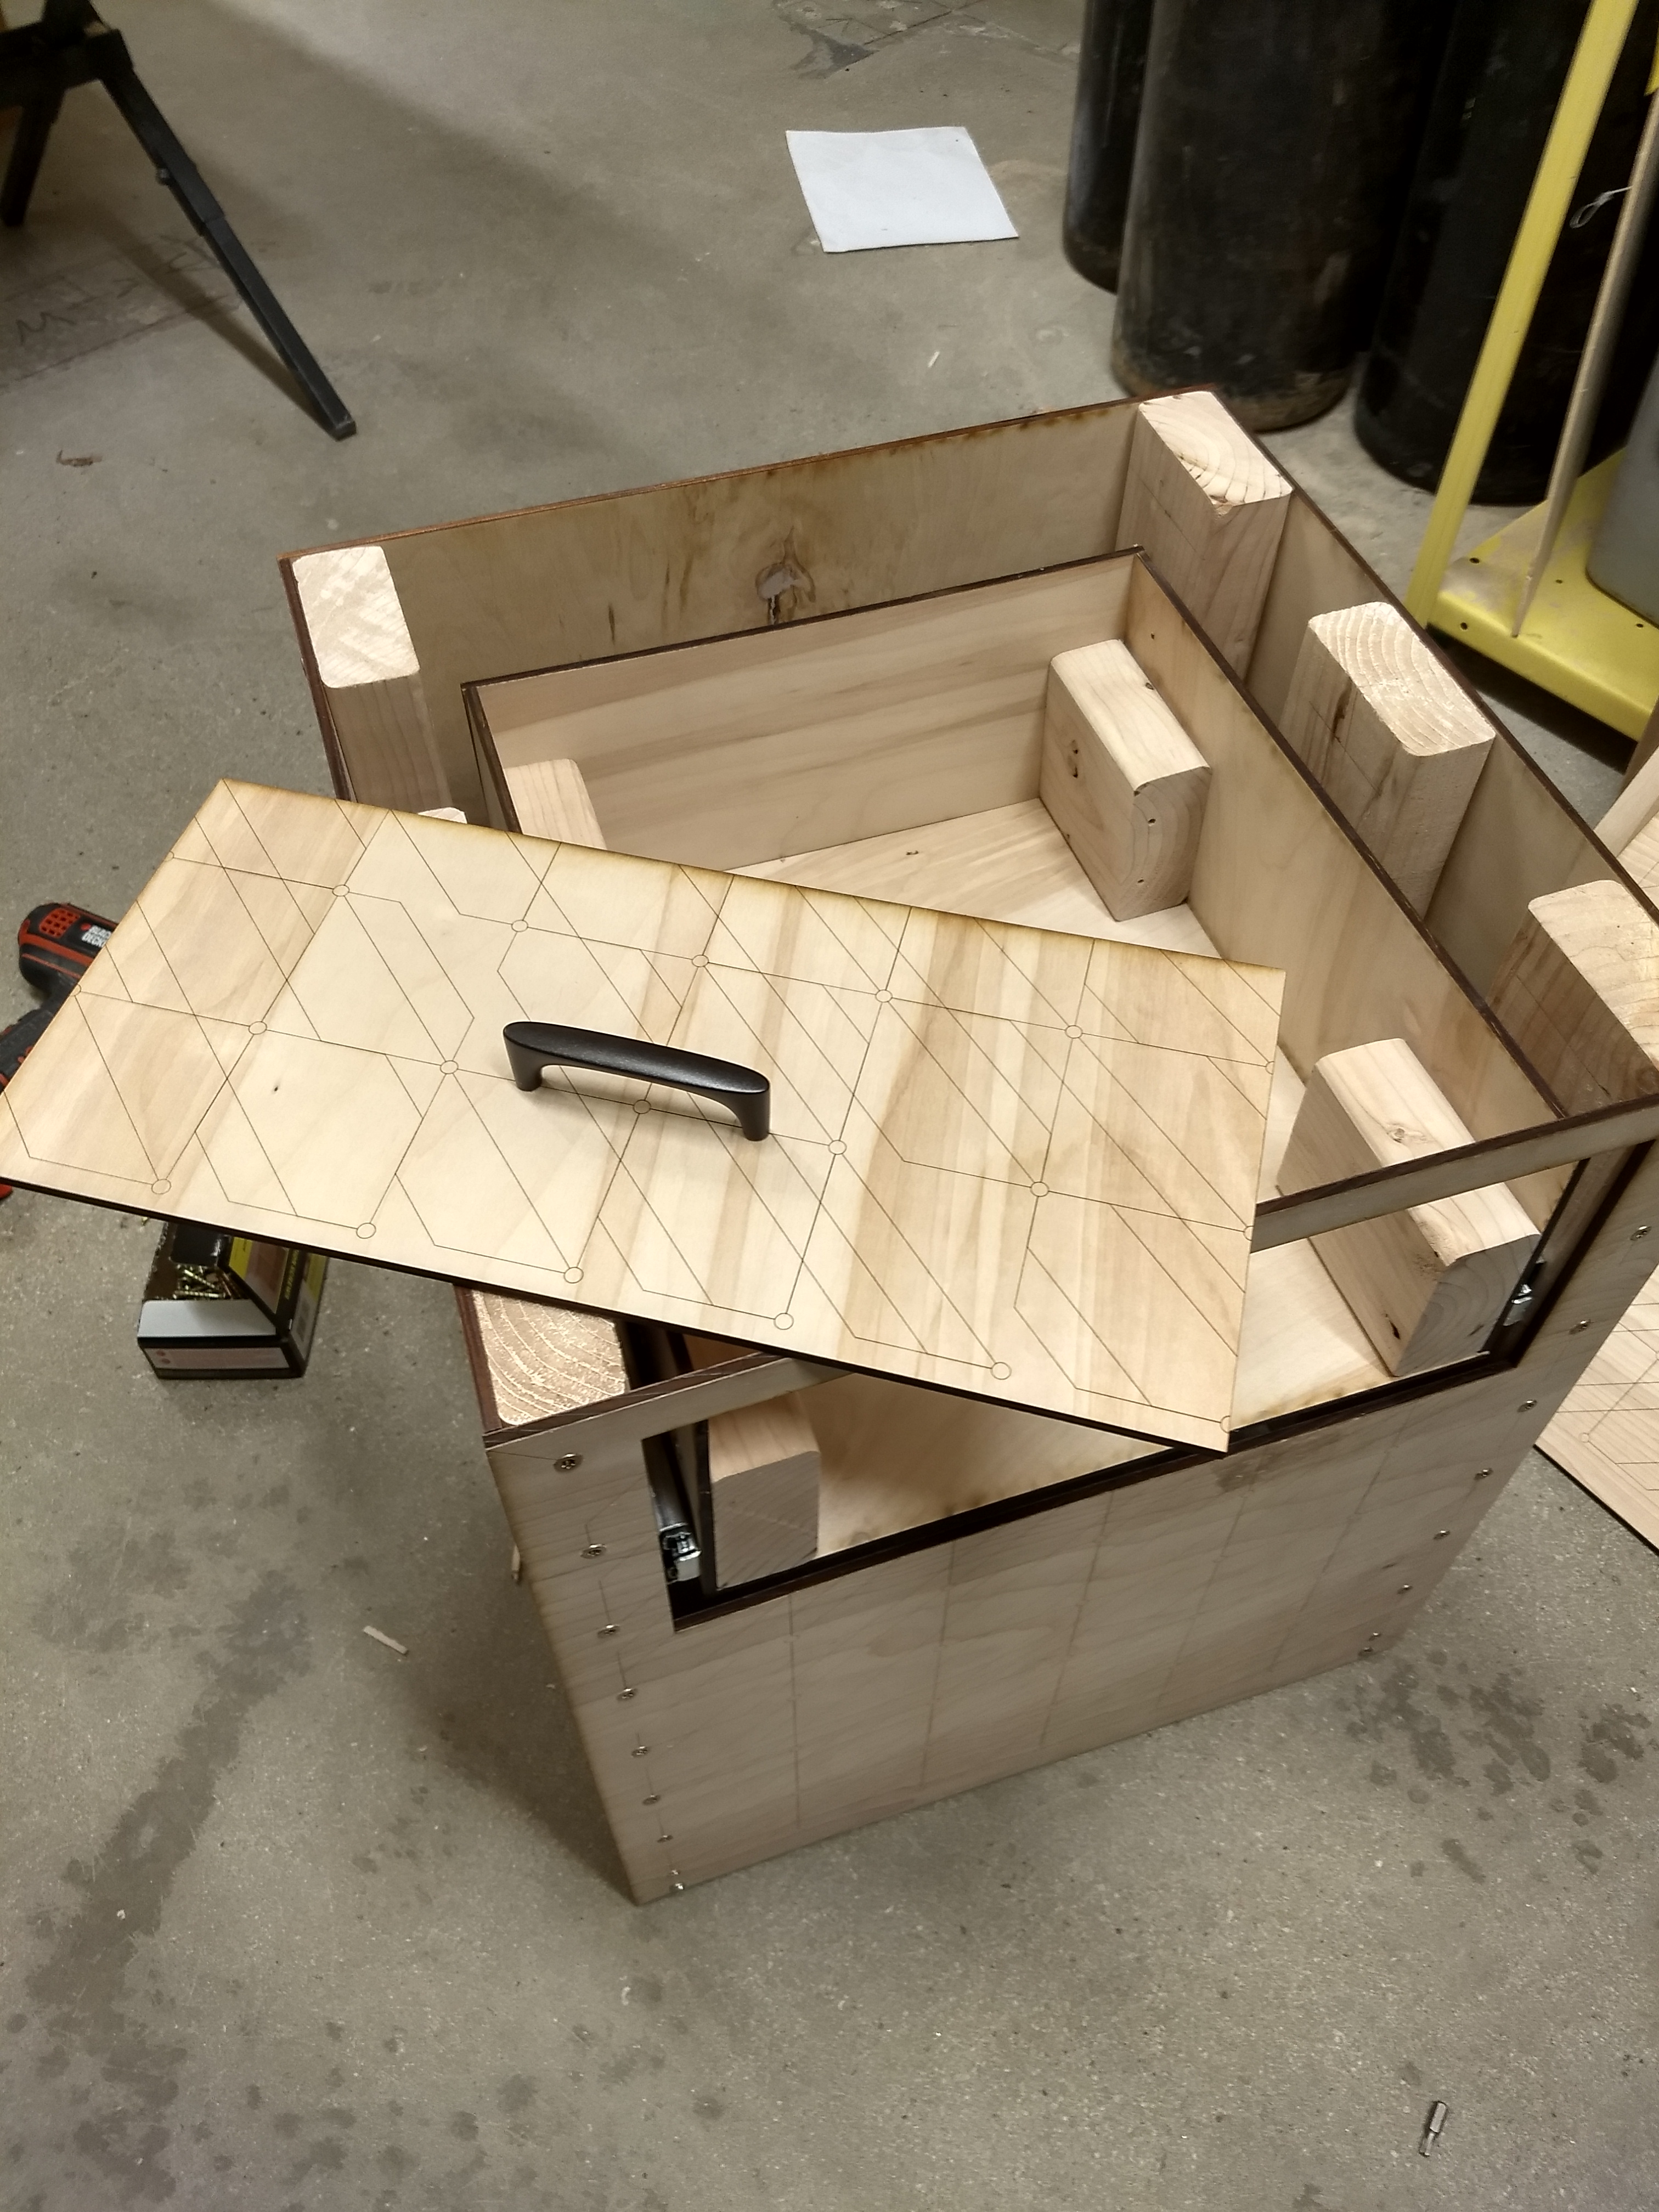

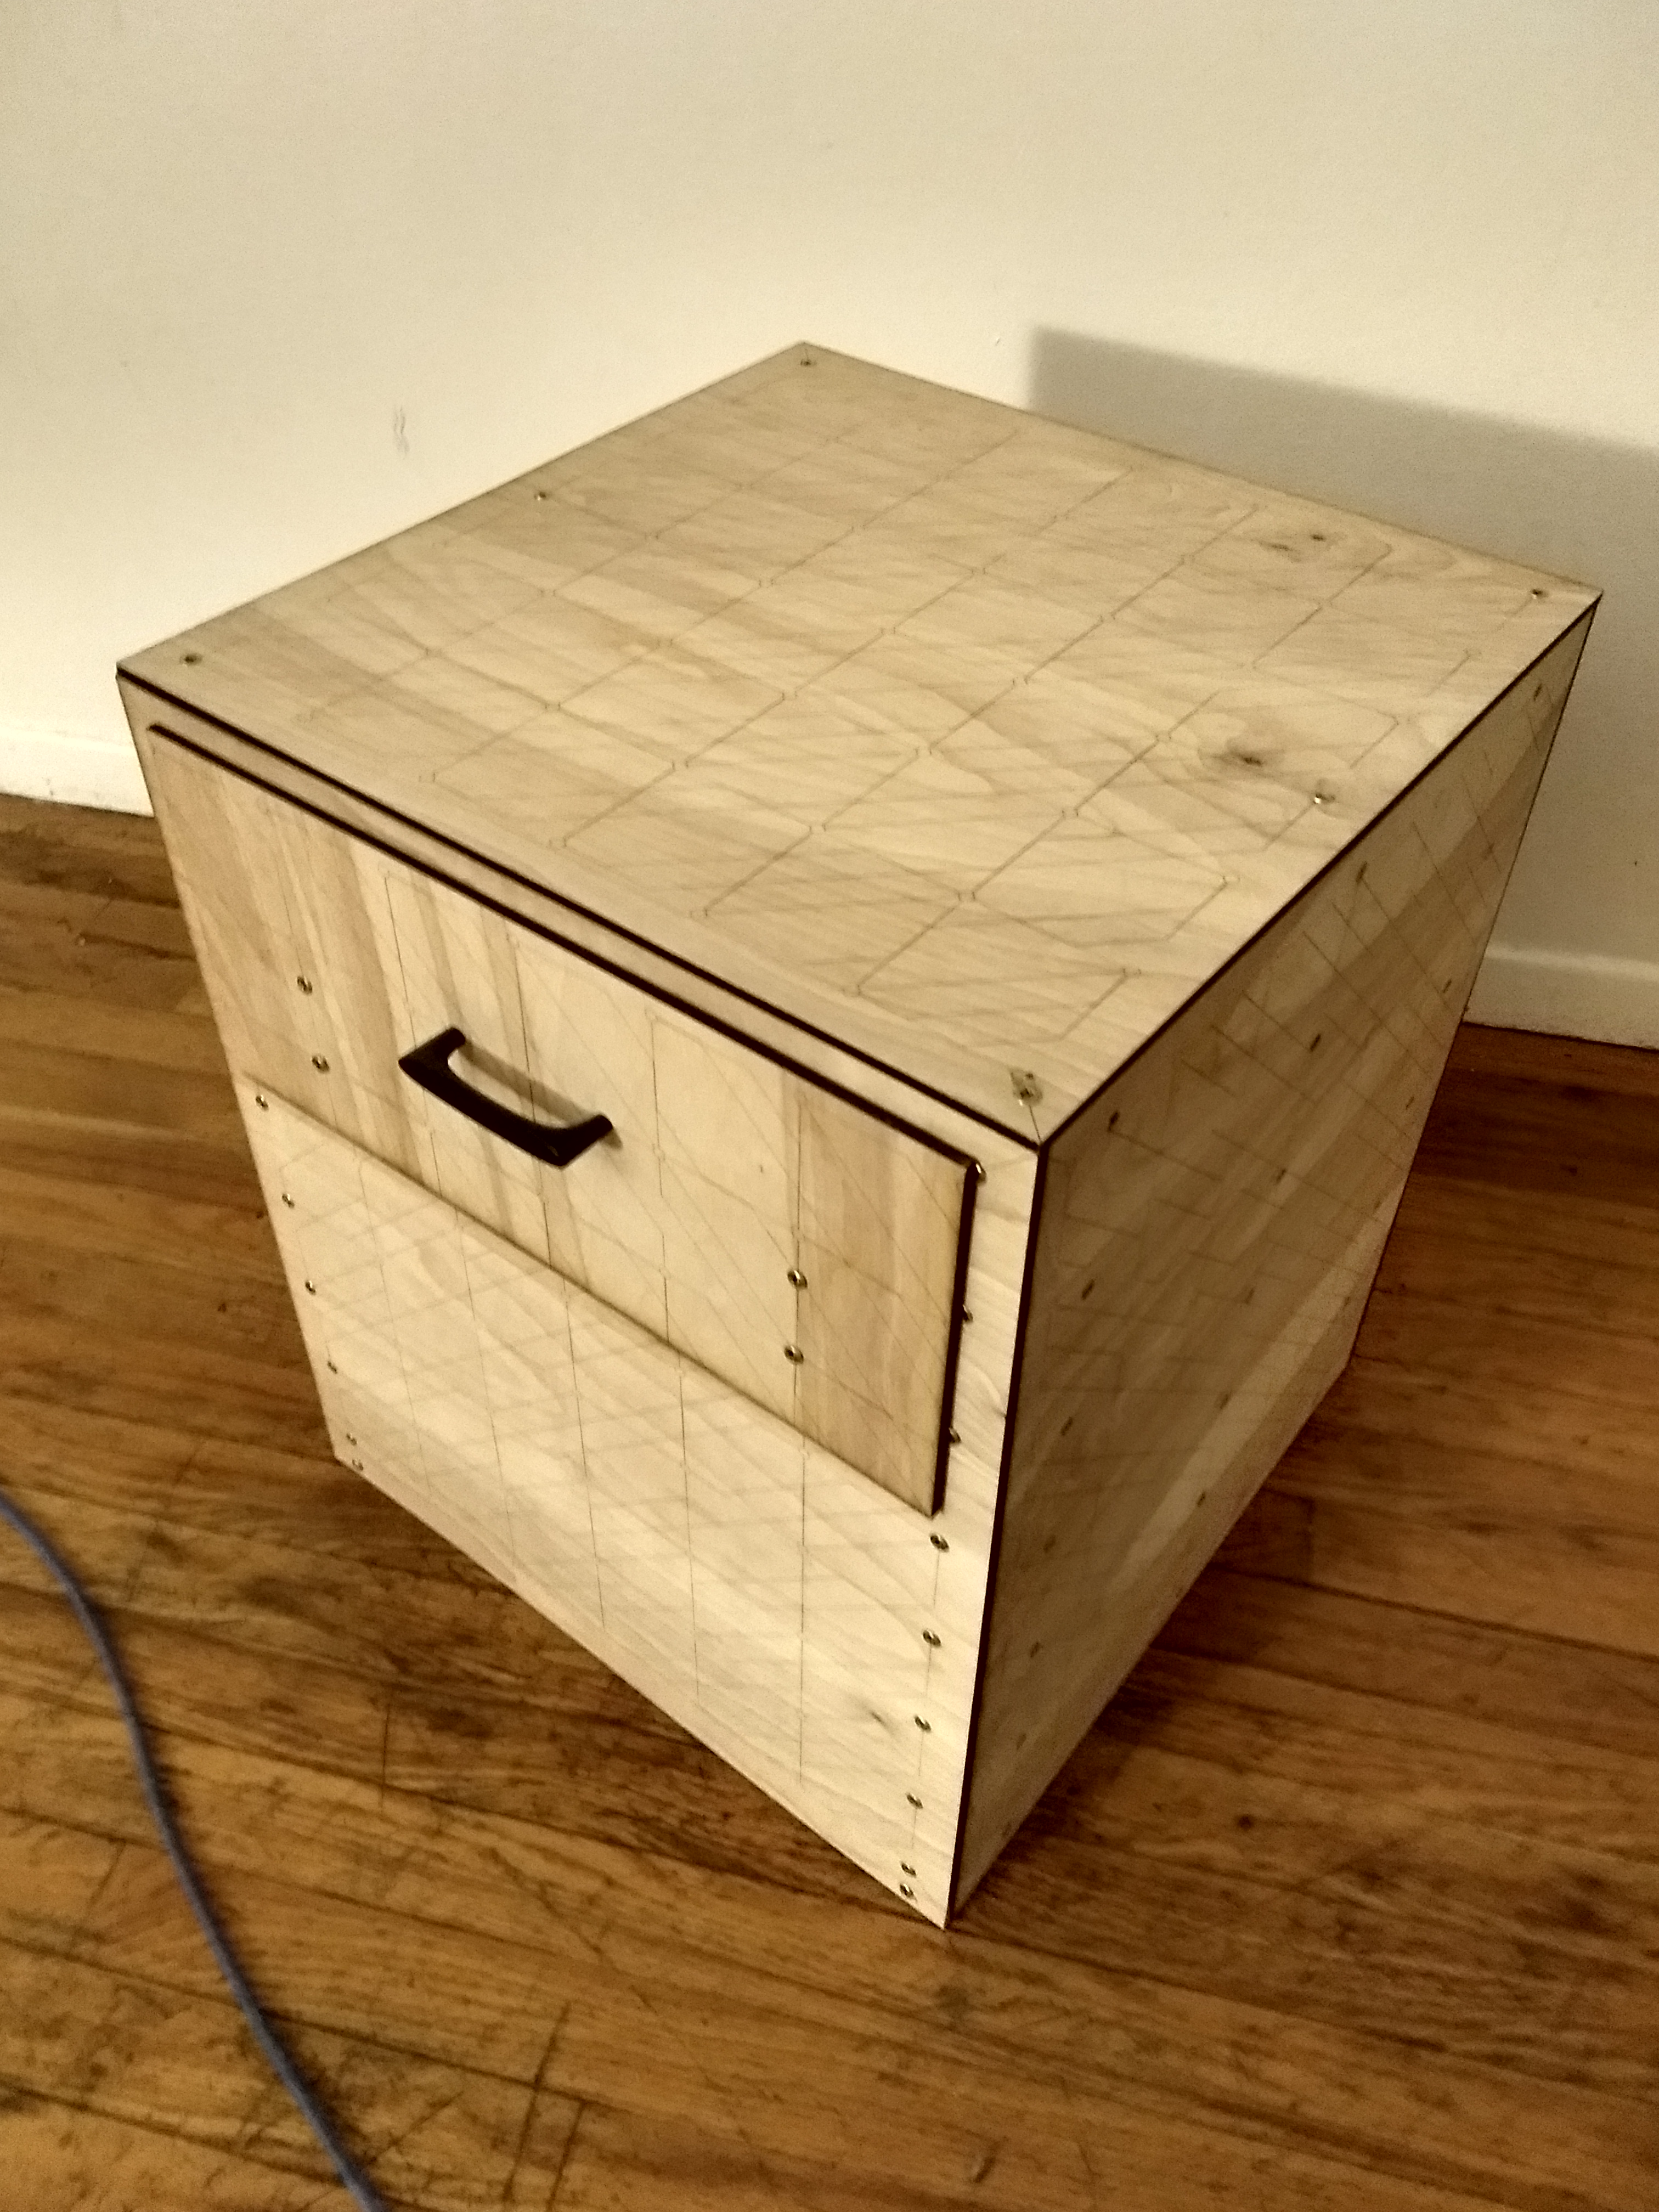
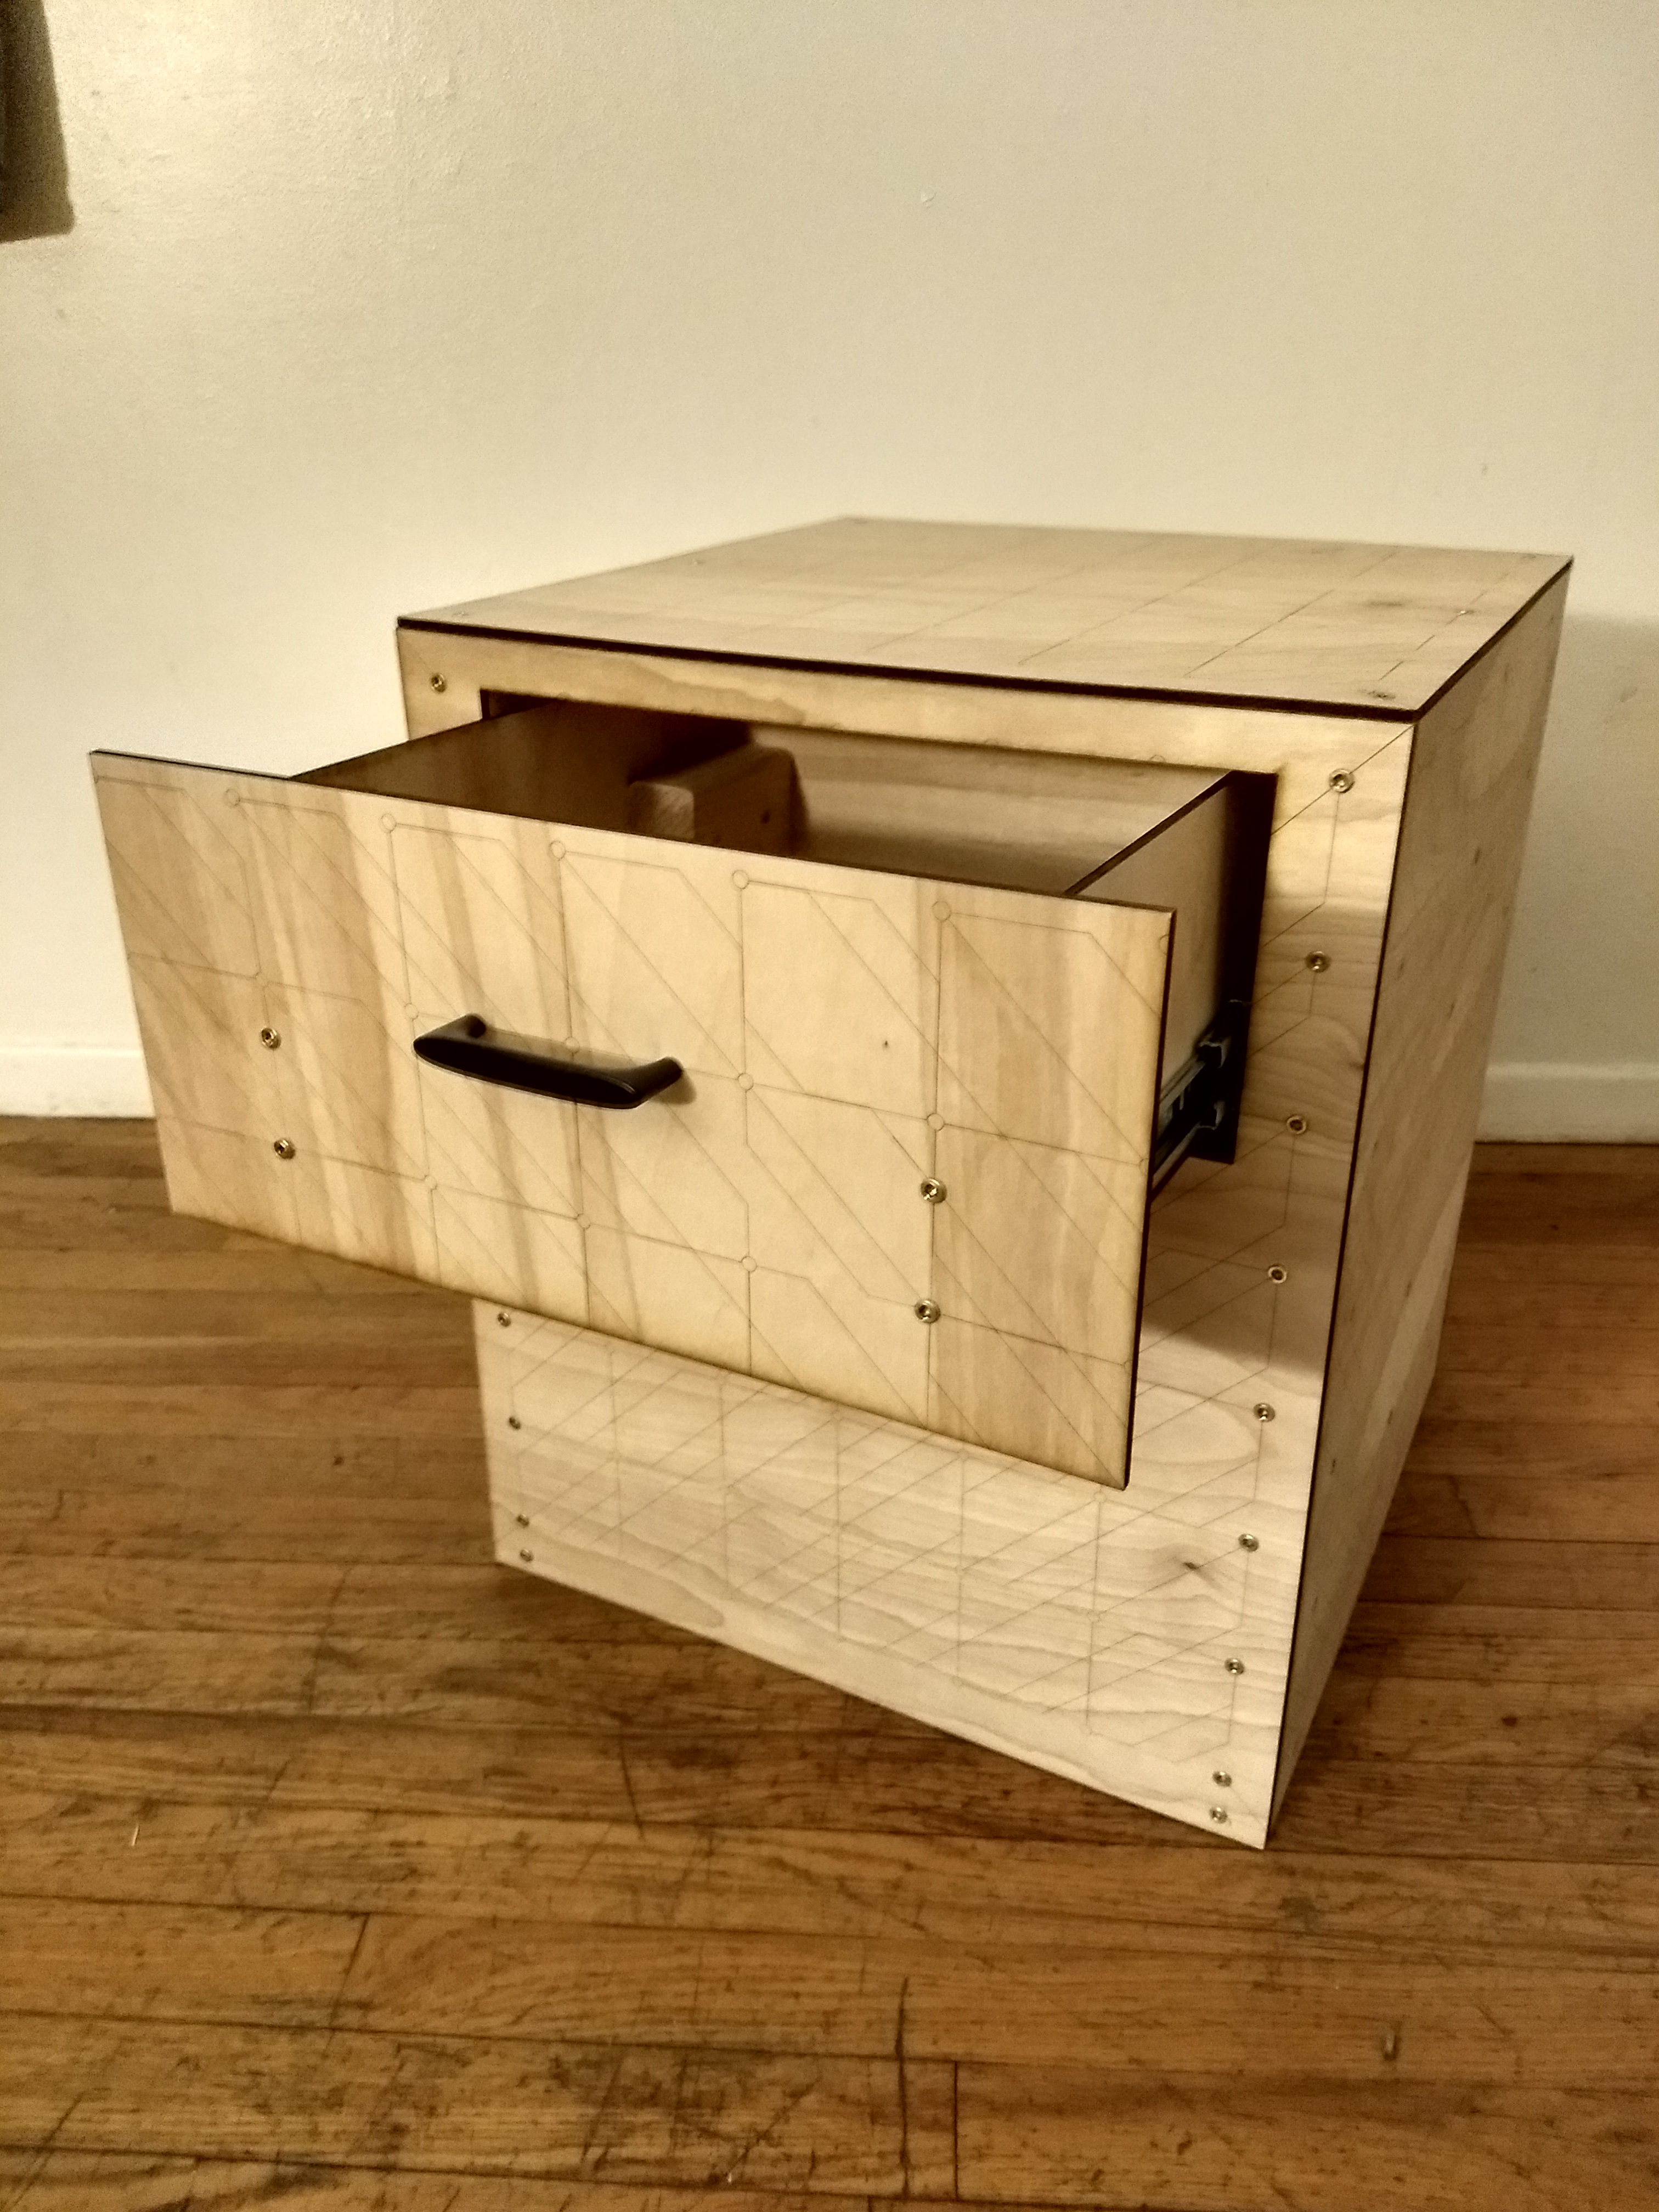
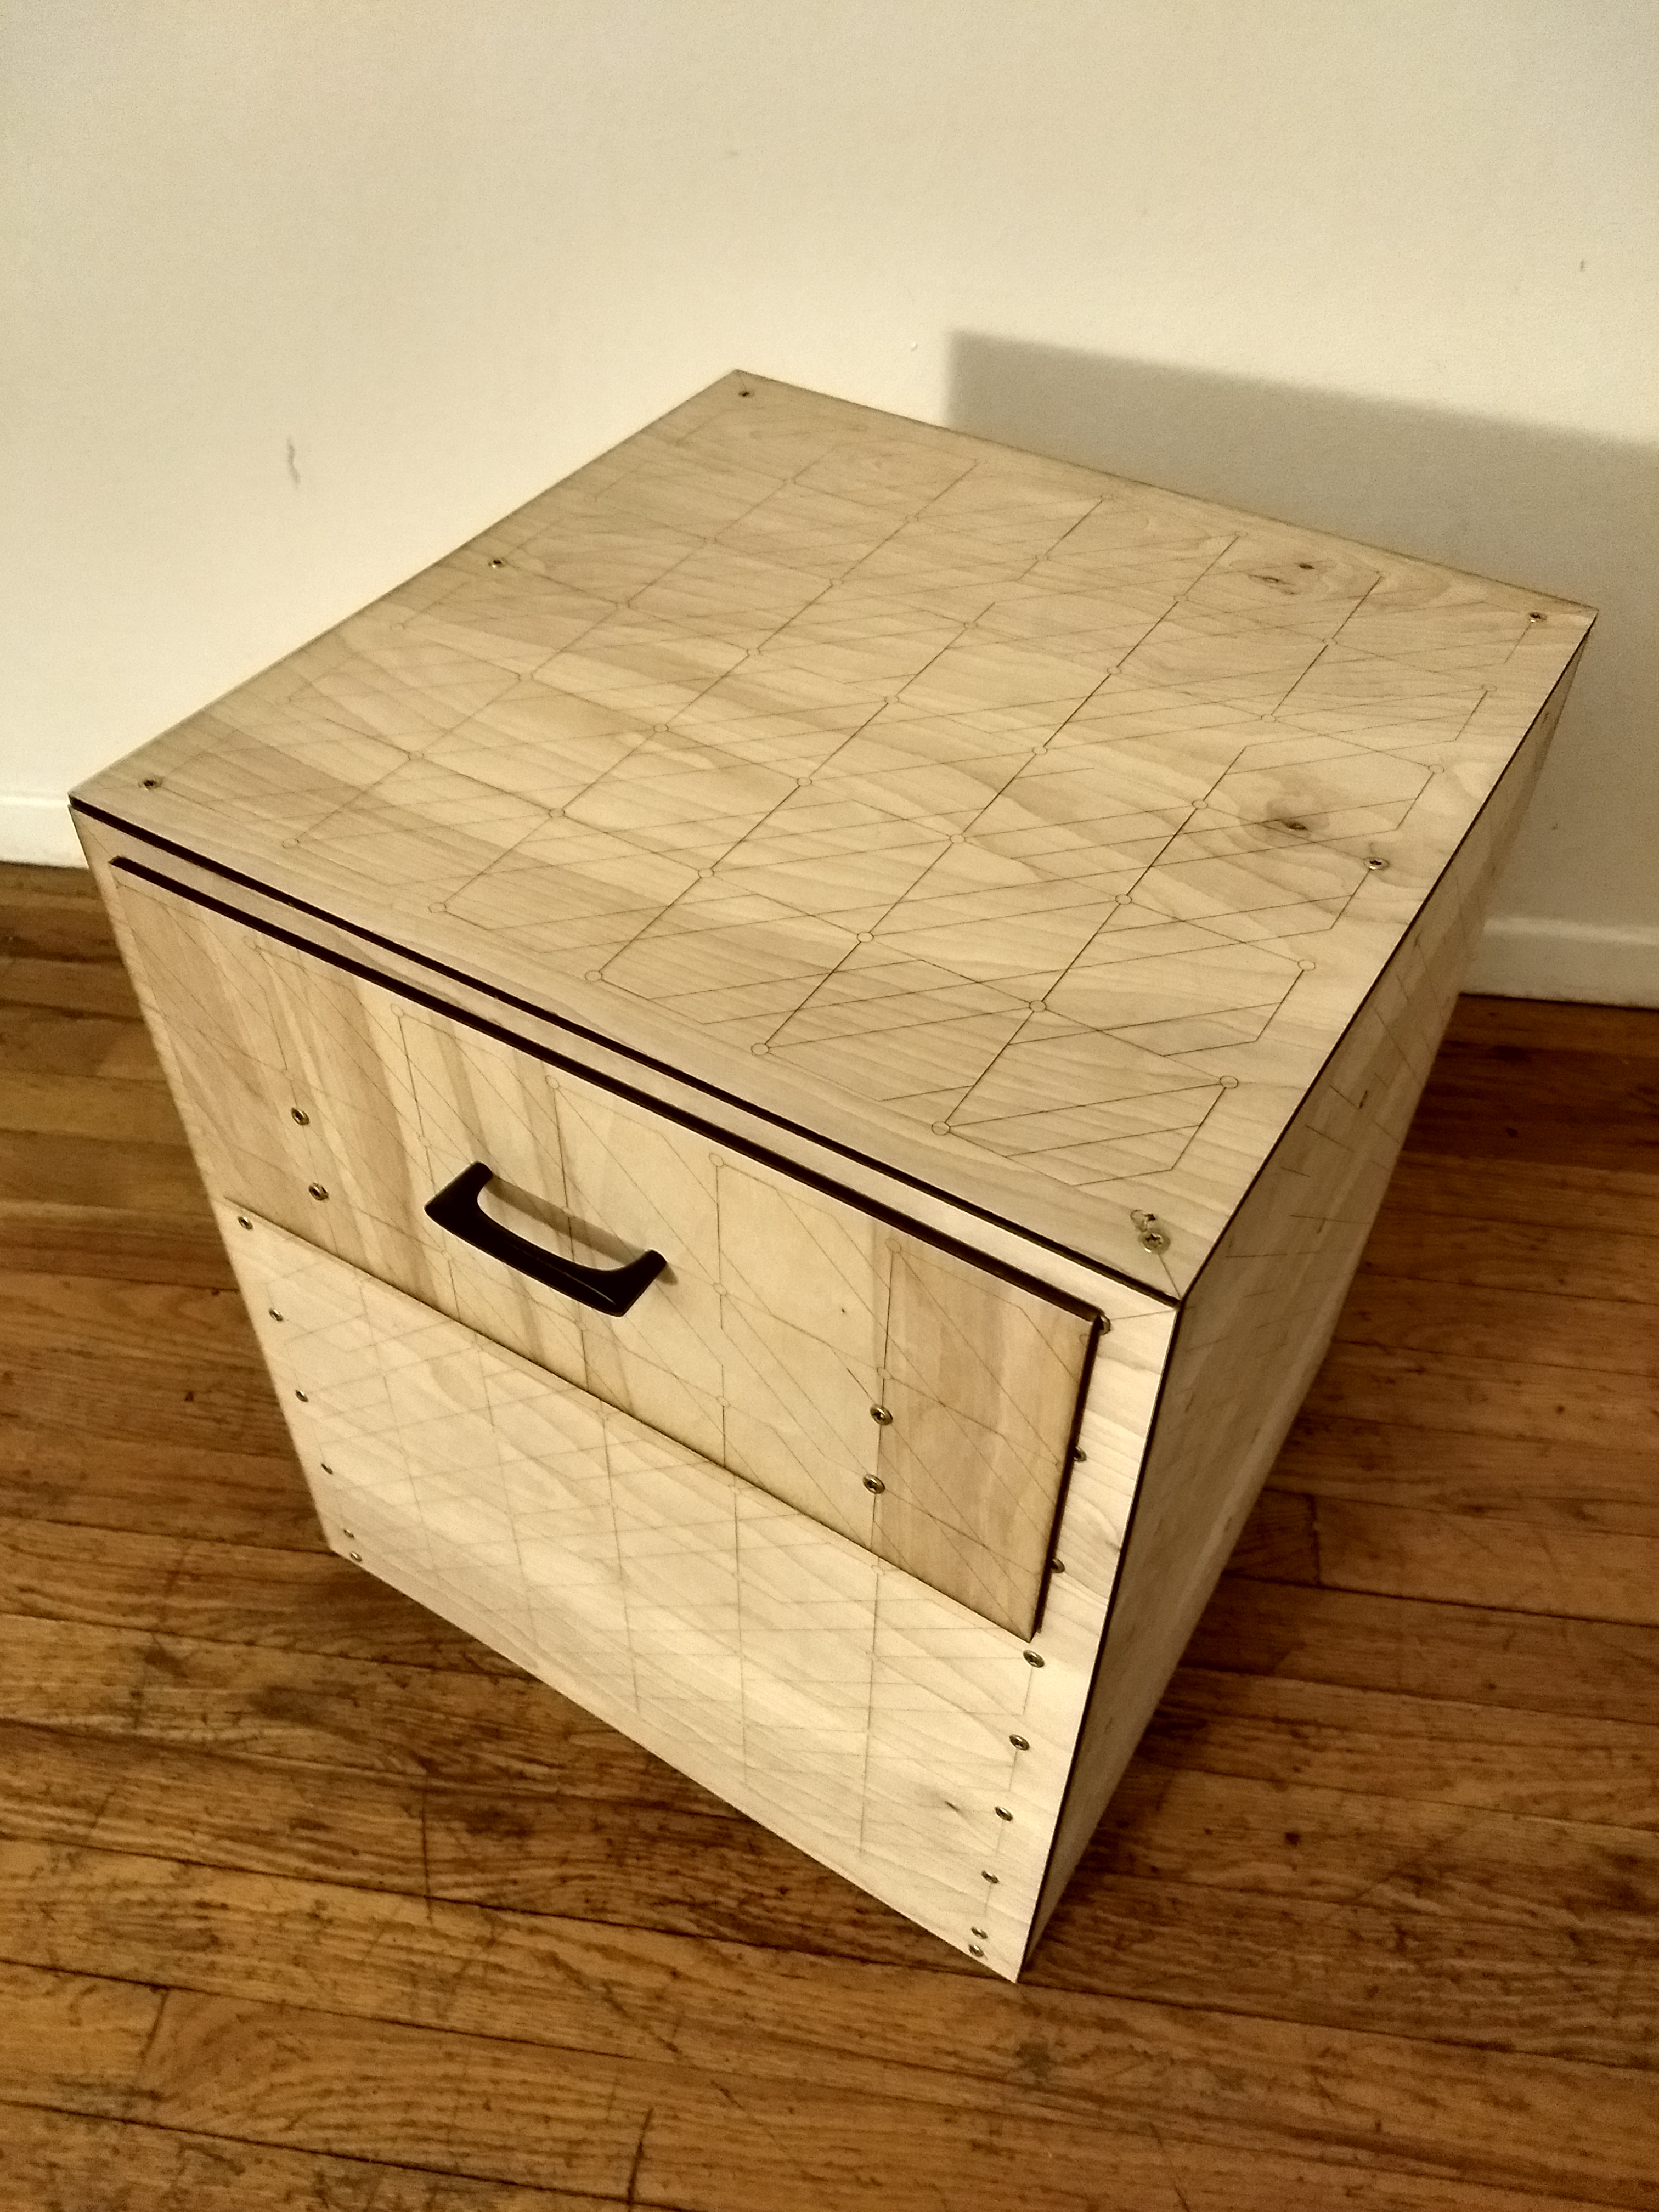

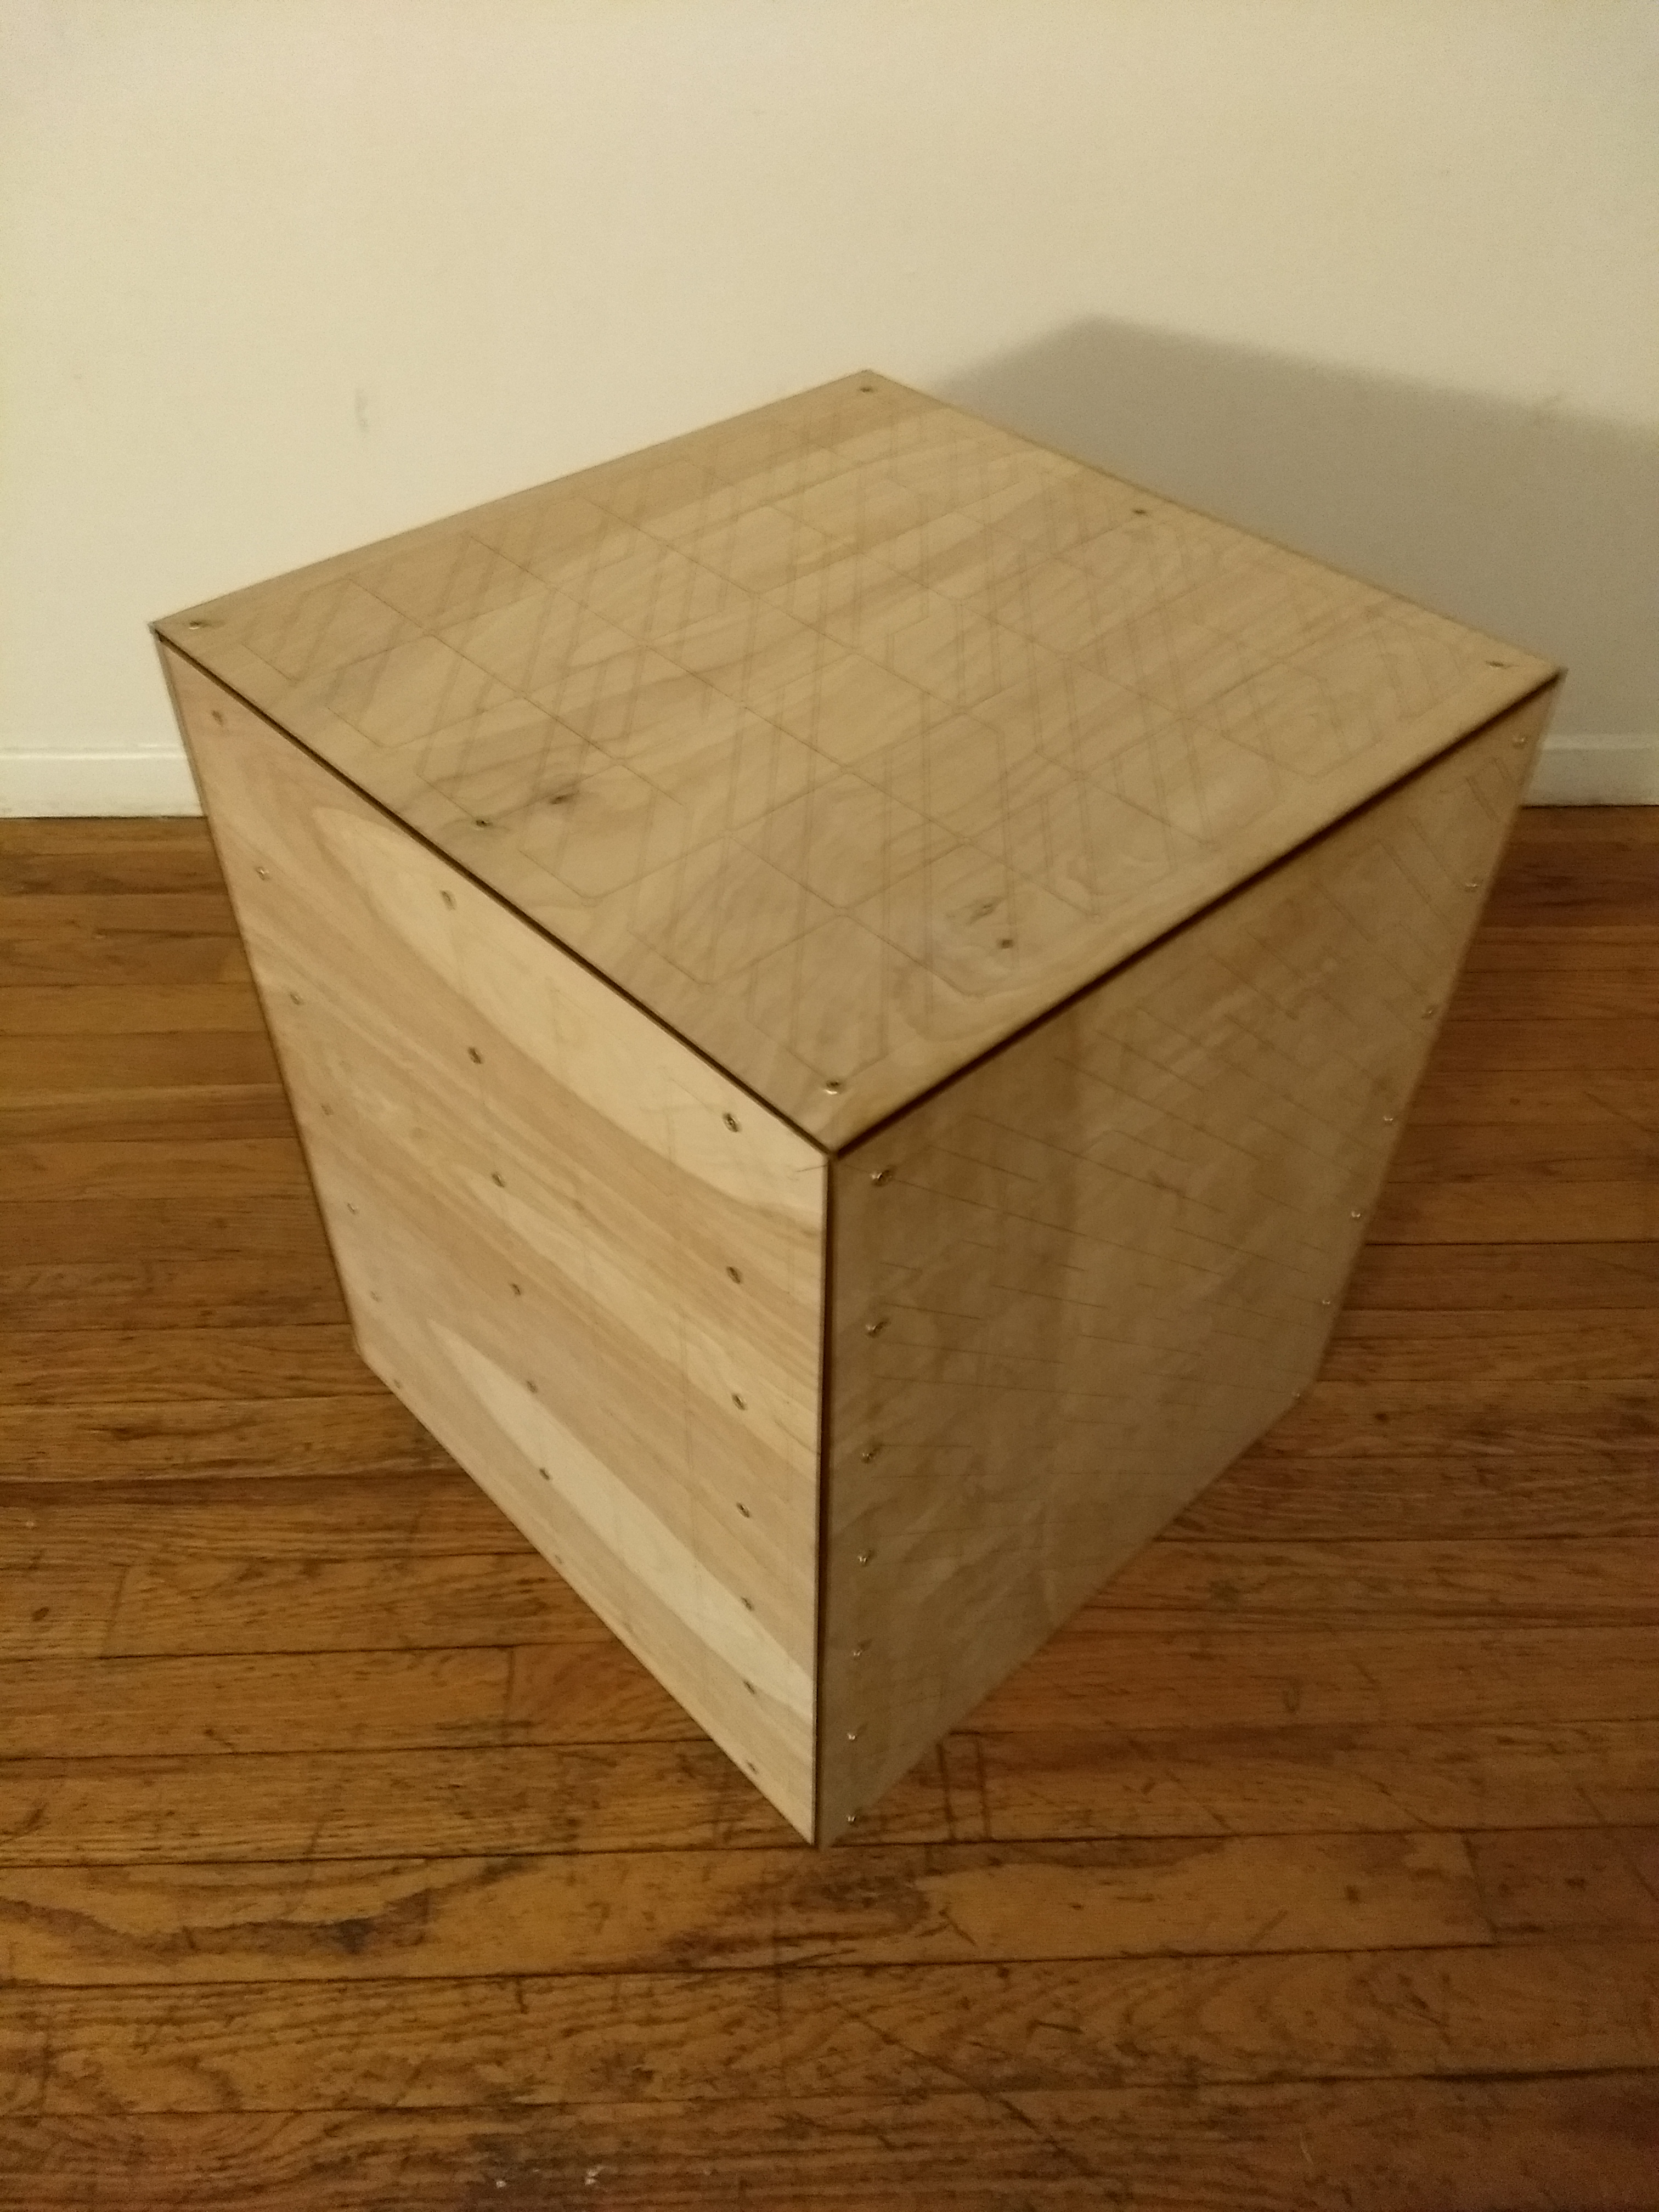

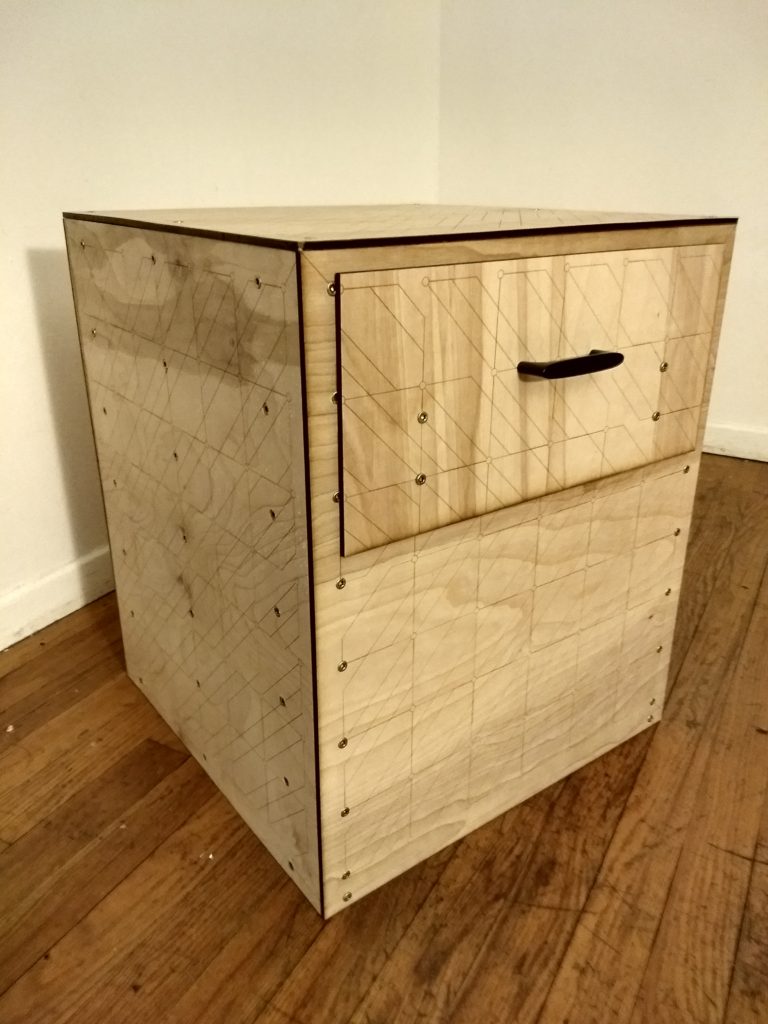
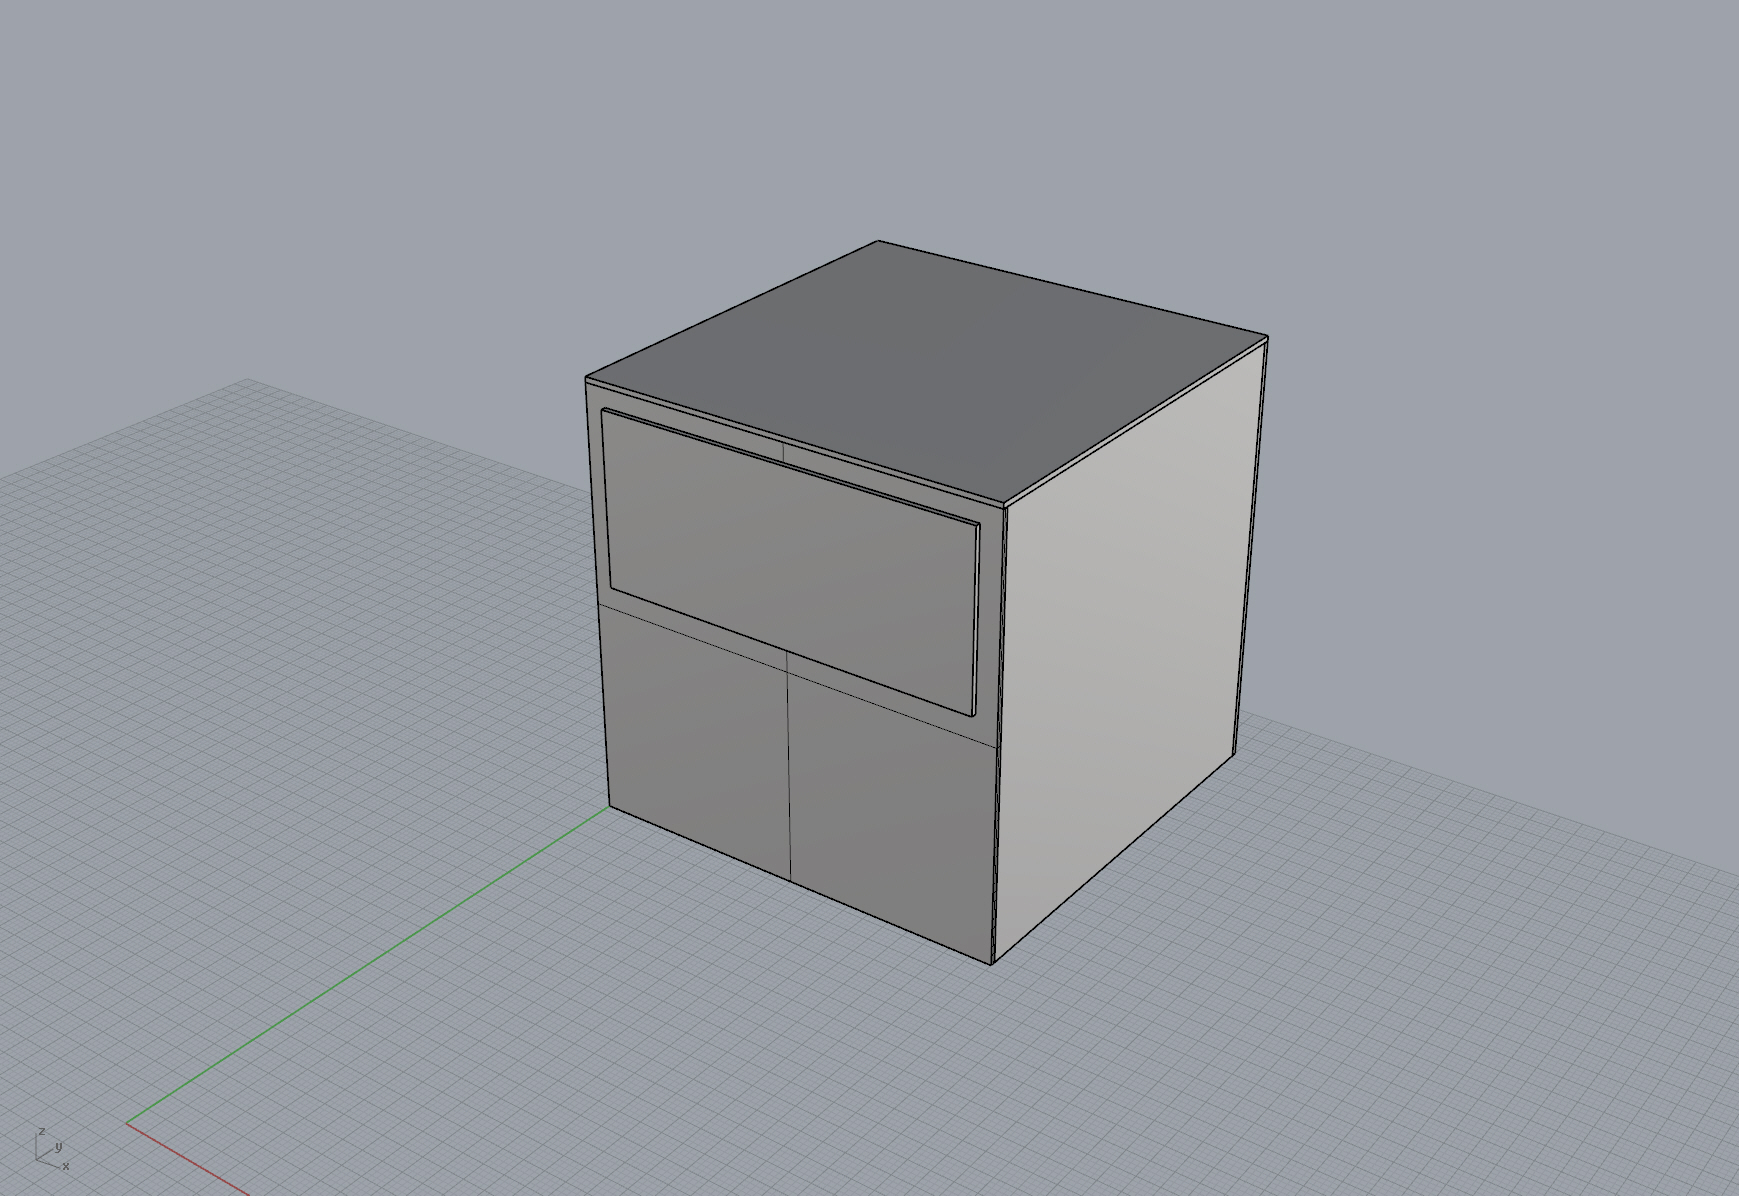
The Completed Project
- Overall, I’m very happy with how my project turned out
- The drawer works great
- Only major problem is one screw got stuck so there is a small hole on the top of the table
- Future improvements would be to stain and finish the wood
1 Comment. Leave new
Kyle I remember seeing your nightstand at expo and thought it was very unique and well built. The overall circuit board design it has is very very cool and a one of a kind pattern. I really like how it is not just painted on but actually laser etched in, it adds a very mechanic feeling to the overall project. Additionally I like the look of the construction screws and how evenly they are spaced out. Typically in furniture building the idea is to “hide” all the screw heads from showing but I think it looks great especially the way you laid them out. Great work !!