
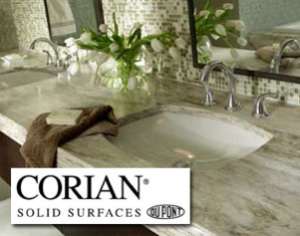
For my upcycle project I chose to make a box for myself made completely of this material called Corian. This is a solid surface material primarily used for making countertops and windowsills. My inspiration came from working with my dad a couple of summers ago. My dad works at a company called American installations where he fabricates and installs these countertops and while working there I picked up a few skills.
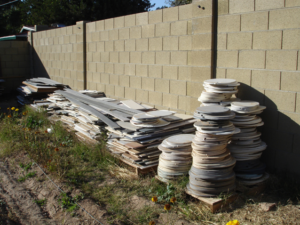
At the shop they had a lot of leftover material when they fabricate these countertops. Primarily coming from hole and sink cutouts. These extra pieces of material are generally too small to be used in for projects so they go to a scrap yard until the material gets dumped. I figured that I can look around and reuse some of this material for my upcycle project.
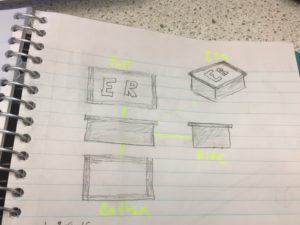
Early sketches of the project really were helpful in making this project because it gave me a chance to really visualize the design so that I can make it come to life.
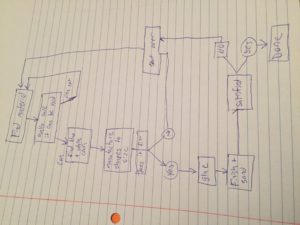
I came up with this flow chart so that I was able to see the process a little better and a work out any issues on paper before do the actual build. This way I don’t waste any time, money, or material. A brief summary of this process is shown below.
- Pick usable material
- Manufacture Shape
- Check for fit
- Glue
- Finish and Sand, Inspect
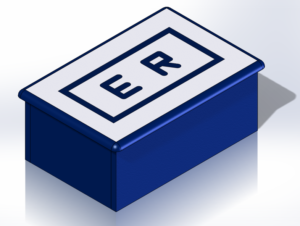
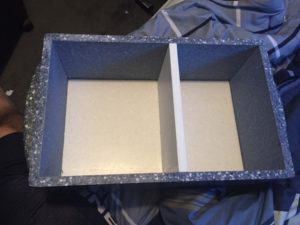
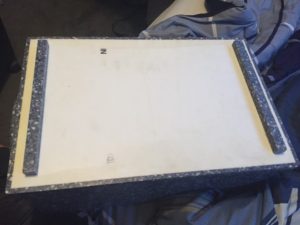
To make the design process a little essayer I created a model of my design in solidworks so that I can get all of the dimensioning right before I start making any cuts to the material. As you can see the box is composed of 6 pieces of material that have other pieces seamed into that material.

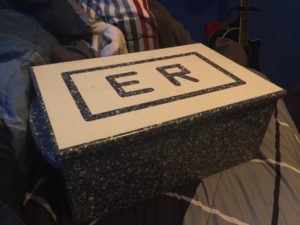
During actual construction of the box I primary used three tools, a circular saw, a hand router, and a hand sander to finish that the surface. I started off by finding the right material for the project. I was looking for a material that was not too damaged and looked aesthetically pleasing. I used the circular saw to cut all of the pieces to size so that they would be ready to glue. The hardest part about the build was the top of the box. I chose to seam two different colored pieces of material together to add my initials to the top. I feel like this really made the whole project come together. I also added blue trim along the top and around my initials. To do this I used the router to cut down into the material to create negative for the blue pieces to go. I than cut out all of the filler pieces, being slightly larger than the space that it’s fitting in so that I know the pieces will seam together properly.

Now that all of the pieces are cut and fit together I used a special glue that is specifically made for gluing this material together. This glue is extremely strong and made from a 2 part acrylic resin and curing activator.
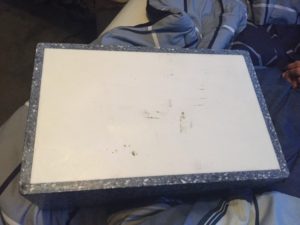
I than clamped and glued everything together and waited for thing to dry. After it fully dried I sanded down any extra glue and smoothed out any scratches with fine sandpaper. For the final finish I polished the final product with red and grey Scotchbrite to give it that smooth glossy finish.
video link
https://drive.google.com/open?id=0B22MVSuq3G3oUjAtZWtwclJQNkk