
For the “how” behind this project, I initially wanted to go with the route of laser cutting the outline (as shown above) based off of a 3D Solidworks model to increase the accuracy of the cutout, along with manufacturability of the piece. However, due to COVID-19 and the loss of University resources, I had to adapt my fabrication process. Lucky, my dad had some power tools, including a Jigsaw, which I implemented to carefully cutout the final piece.
The timeline for construction and finalizing the artwork was as follows:
- Acquired “aesthetic” wood from Home Depot – (03/22)
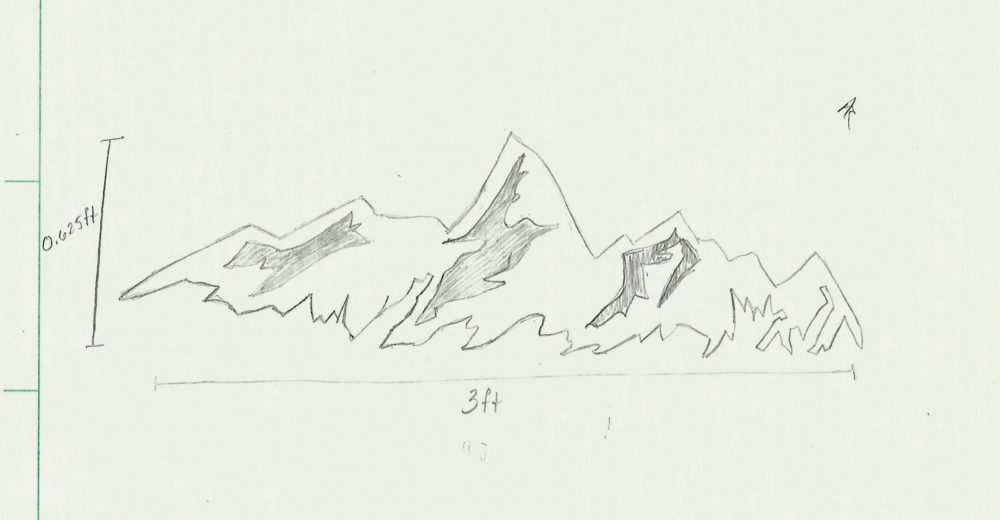
- Drew out shape/geometry of the cutout by hand – (03/23)
- Jig sawed out the shape of the mountains – (03/23)
- Approximately 1.5 hours to complete initial cutout
- Ordered LED Lights – (03/24)
- Sanded and applied clear coat of wood stain – (03/28)
- Approximately 1 hour of sanding and an hour total for staining the wood and allowing to dry
- LED Lights received in the mail – (04/05)
The biggest challenge of this project, due to COVID-19 interrupting the original plans, was Jigsawing the final geometry. As I stated in multiple posts beforehand, this process was tedious and deliberately careful so as to not accidentally cut out too much material and or mess of the shape itself with a wrong cut. During this portion of the process, I had to carefully follow the outline I had drawn earlier, along with cutting in unique methods to remove material that was initially in the way of where I had to actually cut.
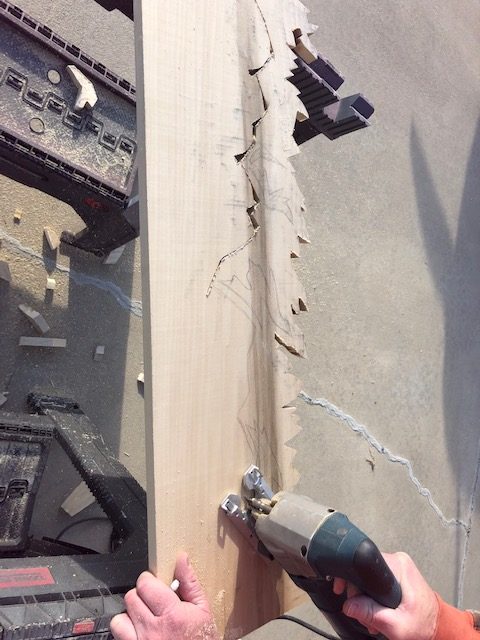
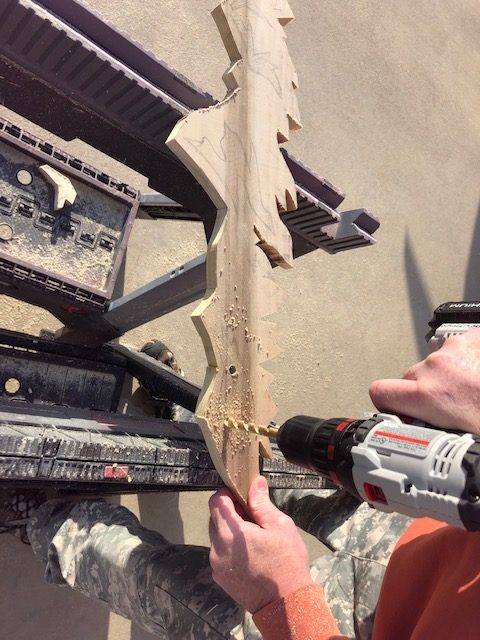
Another challenge, was finding a method to cutout the inner parts of the project as well. After troubleshooting some ideas, I decided to drill holes large enough into the wood, allowing the Jigsaw to fit through and start cutting out the shapes within the middle of the final project (as depicted below). This process was even more meticulous and careful than before, as a single mishap would destroy the project.
Once this was complete, I then began sanding down the final piece to get rid of all the rough edges and make a smooth surface for the final product. This process would have taken hours and hours of sanding by hand, but thankfully, I had access to another power tool, which made the process seamless and efficient. This took approximately 15 minutes to fully sand down before I started applying a final touching “wood” stain to preserve the product, and to “pop” the grains in the wood.
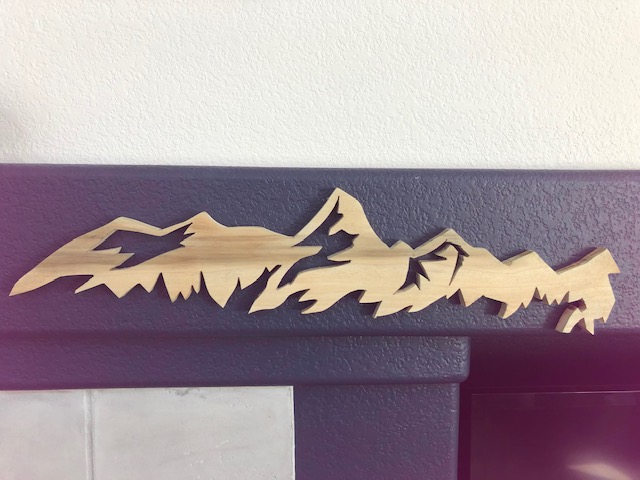
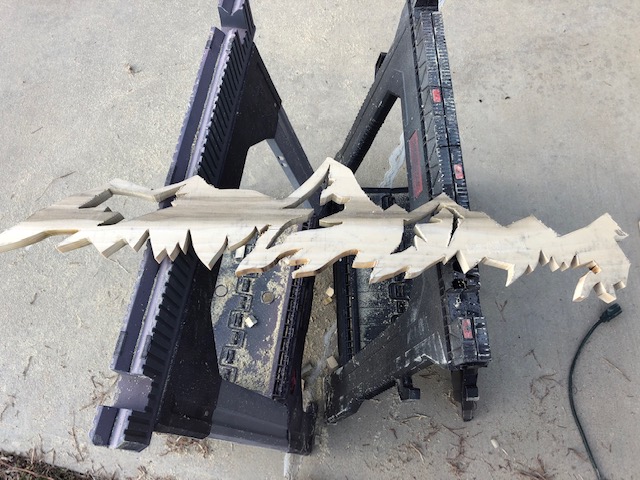
In conclusion, this project was a huge success! It turned out exactly as I envisioned, despite the challenges that COVID-19 presented. In a way, the project became more meaningful due to the increased time investment and work required to finish the project. The only aspect of the project that didn’t come to fruition, were the LED lights. Once I had acquired the LED lights and tested them out, I decided against adding them to the project. Even though they were cool and unique, they ultimately took away from the “aesthetic” that I was striving for. The final product (as shown above) is a stand alone piece that is perfect to hang on any wall of any house.
VIRTUAL FINAL PROJECT PRESENTATION:
https://drive.google.com/file/d/1HegIiZjltw-0QERtl-9XCUnDhbrnd3kI/view?usp=sharing
2 Comments. Leave new
Hey Austin! This project turned out so well, and despite all of the extra challenges you ended up with a really beautiful final! I am SO impressed with the inside cutout and how well it creates a dynamic aspect to your project. I agree with your decision to go without the led lights, and I think what you ended up with perfectly illustrates your more simple, minimalistic aesthetic. Great job 🙂
I really like how this turned out an am impressed you were able to make something. I think you did a great job adjusting from laser cutter to using power tools it really showed your adaptability as an engineer.