
Inspirations
For my main project, I am thinking about doing a hidden blade, a concealable weapon inspired by the videogame saga Assassin’s Creed. In the videogame series, the hidden blade undergoes many aesthetic and functional variations. The first hidden blades showed in the game are owned by Altair and the other Assassins, they are based on a primitive model since it requires a flick of the wrist to extend and required its user to cut off their ring finger to allow the blade to extend. This was based on both a traditional rite of passage and a requirement to use the blade.

In Assassins Creed II’s storyline, the hidden blade was modified by Leonardo Da Vinci and adopted a new mechanism that didn’t require the users to cut their fingers off. Many more functional modifications with added features were seen throughout the games. Additionally, the aesthetics of each gauntlet holding the hidden blade matches the aesthetics of the era and region in which they were used. Some of the ornamentations consist of the hidden blade cover and the majority is shown in the bracers that hold the blade cover to the user’s arm. The more modern hidden blades shown in the games are compact and not always feature bracers (due to the fact that we no longer fight battles with swords and don’t need to protect our arms and wrists from getting cut). However, the design variations of fan-made hidden blades, especially in the DIY environment, feature either nice-looking modern styles or the evidence that the parts were made from readily available components such as cabinet roller slides. Most hidden blades feature a resemblance to the Assassins’ crest as part of the bracer’s ornamentation or design; these bracers are made of materials such as leather and metals with carvings and jewels to decorate them.
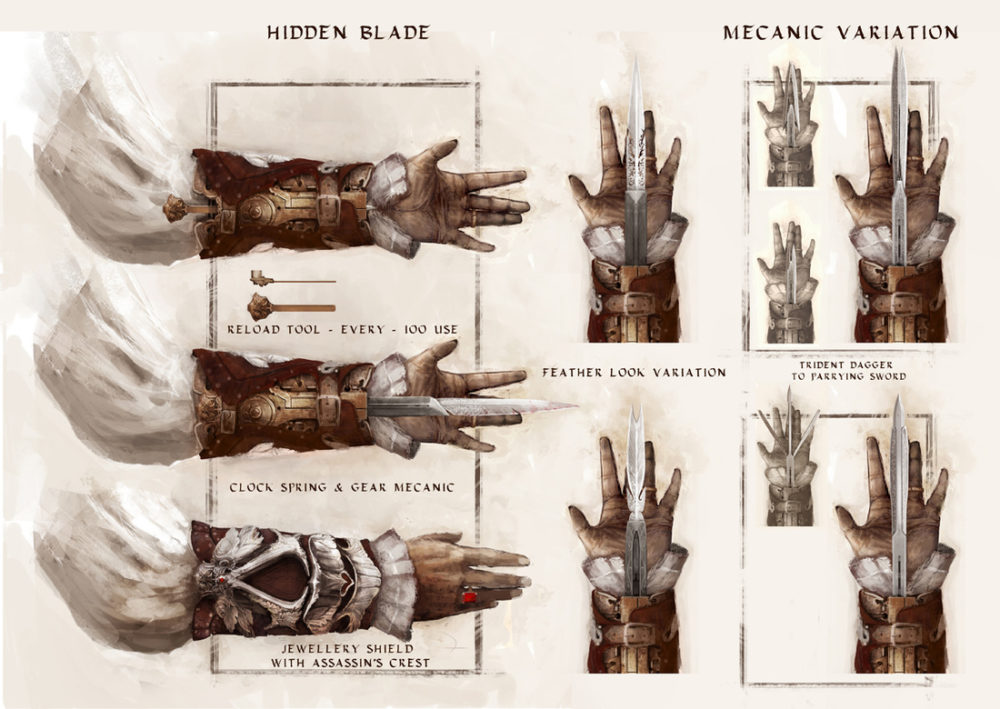
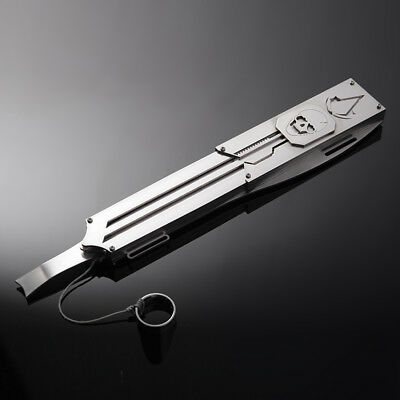
From the many variations on aesthetics and functionality, the hidden blade retains the main feature, its blade can extend based on something the user does and retract after the user does something else. I tried to make my own hidden blade when the first games came out (in 2008), I used a ball bearing roller slide that I got from Home Depot with a letter opener to make the hidden blade. To activate the mechanism, I used a ring attached to the roller slide with a cable. A couple of springs retained the tension in the mechanism such that when the ring and cable were pulled, the blade extended and when tension from the ring was released, the blade retracted. The result achieved the desired main goal of a hidden blade, but the performance standards were not up to my expectations. The ring and cable had to be pulled significantly far to achieve the desired blade extension, therefore, my hand had to flex far back. Back then, I based my design on a YouTube video showing how to make a hidden blade.
Design Progress
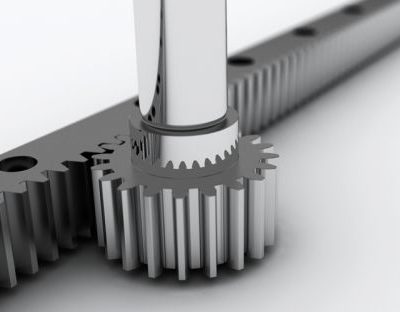
For my new design, I plan to use a motorized mechanism with a rack and pinion to extend and retract the blade. I also plan to give it a modern aesthetic instead of the videogame’s medieval or renaissance styles. However, I do plan to incorporate relevant ornamentation and obviously, the Assassin’s Crest. I was initially thinking about doing a futuristic shape with metallic color. However, after learning about the effects of certain aesthetics in class, I realized I could implement some of these concepts into my design.
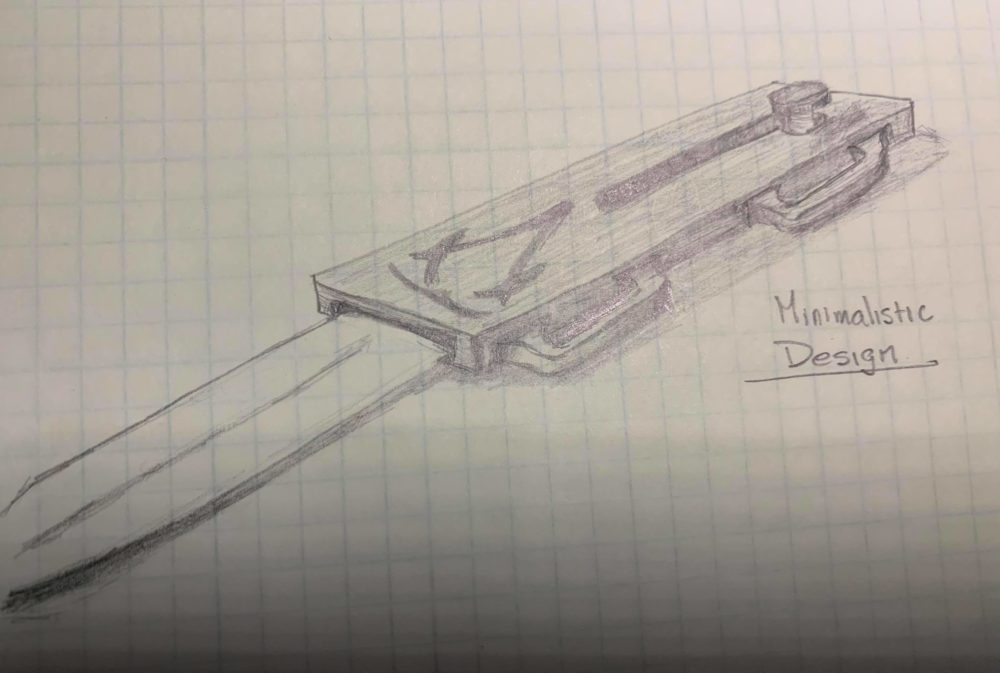
My first design consisted of a rectangular box container to house the blade mechanism. It featured two slots on each side to insert elastic bands to retain the hidden blade to the user’s arm. The mechanism was designed to be as simple as possible and the Assassin’s crest would be engraved onto the surface. The large crest captures people’s eyes and brings unwanted attention to the user; this reduces the stealth of what is supposed to be a hidden weapon. The black color has the possibility of remaining undetected and can serve for increased stealth. However, the color black can trigger an alert response in people who see the hidden blade. The mechanism shown is a simple tension spring with a thumbscrew that the user can pull back and push into a retaining pocket. When the user wants to engage the blade, he simply needs to push the thumbscrew to the side and the spring will pull the blade all the way out. This design is a little dangerous since it can be accidentally triggering, so a locking mechanism would be necessary.
The second model of the design removes sharp edges and substitutes them for curves; the entire box is made of semi-overlapping circles. The idea of having a curvy profile is that it has a lower chance of triggering an alert response in people who see the device on the user’s arm. Given today’s technology people will tend to believe that it is a wearable electronic product and not a hidden weapon. With this model, the user can feed three elastic bands through the slots on the edges of each circle to attach to their arms. The Assassin’s Crest is still featured but it will be smaller and located in between where the elastic bands cover the device. Instead of the black from the first model, I am thinking of using a moss shade of green. I believe this color poses little threat compared to the intimidating black and it is still dark enough to remain stealthy. The mechanism of this device would be a small servo motor attached to an internal battery which is activated to turn a pinion on a rack. I am still finding the best way to activate the mechanism and my main idea is to use a pressure sensor on a pad above the user’s wrist such that it will engage upon flexing their hand back. The sensor would feed information to a processor such as an Arduino and then activate the motor. This transfer of energy between the rotational motion of the motor and the linear displacement of the rack causes the blade to extend.
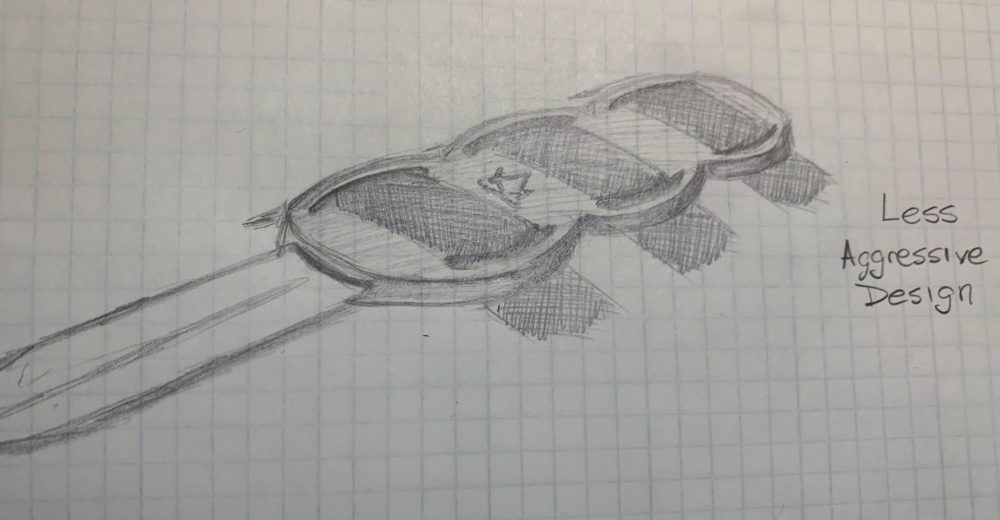
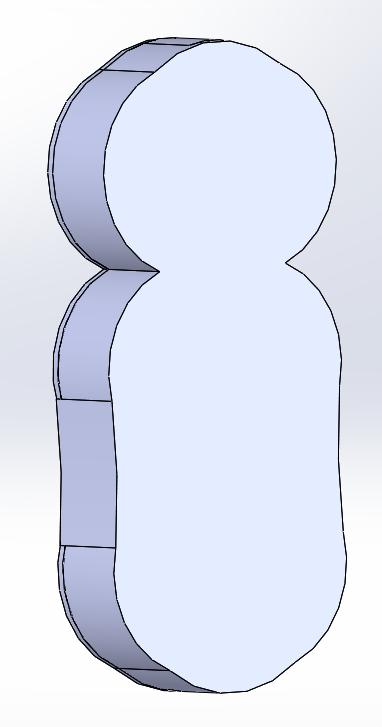
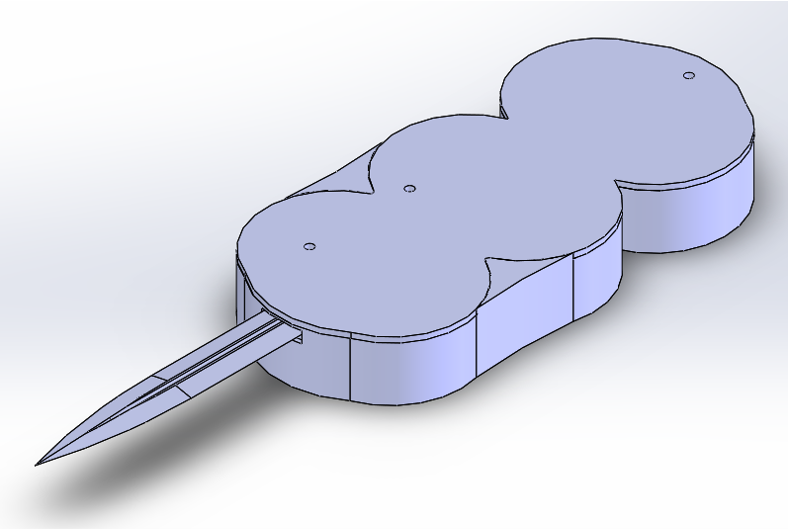
When fitting the components in CAD to visualize the assembly, I realized that the motor was too big for the housing. I expanded the sides of the box to fit the motor and noticed that the box now looked like a baby. I refined this shape given that the Baby-Face Bias would also reduce the aggressiveness of the device and would be less likely to trigger an alert response in people who see it.
Vision for the project
My initial goals were to design a futuristic version of the hidden blade that is stealthy (doesn’t trigger an alert response in people who see it) and that can be safely operated by the user. This device is not intended to be an actual weapon, so I am designing it with enough resistance to be realistic and withstand accidental impacts but not enough resistance to stab someone. It is meant for cosplaying and showcasing. After experimenting with different aesthetics, I decided to use a non-aggressive, curved, modern aesthetic.
I have decided to continue working on this project as a virtual design and not manufacture it given the high cost of materials and manufacturing of custom components, the long lead times, and the complexity of inter-disciplinary tasks (mechanical, electrical, and software). My goal is to have a mechanical prototype ready for manufacturing with a preliminary design of the electronics. I will not be programming the Arduino code for this project.
Fabrication
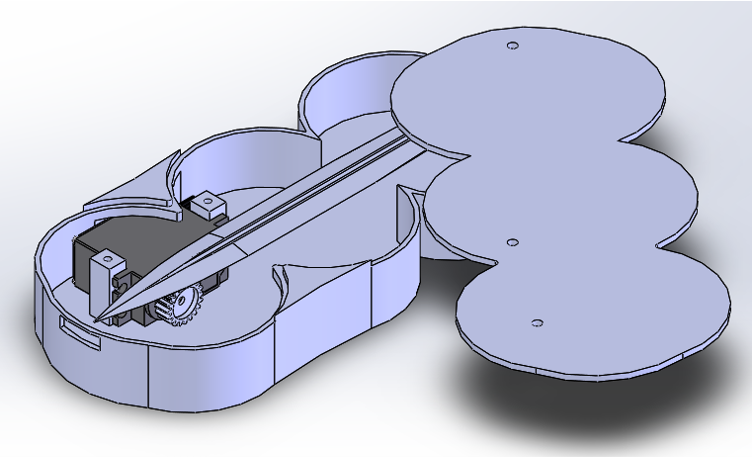
The prototype is intended to be manufactured out of plastics; therefore, 3-D printing is a great fabrication method. I am refraining from using Fused Deposition Modeling 3-D printers because of the rough surface finishes and low mechanical properties created by the filaments. All custom parts would be manufactured with Stereolithography (SLA) and then assembled with the commercial off-the-shelf (COTS) components.
The internal mechanism is assembled by securing the Hitec HS-625MG servo motor to the inner columns using screws. Then the battery and Arduino are inserted into their corresponding slots. Finally, the electronic circuit is connected, and the box lid is to be secured to the container.

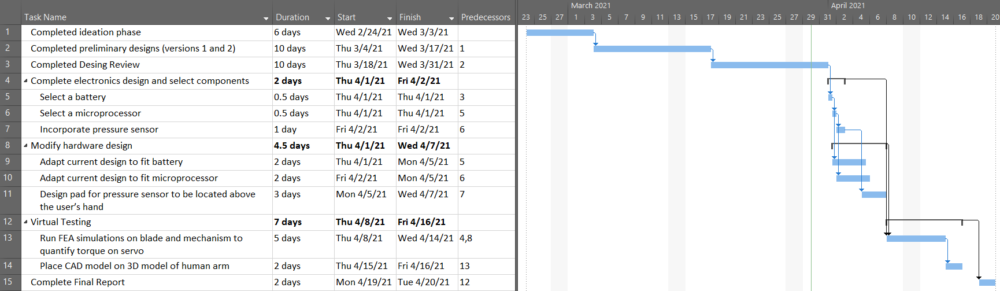
Schedule
Self-Imposed and Class Deadlines:
- Completed ideation phase by March 3rd
- Completed preliminary designs (versions 1 and 2) by March 17th
- Complete electronics design and select components by April 4th.
- Incorporate pressure sensor.
- Select a battery.
- Select a microprocessor.
- Modify hardware design by April 11th.
- Adapt current design to fit the battery.
- Adapt current design to fit microprocessor.
- Design pad for a pressure sensor to be located above the user’s hand.
- Virtual Testing by April 17th
- Run FEA simulations on blade and mechanism to quantify torque on the servo.
- Place CAD model on a 3D model of a human arm.
- Complete Final Report by April 21st
Gantt Chart
Presentation Video
Image Sources
Figure 1: https://aminoapps.com/c/assassins-creed-brasil/page/item/altair-ibn-laahad/x5o6_DnHQIwrDdpN32mpzYEJ6QWLvvqpY
Figure 2: http://assassinsandtemplars.weebly.com/the-hidden-blade.html
Figure 3: https://www.ebay.com/itm/Assassins-Creed-Hidden-Blade-Props-Stainless-Steel-Custom-made-COSPLAY-DIY-New-/303032242015
Figure 4: https://andantex.com/product/racks-and-pinions/
2 Comments. Leave new
Hi Gary,
Excellent work across the board with this write-up. It’s really clear you’ve put a great deal of thought into this and I think the results will show for it. Do you plan on 3D printing a prototype or is this a purely virtual project? I think either way, you have done an excellent job at designing this and conveying an aesthetic.
Hey Gary, this is a super cool project! I like the fact that you are making this a virtual project so you can focus on the aesthetics and design of the mechanics. Also, unless you have a furness to heat treat your steel, actually making a functional blade is almost impossible. That being said, do you think that you might actually build this design one day or probably not?