
I chose to make a Light Board for my final project instead of the second option which was a sketching robot. The main reason being that it seemed farfetched to fit in a sketching robot project in the given time-line.
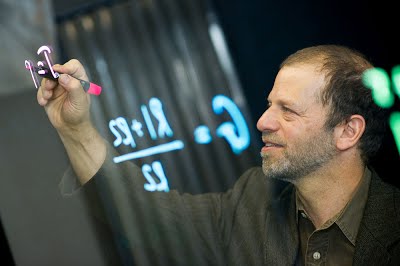
I first saw a working Light Board in an on-line class that I took on Coursera, called “Modern robotics”. I was intrigued by what seemed like magic when I first saw it in action. The professor was writing in the air and the neon marker colour was radiating out in space.
Since then I wanted to understand the principle behind the working of a Light Board and I wanted to make one for myself.
The working principle behind a Light Board is pretty simple. Most of the white light from a LED strip at the edge of the Light Board undergoes Total Internal reflection and hence only leaves at the other edge of the glass. Some of the light waves is transmitted along the surface of the medium (Glass) and is called the evanescent wave. If a a third medium (say neon marker ink) is introduced to this surface (i.e touched to the surface) the evanescent wave gets frustrated and travels through this medium. This effect is called “Frustrated Total internal Reflection (FTIR). The illuminating effect of what ever is written on the board is due to the photons transmitted through the third medium (neon marker ink).
I have taken reference for construction material from Professor Michael Peshkin’s blog: https://lightboard.info/home/construction.html
Materials Required:
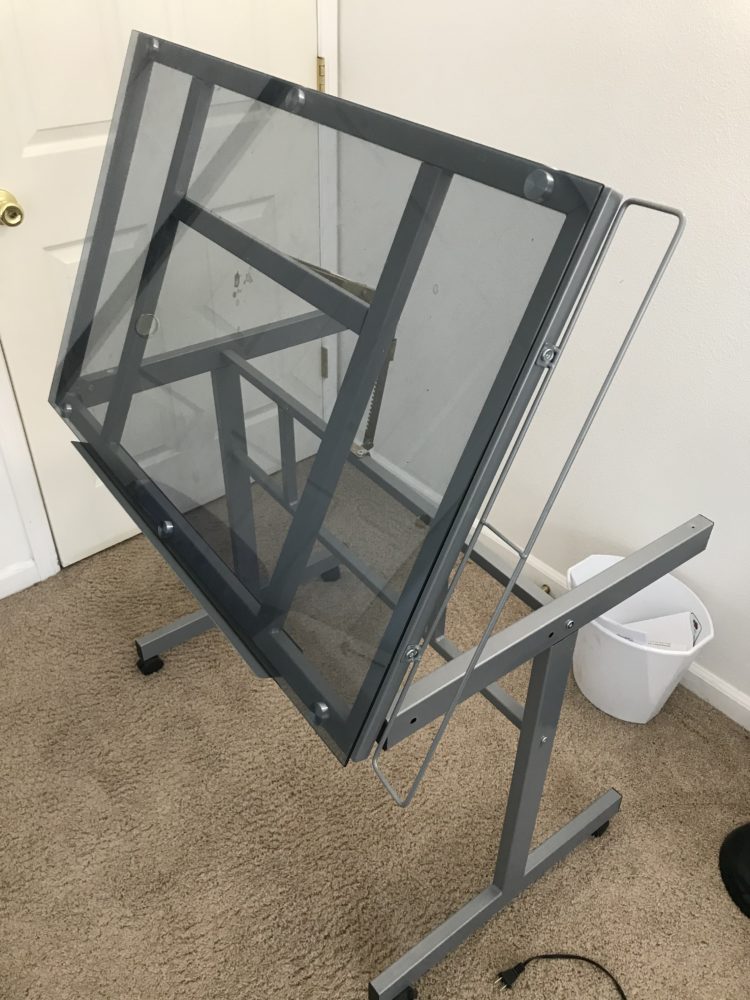
My drafting Table with Table top dimensions of 35.5″ x 23.8″ which is almost 3 ft x 2 ft
White LED Strip– 12V 200 lumen/ft 6000K White LED light strip- https://www.amazon.com/HitLights-Premium-UL-Listed-White-Light/dp/B01LBDRD0E/ref=sr_1_1_sspa?dchild=1&keywords=high+lumen+white+led+strip&qid=1617178621&sr=8-1-spons&psc=1&spLa=ZW5jcnlwdGVkUXVhbGlmaWVyPUEzNlZTWk9PNFpGVzYzJmVuY3J5cHRlZElkPUEwNTQ5ODgyM0hDQjVRSkc3WEhENiZlbmNyeXB0ZWRBZElkPUEwNjk3OTQxMjYwT0FST1UzVUxZViZ3aWRnZXROYW1lPXNwX2F0ZiZhY3Rpb249Y2xpY2tSZWRpcmVjdCZkb05vdExvZ0NsaWNrPXRydWU=
Electrical insulation tape- https://www.amazon.com/Kapton-Polyimide-Silicone-Adhesive-Thick/dp/B004V3XPLI
Plexi Glass/ Starphire Architectural Glass– 35.5″ x 23.8″ x 0.4″
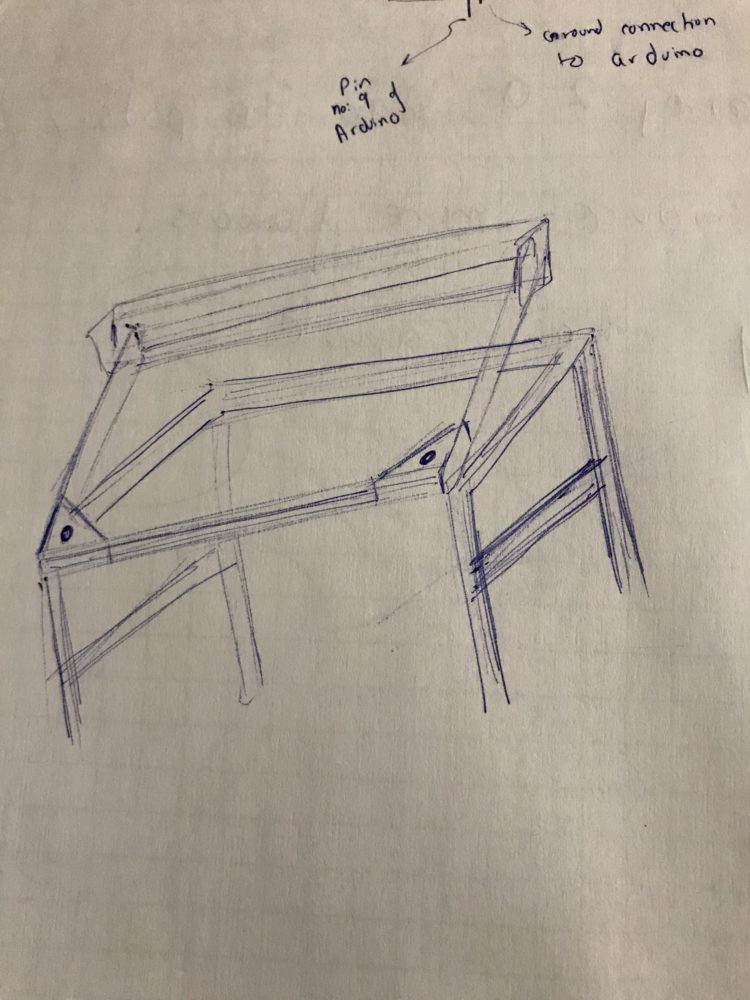
3D Printed fixture for holding the LED Strip- In order to hold the strip in place I might have to 3D print 4 number of fixtures whose design I have not finalised yet but have a vague idea of what it will look like on the board.
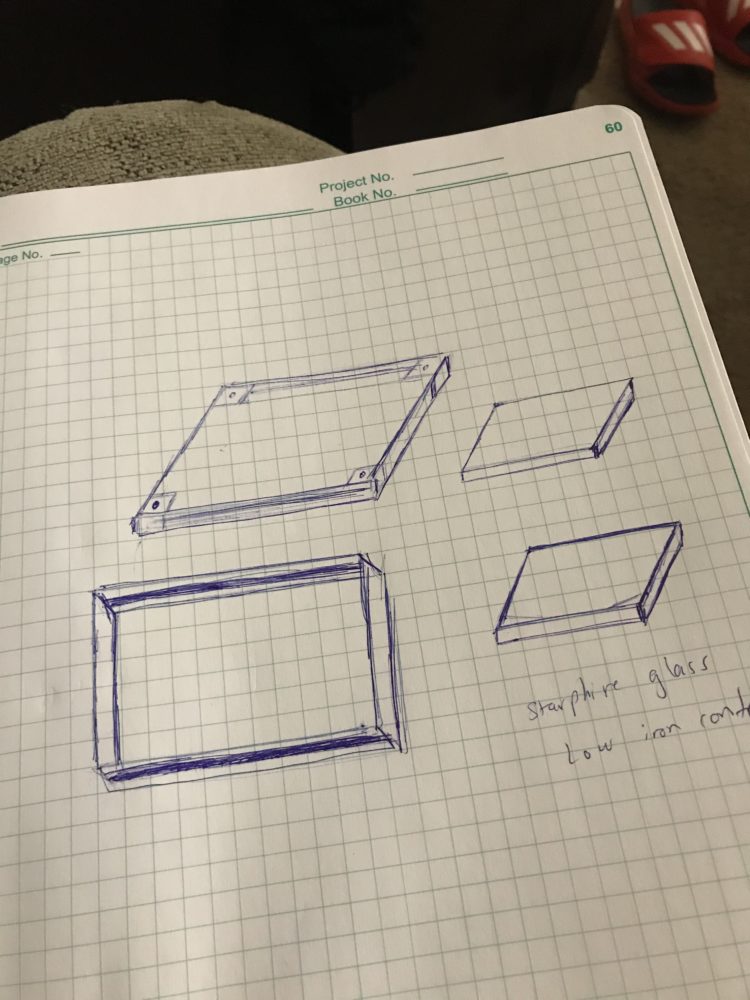
Choice of Glass– Normal glass will not be a successful choice in this project as due to the tint at the edges of a normal glass a lot of light will be restricted from reaching the center of the glass. Hence a clearer glass is required. Starphire Architectural glass has low iron content hence is clearer than the usual glass. Another choice could be Acrylic sheet (Plexi Glass). The final selection will be based on ease of availability and cost.
Easy Dry Erase Neon Markers– https://www.amazon.com/Expo-Bullet-Erase-Markers-Colored/dp/B0033AGVVG
Timeline:
Final selection and order of Glass top- 3rd April
Design and order or 3D printed Fixtures 5th April
Final Assembly- 18th April
Finishing Touches and Final Report- 21st April
The total cost of the projects is estimated to be around $200
Video Presentation Link : https://www.youtube.com/watch?v=w_hsMzX-h7I
Other reference:
Featured image-https://lightboard.info/_/rsrc/1379007546717/home/Light27.jpg.1379007546439f17c.jpg?height=266&width=400
FTIR-https://www.youtube.com/watch?v=FlaB4wC3K0k
3 Comments. Leave new
I’m excited to see how this turns out and I’m sure the lighting effect will be great regardless of the type of glass. Also, do you think you could use this as a light table for 2d traditional animation?
I think that this project sounds very interesting and I am excited to see how it turns out. I think that plexi glass could be a great choice for your project since it is a bit less brittle than other glass. I think that you are on a great track and it I think that the LED’s will create a very engaging aesthetic.
Hey Ankit!
I think that this is a really cool, and super functional concept! I love how you have a detailed vision of how it should work, and applied a lot of different ideas to a product that you already own. I can’t wait to see how you end up putting the LEDs on, and the final product coming together. Greak work!