

For my final project, I had been struggling to find a concept that I would really enjoy exploring as well as something that I could use or look at daily! I was struggling between two very different aesthetics that both in their own way, spoke to me. The first aesthetic I explored was the aesthetic of trees, more importantly, trees that refuse to give up as can be seen in the photo below. This tree is shown growing out of a rock! 
It is inspiring to me to see a tree grow out of something so hard and continue to thrive! Initially I thought about doing a small rotating paper maché sculpture that mimics a tree growing out of a rock. I was going to include lights and flashy aspects to give it this sort of bonsai type grow pattern.
After some thought and pondering my other aesthetic, I decided I would make the tree my backup plan if my main idea went south. The other aesthetic I was exploring was the aesthetic of manufacturing and industrial design. Just look at this GIF below and tell me that is not super aesthetically pleasing, each shaving is almost identical!

I really wanted to put the idea of form and function together, however, I do not have access to these high end machines such as a mill and lathe so I decided to manufacture/fabricate a swivel bar stool. My inspiration for this swivel bar stool came to me when I was browsing through the internet and came across swivel L brackets for shelves similar to the one below. This swivel L bracket allows for the shelve to be put away and gave me the idea of the swivel bar stool as described more below. Also this design is very industrial looking.

Currently, the house I live in has a bar in the basement and a pool table not to far from the front of the bar. The problem that we run into is that to play pool you have to remove the bar chair by picking it up and lifting it to another location of the basement. I decided I would make a swivel bar stool that would attach to the bar itself and swivel easily underneath the bar top counter for easy storage. Below are the images of my initial sketches of the design.
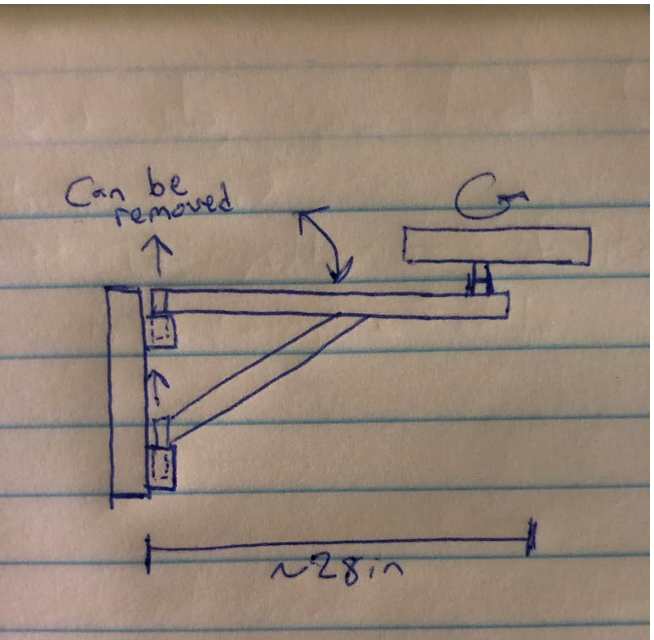
My thought process is to make an arm that can swivel and a seat that can swivel independently of that. Additionally, I wanted to make sure that once bolted to the bar, it could easily be removed for any reason so the design above shows these aspects. To take it off the bar you simply lift the swivel arm straight up and out of the bolted down bracket.
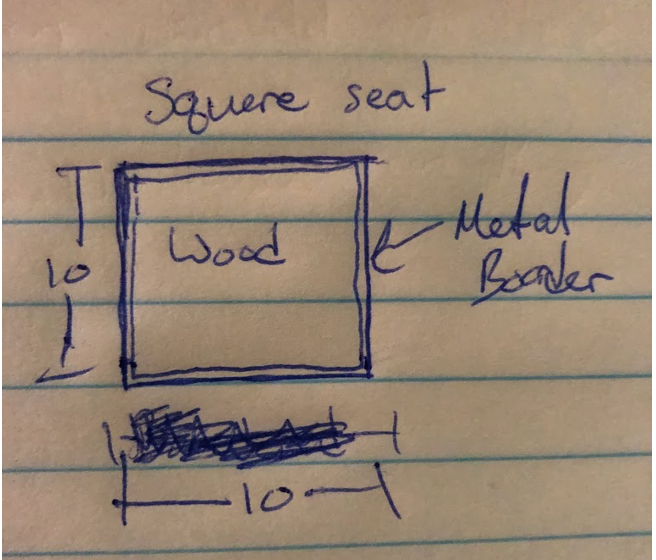
In the picture above, there is a top down view of the seat. I will use metal angle Iron to create a nestle of sorts for a piece of stained wood to be placed into the top of the seat giving it a nice rustic look while still being totally functional and aesthetically pleasing. Below is an initial CAD render of the 3 main parts of the assembly!
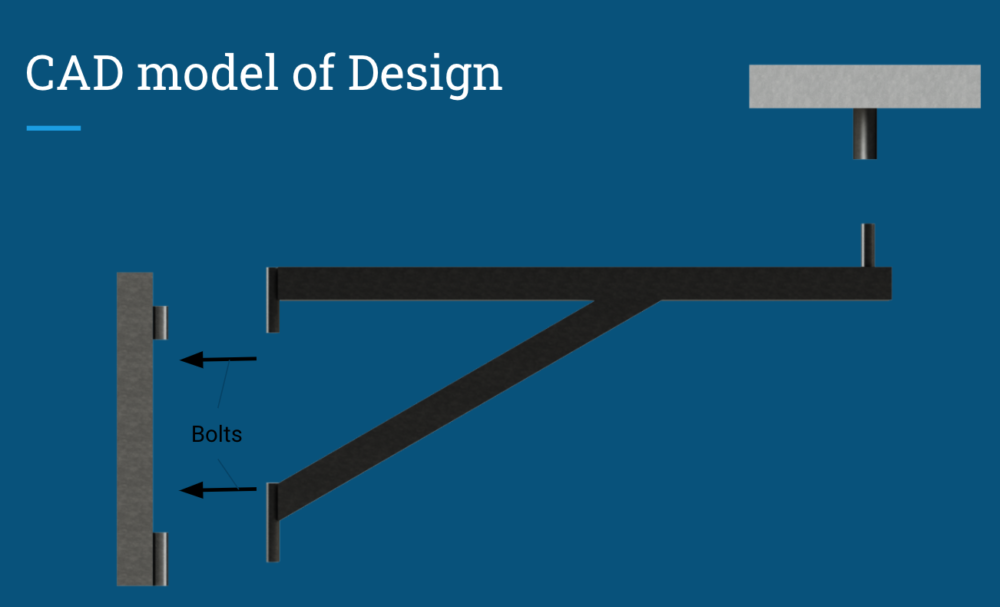
This diagram shows where the bolts will position the swivel bar stool to the bar. It is easier to visualize how the seat will go together in this layout. It will be real easy to bolt the swivel bar stool in because the material I will be using for the frame is material I currently already have in my possession and can be seen below.
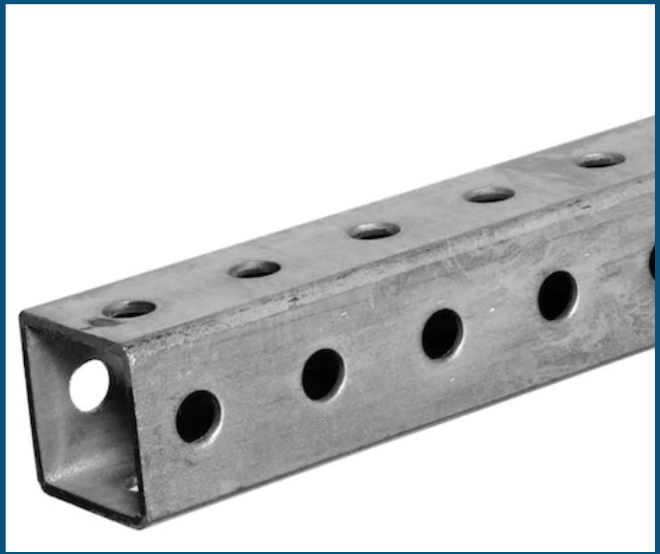
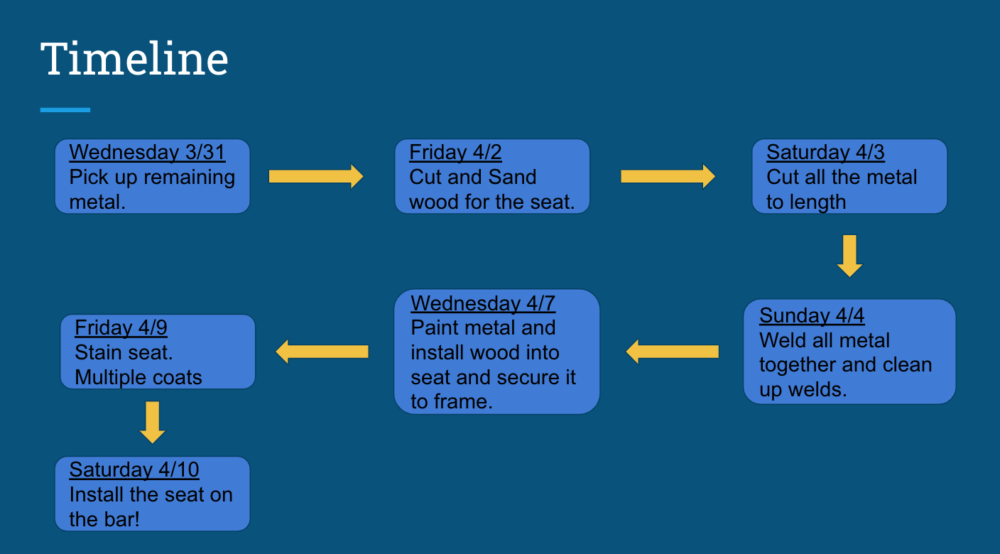
This is perforated square steel tubing that is 1.5 x 1.5 inches and I already have roughly 5 feet of it making is an ideal candidate for this project. There are still some more materials I need to purchase and I will get them at Lowes. The outline of the materials I still needed can be seen in the timeline below. On Wednesday March 30 I am going to get the remaining materials needed for this project. An outline of the timeline I will be following can be seen below. I expect to be done in one week from Saturday, April 10th.
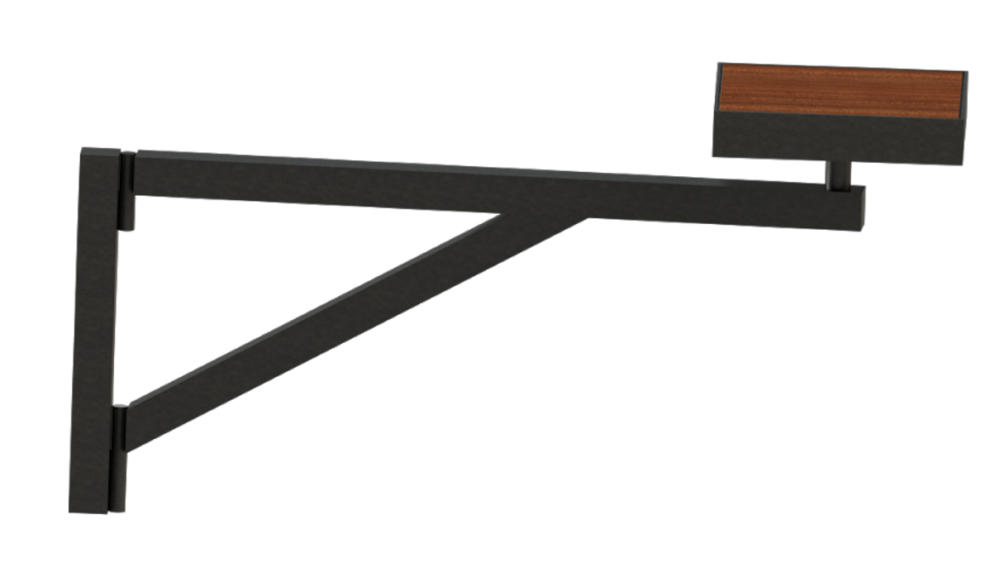
Once completion of the project I imagine it will look fairly similarly to the render below. With this design below, I believe it does a good job of capturing the industrial manufacturing aesthetic! Sort of also has a rustic look to it.
The How:
I began by acquiring all the required materials that I would need to build this swivel bar stool. Below is all the metal I will be using to build the stool. 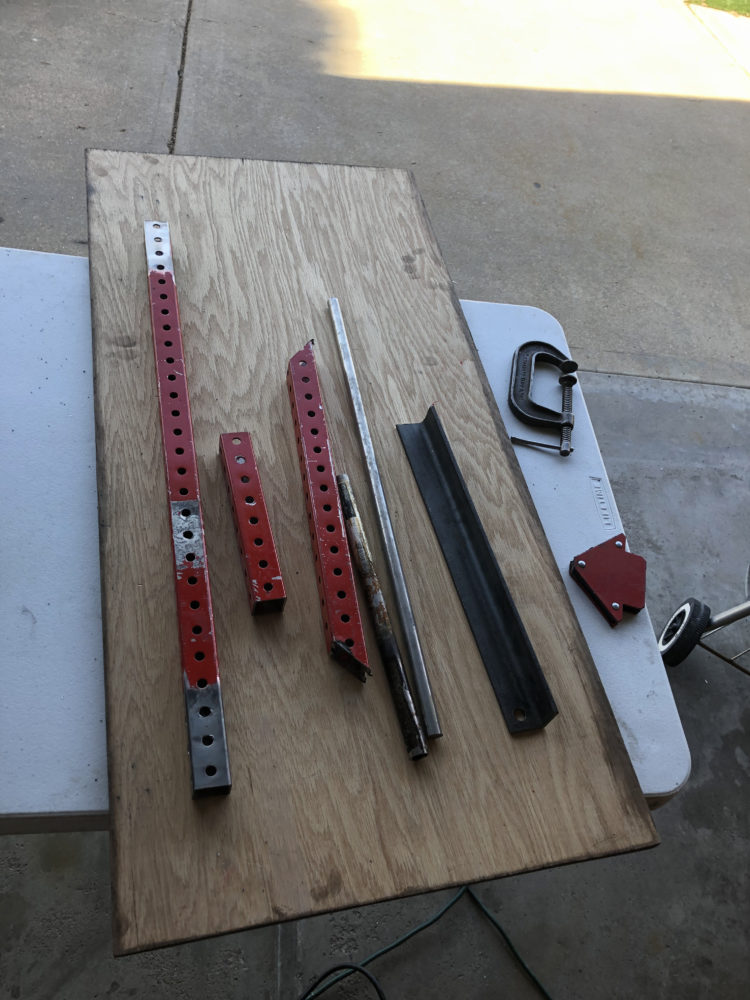
Below is a picture of the already stained piece of wood that I had laying around so all I needed to do is cut a piece out of it and clean up two edges. 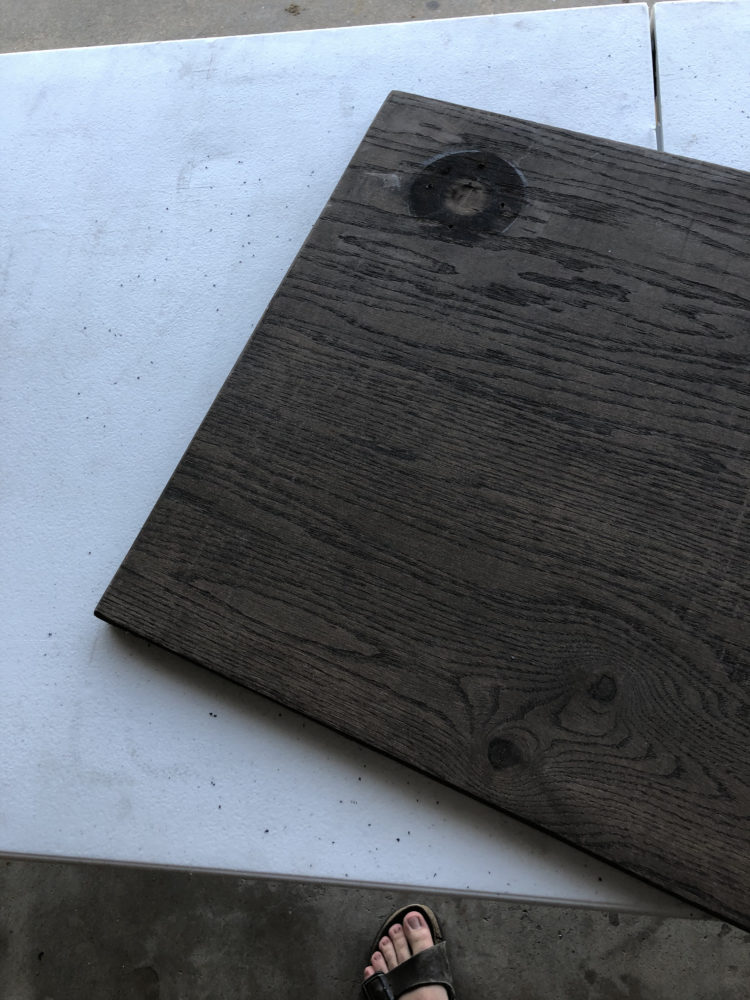
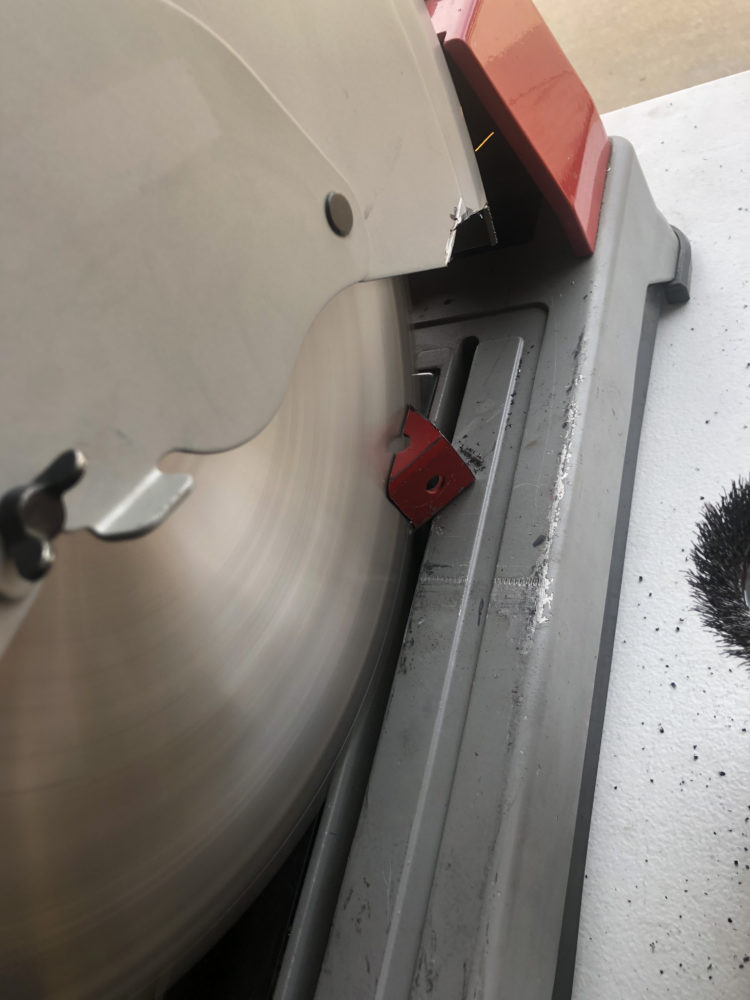
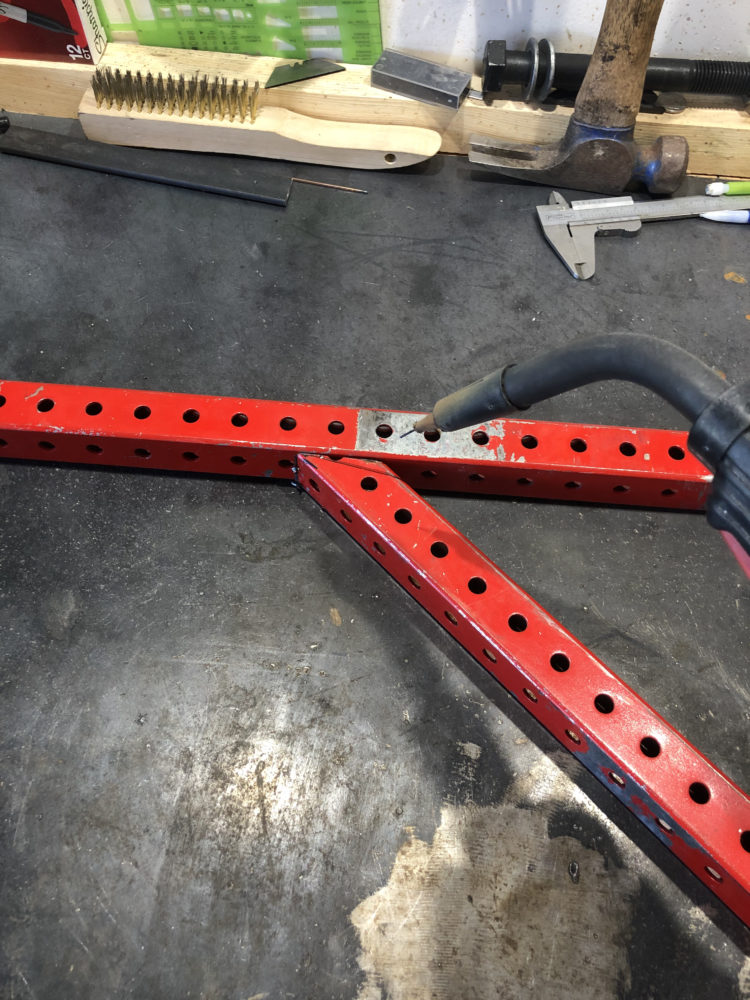
Once I had all of the materials I began cutting them into the sizes I would need for the project. This is an example of me cutting a 45 degree angle in a piece of square tubing.
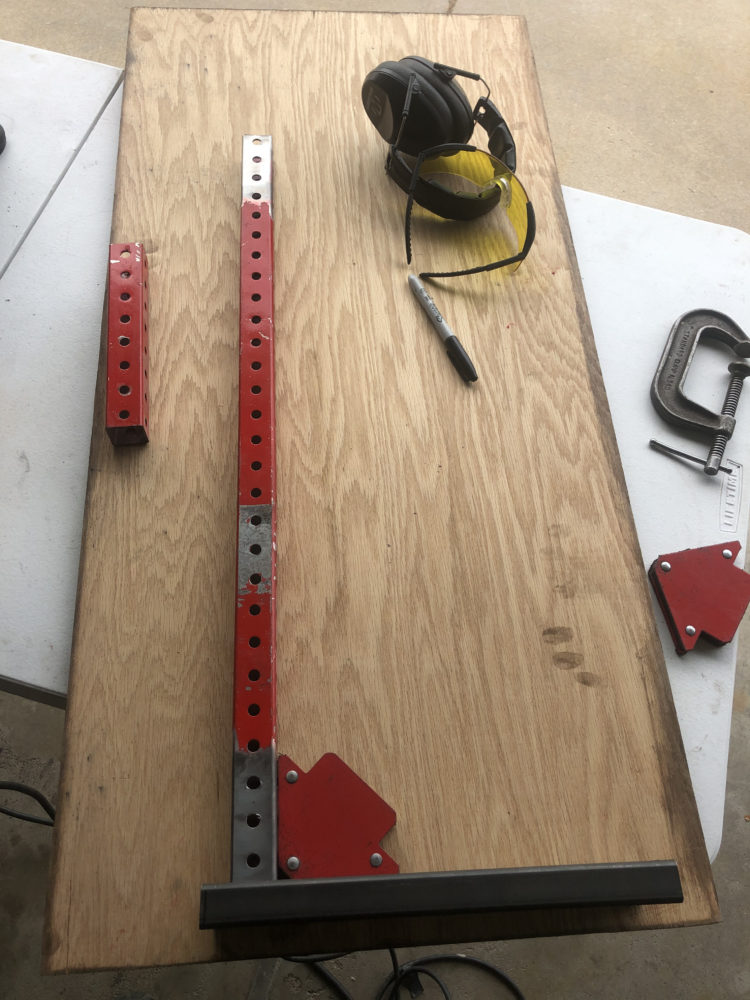
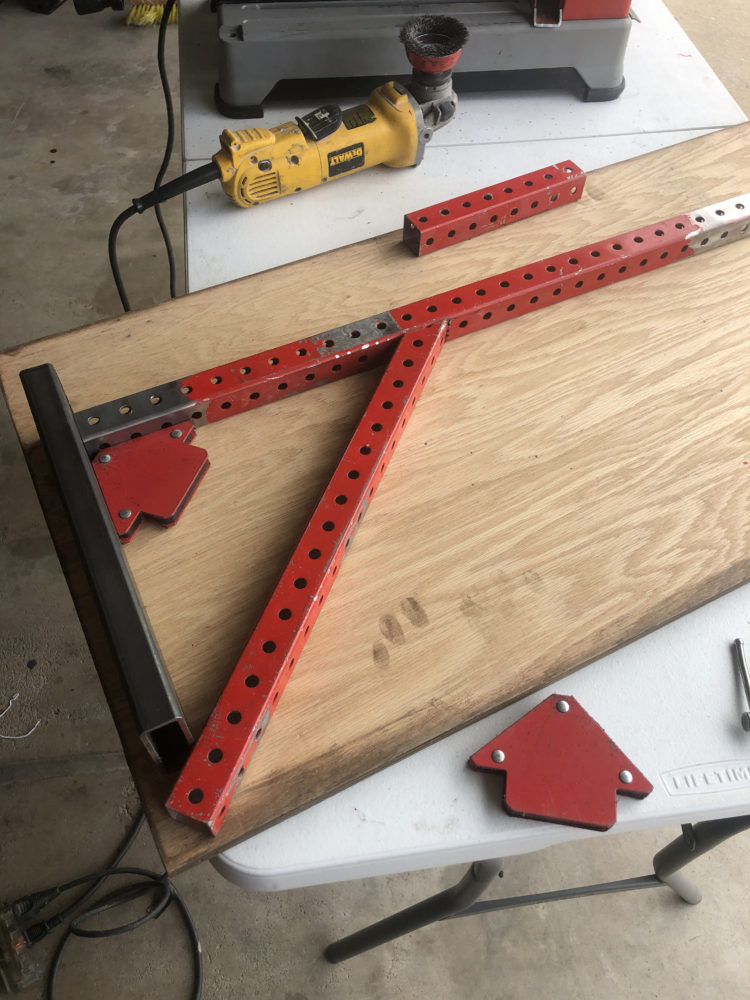
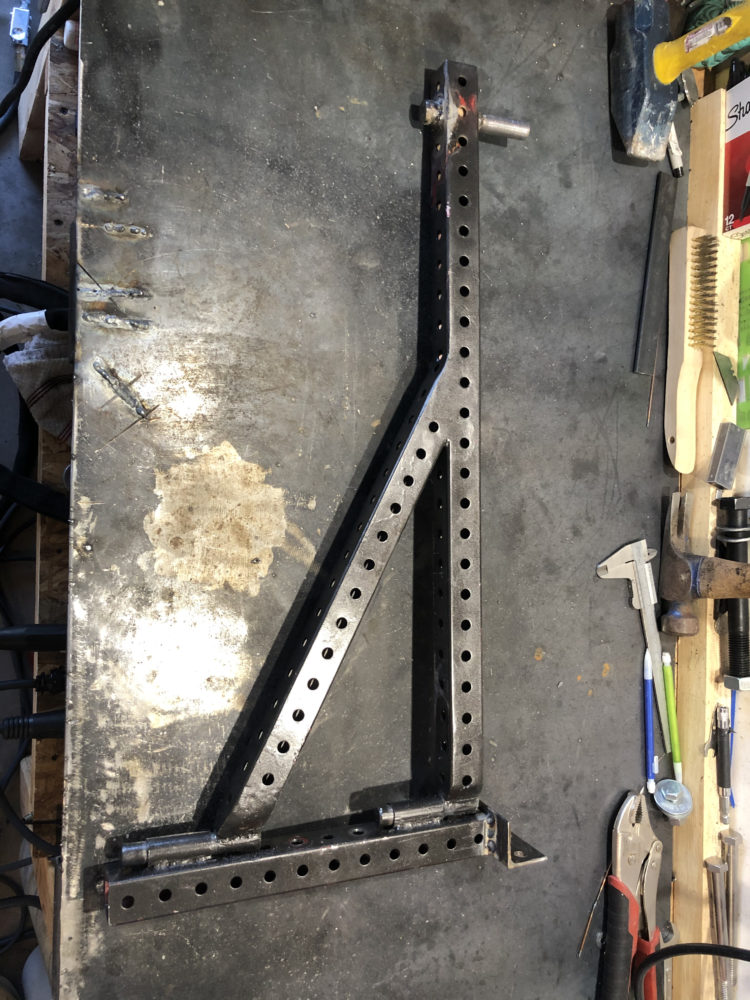
Once all of the pieces were cut, I began to mock up how I wanted the chair to look. Below is a couple images of the mock up process. I used some right angle magnets to make sure it is square!
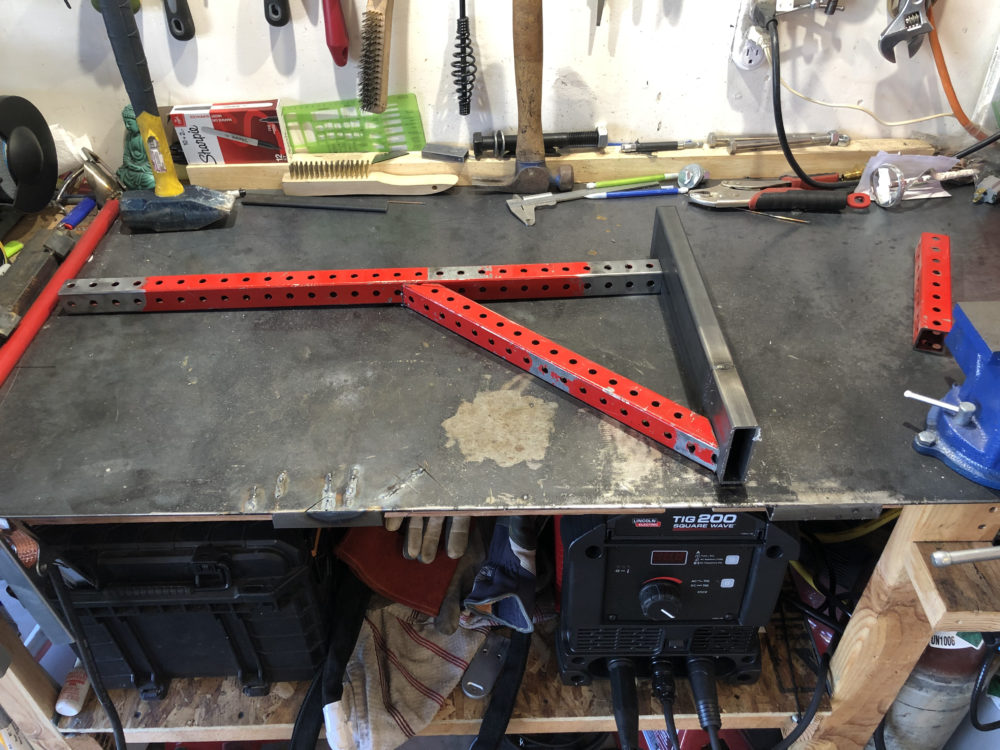
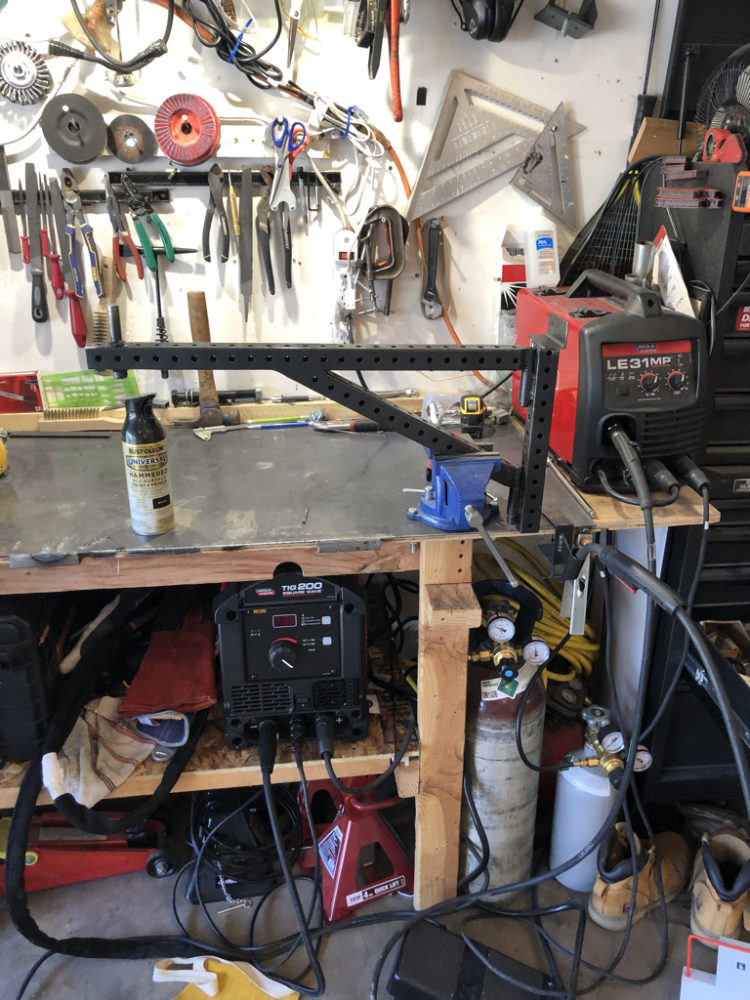
I moved it over to the welding table and got it how I wanted it.
Before welding it I cleaned all of the paint in the area that is going to be welded. I used a wire wheel to get the paint off, below is a picture mid way through the process.
Time to weld! Don’t worry, the paint was cleaned off all of this before welding, for some reason I took this picture at this stage because i had my phone in my hand at that convenient time.
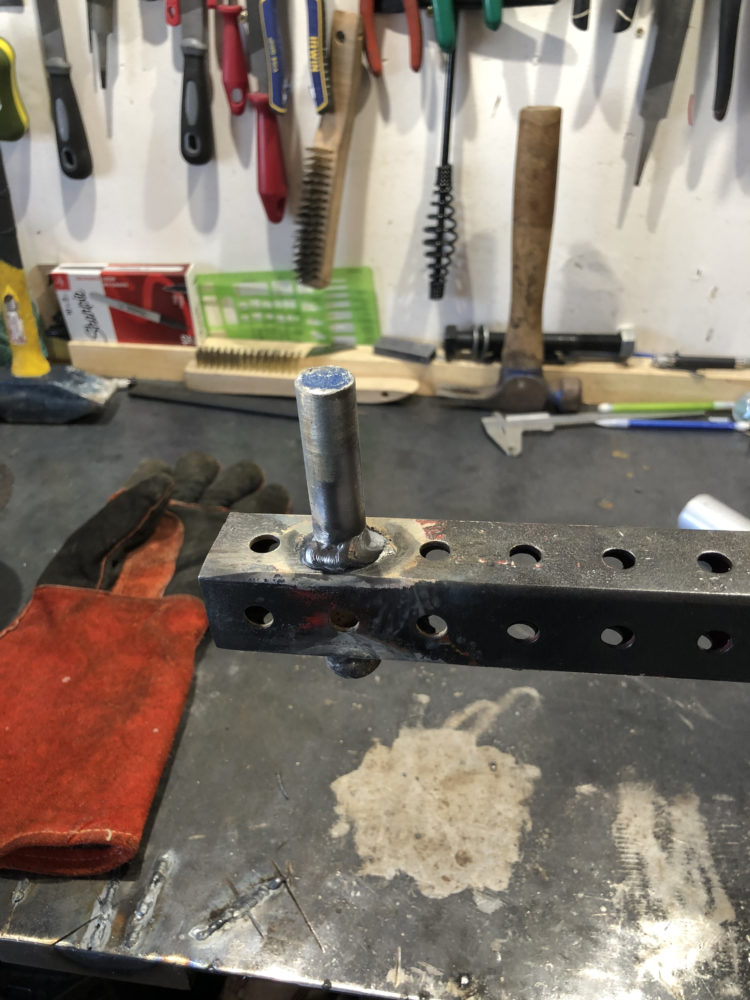
After a little welding I finally got the main frame put together with a light coat of hammered black paint! After I painted I decided that I need to clean up my welds and redo a couple of them.
This was my attempt at cleaning up the weld, it was a tough welding interface because of the drastic differences in thicknesses between the two materials.
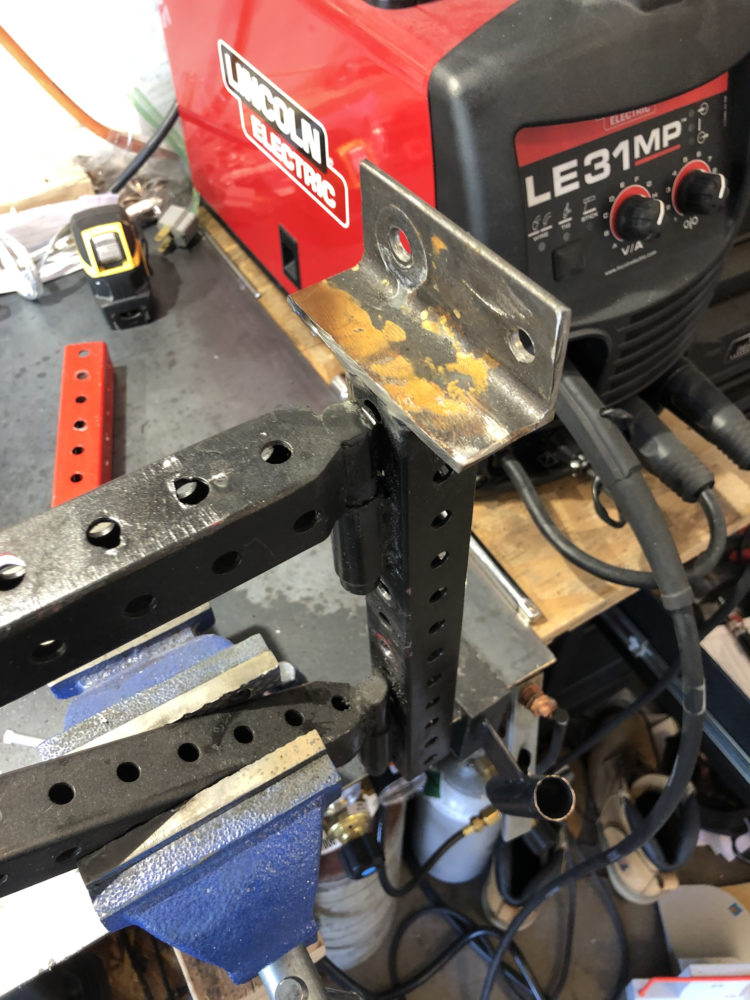
I also added a piece of angle iron over the top of the bolted section to add an addition spot to bolt it to the bar. It was left outside so it is a little rusty but it will be cleaned up and painted!
Here Is an image of a fresh coat of paint on everything. So far I am pleased with how its coming out!
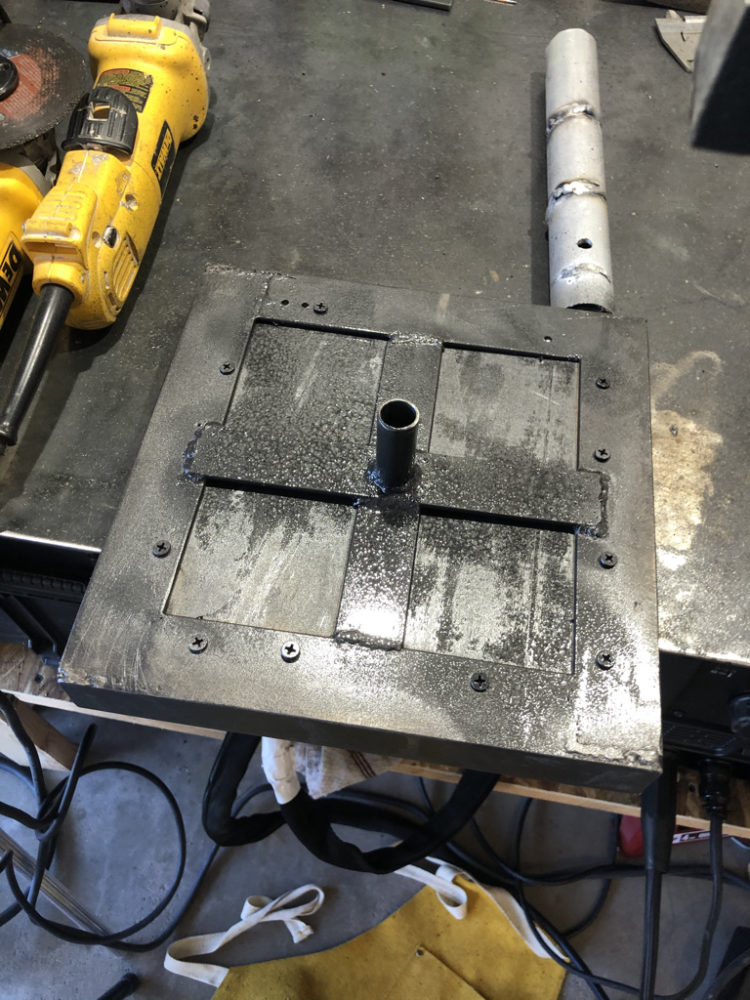
Here is an image of the base of the stool, in the image following this one you will see the top of it! I kept breaking screws while installing the wood.
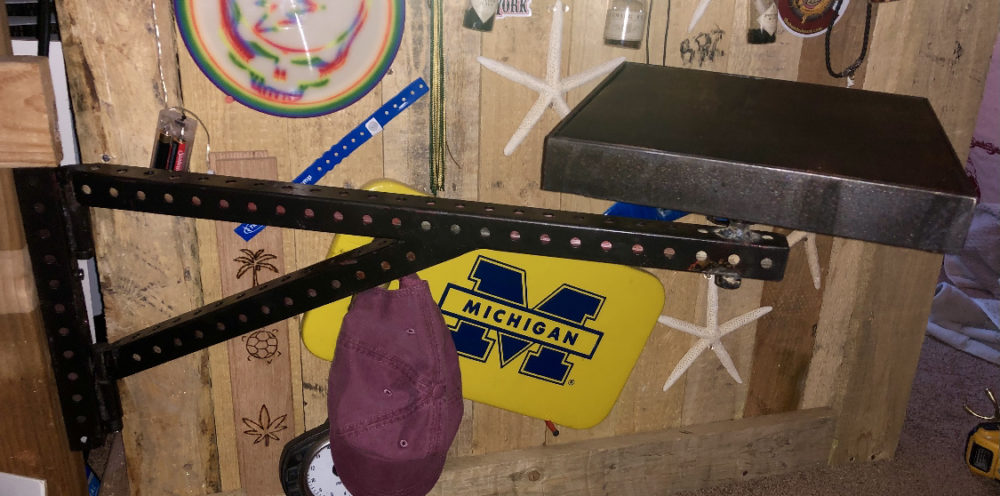
This is the finished product! Super happy with how it turned out.
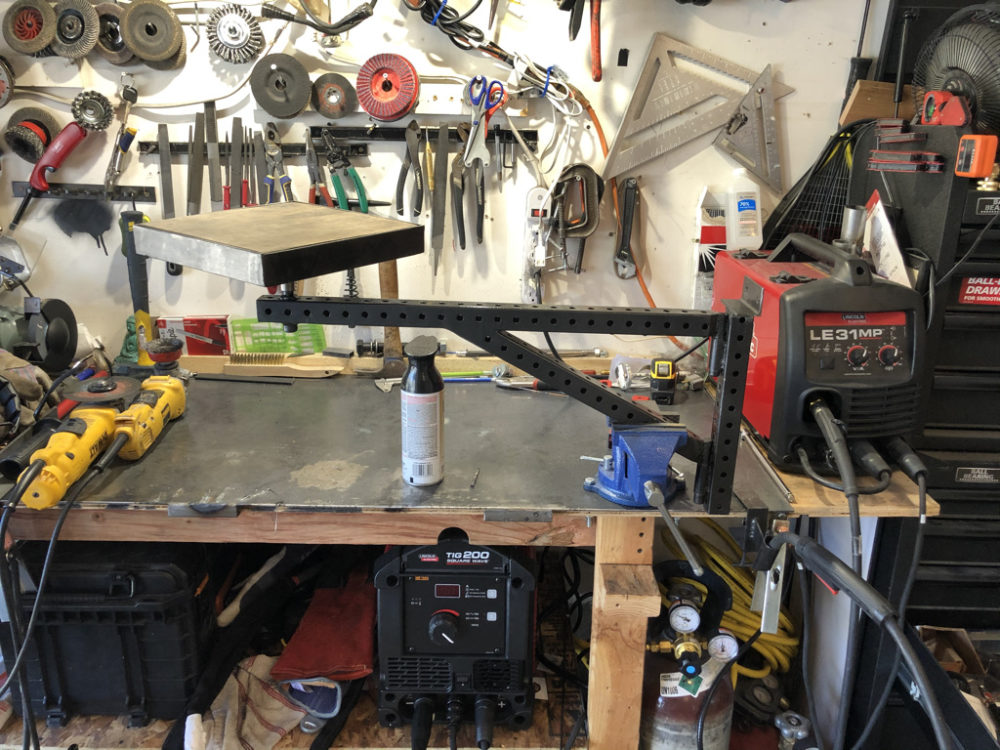
This is a picture of the stool attached to the bar! It works well!
In conclusion this turned out pretty much how I expected it to turn out. I had an idea in my head and it seemed to work out pretty well. If I could do things differently, I definitely would. For example, I would use solid square tubing instead of ones with holes, I would have spent more time cleaning up my welds and painting better. I am currently waiting on bushings so I can reduce the squeak between the metal interfaces on the swiveling components so that will be the next step in this project! I am happy with the general aesthetic of the project, I think it came out super rustic and industrial/ manufacture-esk.
Video of my presentation:
Citations:
https://www.lowes.com/pd/Hillman-12-in-x-1-ft-Plated-Steel-Sheet-Metal/1000035125
Architecture & Design, www.architecturendesign.net/.
Giphy. “Private GIF.” GIPHY, giphy.com/gifs/cnc-slowed-machining-FKjTmC3duRXbi.
2 Comments. Leave new
Peter, Awesome Job! I really dig the holed tubing and what a great space saving solution to your bar. I also enjoyed the fact that you welded your project since that was somewhat unseen across the other projects in this class! Its always hard to tell when a project is fully done so be careful that the bearings dont lead you down another rabbit hole!
Hey Peter,
I think my favorite time of Engineering is practical engineering and you really took that and ran for this entire project it seems. I really like the simplicity of your design and think it conforms well to that industrial design aesthetic you were shooting for. The way I see it, you took the bones of something that could’ve easily been turned into a more elequent home product with a lot of fluff added on top to make it conform more to being in a home, and went in the opposite direction. The strength of a chair does not come from the elequent backplate or carnved legs, it comes from the structure and bones which you have done by keeping the design in it’s most simple form. Great job.