
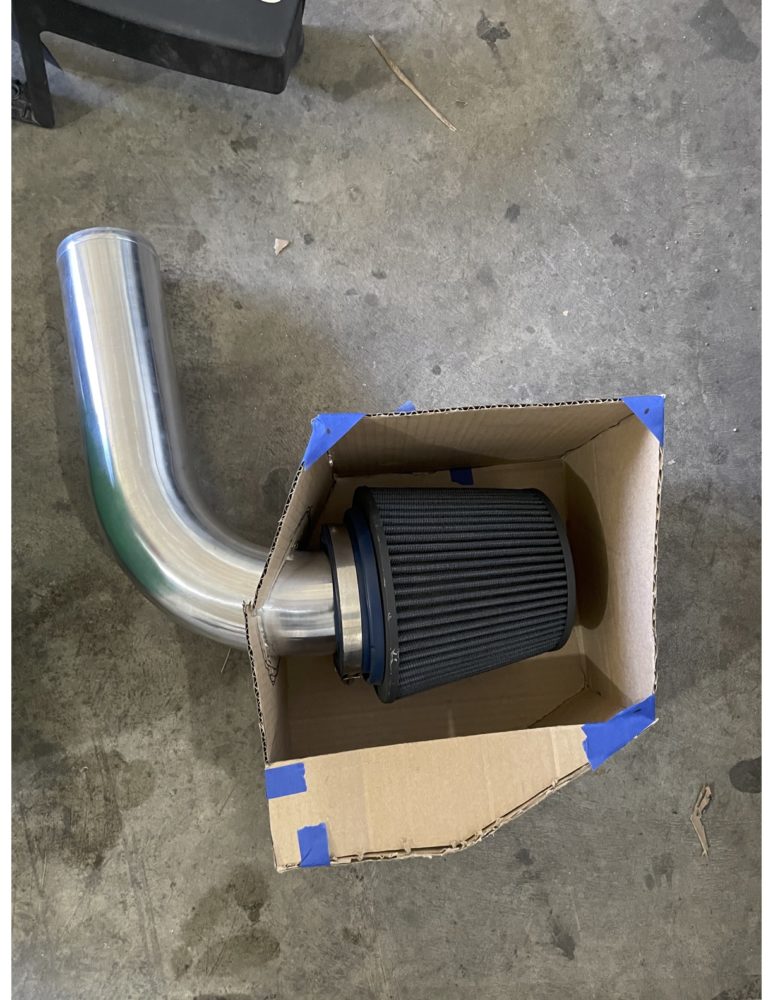
For my final project, I decided to design and construct an air intake system for my car that consists of an intake tube and air filter enclosure. I am aiming to develop a design that simplifies the engine bay while also conforming to the minimalist aesthetic. However, I want to add features that are reminiscent of the other components in the engine bay like the fuse box and the valve cover on the engine. With these constraints in mind, I will create a simple elegant look, almost as if the manufacturer intended it to be there.
My primary constraint while designing this project was the available space I have to work with and the size of the air filter I decided to use. I also had to design something that would actually be functional, so it must have a smooth path for fresh air to get into the engine. I discussed my design process more in-depth last week, but I began with 3 potential designs and explored the benefits and shortcomings of each design. I choose something that takes up more space in the engine bay but also gives me more freedom for the design process.
![]()
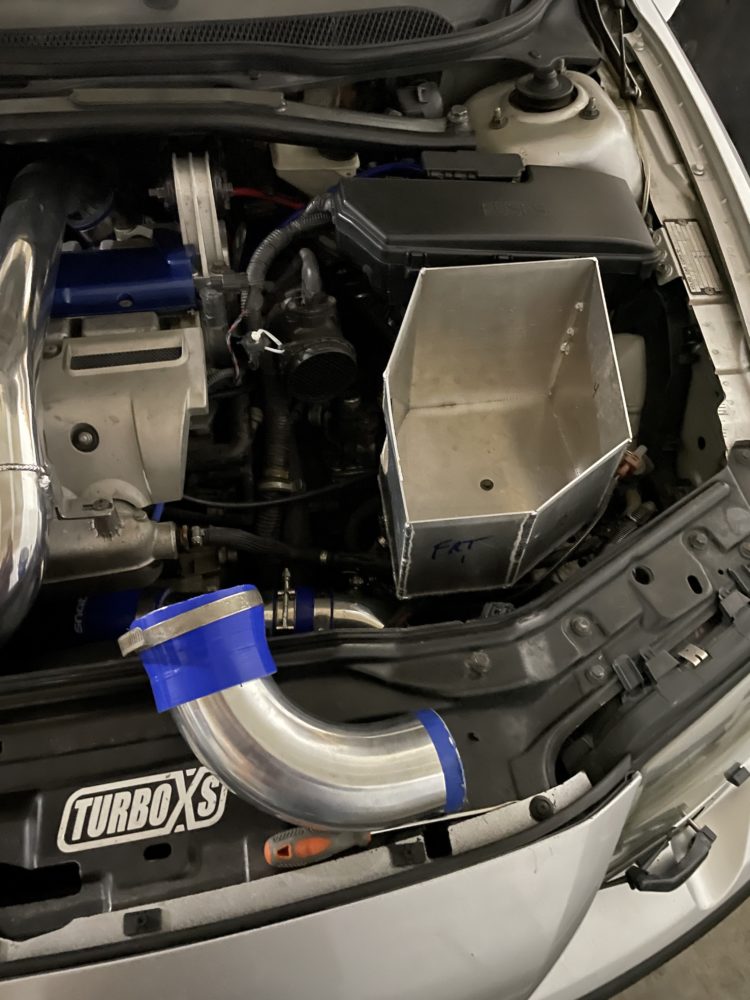
I started by taking everything out of the engine bay that would no longer be needed like the cover panel on the driver side and the air filter. This allowed me to design a prototype that would fit well and match the vehicle without excessive amounts of work. I was lucky enough to find a good mount to build off of that would be solid enough to hold the weight of the airbox and happened to have a threaded hole which I could use to mount to.
I primarily used cardboard to construct my prototypes, as it is easy to cut and bend. I connected the pieces together using masking tape so it could be easily disassembled if needed. My process was to first test fit the piece, make the cuts or bends as needed, and then test fit again. I did this for each part and every time I completed a part, I taped it to the prototype. After many test fits, and more than 3 different designs, I decided on a relatively straight top edge, and welded edges instead of smooth bends. I went with this design because it effectively combines ease of construction with good aesthetics in the engine bay. I am very pleased with my prototype because it matches all of the contours I wanted it to but also minimizes the bends and features.
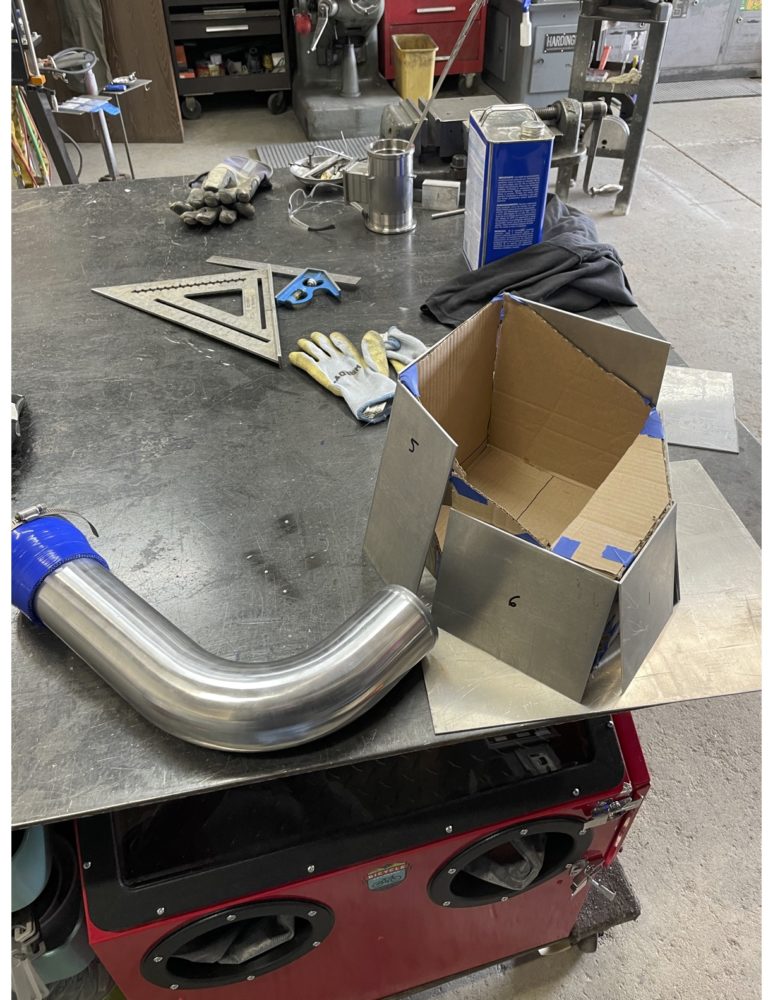
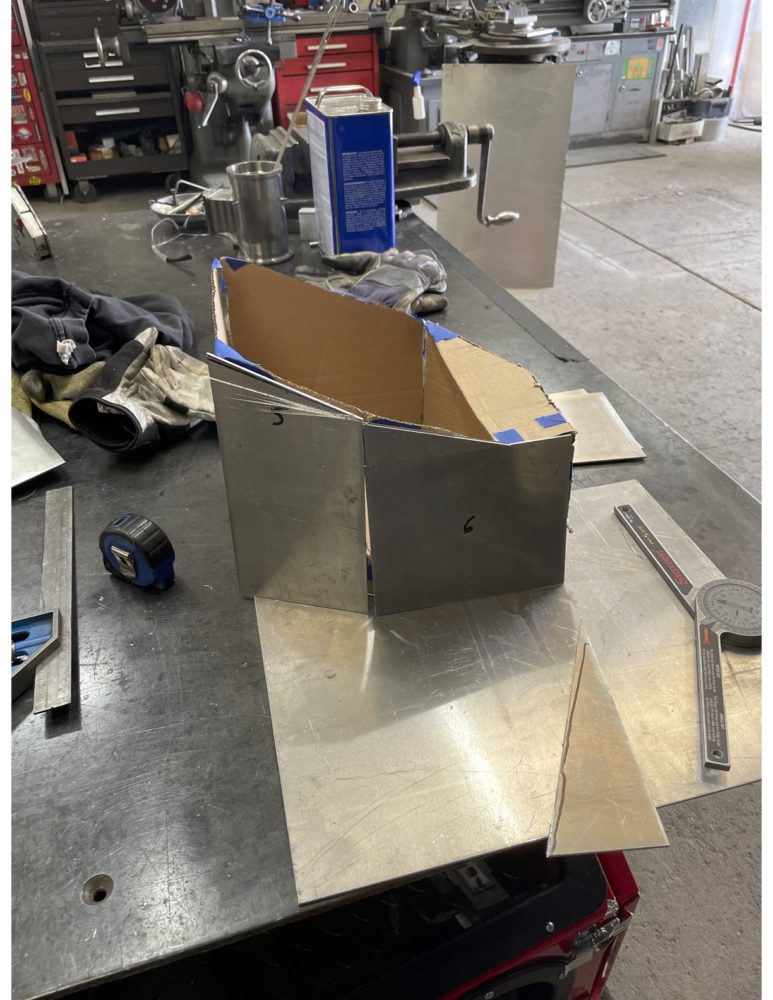
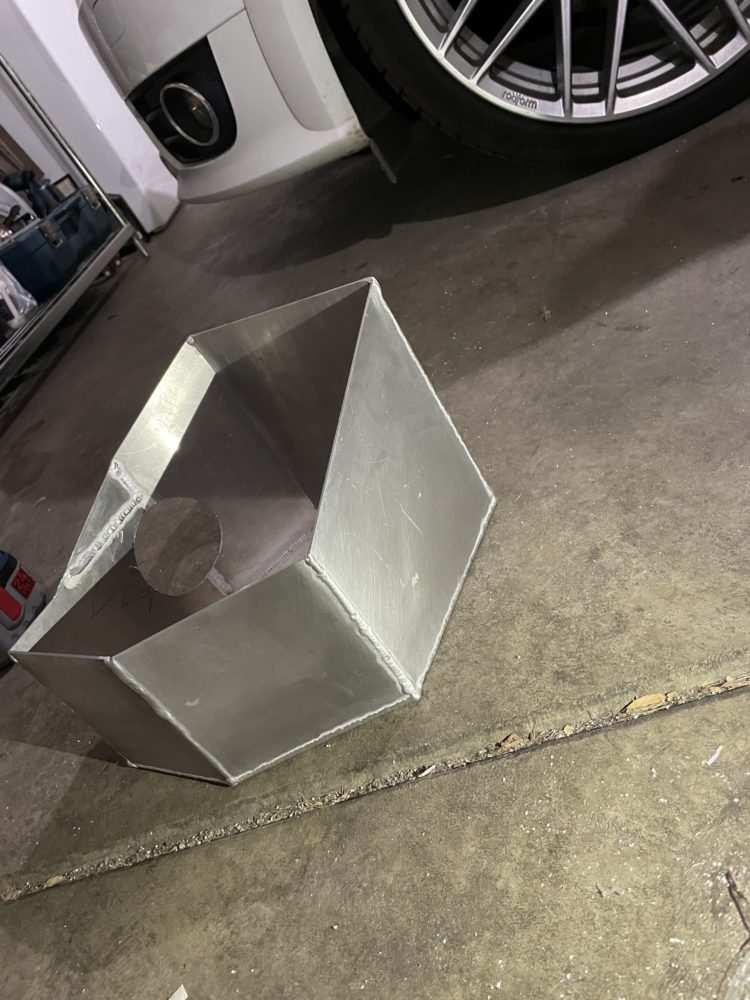
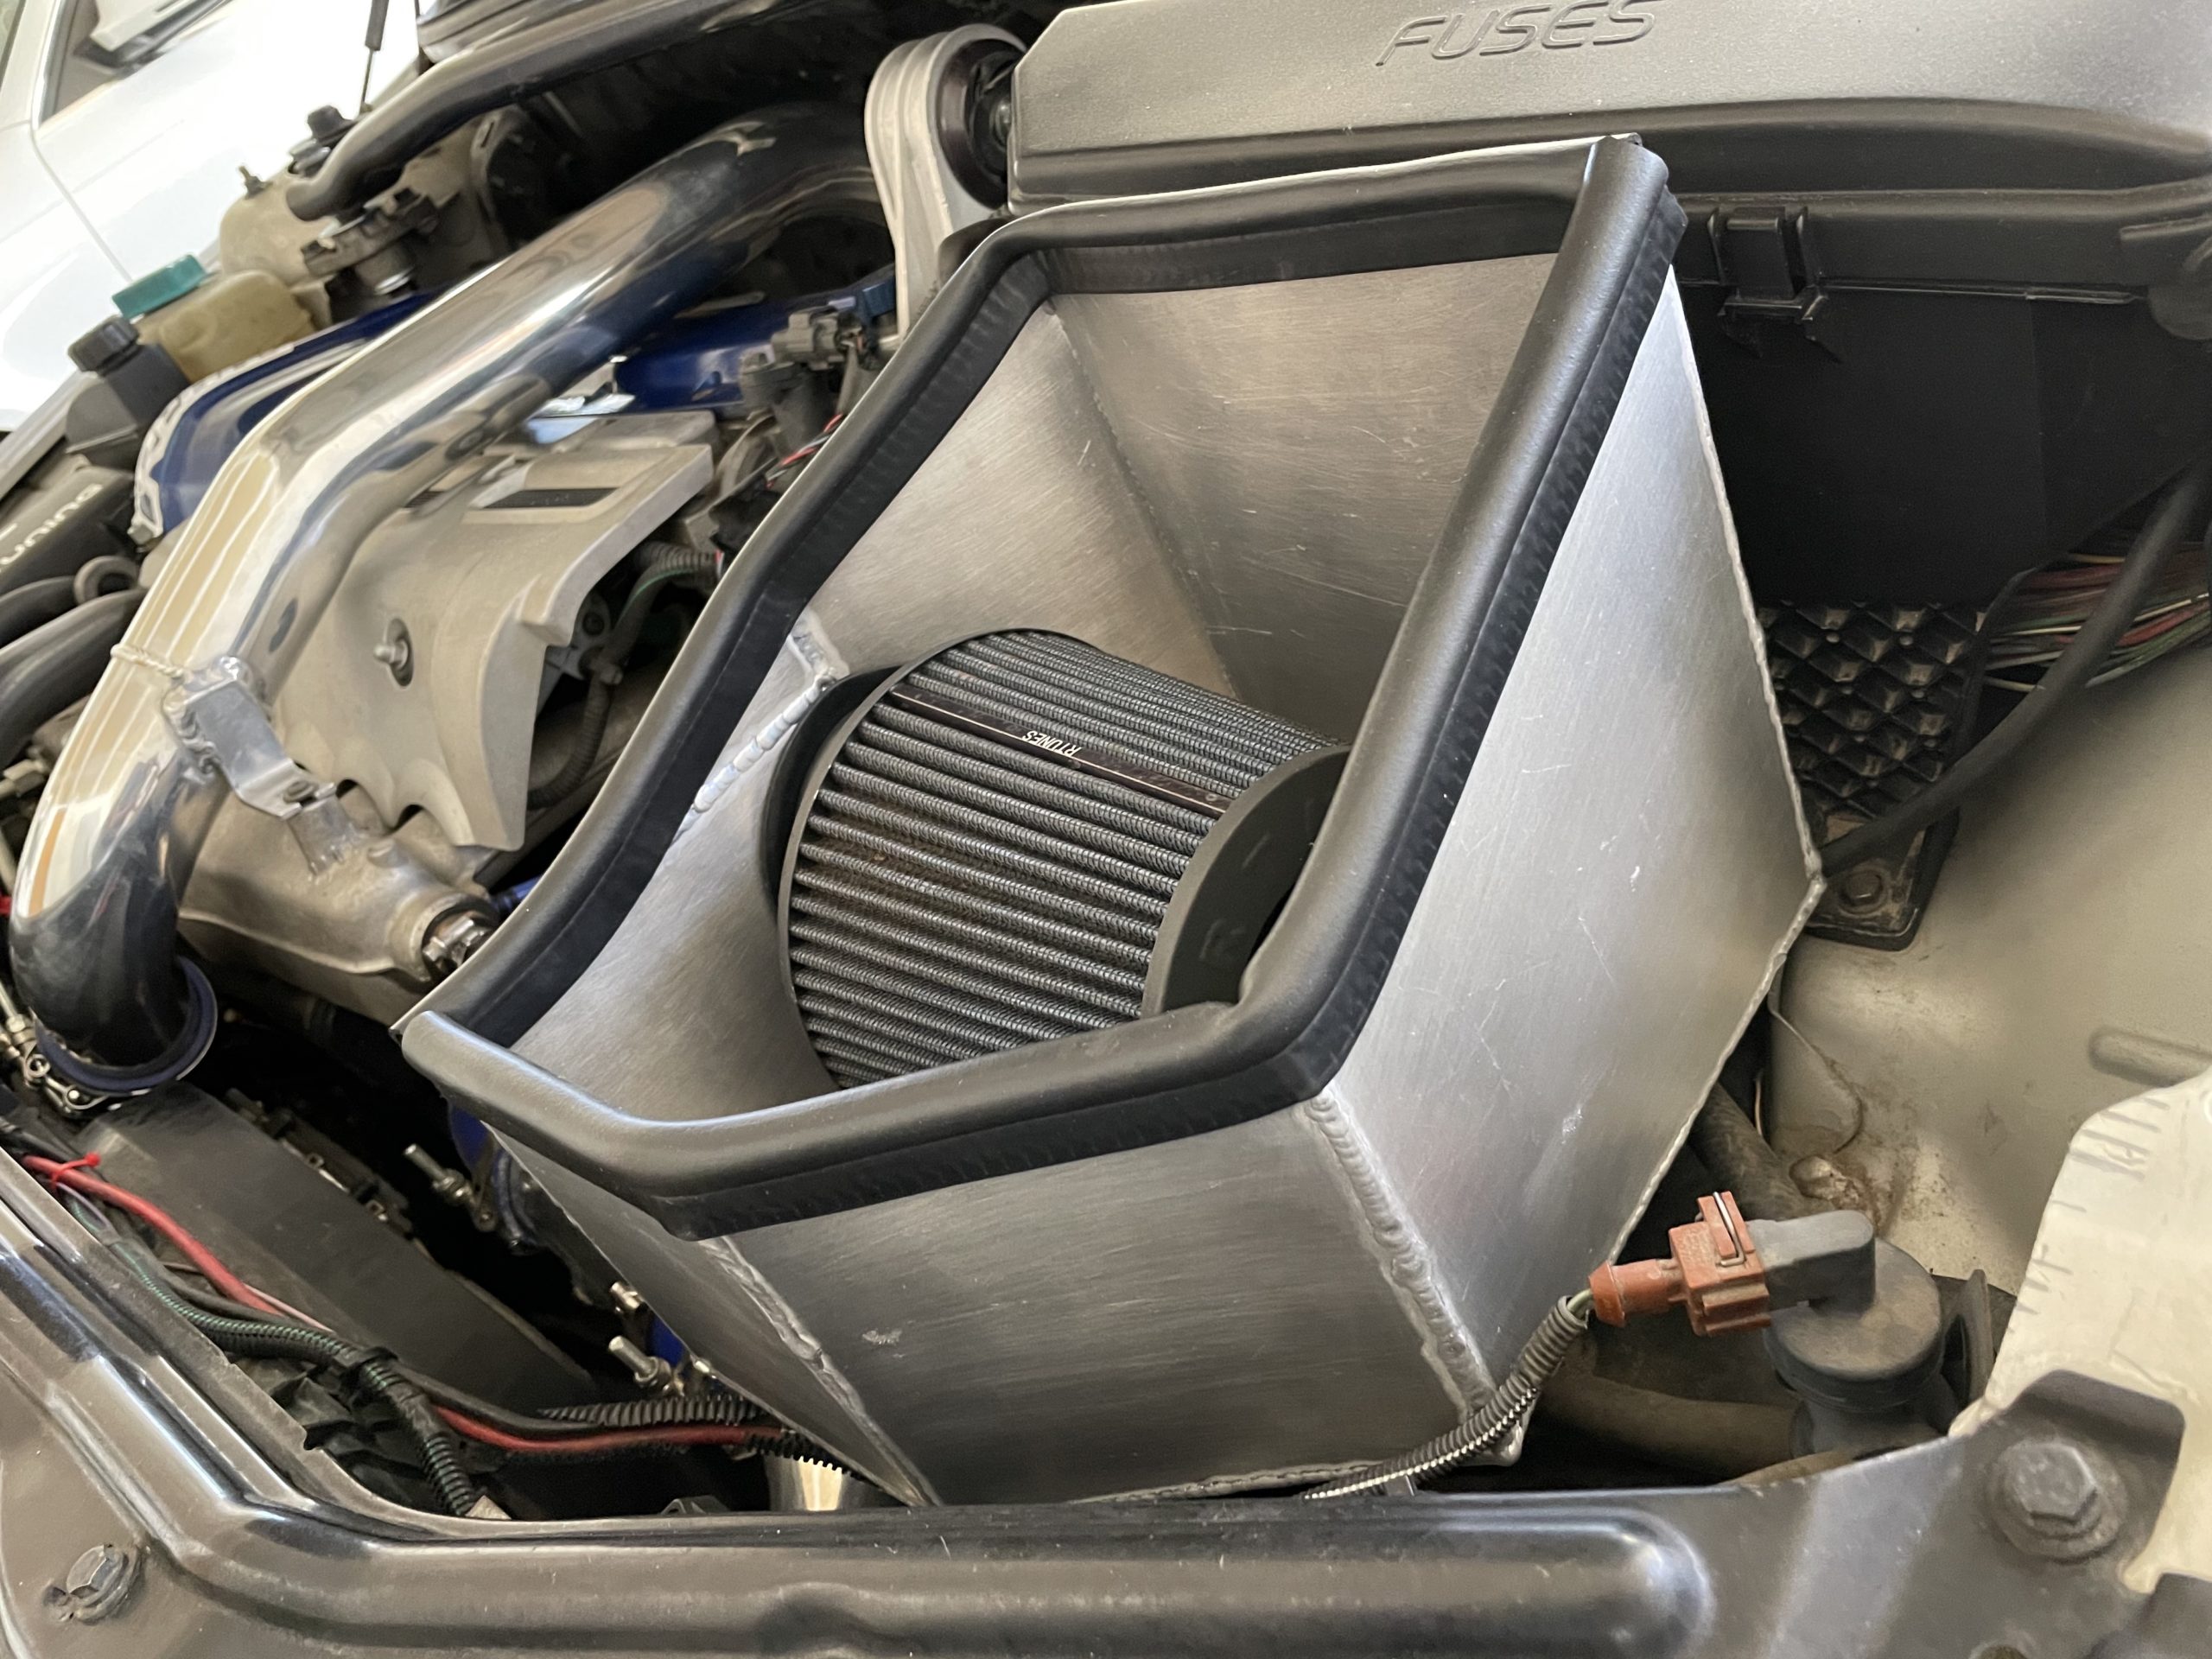
My next step was to turn this prototype into a reality. Luckily, I happen to be working with a bike frame builder who was nice enough to share his shop and expertise with me for the metalworking. My prototype was very useful because I was able to remove the tape and trace out all the pieces I would need on sheet aluminum for cutting. I used a band saw to make all the cuts because most of them were straight. There was only one piece I had to make a triangular add-on to in order to satisfy the design. I quickly learned that fitting metal pieces together is not as easy as I anticipated. It took me some time to get the edges prepared using a grinding wheel, but I was pleased with the results.
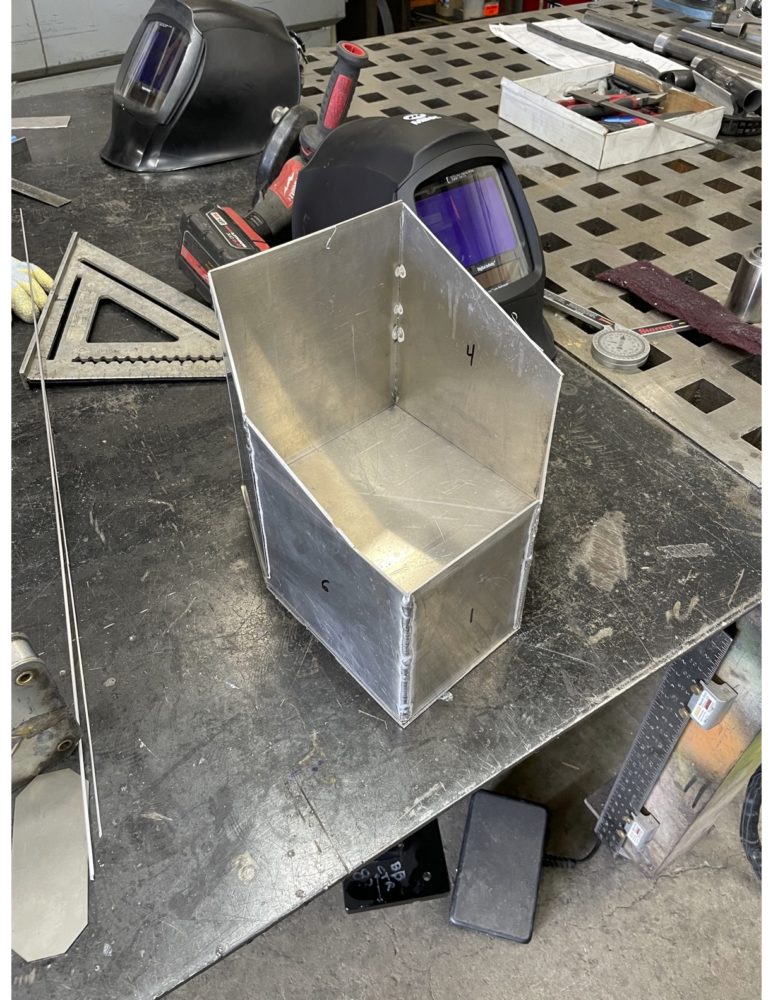
Once I had all the shapes cut out of metal, it was time to weld it all together. Unfortunately, I have never done any welding in my life, so I had to learn in order to complete this project. I was lucky enough to use high end welders and had someone who knew what they were doing to apply the correct settings on the welder. I began learning on stainless steel because it is significantly easier, and then transitioned to aluminum. The owner of the shop I was working at happens to be a master welder and he was able to teach me a lot about how to weld correctly. While I did do much of the welding on my project, he also went back and cleaned up my welds to make them look more consistent. Without him, my final project would not have come out as nice.
After all the welding was completed, there was still a lot of work to do. At this point, it is only a shaped box that fits in the space. The next step was to add holes so that it could be mounted in the car. To do this, I placed the bolts through the mount backwards and pressed the box into them so the bolts would create an indentation exactly where the mounting hole needed to be located. Next was to add a large 3.25-inch hole for the air intake tube to pass through using a hole saw. This was a little harder because I had to guess the location for my pilot hole, but it actually came out in the perfect spot. I also had to cut 2 smaller 2.25-inch holes next to it for the cold air feeds to pass through and give the engine fresh air (only seen in the cover photo). Of course, all of these holes had to be filed down so they didn’t have burs or sharp edges.
I also purchased a 3-inch 90-degree bend for my air inlet pipe. I purposely bought one that was too long so that I would not have to do any welding on it or buy any extra material. Unfortunately, this meant I had to shorten it to fit in the airbox. I made 6 cuts before I was happy with how it all fit together. After all the cutting and welding was done, I went over the whole airbox and inlet tube with a coarse scotch-brite to give the aluminum a clean brushed finish, which I think added a lot to the minimalist aesthetic. I noticed that as everything came together, I was missing little things like an extra hose clamp and weather stripping that I had to source in order to complete the project. However, this led to some poor choices that I had to quickly remedy.
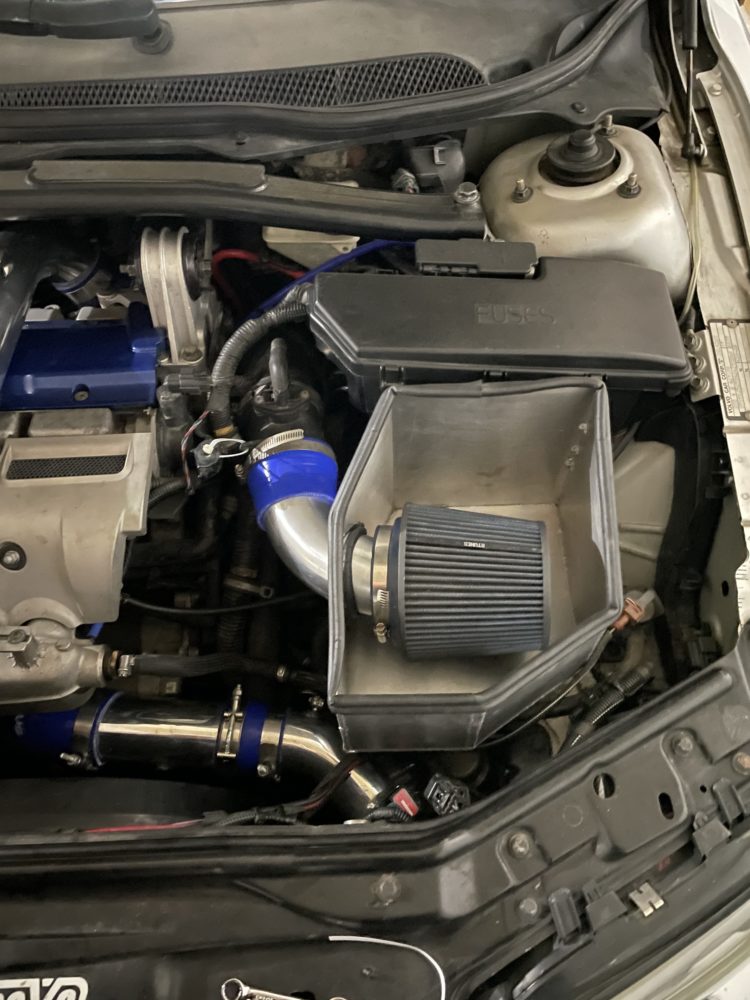
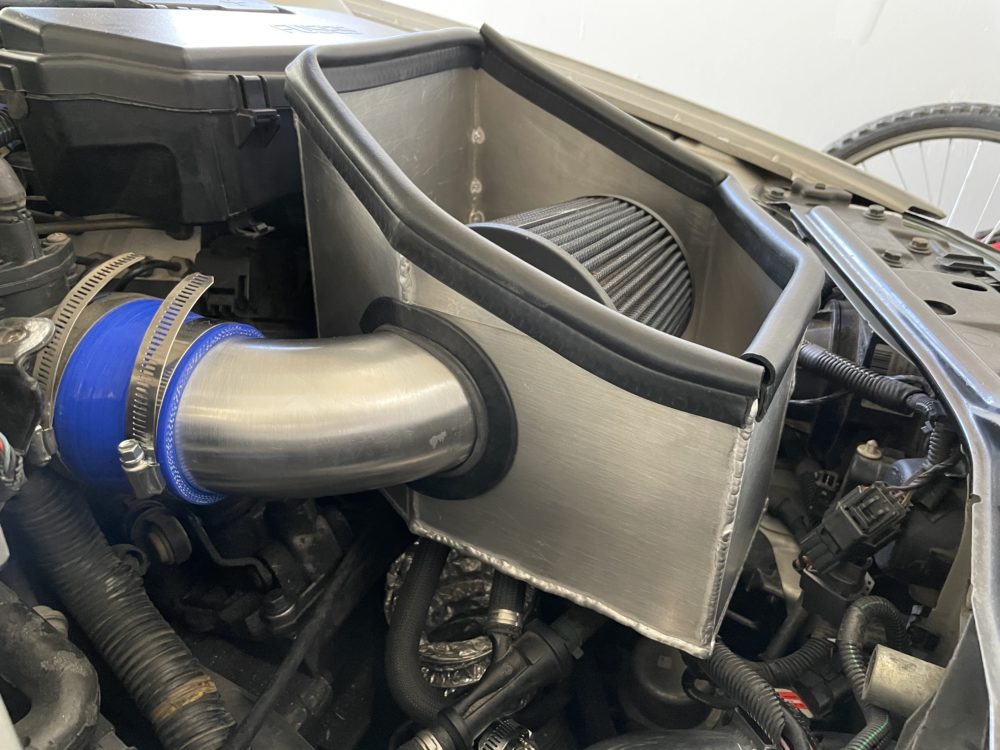
The first thing that was a big issue was the weather stripping I placed along the top edge. The material I bought from Home Depot was not effective at all and just kept falling off. I also really disliked how it looked. However, I found the perfect weather stripping on amazon that is designed to clamp onto a 1/8-inch edge and has a lot more cushion than the previous weather stripping I had. This alone added so much to how complete the project looks but it did have one unforeseen drawback. Because this material hangs up more, it actually seals to the hood. This is probably because I designed the airbox to perfectly fit the shape of the hood but designed it with shorter weather stripping. Unfortunately, this meant I could not add a top cover to the enclosure like I initially wanted to, but I am still very happy with the results and it is something that will probably stay in my car for the rest of its life.
If you are interested in seeing my live presentation of this project, follow this link: