

Manufacturing of the envisioned design is progressing well. As predicted, there would be a lot of fine detail that would need to be done to work with the unique geometry of the violin. Currently, manufacturing is being done with 3 steps
Step 1: Disassembling of the current violin
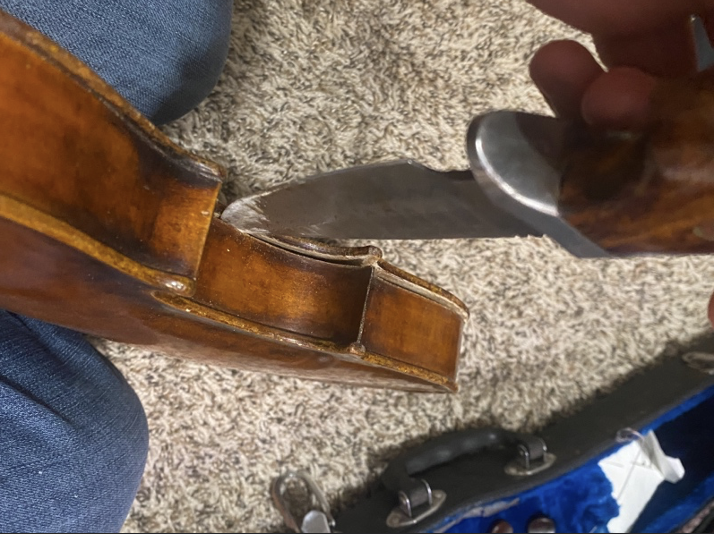
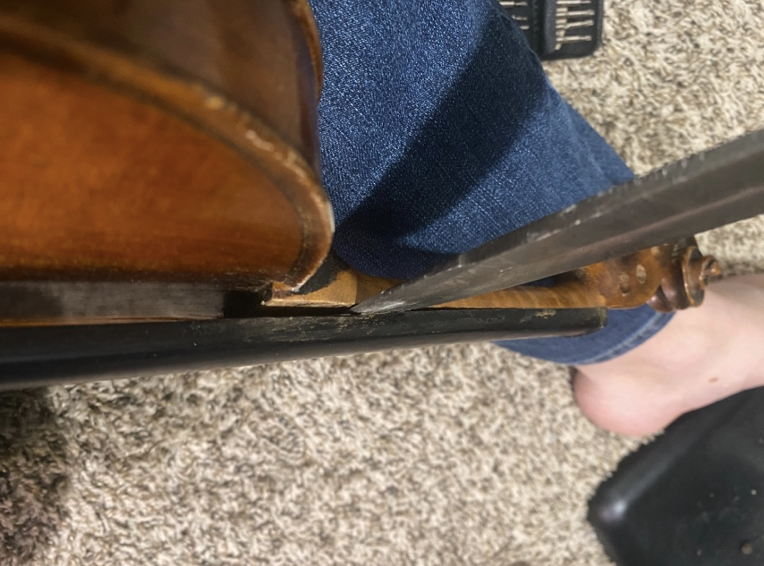
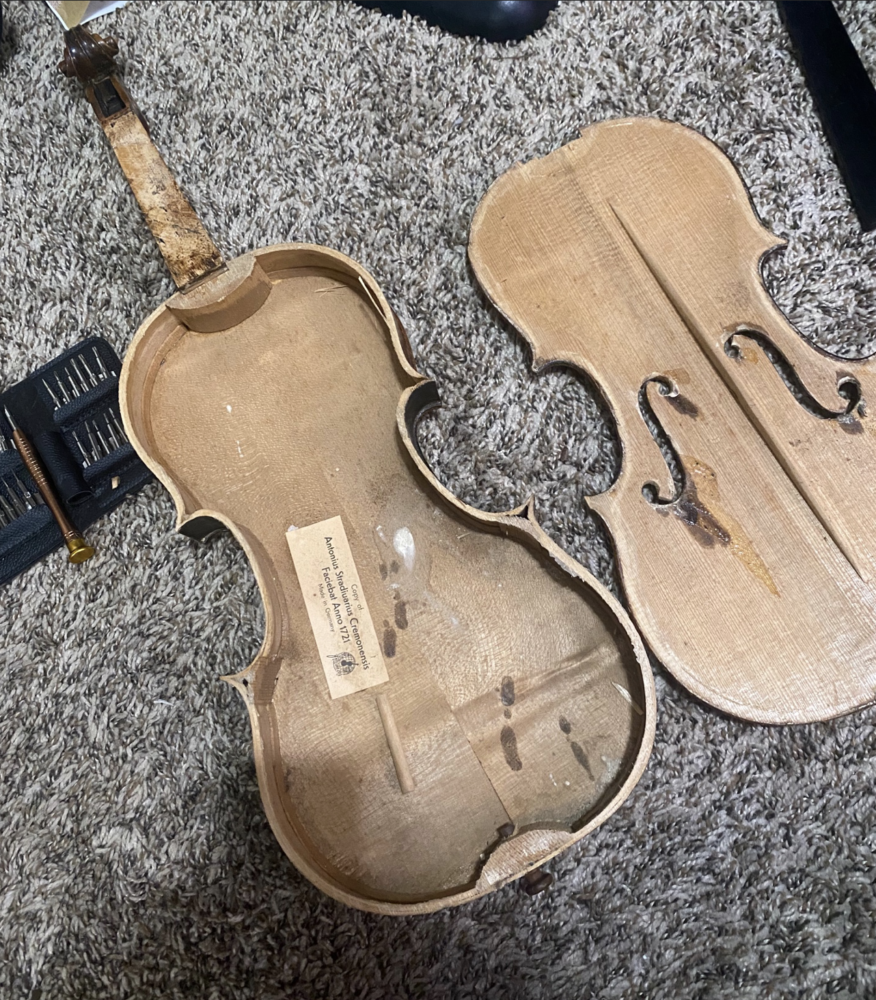
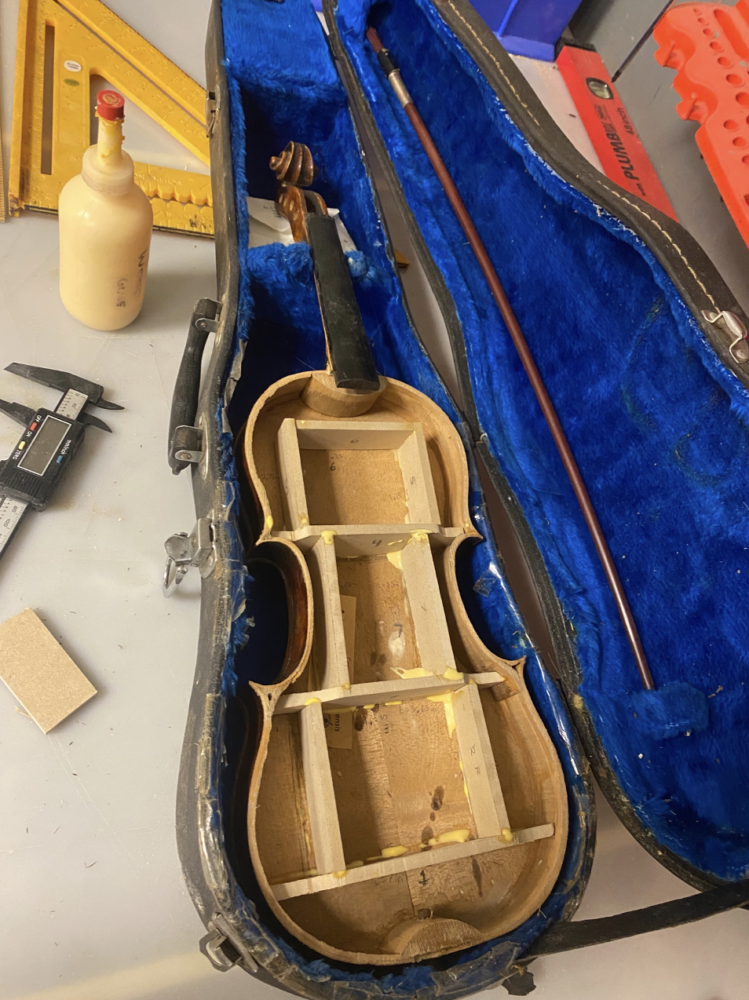
The violin has several steps necessary to take it apart. The first part is getting the violin to its base state which requires removing the chin rest, bridge, tuning pegs, strings and fine-tuning pegs. Once the violin is in its base state, I had to resort to some violin disassembly tutorials to be sure that I didn’t damage anything. With the tools available to me in my apartment, I used a hunting knife and hammer (using light & fast taps) to break the seam across the entire violin face. Doing this for both the face and the fingerboard is necessary for complete disassembly. Despite utilizing less than ideal tools, this method, was extremely successful and resulted in no damage to the instrument.

Step 2 (Current Step): Interior Manufacturing
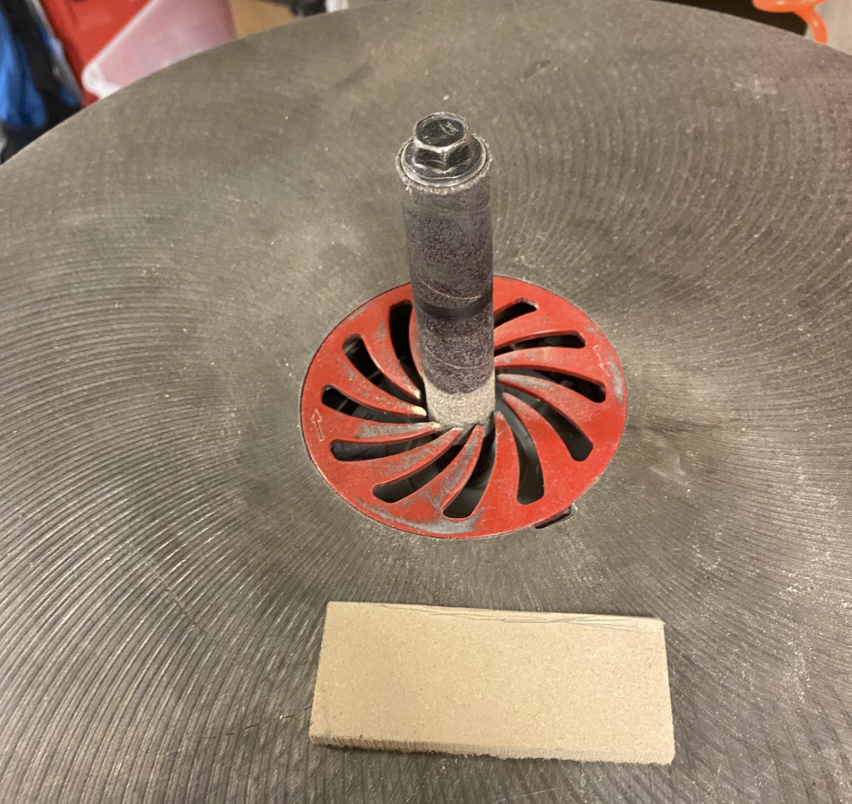
This next step is for building the interior model for the pictures to be placed. Because of the violin’s unique shape, and the way that it is going to be displayed, it will have 3 different nooks for photos. For this, I made cuts in the wood I am recycling and went to the woodworking shop. After cutting out the rectangles with the band saw, I set to making the pieces fit by using different sanders. This allowed for getting precise curves for fitting the pieces on the uneven surfaces.
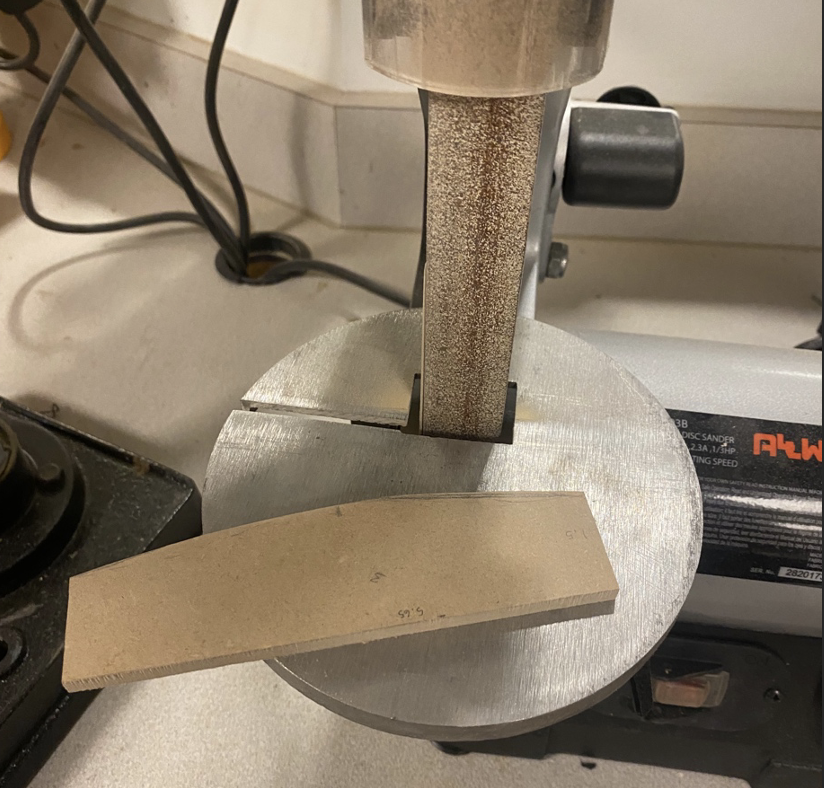
Once the pieces fit for the places that they are going to go, I then use wood glue to attach them
Step 3: Plants implementation
For this step, I will have to make sure that the violin will be able to hold plants for the long haul. For this, I will be cutting out acrylic to protect the pictures, laying down plastic bags to separate the violin from the moisture, and planting the moss. Plastic bags a kinda flimsy and hard to work with so I am currently entertaining the idea of using flexseal in addition to the plastic bags to make sure that the water will not compromise the violin. These steps should not be too difficult and will be able to meet the deadline for the project!
2 Comments. Leave new
This project and progress looks amazing! I love how this project will bring together awesome photos with a beautiful violin. How long where you planning this project?
This sounds awesome! I love how you were able to achieve the same results with only the tools you had on hand. What kind of photos and plants do you plan on having in your violin?