
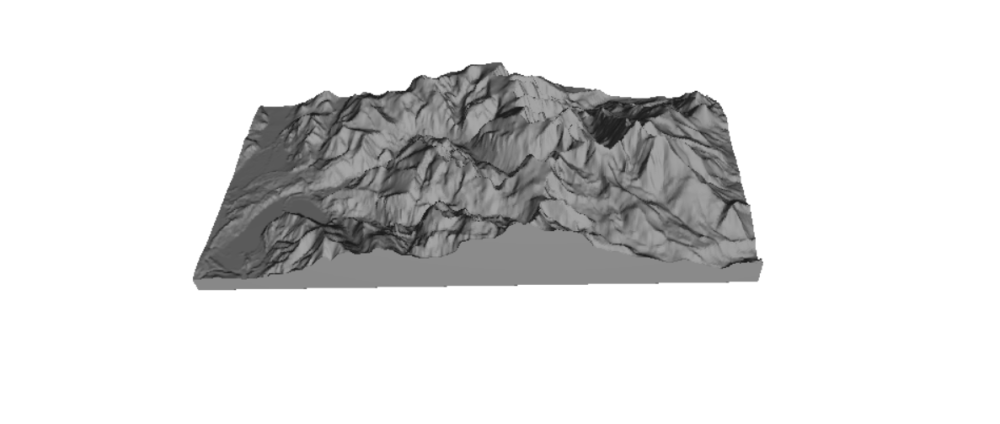
My Upcycling project has been proceeding with mixed success. I worked to determine the area I wanted to focus on, and decided on Long’s Peak and the Dream Lake area of Rocky Mountain National Park. After working hard to generate STL files using topographic data by setting the size, setting a z-scaling factor, and determining the area of interest I began this week ready to start manufacturing my project. Unfortunately, I have been running into roadblocks for my initial idea for my upcycling project at almost every turn. Over the last weekend I spend several hours developing STL’s hoping to be able to start cutting them on a CNC router the following Monday. My first avenue of exploration hit a dead end here as I was told that the operator of the CNC lacked one of the important bits to have a smooth finish. After researching possible locations where I could source a bit locally, I returned only to find out that the design was too complex and the CNC operator didn’t have experience with this type of CNC application, so it would take too long to get the toolpaths determined.
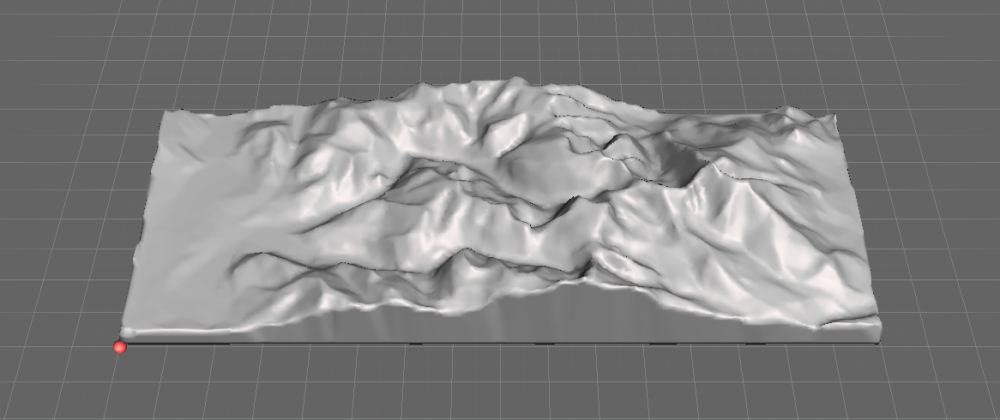
Following this, I made some design adjustments and worked on mesh smoothing so that the design would be easier to manufacture. I also reached out to staff at the ITLL, who responded that their CNC machines were busy with freshmen projects, and they wouldn’t be able to help me until after the deadline. So, planning for the worst, I began to prepare a modified STL that could be used for laser engraving using cardboard. However, I still had connections at a local makerspace where I could attempt to have my design made. Hoping for the best, I spent an hour preparing materials and then three hours in the makerspace working with one of the staff there only to be thwarted by software! Even though the programs would successfully create the G-code to define the operations, when it came time to actually cut out the material we would get errors that there was nothing that was able to be cut with the current settings. I did, however, get a lead on another wood shop on campus that may be able to cut the part from one of the staff in the ITLL. They wouldn’t have the ability to finish my project before the project deadline, but I hope that I can realize my initial vision with them.
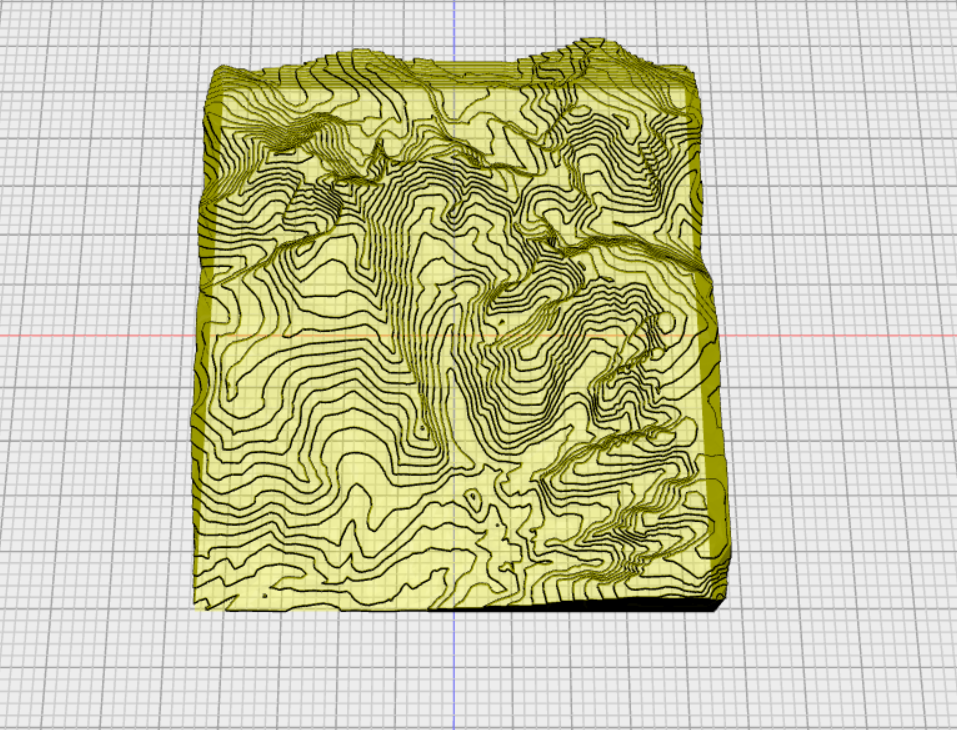
So, I have made the transition to focusing on finishing the project using layered cardboard. I have cone through the process of generating an STL file and importing it into a slicer so I can easily make files that can be used in a laser cutter. I also already have the cardboard necessary for my project, and I will be doing the necessary pre-processing of it in the following days. I am going to cut the larger boxes that I have into small 9×9″ squares that can easily be used for laser engraving. The STL that I have generated has 24 layers currently, though I may remove several of the bottom layers. I have also decided, and will be acquiring, some preserved moss. The suggestion of investigating terrariums was made on my last post, so after doing some research, I found that preserved moss could work very well for my project and it would match the aesthetic that I have been aiming for, albeit in a slightly different fashion that I originally envisioned. I think that the new direction for the project will still match with my biophilic industrialism aesthetic, though it will take on a more modern approach than I initially intended.
5 Comments. Leave new
This is really awesome! My project is along a similar vein, but I manually did the slicing. How did you accomplish it, what program did you use? Also, how long will the preserved moss last, will it stay green forever, or will it eventually fade to brown?
Like Anna said, your dedication to figuring out how to complete this project through all the hang-ups is admirable and I wish you luck on it. I was wondering, with your new direction of adding moss and greenery to your project, do you plan on adding other things like white powder or something for snow on mountaintops?
Hi Austin, thank you for the comment! I had planned to incorporate some form of greenery into my project, though my initial plans were to incorporate something like an air plant. I decided to pivot to mosses because of a comment on my last post and I believe that I could integrate them more into the aesthetic that I was targeting. When I was finishing the project, I decided to keep the rest of the project fairly simplistic to accentuate the differences between the moss and the cardboard. I also did this to highlight that the underlying material was just corrugated cardboard, which also ties in with my chosen aesthetic. I think that adding a white powder could look really interesting on another version of this type of project, but that wasn’t the direction I went in for this itteration!
This is a really cool project! I’m sorry to hear you’ve had so many hangups but it’s impressive how you’ve adapted to make things work. I’m curious to see how this turns out! With the new design are you going to be going for more of a topological map look, a miniature diorama look, or something else entirely?
Hi Anna, thank you! I am trying to keep my initial idea alive by kind of combining the look of a topographic map and a pseudo-terrarium. Since I can write this comment with the benefit of having completed this project, I decided to keep the cardboard as a fairly straight forward and simple topographic 3D representation. I however, added moss around the borders to make it appear that the cardboard topography was rising out of it. In this way, it can almost give the impression of a diorama, though that wasn’t necessarily my design intent. Despite the trouble I had initially, I am very happy with how the end result turned out!