
The inspiration for my upcycling project came from Central European folk ornamentation, and in particular, the work of Slovak artist Štefan L. Kostelničák. Central European folk ornamentation is incredibly varied across different regions, time periods, and even among individual artists. It champions the creativity and imagination of each individual who engages with it. At the same time, participating in the rich tradition of folk ornamentation can tie a person to the culture and people it comes from. Though I only started creating my own ornamentation recently, for me it’s a way to reconnect with my Slovak roots.
My initial design (which I doodled on my first day in Aesthetics of Design!) are a pair of dangling cloud-shaped earrings with beads and raindrop shaped pendants. They’ll be quite heavy and probably reserved for special occasions, but should definitely be wearable! My goal was to paint some simple, colorful ornaments onto the clouds to fit the ornamentation aesthetic.
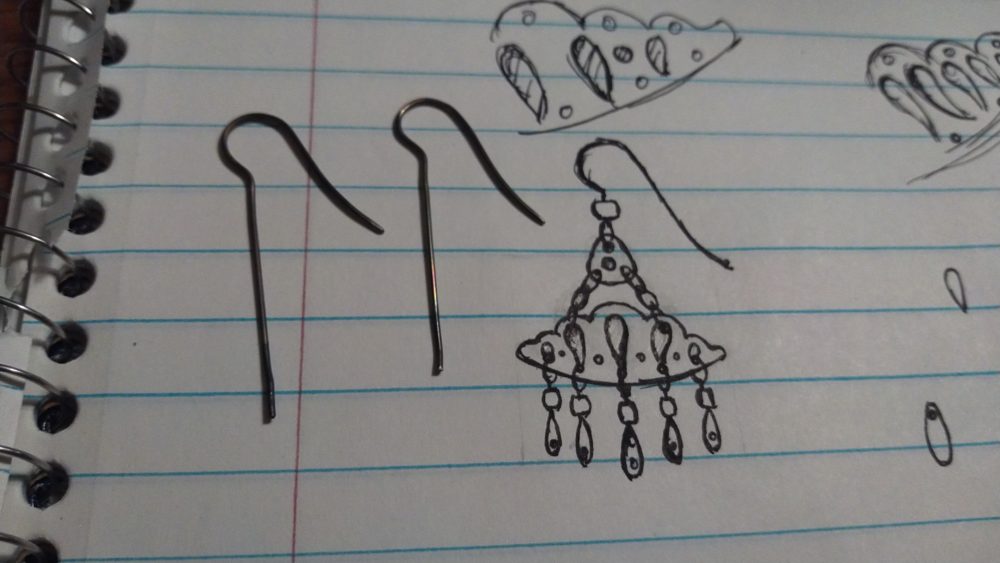
My initial design (Right) and the earring hooks (Left)
I started with the hooks, which I made from safety pins. As is, safety pins are quite springy, so to make them workable I annealed them with a lighter. Then I was able to bend them straight, anneal them once more, and rebend the pins into hooks. I also blunted the ends with some sandpaper so they slide into an ear piercing and don’t stab the wearer when put in.

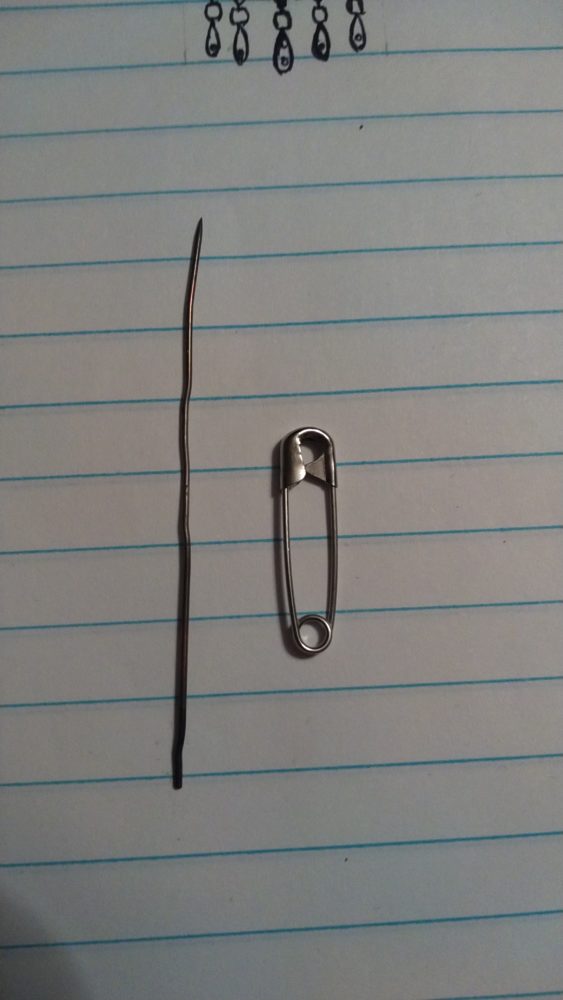
Annealing a safety pin with a lighter (Left). A straightened safety pin next to an intact safety pin (Right).
Next, I started on the beads. My original plan was to make them from wood, but I quickly found that at the scale I was working, the wood grain was not strong enough to hold itself together and the beads would break apart from even slight finger pressure. I had some scrap copper wire laying around and decided to use that instead. I made all 12 beads (2 large and 10 small) on a machine lathe. I had to run the machine slowly and take delicate passes as copper can easily bend or get gummy (ruining the workpiece or tool). It took a few failed attempts to figure this out.
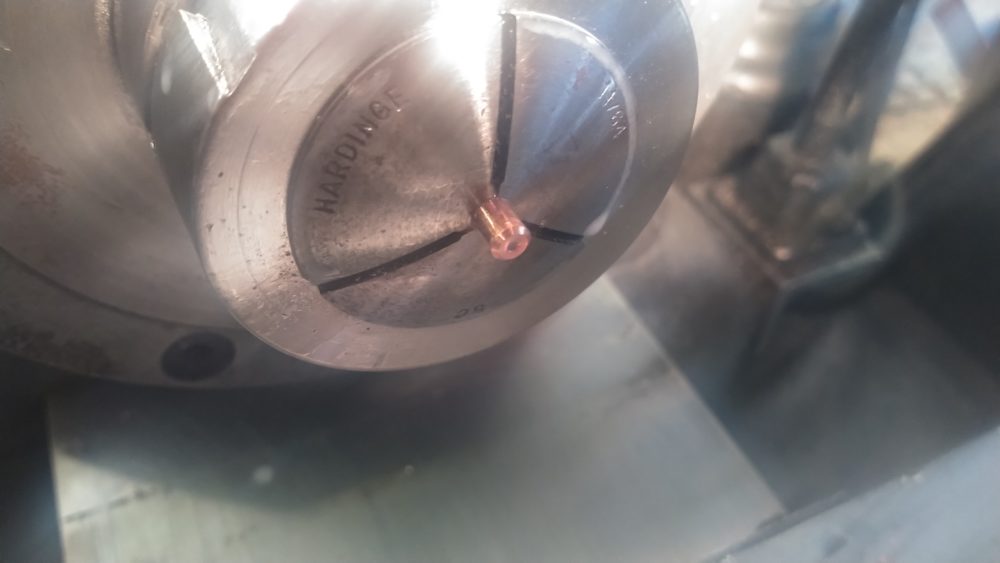
Turning the copper beads on a machine lathe
I originally intended to use the metal from a soup can lid for the steel forms but after cutting into one I discovered the metal was too thin and flimsy. I work in a metal shop where we have a dumpster full of scrap steel so I decided to use that instead. I first traced out the shapes I wanted and pre-punched divots where I wanted to drill holes. Then I rough cut the pieces using a shear and brought them to their final shapes using hand files. At the very end, I drilled the (teeny tiny!) holes for attachment points. Last but not least, I meticulously deburred each piece.
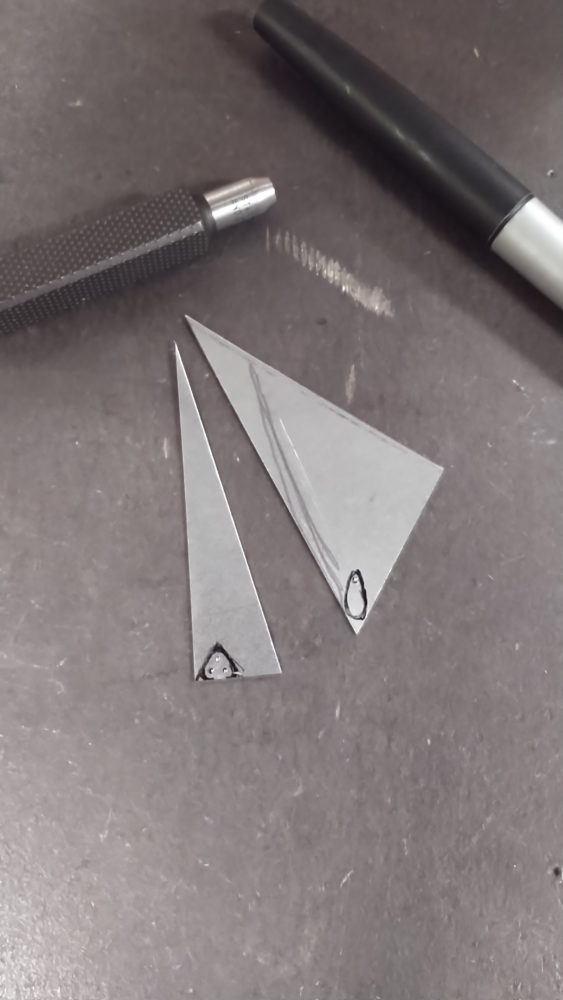
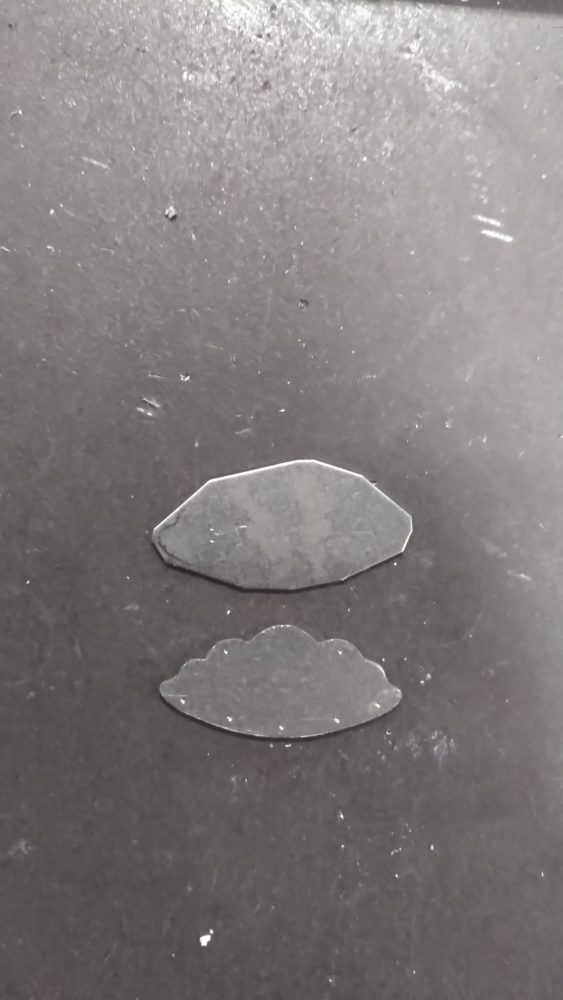
Forms traced out on scrap metal (Left). A rough cut and filed cloud form (Right)
After I finished the forms, I made the jump rings, which will suspend the cloud forms from the hooks. I made these by wrapping annealed safety pins around a small tube, then cutting the spiral lengthwise with a jeweler’s saw. The hardest part about this step was not losing them when they came free!
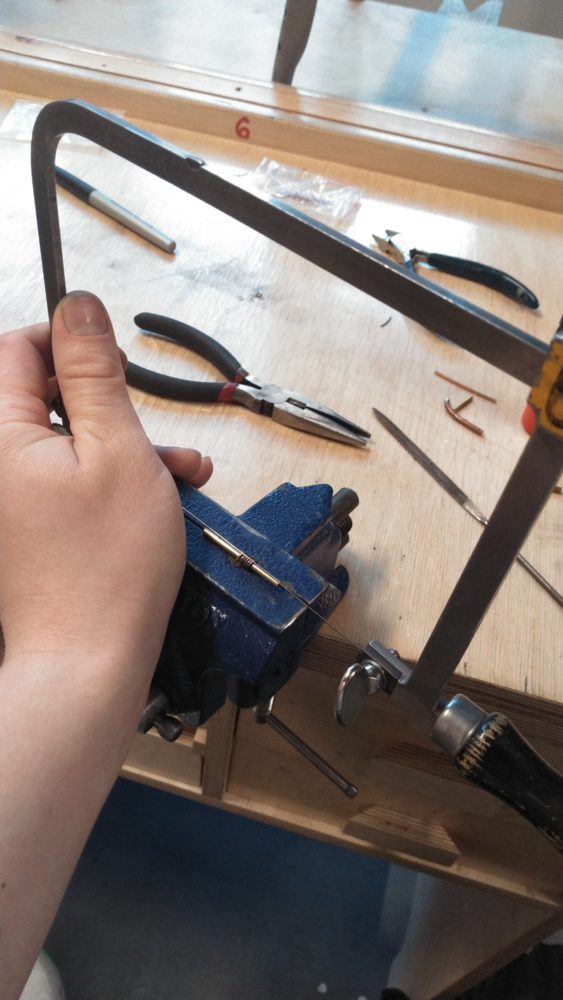
Cutting the jump rings. They’re super tiny!
Next I’ll be making pieces to attach the pendants to the clouds. Each one will have a loop on either side and a straight part in the middle where the copper bead will be held captive. After that I’ll sand the steel forms, paint them and assemble all the pieces!
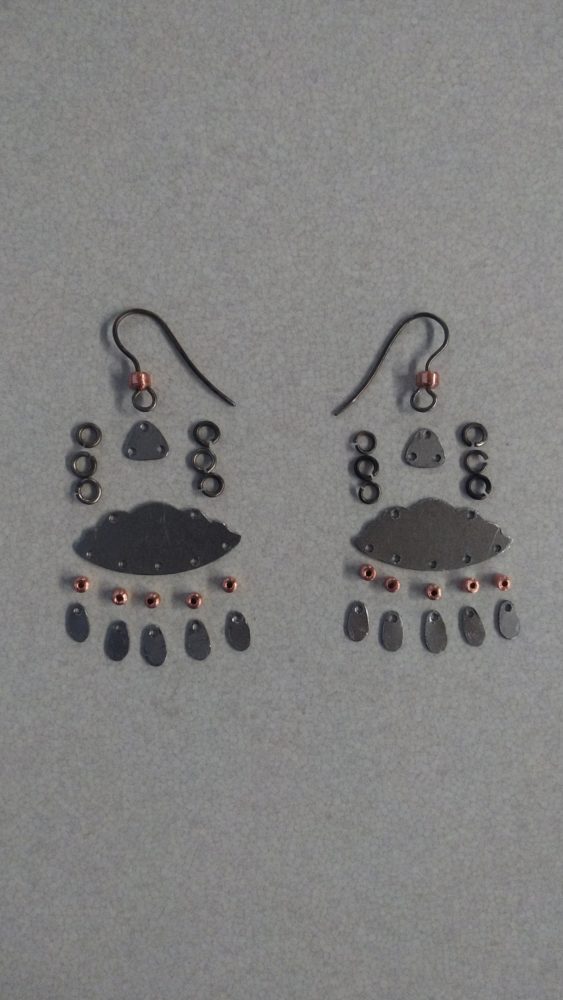
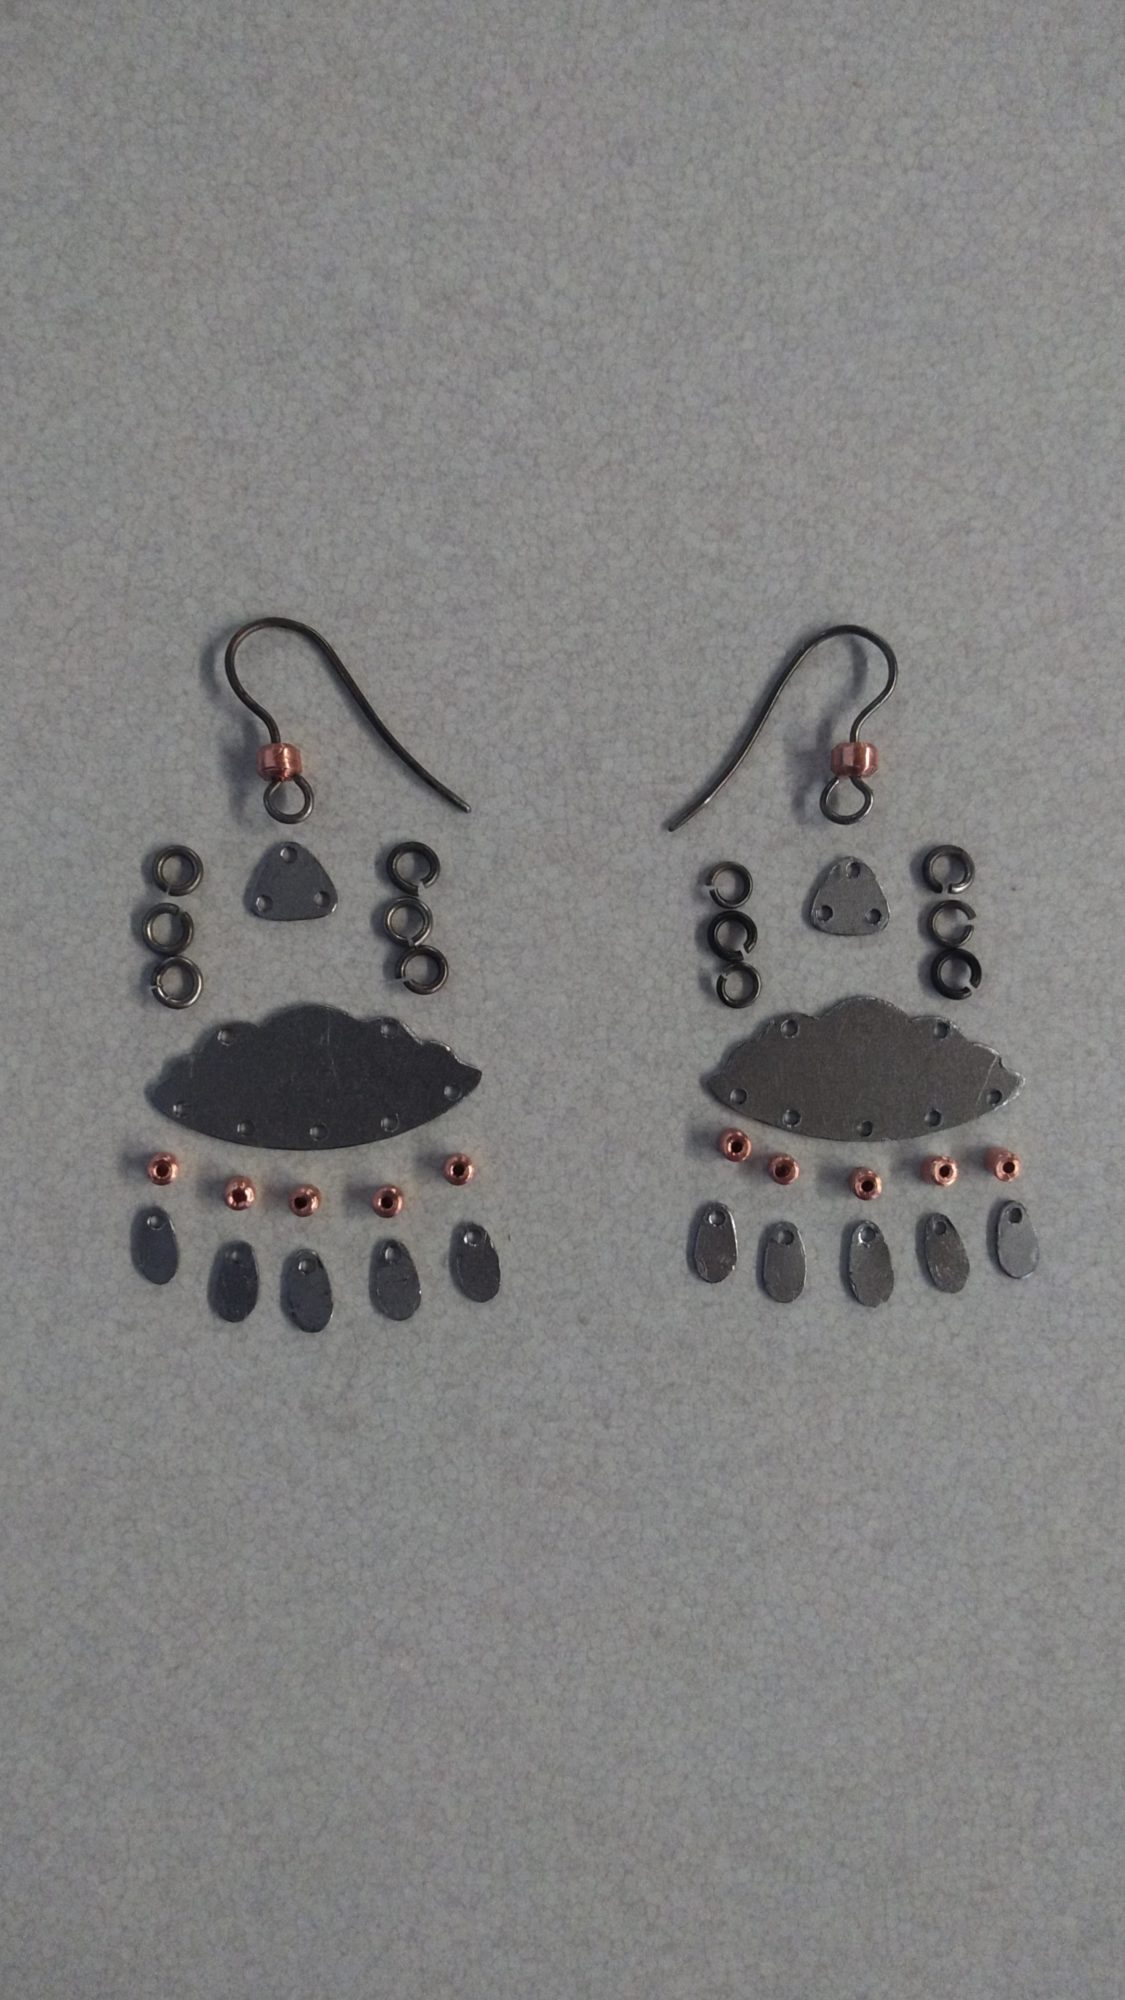
My progress so far. It’s really coming together!
6 Comments. Leave new
I love these!!! I am impressed by how you were able to make them so symmetrical while still using scrap materials.
Thanks! It helps that they were so small. Working small drives the cost of materials way down and sometimes allows you to make things from scraps people don’t even think are worth saving! The cost, of course, is that everything is harder to see while making it. But I find it a fun challenge.
I’m excited to see some jewelry work in these projects. The safety-pins repurposing also struck me as very good material sourcing.
Thank you! I actually had access to nicer materials as well but opted for the safety pins because they seemed more in line with the spirit of the project. They also look really cool when annealed, in my opinion.
These look incredible! I am supper excited to see where this projects goes. What sort of paint do you plan to use on the metal?
Funny you should ask! My original plan was to use a homemade oil paint I’ve used for furniture in the past. However, it wasn’t adhering well so I bought some model paint at McGuckin’s today and I’m going to try using that. I’m hoping it works better!