

Skateboarding has been around since the 60s and has changed quite a bit since its introduction. Over the years, advances in manufacturing, materials, and general deck knowledge have caused the skateboard deck to evolve significantly. For my final project, I will be making my own skateboard deck using a homemade press and mold. The mold provides the contours into which the deck will be pressed, while the press provides the force which tightly adheres the wooden veneers together with glue. This method of manufacturing, while on a much smaller scale, is identical to how most decks are manufactured in today’s commercial woodshops.


(1) Homemade Press (2) Wooden Mold (3) Commercial Deck Press
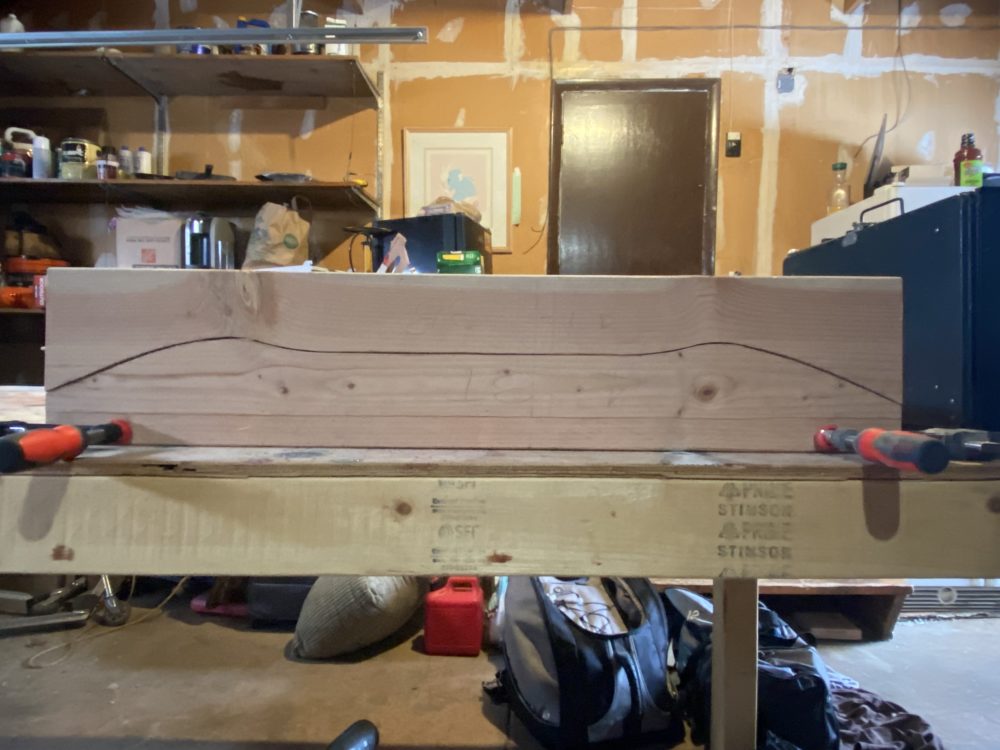
I will be creating a deck with an 80s pool skating aesthetic which will function like a modern-day street skating deck. Pool and vert decks are generally wider, have longer wheelbases, and have long and blunt noses. On the other hand, street decks are usually symmetrical with a slightly shorter wheelbase and squared shovel-like noses. My deck will have the same width and shape as a pool skating deck but with a much shorter wheelbase. The mold I’m creating will have a 13.875″ wheelbase, making it even shorter than a street deck. This modification will allow me to control the board like a street deck, regardless of its cumbersome size. I plan on making the graphic of the board relatively simple. I don’t want too many different elements involved in the graphic. I’d like a maximum of two different colors and one to two subjects in the graphic.
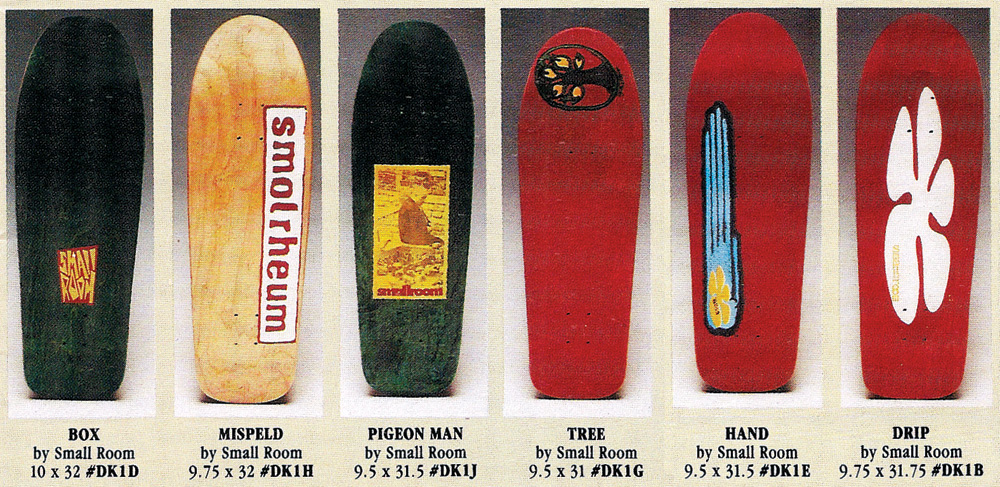
(4) Pool/Vert Decks
I began the manufacturing process by cutting two 2x8s into 34″ lengths. Each of these 2x8s was then cut on a bandsaw long ways to separate the top half of the mold from the bottom. The slight changes from piece to piece are what give the mold its shape. After that, I began to remove material from the high edges of the bottom side of the mold using an angle grinder with an 80-grit sandpaper attachment. Once the lower half of the mold had a more continuous and smoother-looking appearance, I began work on the top half. This has been the most time-consuming task of the project thus far. To ensure the deck will be pressed tight enough I need to minimize the gap between the lower and upper halves of my mold. This means that every upper 2×8 needs to fit nicely into its respective lower 2×8.
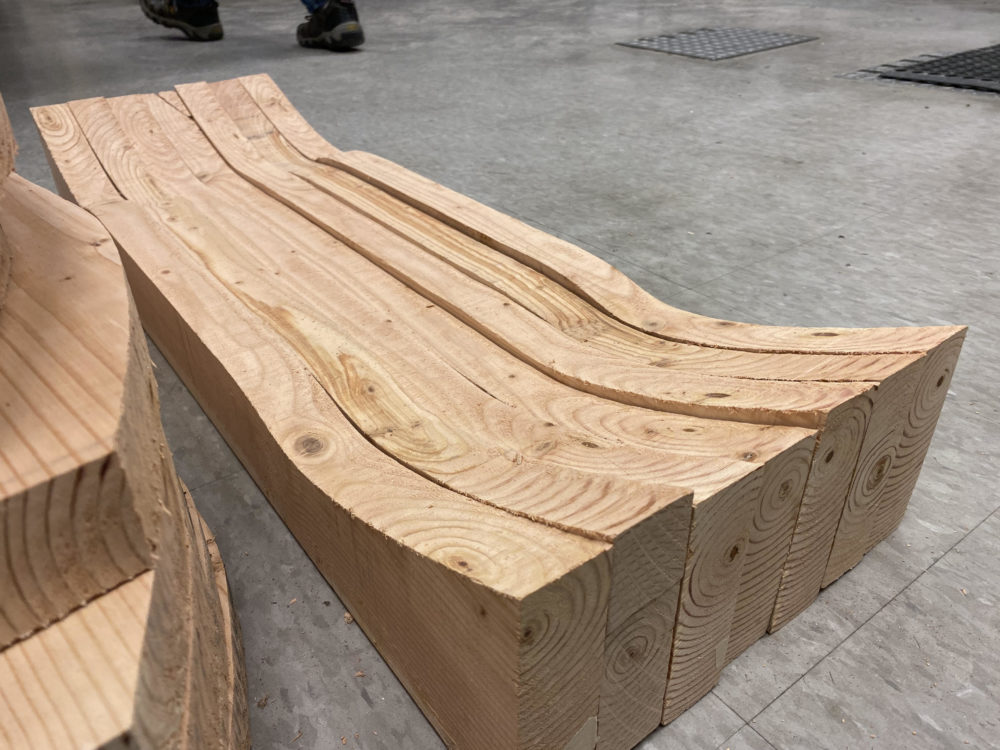
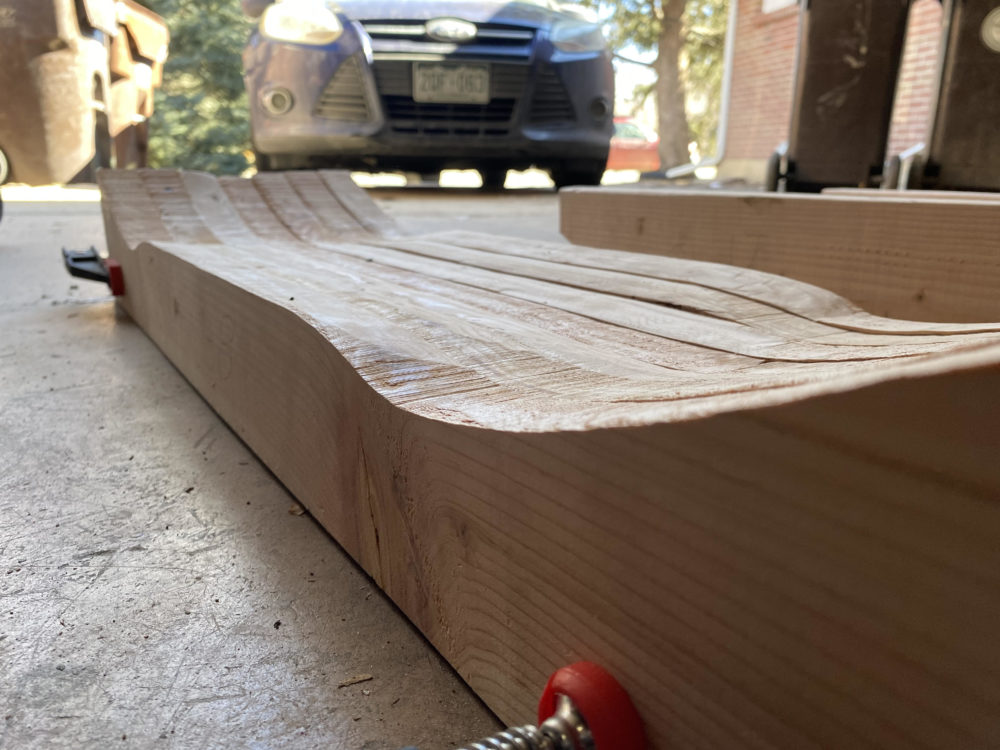
(5) Lower Half of Mold with Hard Edges (6) Lower Half of Mold After Removing Hard Edges
(7) A tight fit between the top and bottom of one 2×8
Once I have finished this it will be time to glue the mold together. I will use Tightbond III for my glue as it is designed to be impact resistant. Once the mold is glued up, I will use an orbital sander to even out any imperfections. Additionally, I can use fiberglass Bondo to fill in any cracks or holes present in the mold. Ideally, at this point, both pieces of the mold will fit together nicely.
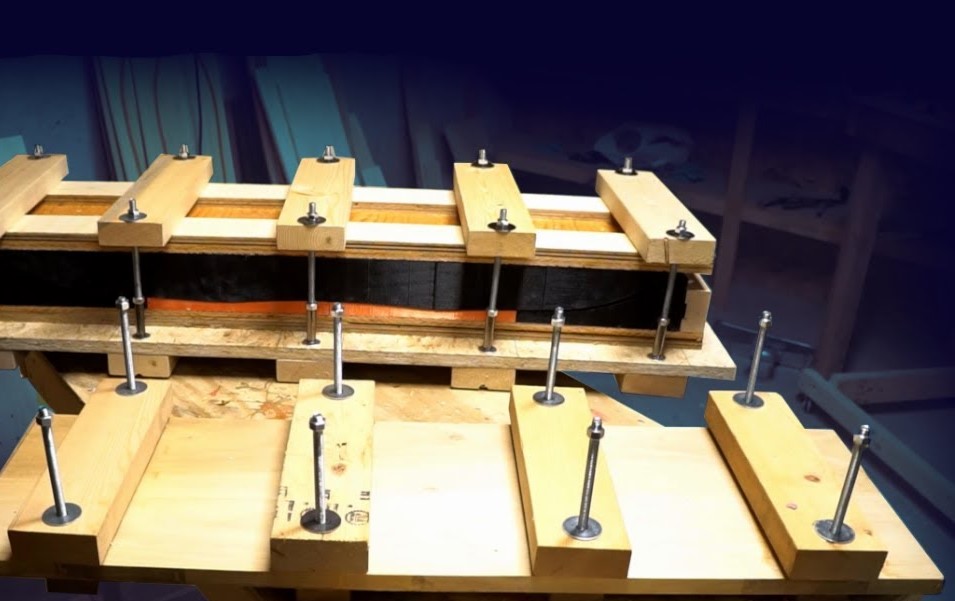
The next step in manufacturing will be to create the press. The press is the simplest component of this project. It involves two boards connected by threaded rods. The threaded rods will be sent through larger pieces of wood across the width of the press. These rods need to be evenly spaced across the length of the board to ensure even pressure within the mold.
Finally, it will be time to create the deck. I will purchase seven pieces of maple veneer to be used in the first deck. These will need to be arranged so that the grain travels in each direction to add strength to the deck. I will apply glue to each piece and then lay it into the mold. Once all seven veneers are loaded in the mold I’ll place the top of the press on and crank down the threaded rods. After 24 hours, the blank deck can be removed from the mold.
At this point, I will use a truck template to drill the truck mounting holes into the deck. The truck template will help to make sure that the holes I drill are square and in the middle of the deck. Then I will use a jigsaw to cut out the shape of the deck and a router to smooth over the edges.
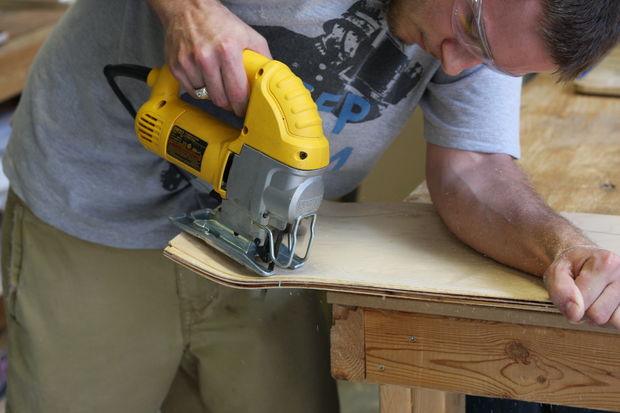
(8) Cutting the shape of the deck
(1) https://www.youtube.com/watch?v=EcdVgQr8FRQ
(2) https://www.cgtrader.com/3d-models/industrial/tool/ready-to-be-milled-mold-for-skateboard-decks
(3) https://skateparkoftampa.com/article/785/Paul_Schmitt%27s_Skateboard_Deck_Factory,_PS_Stix
(4) http://vertisdead.blogspot.com/2016/08/small-room-skateboards.html
(8) http://www.thinairpress.com/skateboard-building/2015/3/23/layout-cut-and-finish-a-skateboard
3 Comments. Leave new
This is really cool! Sorry if I missed it, but what aesthetic are you going for with the graphic?
This a really well thought out project! I like the implementation of the rasterized cross sections; I am interested to see how you apply forces uniformly across the entire board and if more than just standard profiles can be achieved.
This is awesome! Super stoked to see how this project turns out, especially the function of the shorter wheel base