
I’ve completely changed my project. I was going to make saddlebags for my motorcycle but its engine seized so I won’t be riding it for a while. I could still have made them but most people’s positive feedback to my project was that it would actually be used. So I tried to replace it with another useful project.
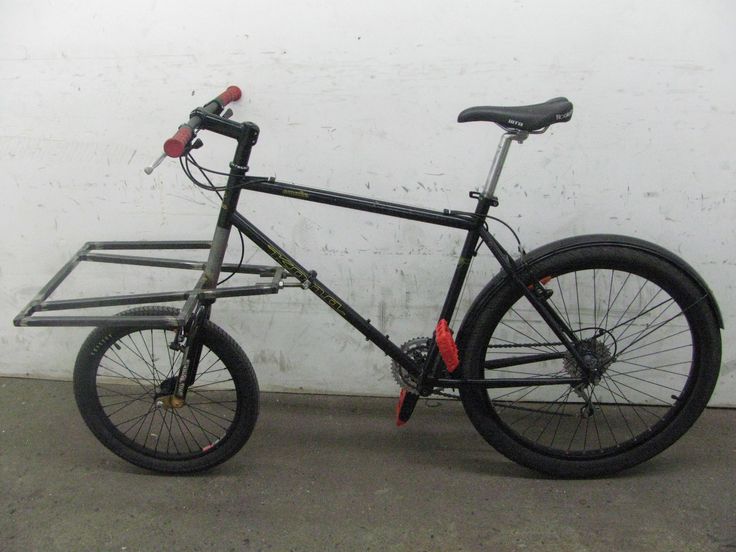
I’m known to my friends as a guy with a lot of ways to get around, bicycle, skateboard, motorcycle, car, so I thought I’d add another to the fleet, with its own purpose. I’m making a cargo bike. Specifically what would be called a ‘cycletruck’ or a ‘short john’ style cargo bike, like this one.
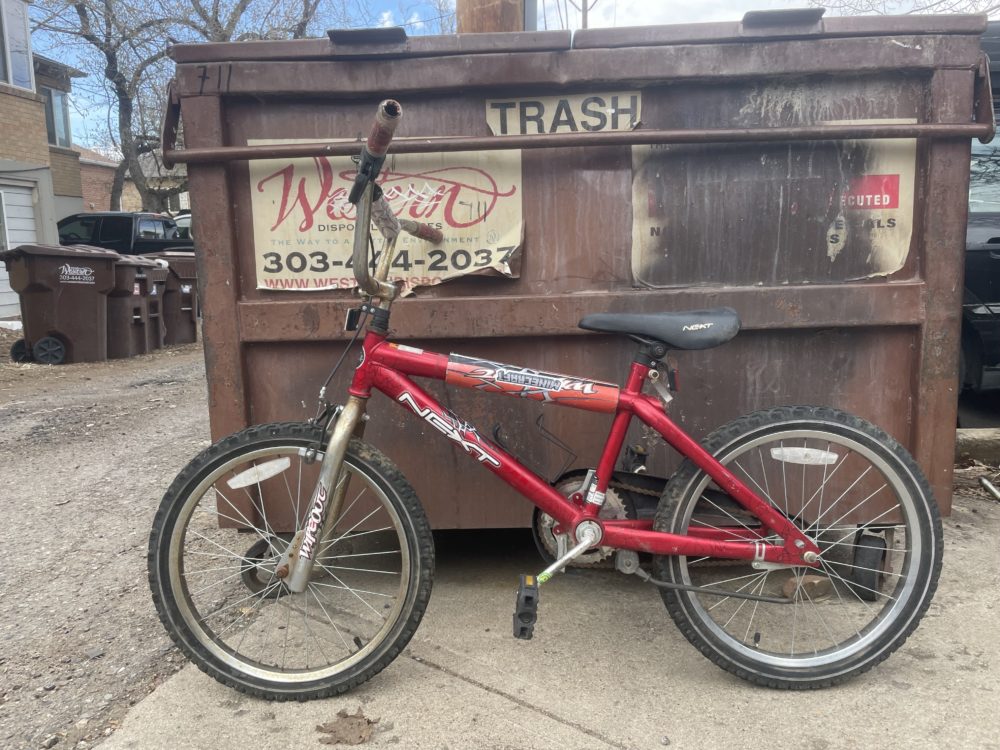
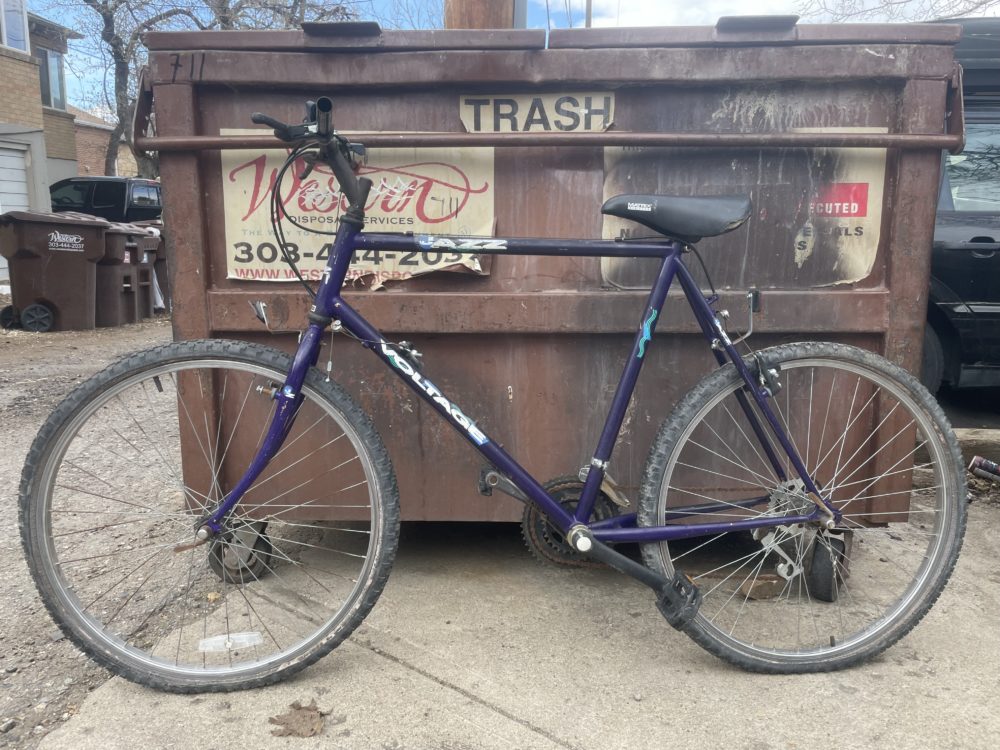
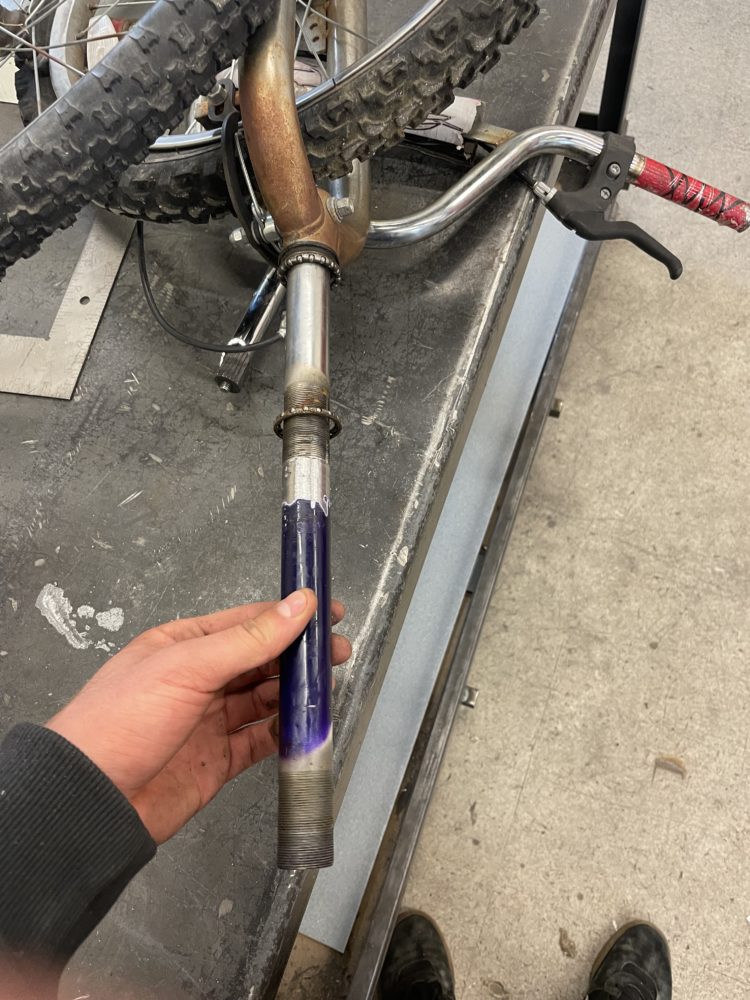
All you need to make one of these is a kids bike, or bmx bike for the small front wheel and fork, and an old full size bike. So I set about finding some of those on marketplace with the right dimensions (the head tubes have to be similar in size for this to work). I found them both in the same place for pretty cheap, in decent condition, brakes and gears all worked. So functionally, all I’ll have to do is pump up the tires and add a new chain for it to work.
Of course this is a class about aesthetics and the aesthetic I’ll be going for is the one I wrote about at the beginning of the semester. A 60s show bike inspired cycletruck. That aesthetic consists of sparkly paint and shiny chrome, so once fab work is done I’ll spend some time and elbow grease painting and polishing.
To start the project I had to find the trail number for the mountain bike. Trail is part of a bicycles geometry that determines how it handles. If you draw an imaginary line from the angled head tube to the ground and another line from the center of the wheel down, the distance between those lines is your trail. Mountain bikes generally have a large trail so the bike stays stable at higher speeds and is more sensitive at lower speeds. Mine measured 81mm, generally road bikes are between 60 and 50mm. And bikes with heavy loads on the front (like a cycletruck) should have trails closer to 40mm. There aren’t any hard set rules though, as long as you don’t have negative trail, any bike should be rideable. Going forward I knew I needed to move the trail to a lower value by making the head tube angle steeper.
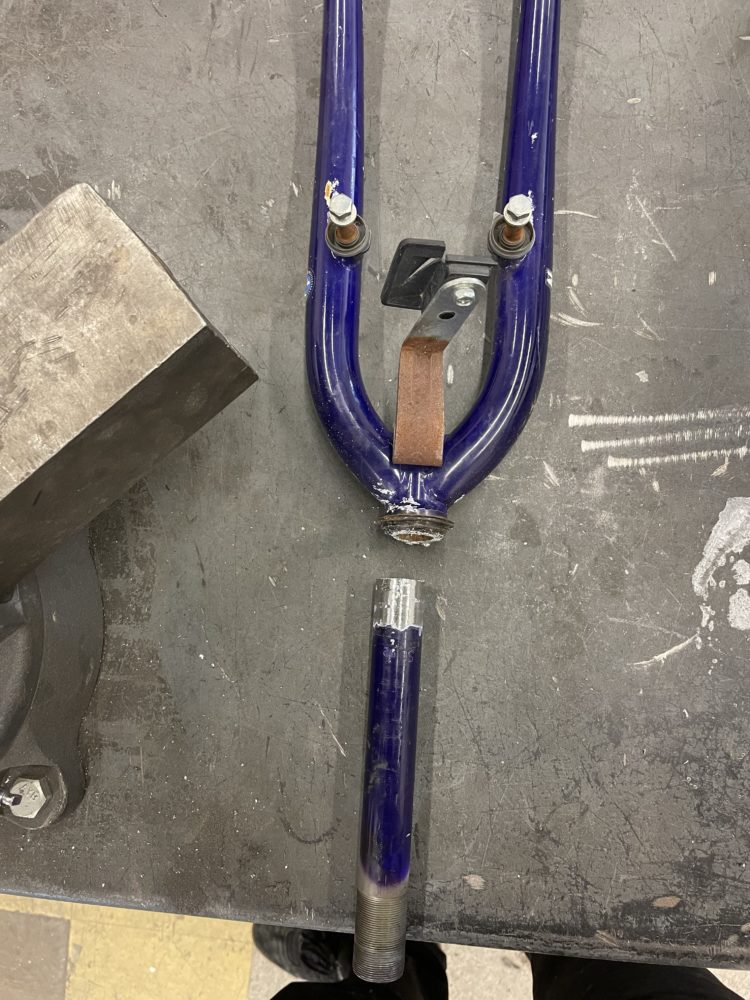
Geometry aside, I got to the fun part. I chopped the head tube off of the kids bike, ground off the old welds, and mocked it up as an extension to the mountain bike.

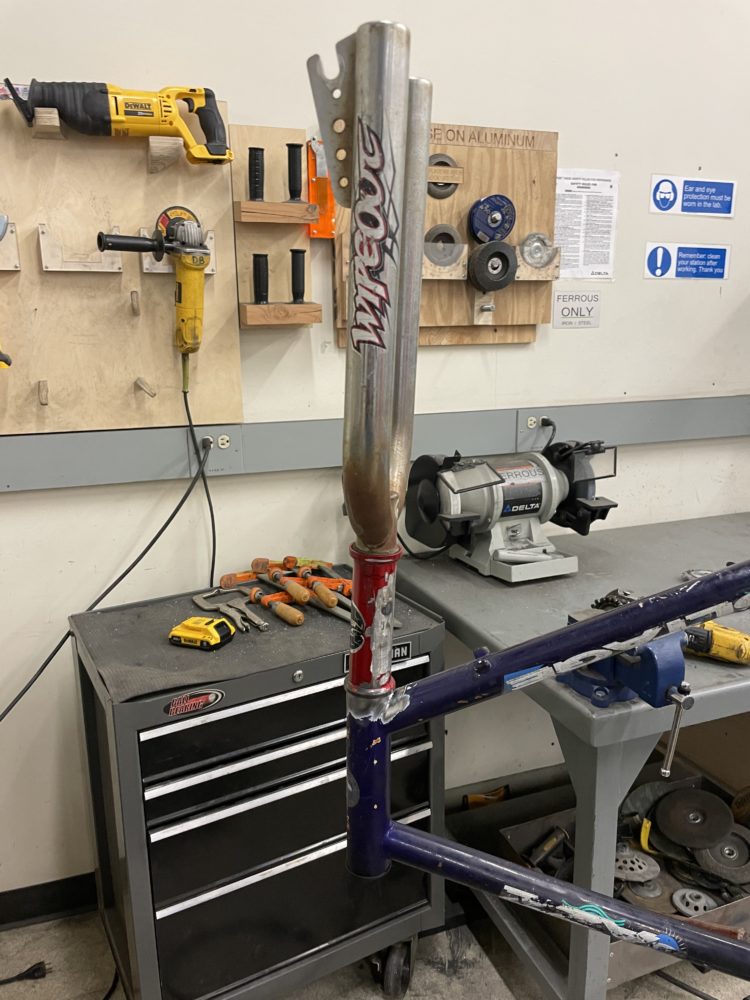
At this point I could tell that the overall length of the front end was going to decrease, which meant that my trail was too. So I cleaned up the edges and prepared to tack the head tubes together to see what my new trail would be. I was lucky that the ENVD makerspace has a bike frame fixture, so I could use the head tube section as a clamp/welding jig.
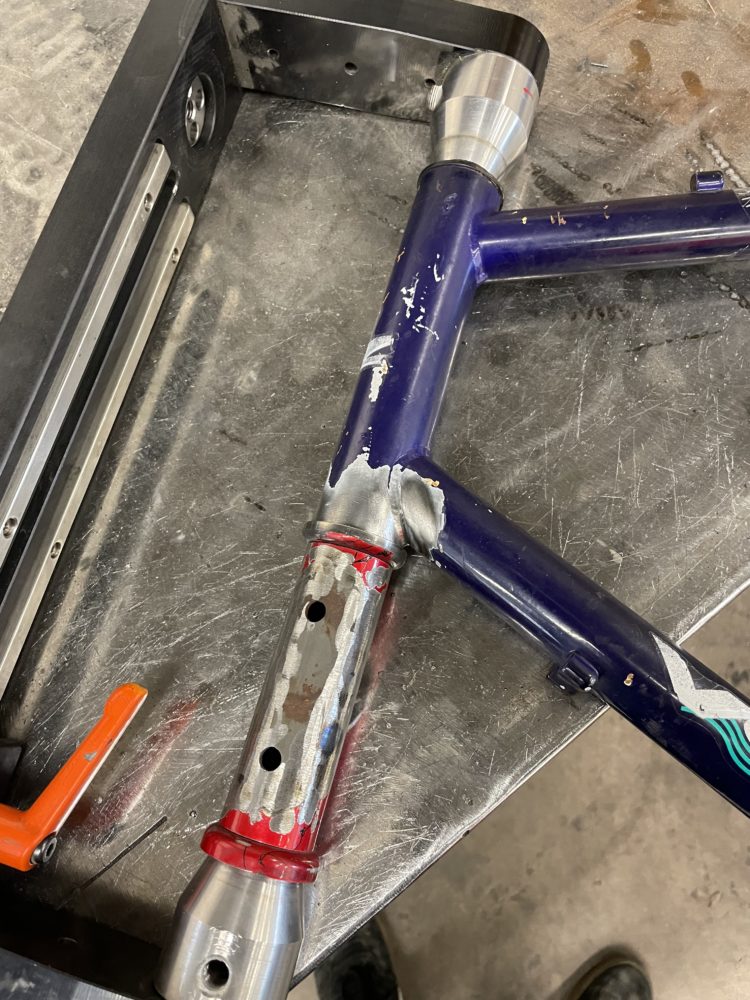
The important part here is to keep everything straight, if the tubes are out of alignment the final fit up wont go well and you’ll be left with junk. After a couple rounds of tacking and cutting I finally got one that was as straight as I could make it. Then I welded everything up. You know what they say, MIG is for the money, and TIG is for the honeys.
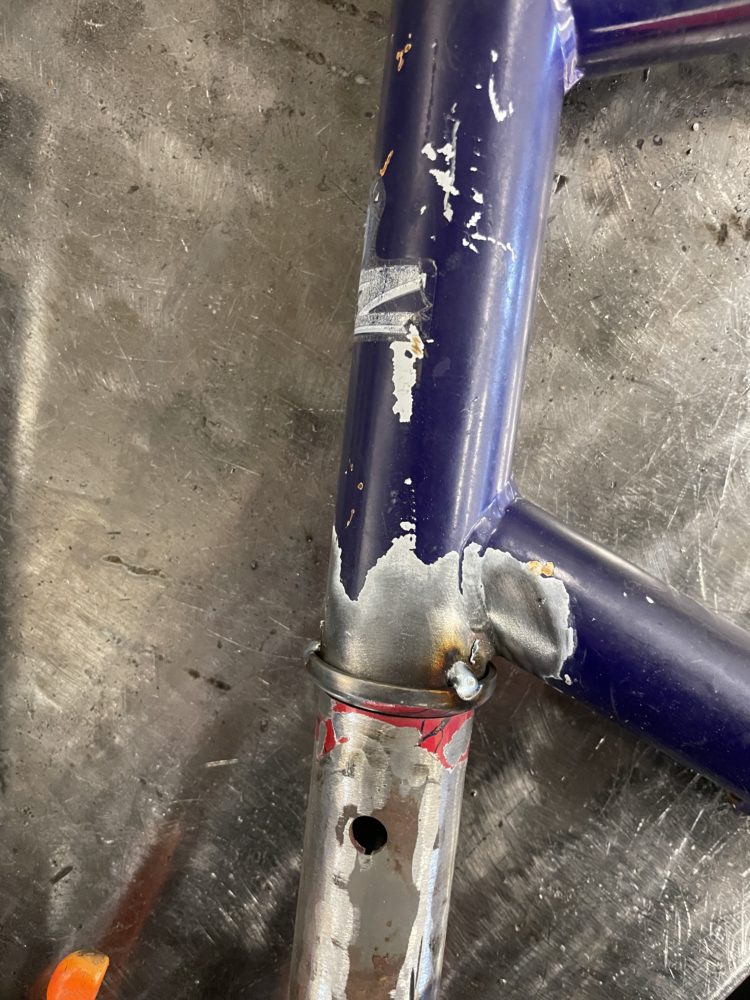
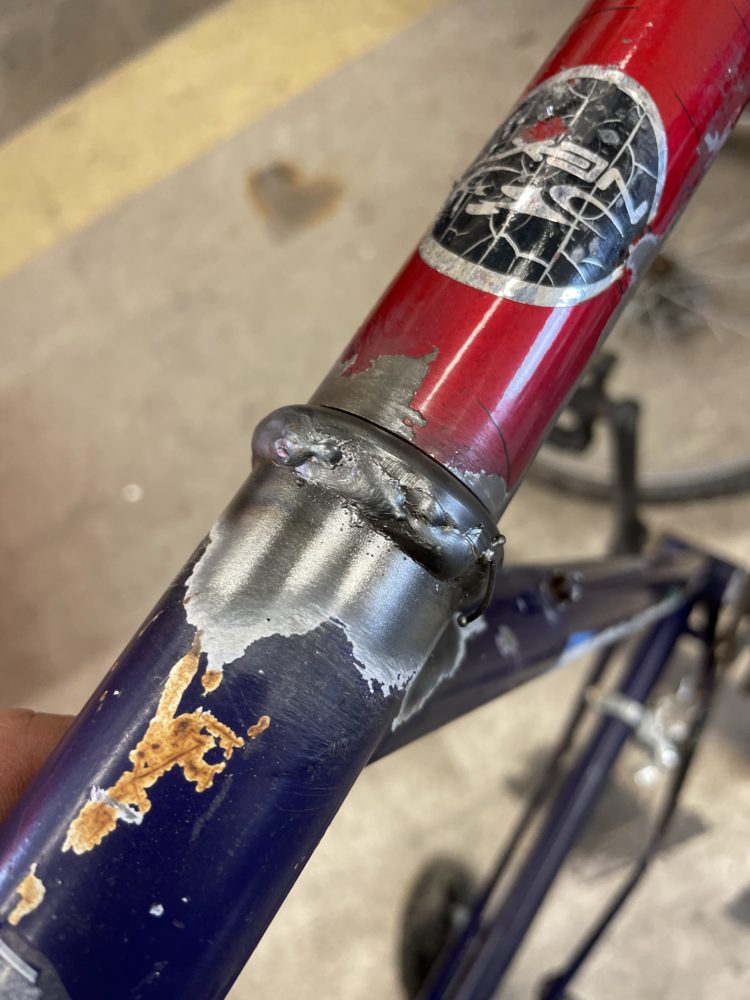
Once I ground down the ugly welds I mocked everything up and checked my trail, it came out to around 57mm which is around the gold standard for ‘neutral’ handling. Although I wish that it was closer to 40 or 45mm this was the easiest way to make it happen and I’m pleased with it.
I’m digging the stance especially with those high bmx bars, really lends to the chopper aesthetic. Once all the rust is polished out of the chrome, the candy purple paintjob goes on, and some new tires, it might actually look good.
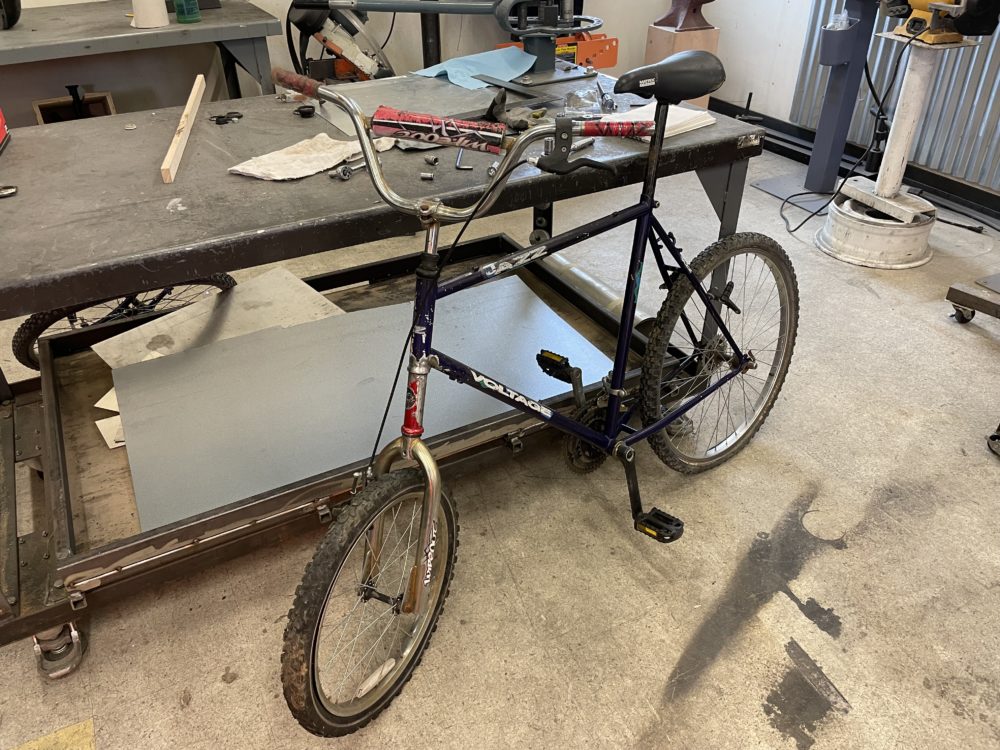
I’ve got some fab still left to do though, I have to make the rack for the front and finish up the fork assembly. I cut the stem out of the old fork and have to weld it to the kids stem to make it long enough to go through the extended head tube. I’ll go use my work’s lathe to even up the cut I made with a sawz-all and get it down to the right height before welding them. After those two things are done, I’m just cleaning, painting, and riding.
2 Comments. Leave new
I think it’s already looking cool! And you know the other thing they say. Grinding and paint makes a welder what they ain’t. I am wondering how that thin road bike frame is going to handle under load. What are you planning on hauling?
I chose the mountain bike because it should be able to hold up, I trust old chunky steel. I’m gonna haul groceries, beer, ice, and the occasional person. I finished the rack and it holds me pretty good, rated up to 200lbs.