

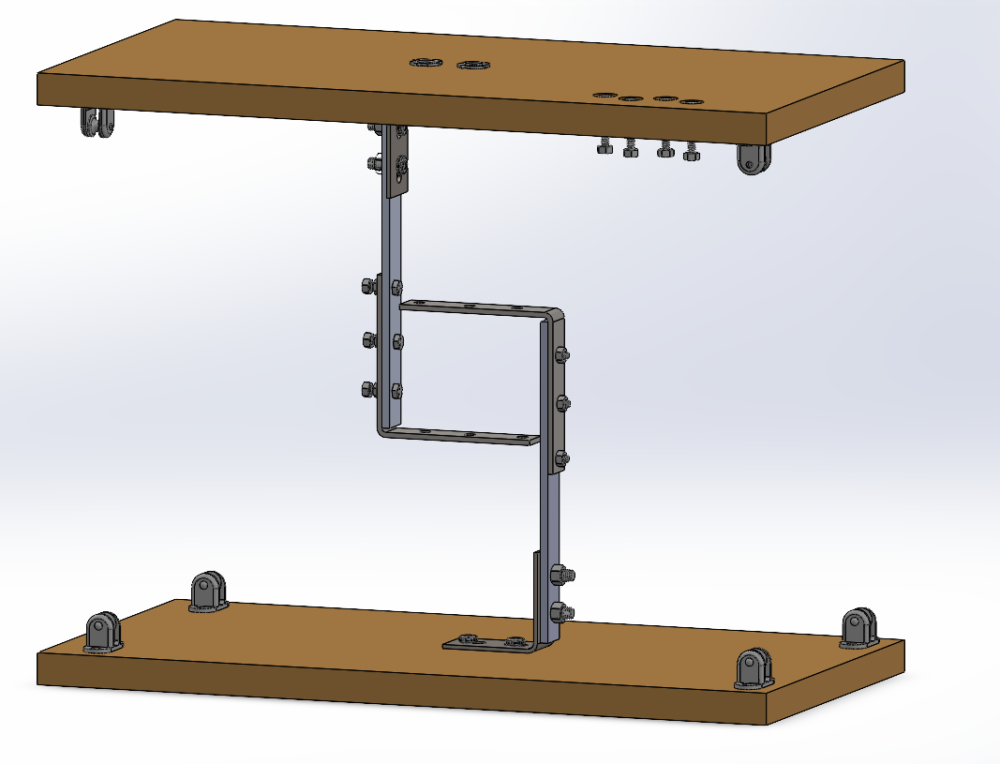
The final stretch of this project has been building the actual version of the solidworks model above. The below photos showcase the initial build.
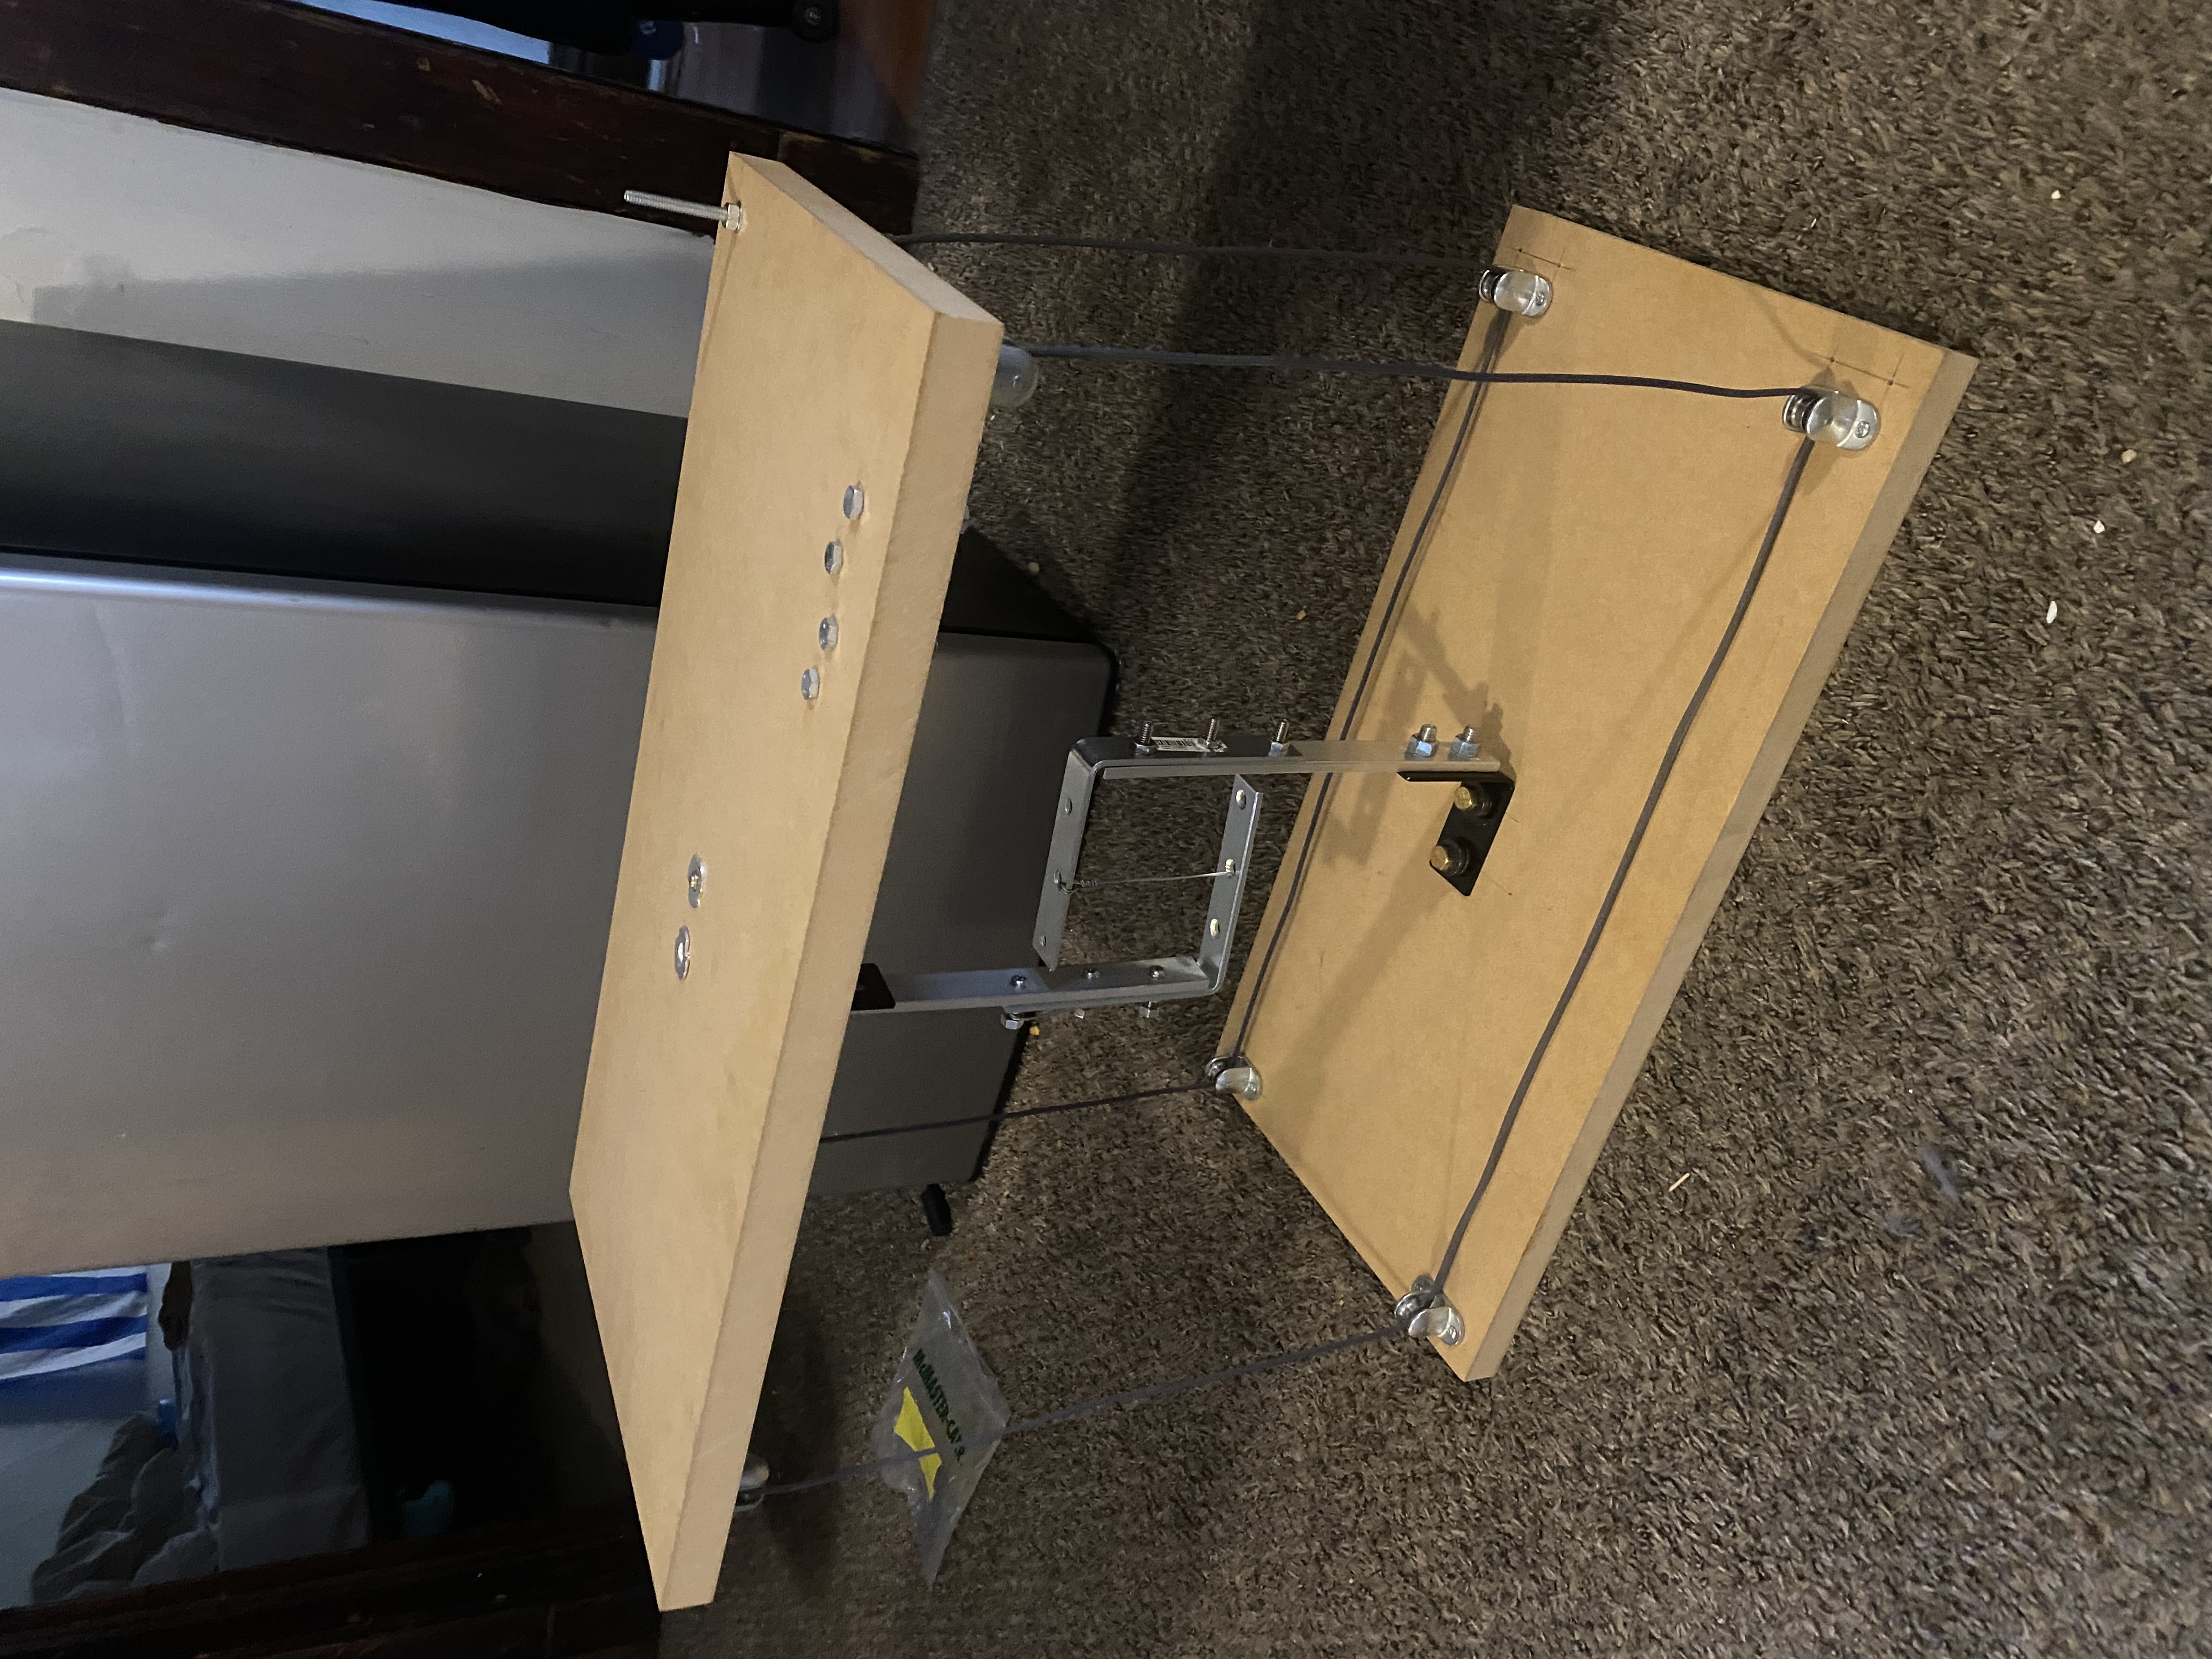

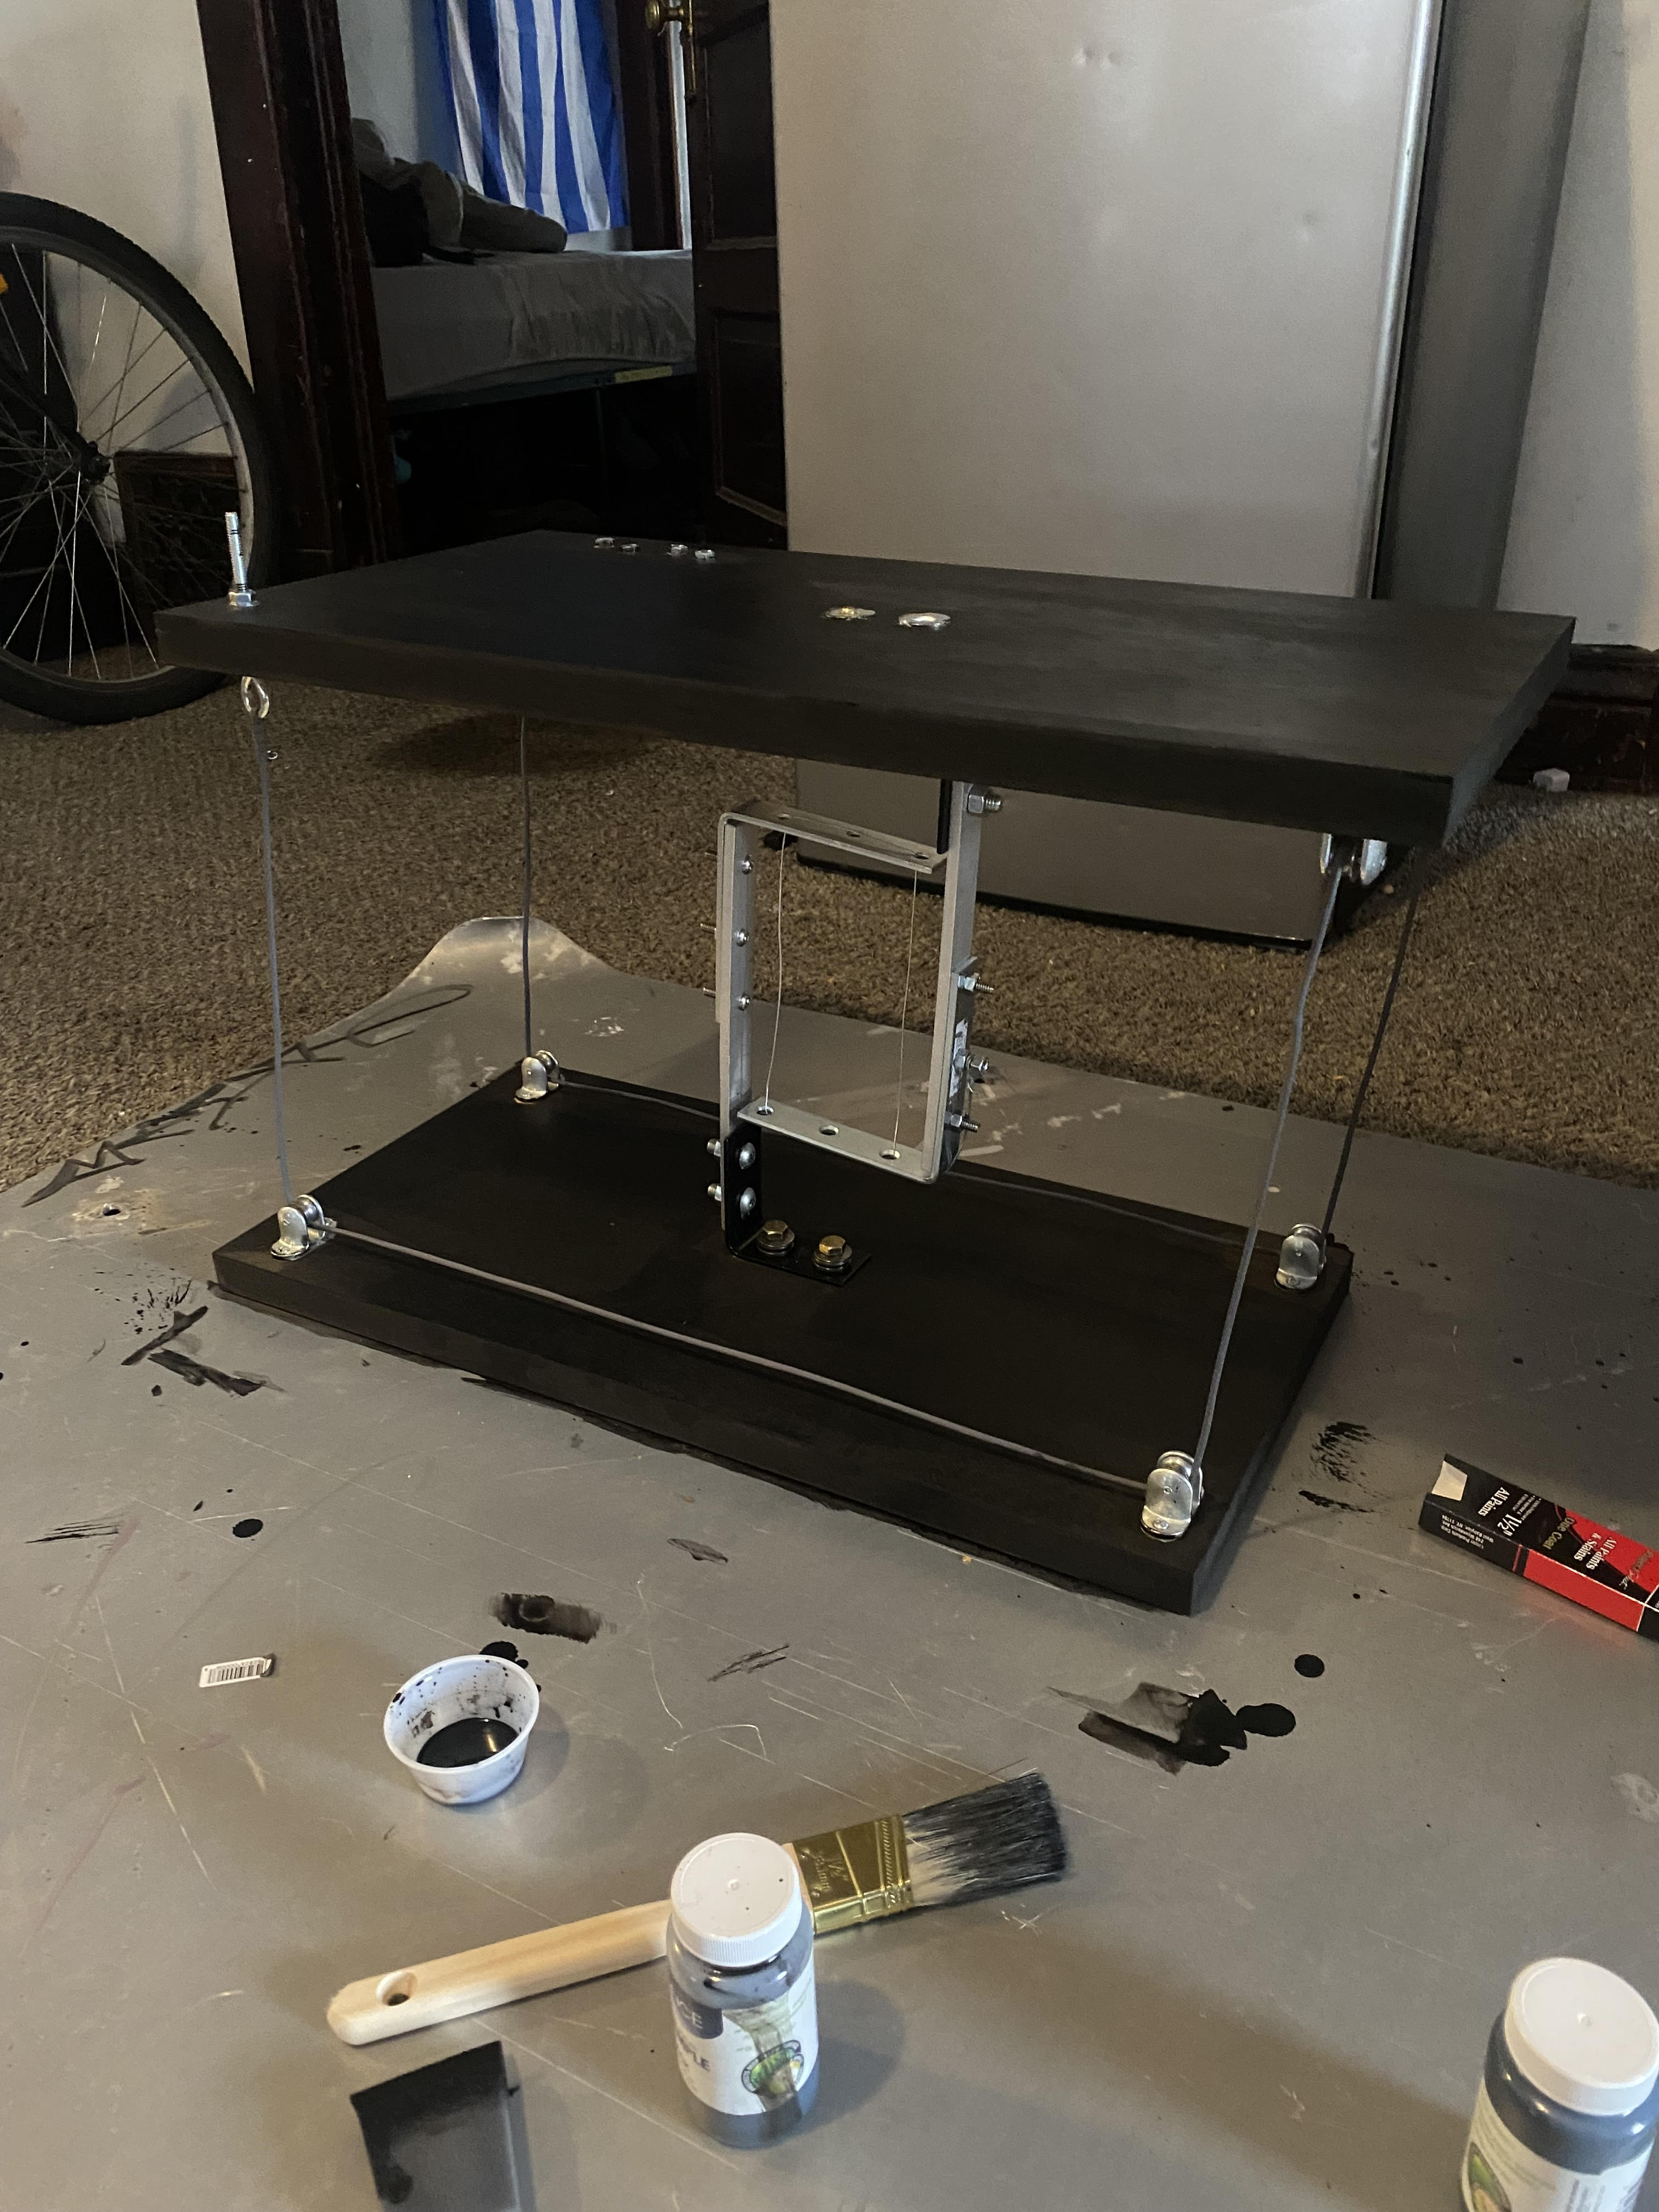
The table came out great and holds its own weight well with the exception of a little bit of bending in the center beams. I made a subtle change to the center to lessen the bending which you can see in the final design at the bottom. As you can see above, the table is at two different heights in the photo with the left being about 3 ft tall and the right photo about 2.5 ft tall.
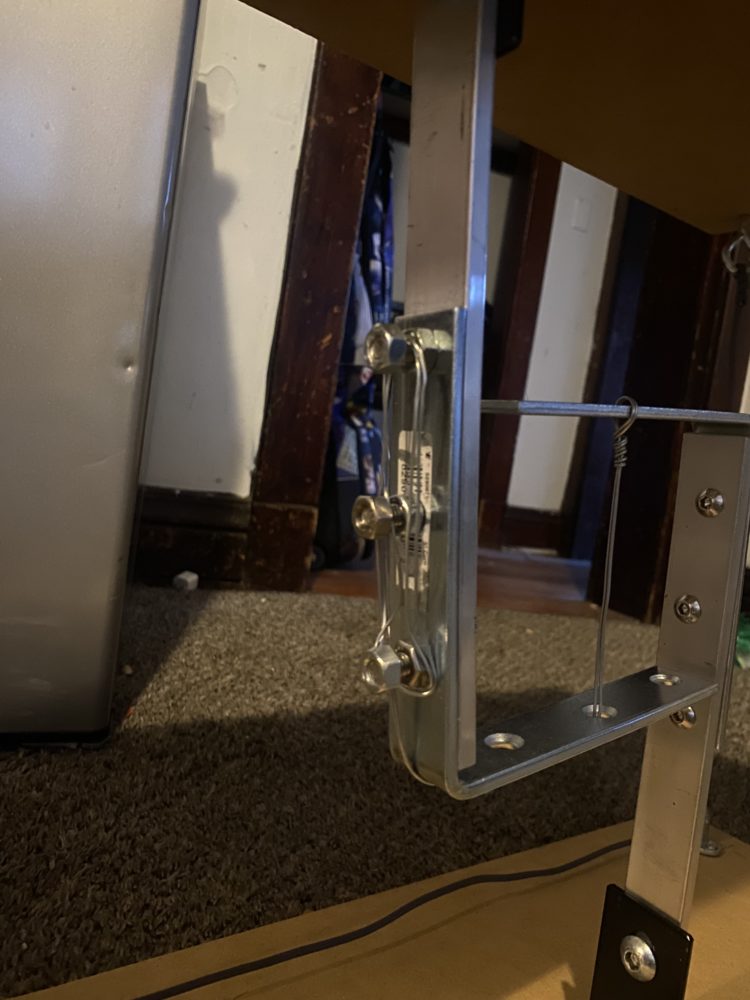
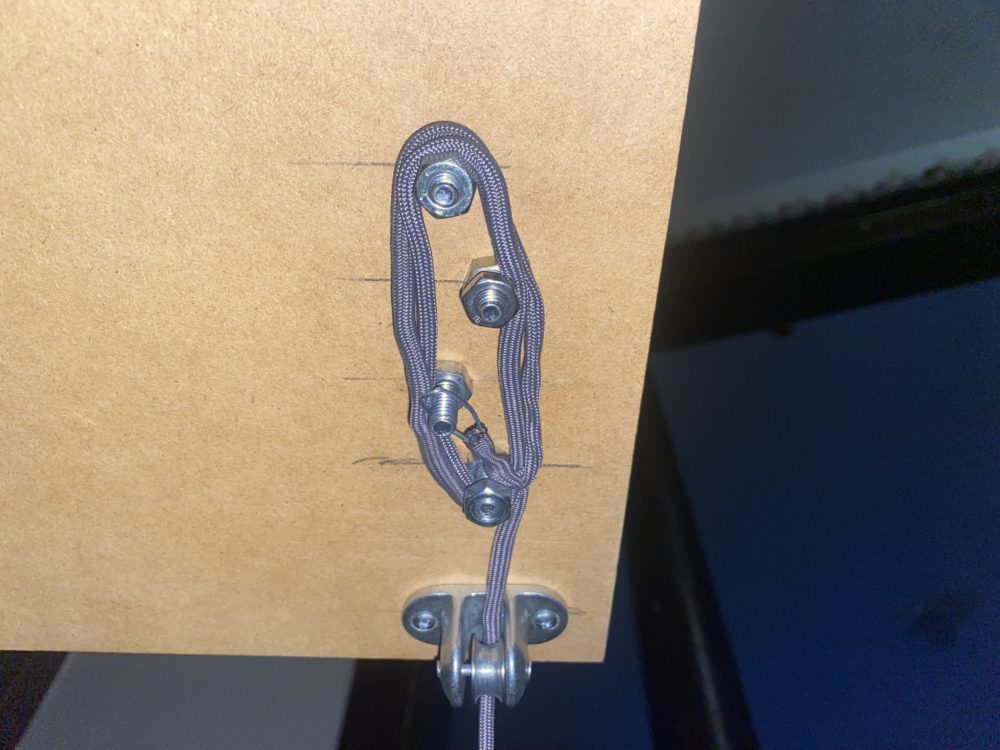
Below are some photos showing the close-up visuals of the attachment mechanisms for the wires and how it actually adjusts its height. The photos below show how the slack in the extra wire is maintained and held taught. The extra wire is wrapped around several bolts and then looped around one of them where it can be secured with a nut. This is best shown on the photo on the right, the nut is removed to show the looped wire. The paracord seen below just provides housing for a metal wire I threaded through it. I did this to maintain a rigid and non-stretchable cord as well as to have a nicer cleaner look than the wire itself. Also, the reason I staggered these bolts in a non-linear fashion is to add more paths for looping the wire to get more precision.
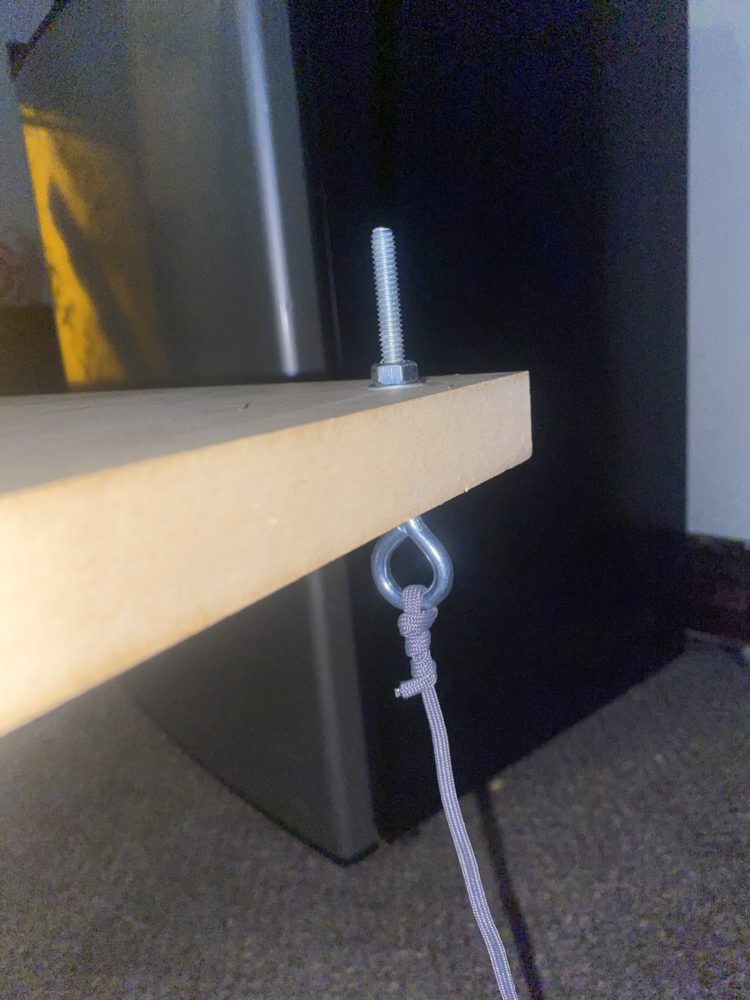
The photo below shows how additional tension is introduced to the outer wire. The eye bolt has about 2 inches of threading. Once the outer wire is tightened as much as it can be by hand and secured like the photos below, the eyebolt is screwed into the nut above the table introducing the extra tension. This adds enough to make the table very sturdy and not wobble much at all.
After some thought, I decided to paint the wood surfaces black. I think this adds to the industrial aesthetic of this piece and provides a nice contrast for the silver metal throughout the table. I incorporated a grey paracord wire which adds to this contrast as well. In this photo I have applied one coat of paint but plan on adding another to add to the deepness of the black on each surface.
![]()
![]()
4 Comments. Leave new
Amazing
kjjl
Excellent work on the table’s final construction! The wire attachment methods and how you modified its height are carefully thought out and implemented. The choice of black paint on the wood surfaces contributes to the industrial appearance while also providing a good contrast with the silver metal.
This is super cool! Great work, I wonder if there’s a way to hide the eye bolt? It might be annoying on the table. Regardless, very cool. Nice work!