
Project Aesthetic
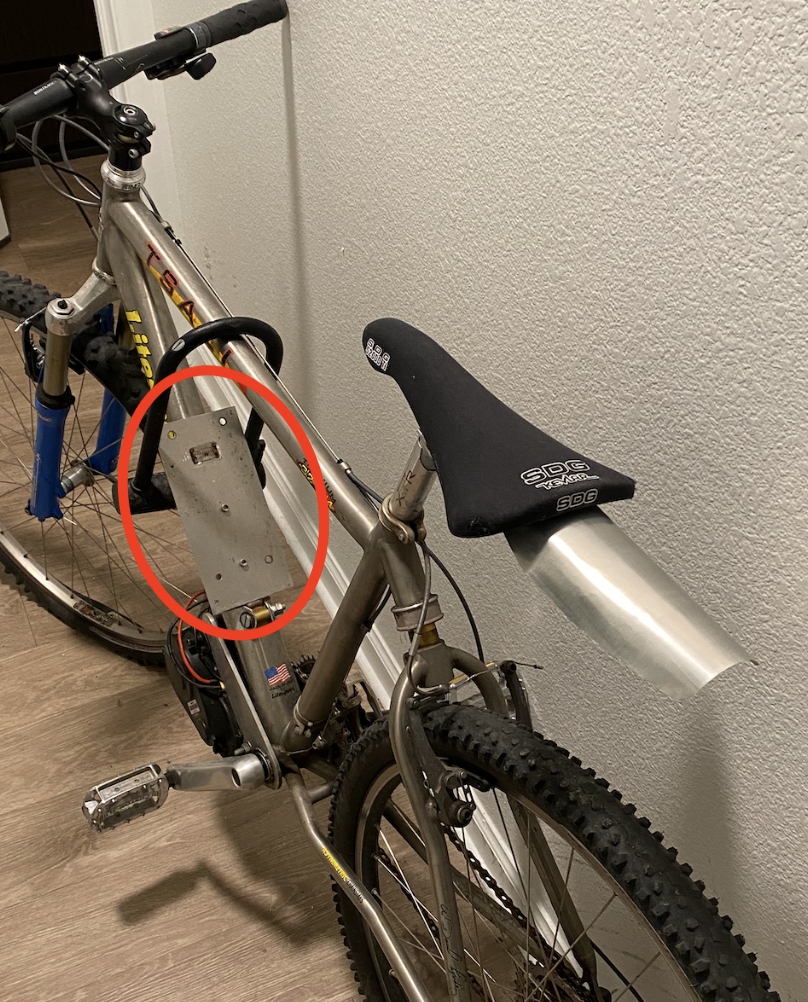
For my final project, I made an ebike battery. My original plan was to match the battery to the bike as best I could. This didn’t necessarily mean matching the current aesthetic of the bike but rather finding a similar style that pairs nicely with it. The bike style is minimalist and streamline. It has a brushed aluminum finish that is semi satin. The graphics on the bike are minimal and so the whole look is very clean and sleek.
I wanted the aesthetic of the battery to be minimal and streamline but I had been playing around with a few other aesthetics that I think would still match the bike. One of these was the Braun style and similar designs by Dieter Rams. Rams’ moto is “Less, but better” which is exactly what I’m going for with this project. He is also a strong believer in functionalism where everything that is added to the design only adds to its function. This is similar to minimalism in my mind.
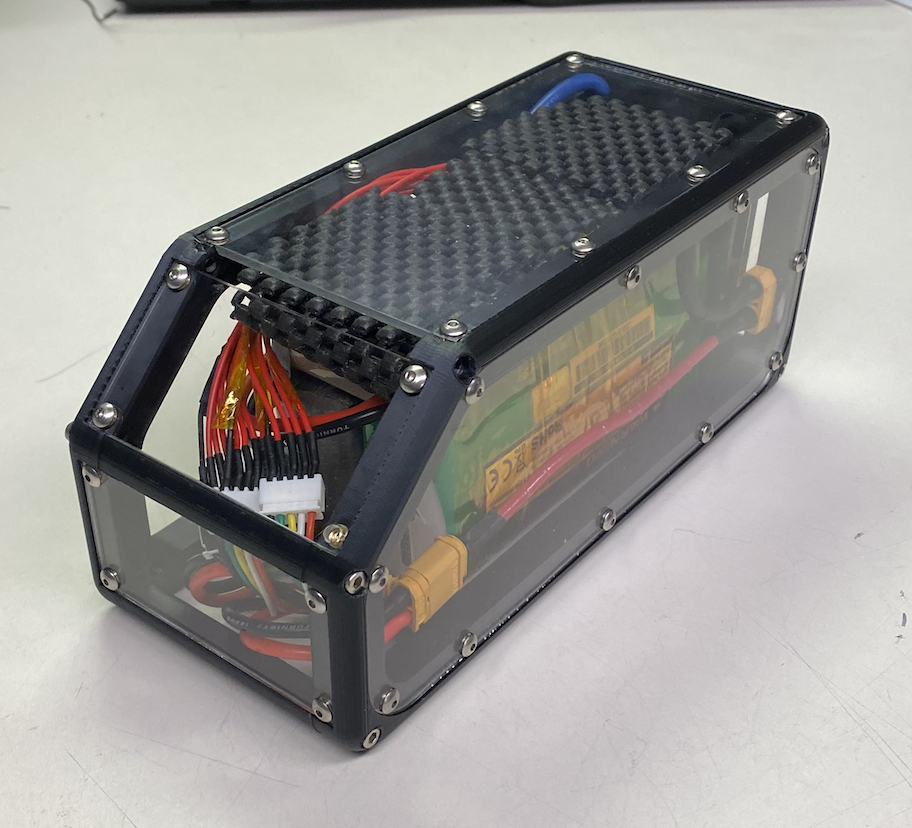
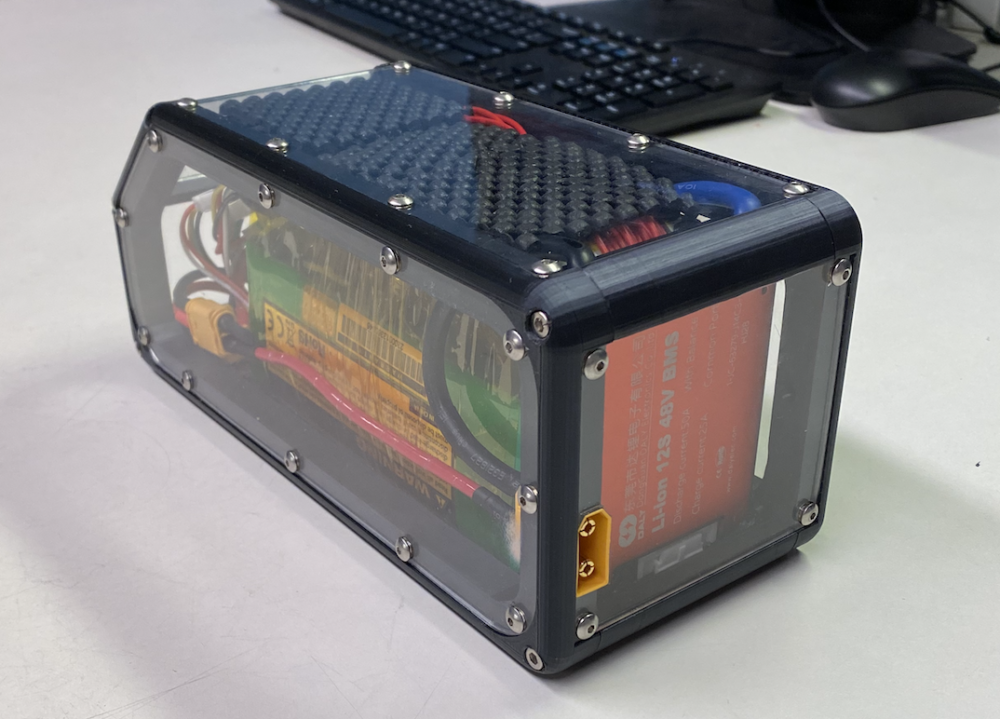
After doing a few CAD renders, I really liked the look of clear panels so that you could see inside the battery. This shifted the aesthetic to a more mid 2000s modern/futuristic style. In retrospect, this aesthetic matches the style of an electric bike way better as an ebike is already futuristic in itself. I am extremely pleased with how this aesthetic turned out and am proud to display the handywork I put in under the hood.
Top Five Specifications
Coming into this project, my main specification was that the battery functioned on my bike. After some consideration and timeline issues, I had only chosen to make the enclosure for the battery. I was excited with how it was turning out so I continued with the electronics! My first specification was that I wanted the enclosure to fit on my bike. I also wanted the enclosure to fit the batteries and circuits was going to ouse. Moving from function to form, I wanted the design to match my bike. This is obviously pretty subjective but I think I’ll know if it matches or not. I also wanted the enclosure to be comfortable when riding, i.e. not rubbing on my legs when pedaling. Finally, I wanted the enclosure too be fairly lightweight, something under ~3-5 pounds. I prioritized both the external and internal form factor because if the design failed either of these criteria, then it would have essentially been nothing more than a paper weight to me!
Top Five Constraints
I assumed that the largest constraint for this project was going to be time, I was right. This design took multiple iterations which meant a lot of print time (37 hours for each print!). Furthermore, multiple iterations use more materials and so my second constraint was to be money. I am imagined that this design was going to be in part 3D printed and so printer availability on campus was a potential issue. One large constraint in terms of form is the size of the enclosure. It was going to be tight fitting all the batteries and circuits in the enclosure and still keeping the enclosure in a small form factor for the bike.
Design Ideation
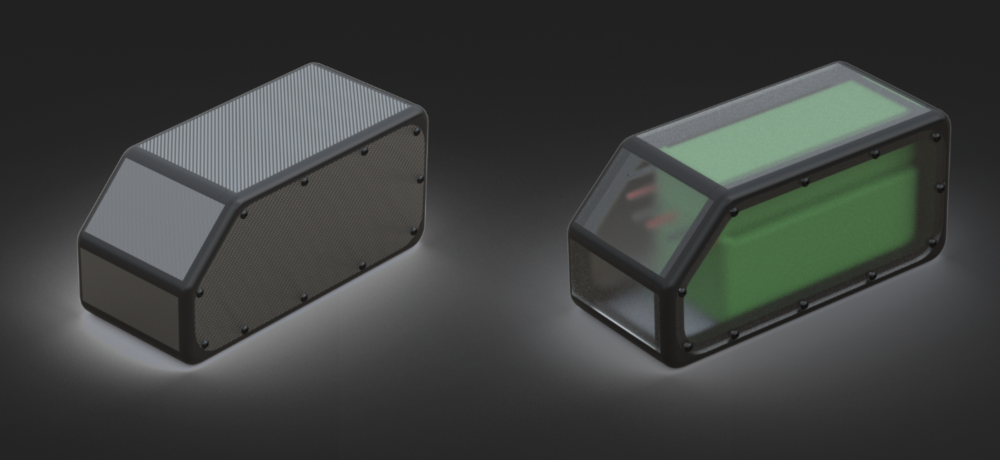
I planed to 3D print the trim of the box out of ABS but instead just went with PLA. The trim/frame of the enclosure has recesses to accept panels on all the sides. I planned to have aluminum panels but instead went with clear acrylic. These were screwed into the trim using heat set inserts. Heat set inserts are small internally threaded pieces of brass that are heated up with a soldering iron and pressed into a 3D printed part. This allowed me to install and remove the panels multiple times without worrying about plastic threads stripping out. I planed to waterjet aluminum panels but there was no availability so I laser cut the panels out of acrylic.
Based on some of the renders I made, I was really excited about having a clear enclosure so that I could see everything that was inside. I’m really happy I went with this route over the aluminum panels. I would still like to add LEDs so that the enclosure lights up from the inside.
1 Comment. Leave new
Hi Reed, I wanted to mention that I enjoy how clean the black trim with silver screws looks with the clear acrylic paneling. Super clean and gives the viewer an opportunity to see what the battery looks like. One thing I thought when looking at your product is that it looks pretty solid, but I wonder how long the PLA will last since it will be exposed to the elements and possibly excessive forces if you crash (I hope not) since PLA tends to become brittle over time. Overall, great project and execution!