
Since my last post, I have been building and assembling my mirror. I have learned a tremendous amount about assembling my mirror and overall thoroughly enjoyed the experience of using my hands to create something I was proud of. Before this project, I truly did not have much experience using tools and thinking logistically about a physical projects assembly. This project taught me a lot and will help me in the creation of future work I complete.
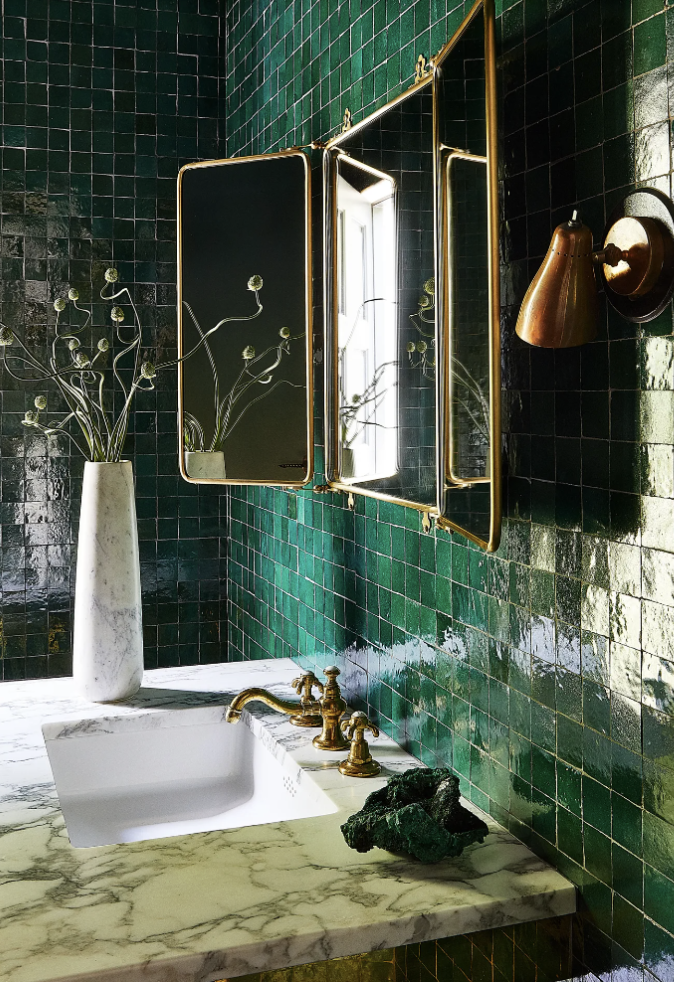
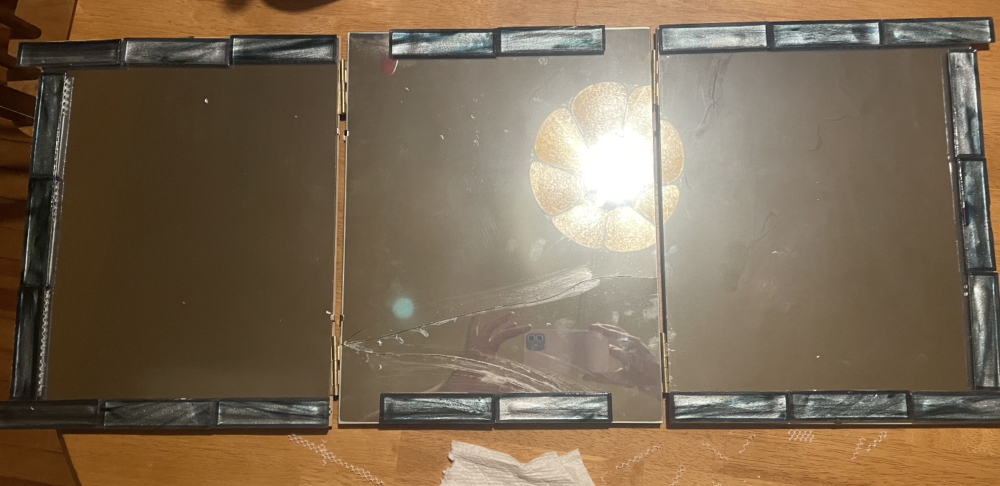
I have used a similar aesthetic through my time in this class. I started by attempting to create a whimsical and vintage aesthetic. I found this aesthetic when I wrote my first blog post and realized it matched a lot of items in my own personal space. I enjoy the color, nature, and carefree energy around this aesthetic. I like how it tells a story in itself and has a child like essence. I continued to use this aesthetic through my final project. I got inspiration for my three paneled mirror from a mirror in Kendall Jenners bathroom.
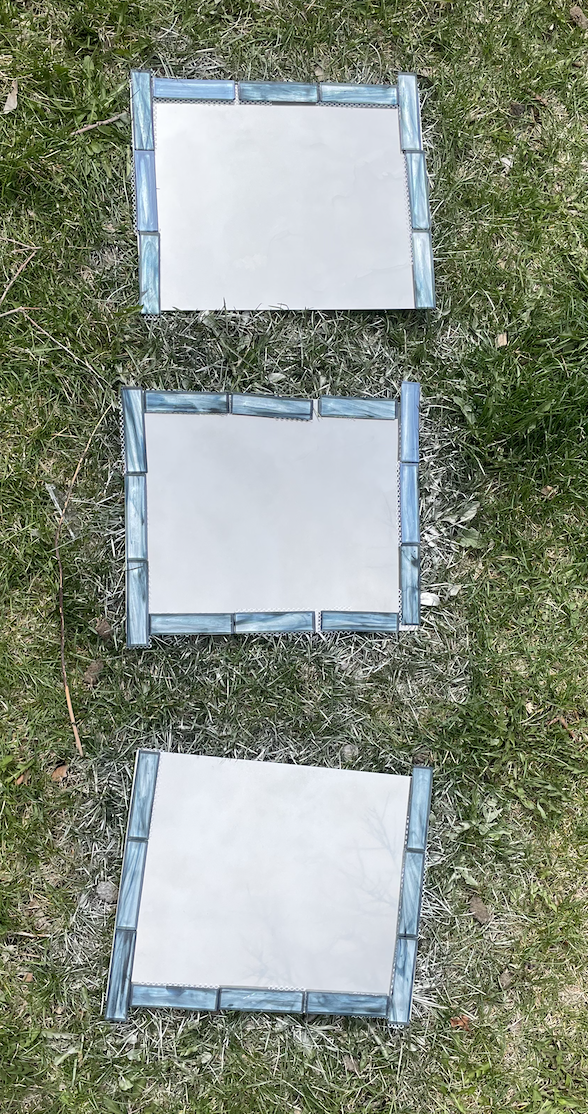
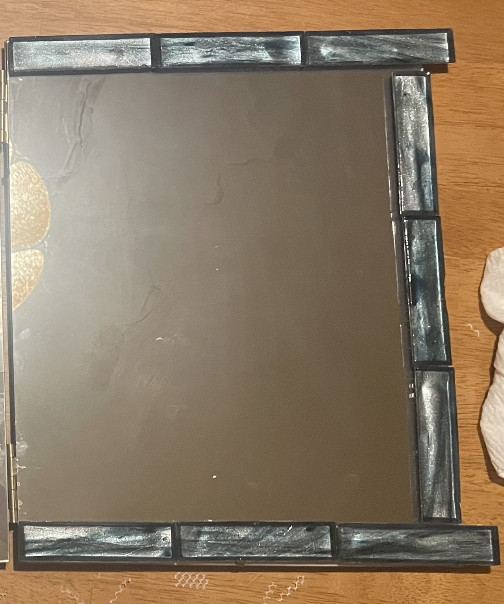
When I first began on this project, I planned to use a copper frame. When I was shopping for copper frames, I realized I was more drawn to the beautiful tile in this photo more than the copper. I think it is the tile that gives this piece the tranquil energy. I ended up using a blue tile to outline the mirrors instead of a copper frame.
I faced a lot of questions about how to go about creating my mirrors. I looked into buying mirror, but it was not a feasible route and would not create the finished vintage, tranquil, and whimsical aesthetic I was going for. I decided to attempt to spray paint glass. In the beginning I was very nervous that this technique would not work as I do not have much experience spray painting. I was very thrilled when I turned over the glass from the side I spray painted and say a mirror that perfectly matched the aesthetic I was going for.
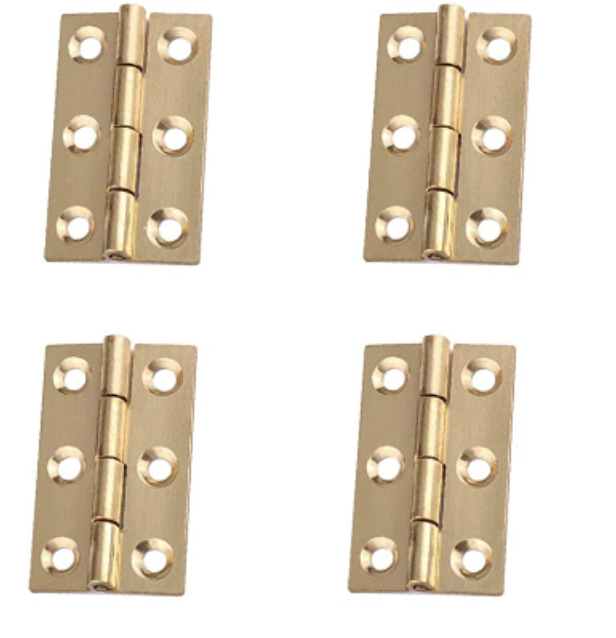
The next big question was how I planned on attaching the three mirrors. I bought 4 hinges and drilled them into a piece of dry wall that the glass was attached to. I successfully created a dynamic three panel mirror using this method. This success completed my requirement of created a shutter like mirror.
Once the hinges were attached to the back, I secured the mirrors to the three panels of dry wall connected by these hinges. Finally, I got to secure the mirrors to the dry wood using little pieces of bent metal that clasped onto the dry wall and the held the mirrors in place.
Finally, I got to add the tile to the mirrors. This is the part I was most excited for and knew would bring the project together. I individual cut out every piece of tile and used glass glue to attach the tiles to the mirrors.
I am very excited to see where the knowledge this project gave me and to use it to create more projects in the future. When I attempted to move the mirrors, I accidentally broke a piece of mirror. So not only do I have bad luck from that experience, but I also only was able to capture a photo with one of the mirrors broken.
I am pretty happy with my final product and if I were to attempt to make a mirror in a similar aesthetic in the future I
My final step is to go to the art store and have the final 4 tiles cut and added to the corners of the middle mirror.
[1] Rus, Mayer. “Inside Supermodel Kendall Jenner’s Tranquil Los Angeles Home.” Architectural Digest, 29 July 2020, https://www.architecturaldigest.com/story/kendall-jenner-los-angeles-home.
[2] Liyafy 1.5 Inch Butt Hinges for Cupboard Cabinet Home Furniture … https://www.amazon.com/Liyafy-Cupboard-Cabinet-Furniture-Hardware/dp/B07R4JLWY4.